decordip Garden and patio decoration inspiration
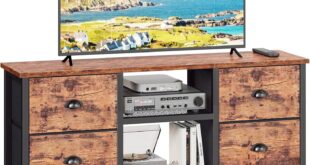
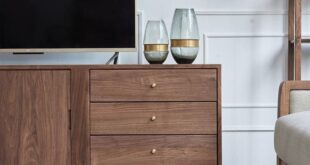
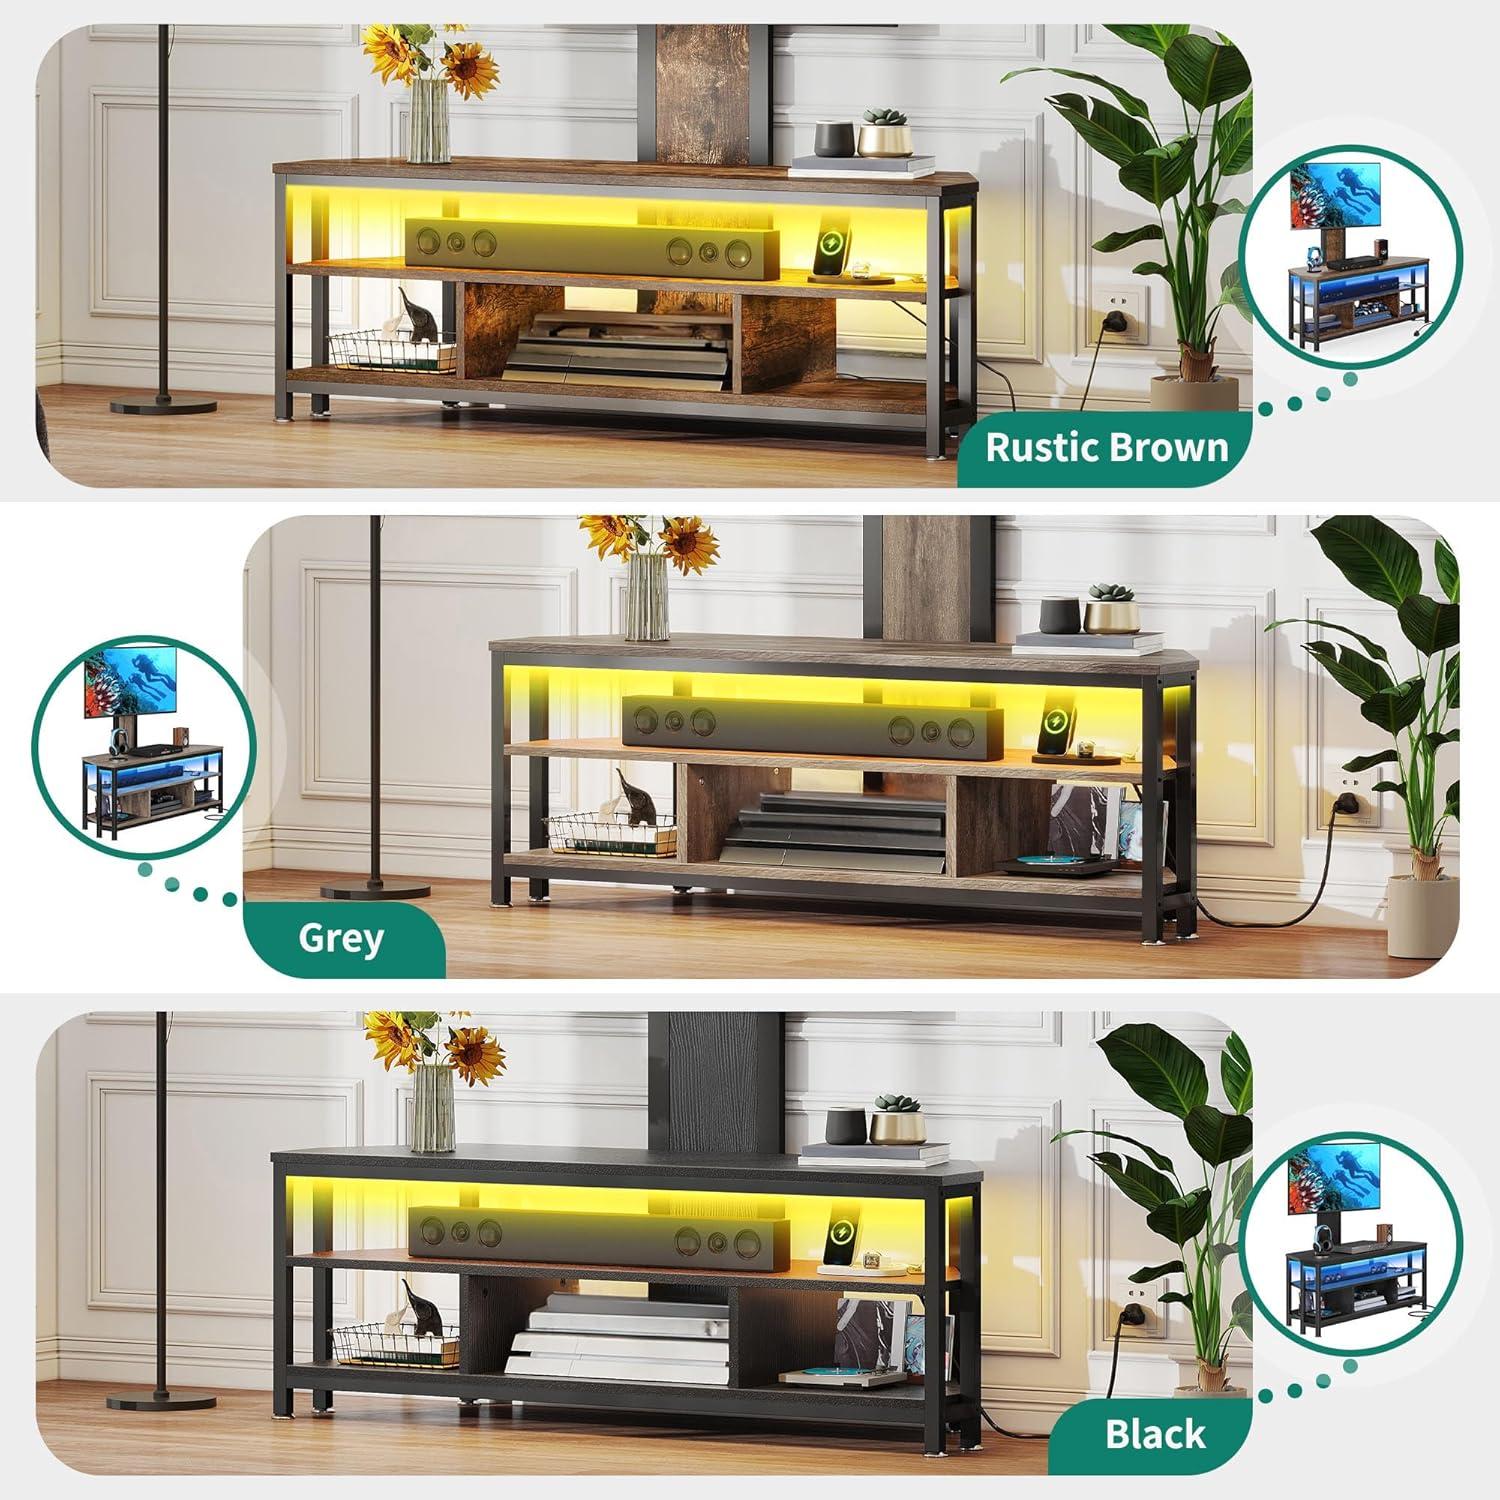
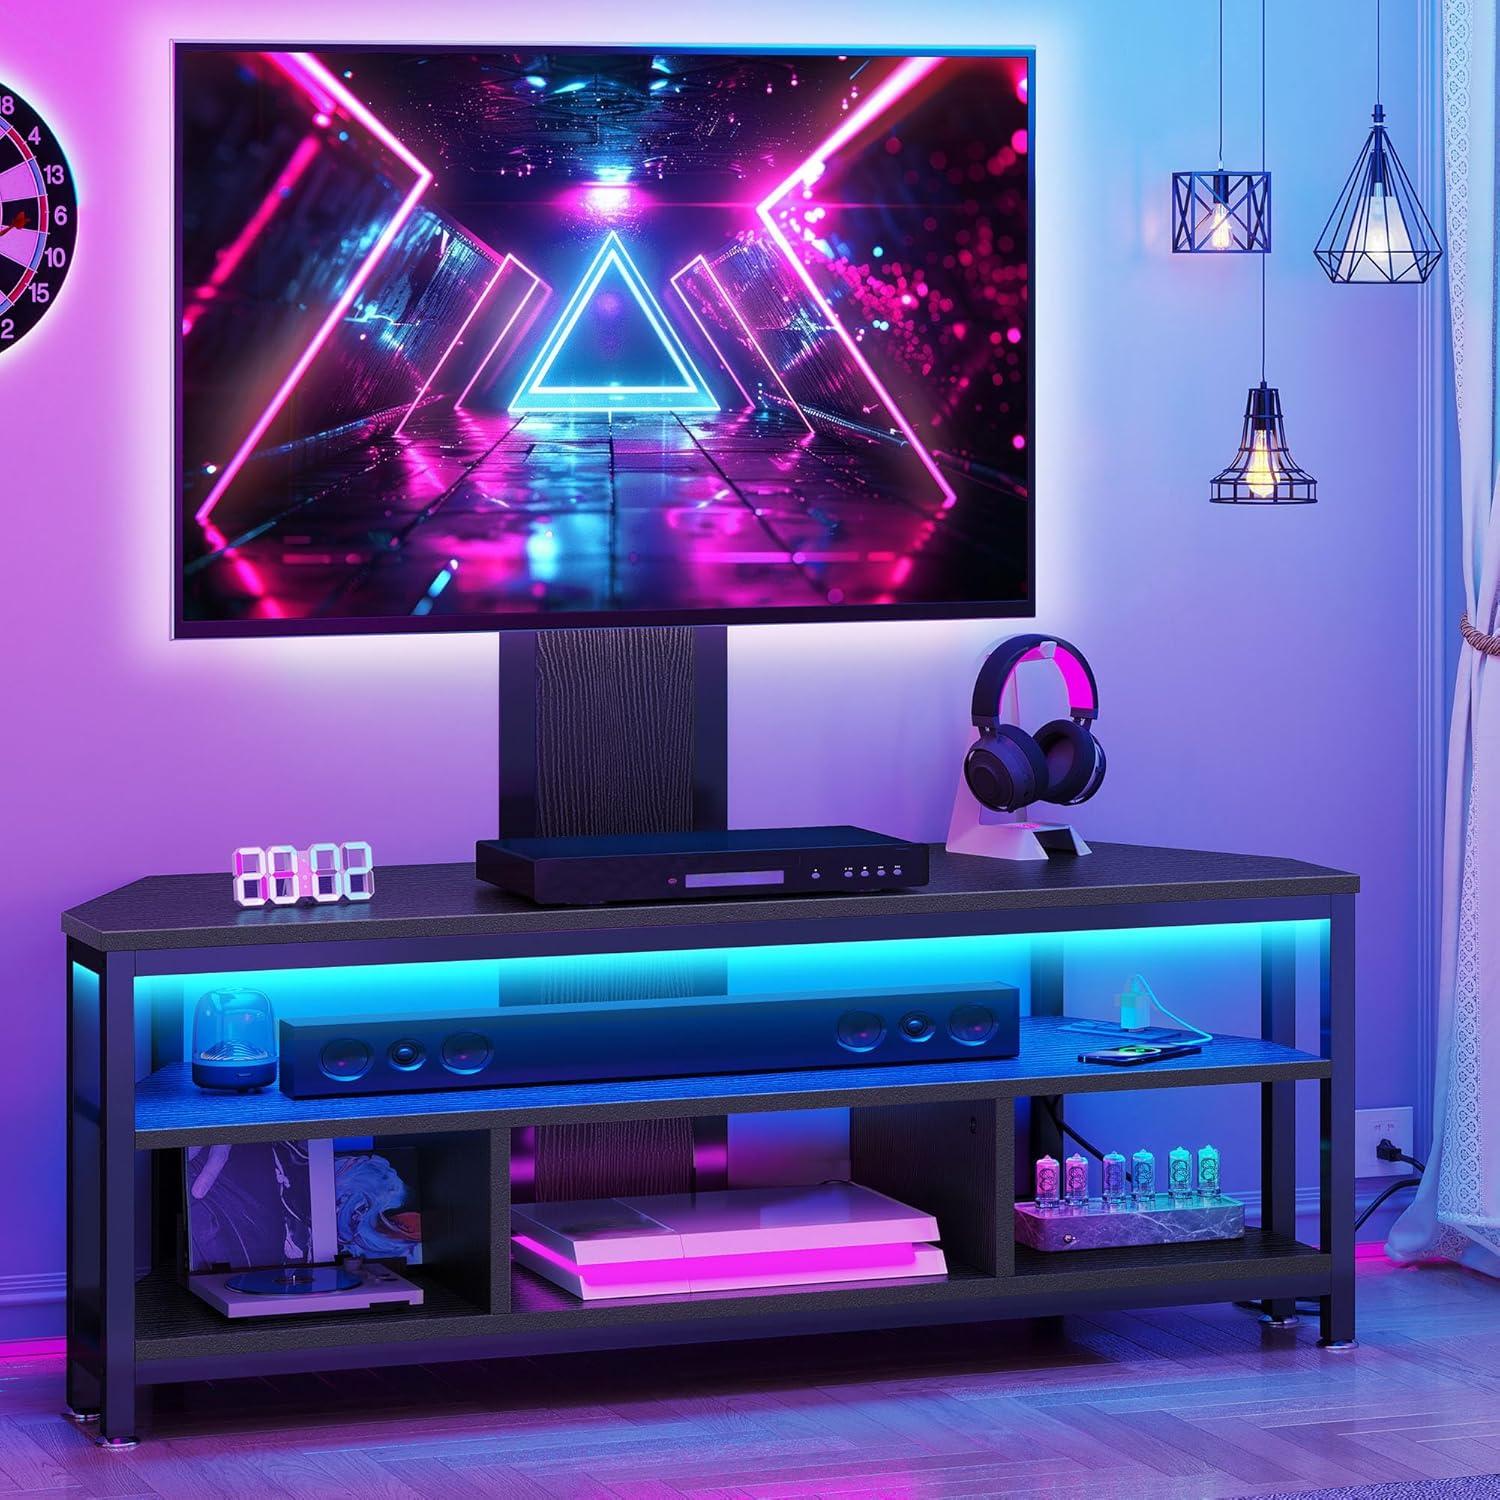
You notice it as you come in — a low, black presence that anchors the TV without shouting. The YITAHOME Black TV Stand with Mount arrived in your living room; call it simply the stand. Up close, the matte engineered-wood surface has a faint grain under your fingertips and a cool steel mount that rises like a spine behind the screen. From the couch it feels wider than its silhouette suggests, shelves forming pockets of shadow that the RGB strip brushes with color when you switch it on. Wires tuck through the hollow back so the wall looks cleaner than expected, and the piece quietly sets the room’s scale and mood.
What you notice first when you unbox the YITAHOME black TV stand and mount
When you first open the box you notice how the contents are layered — the instruction booklet usually sits on top, with smaller hardware packets and accessories visible as soon as the flap lifts. Protective foam and thin plastic film cover the larger panels, so the black finish peeks through without scuffs. There’s a faint factory scent and the metal mount pieces arrive wrapped in bubble wrap; some of those pieces feel dense in your hands and suggest you’ll want an extra pair of hands for the initial positioning.Bags of screws and fittings are grouped together, and a coiled power lead and a slim remote (if included) are easy to find near the edge of the carton.
Once you spread everything out on the floor, the layout makes the next steps obvious: parts are labeled, and the manual’s exploded views are the first place you go. Small details stand out as you sort — adhesive strips, foam corner guards, and a few stickers that protect glossy surfaces. A quick scan lets you confirm major elements are present before you begin assembly; typical items you notice right away include:
- Instruction manual — clear diagrams on top
- Hardware packs — labeled and separated
- Wrapped metal mount — heavier components, individually protected
- plastic-protected panels — glossy faces mostly covered
| Item | What it looks like on arrival |
|---|---|
| Manual | On top, easily readable, with labeled parts diagram |
| Hardware packs | Separated into small clear bags, often labeled |
| Mount pieces | Wrapped in protective material, feel solid and weighty |
| Panels | Covered in thin film, foam at edges to prevent damage |
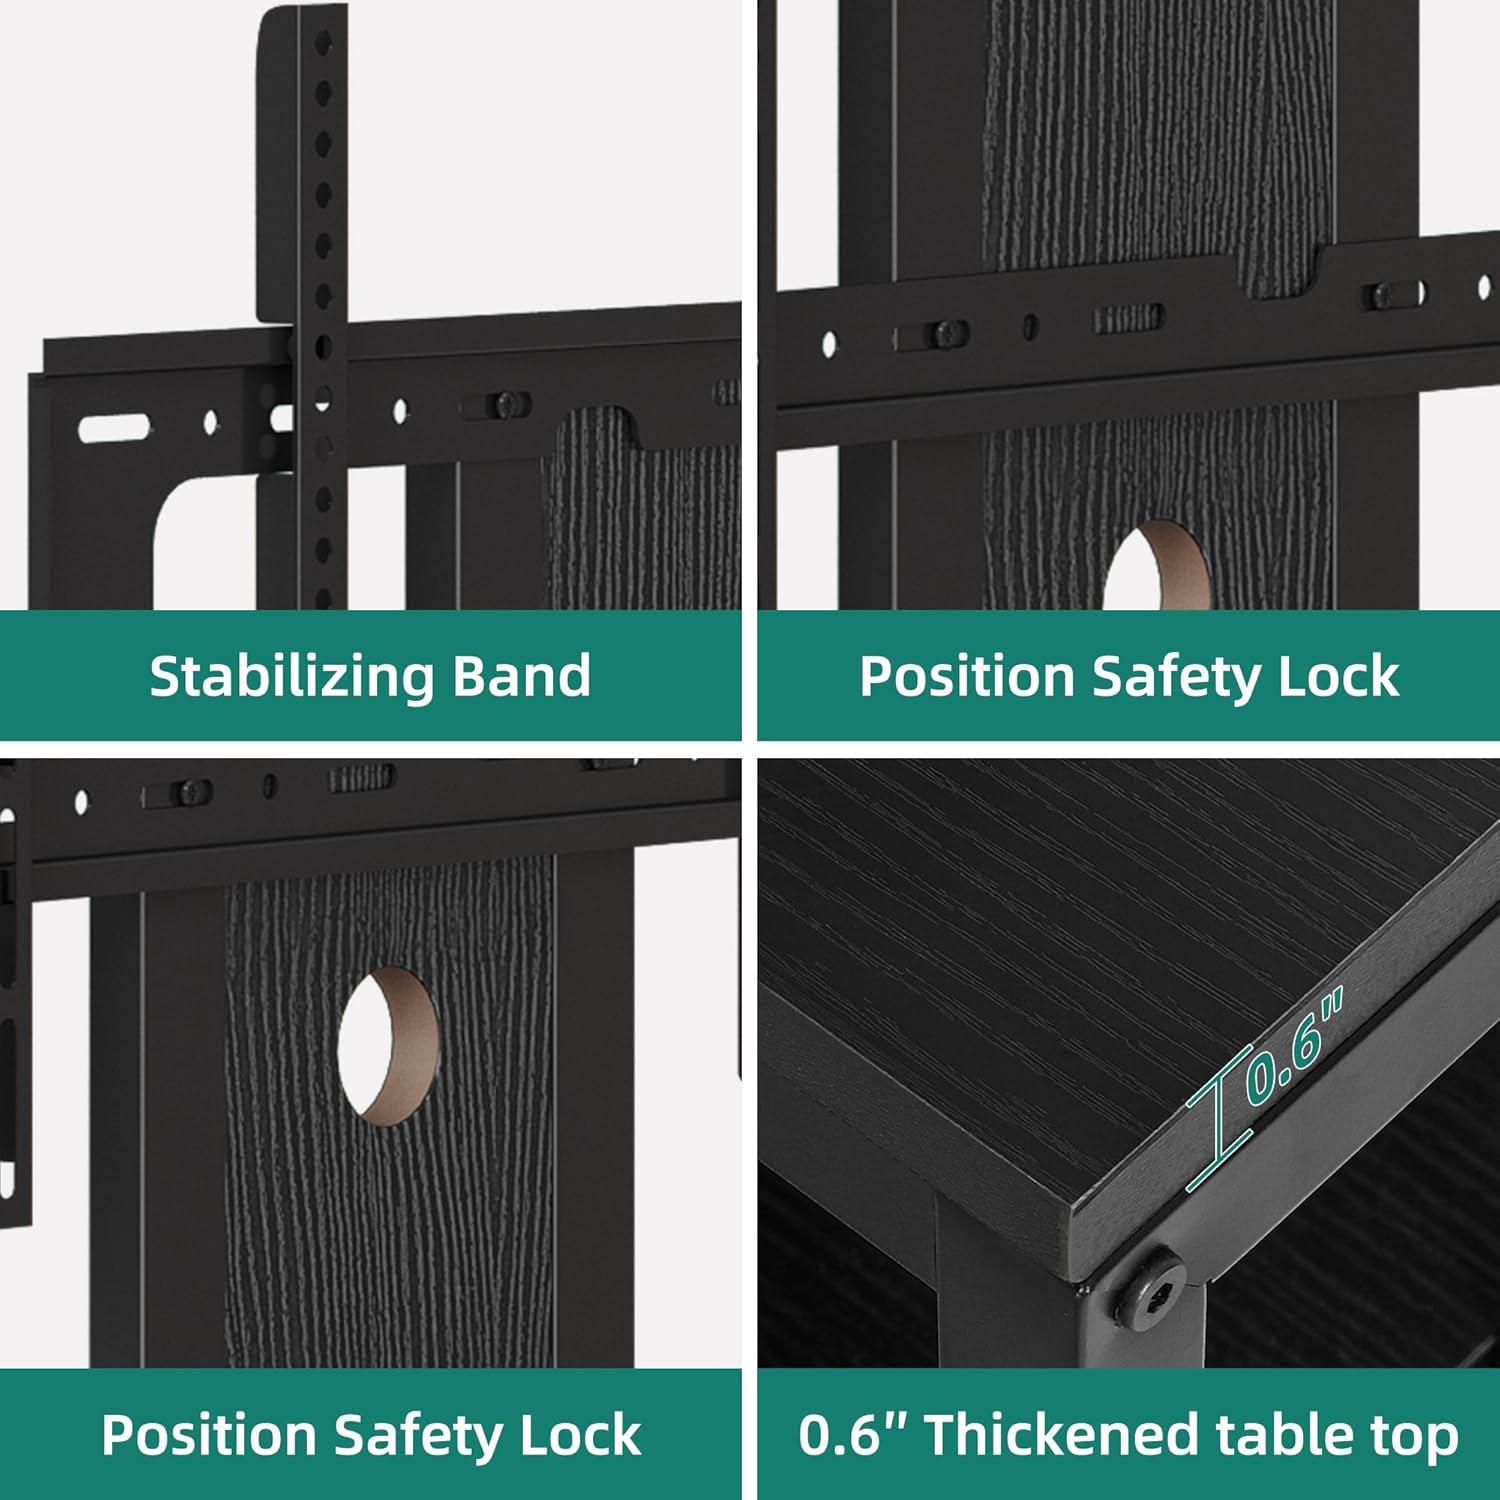
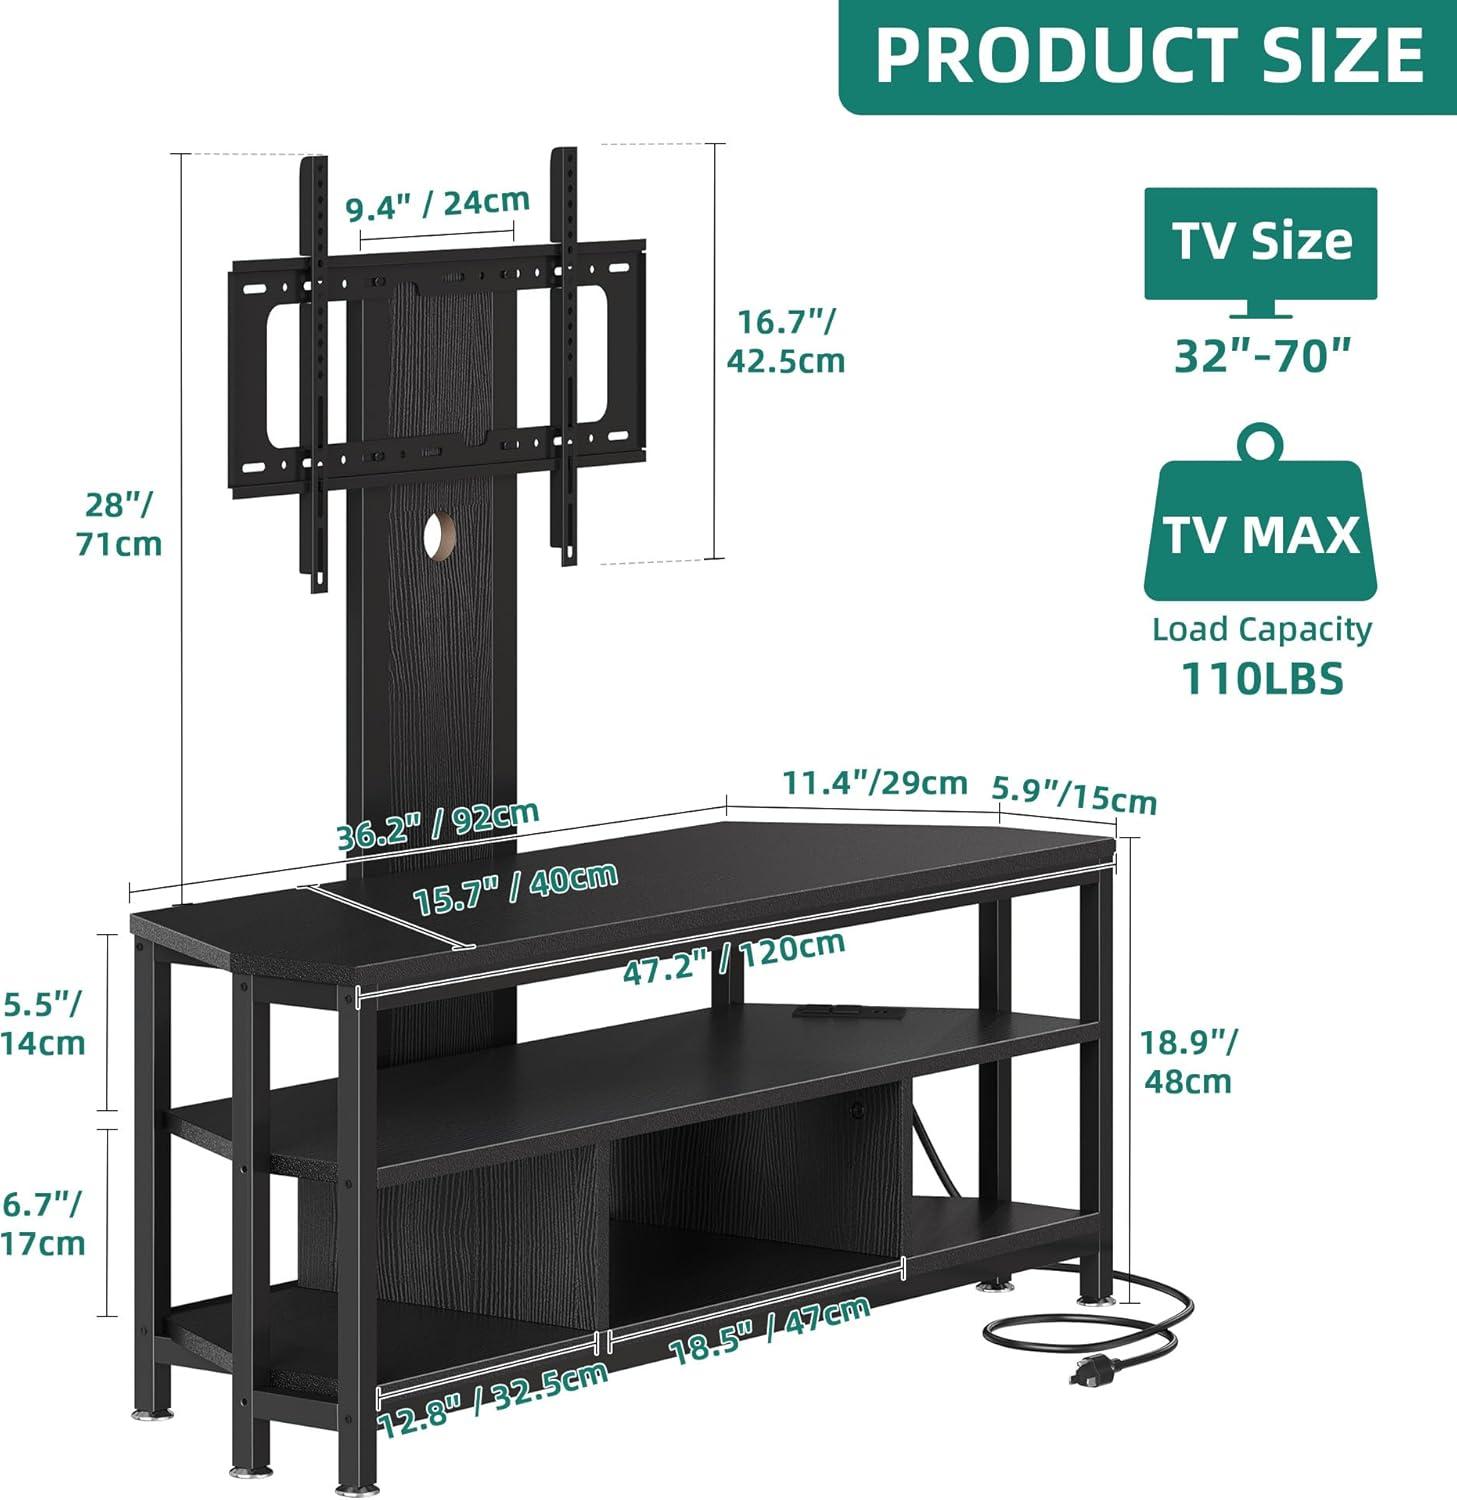
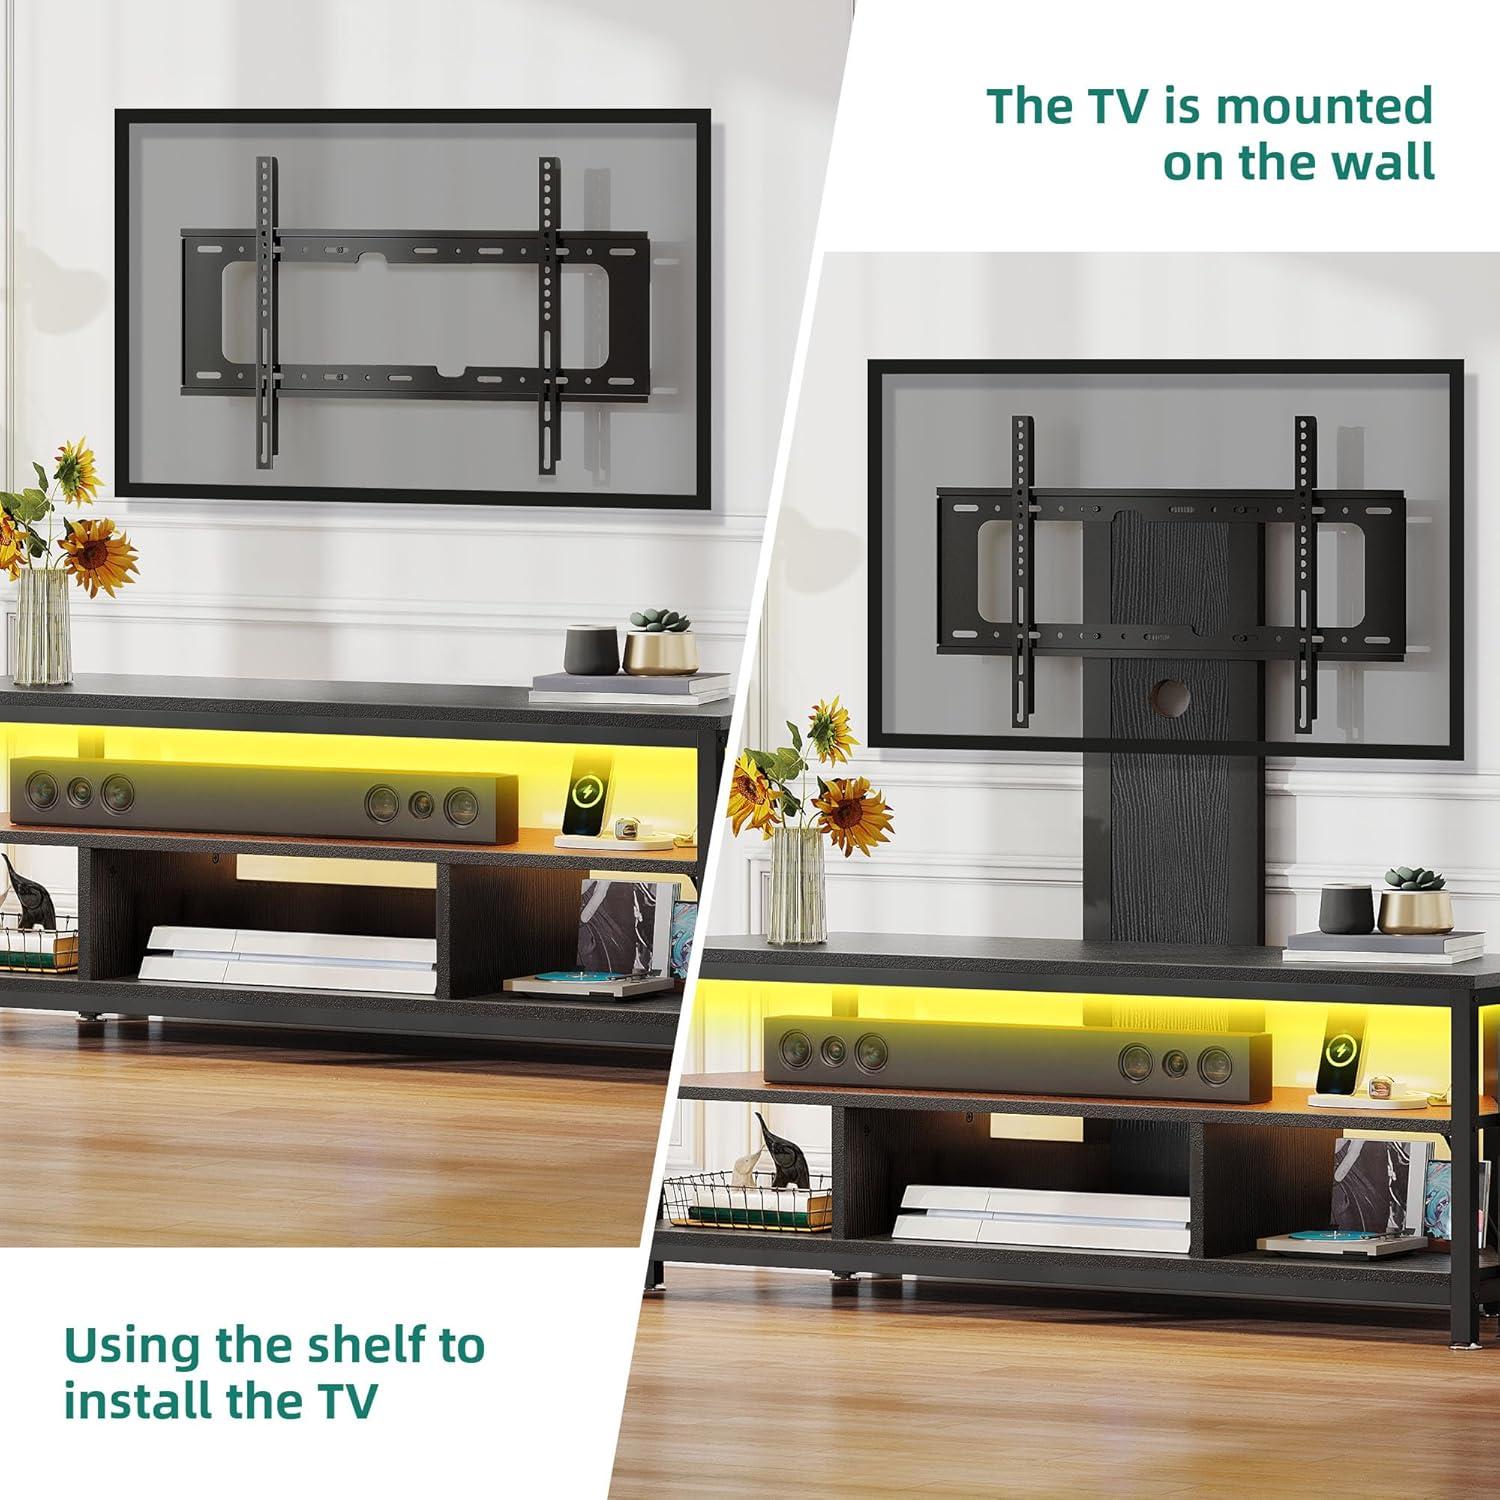
The metal mount sits on a rectangular steel plate that fastens to the console’s top surface and supports a VESA-style mounting plate for the TV. In use you’ll notice the plate has vertical slots rather than a single fixed hole, so the TV’s height is adjusted by sliding the VESA plate up or down and tightening the mounting bolts through those slots. The swivel mechanism is built around a central pivot: a machined pivot point with washers or bushings, a tension/locking bolt and a short arm that connects the VESA plate to the base plate. The metal is finished with a dark coating and the welds and stamped slots are visible where components meet; there’s also a small routed gap behind the pivot that lets cables pass from the TV down into the stand without pinching them.
When you operate the mount you’ll handle the TV while one fastener is loosened to allow movement, then re-tighten to lock the position. Typical steps you’ll follow when adjusting are:
- Mounting: attach the TV brackets to the screen’s VESA holes and lift the assembly onto the mount’s hooks or plate, then secure with the supplied screws.
- Height adjustment: loosen the vertical bolts slightly, slide the VESA plate to the desired slot, then re-tighten to hold the height.
- Swivel and tilt: for left-right swivel, either push the screen gently or loosen the swivel bolt to reposition and then tighten; for tilt, loosen the tilt fastener, set the angle and lock it in place.
Below is a concise reference of the visible parts and what they do in everyday adjustments:
| Component | Visible feature | Practical role |
|---|---|---|
| VESA plate | Slotted plate with multiple holes | Attaches to TV and allows small vertical shifts |
| Pivot/Swivel bolt | Central threaded bolt with nut or knob | Permits left-right rotation and is used to lock swivel tension |
| Tilt fastener | Pair of screws or bolts near the hinge | Controls forward/back tilt when loosened and re-secured |
| Cable pass-through | Small routed gap behind the mount | Guides cables into the cabinet while you adjust position |
The finish and shelving materials up close and the textures your hands meet
When you run your hand along the surfaces, the most immediate impression is the finish: a low-reflective, black laminate that feels mostly smooth with a faint tooth under your fingertips. The top panels give a cool,even glide — not glassy,but not soft either — while the shelf faces have a slightly different feel where the laminate wraps the edge,so you notice a thin seam if you trace it with a nail. The metal parts of the adjustable mounting assembly feel distinctly different; the powder-coated steel is cooler to the touch and presents a uniform, almost satin hardness compared with the engineered wood.On the underside and at cutouts you can sometimes feel the engineered core more plainly — a subtle change in texture where the finish doesn’t quite carry over — and the back openings for cables tend to be smoother where a plastic or sealed rim was used, or faintly raw at an exposed cut edge depending on the panel.
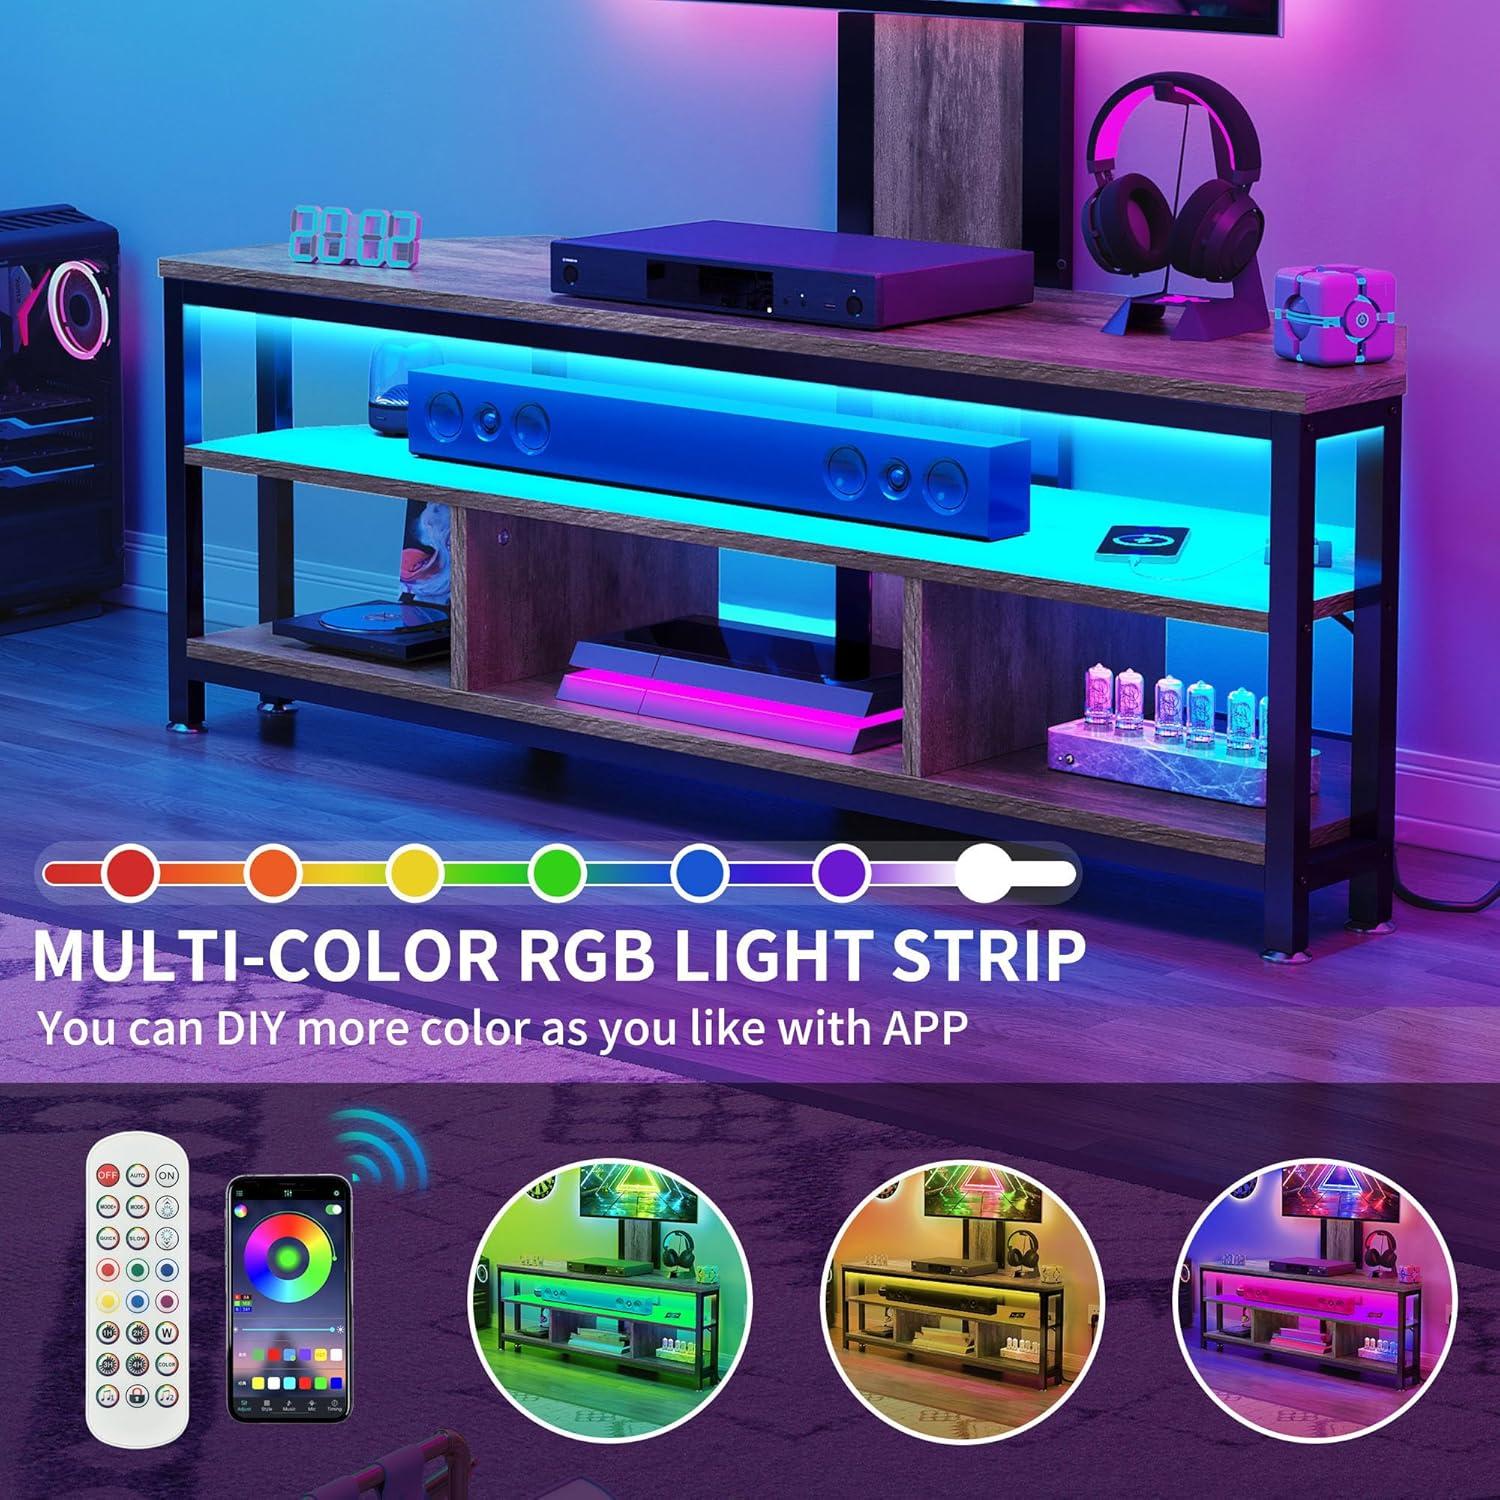
Everyday interactions highlight those small textural contrasts: sliding a game console across a shelf,your palm will notice the same matte drag that leaves fewer fingerprints than glossy surfaces,but dust shows in a different way and accumulates more visibly in recessed seams. The LED diffuser,where present,runs cool and plasticky under the fingers and flexes a little if pressed; knobs and screws around the mount are rigid and precise,with no give. A quick reference of tactile cues you might encounter:
- Top surface: smooth, matte laminate with low friction
- shelf edges: wrapped laminate seam, faint ridge if you probe it
- Mounting pole and brackets: cool, hard powder-coated metal
- Cable openings/underside: mixed finish — sealed plastic in some spots, exposed core texture in others
| Area | What your hand meets |
|---|---|
| Top panel | Matte laminate, even and slightly cool |
| Shelf face & lip | Wrapped edge with a narrow seam |
| Mount/hardware | Rigid, satin-finish metal |
| Back/cable holes | Smooth grommeted openings or exposed cut edge |
The stand’s footprint plays out in your living room as a modest floor anchor rather than a wall-filling piece — it establishes where the primary viewing axis sits and subtly nudges the rest of the seating arrangement. When you position the unit, you’ll notice how it defines walking lanes and the space available for a coffee table or ottoman; occasional small adjustments to the couch or a side chair are normal as you chase the sweet spot. Inside that footprint, three practical observations tend to matter most:
- Sightlines: the screen’s lateral position relative to your main seat determines weather you end up angling chairs or rotating a sofa to avoid head-tilt.
- Traffic flow: the stand’s depth creates a clear zone behind and in front that you’ll naturally keep clear for passing through.
- Cable routing and outlet access: where the stand sits affects how cables run along baseboards and whether you leave a small gap behind it for power leads.
These tend to be the everyday adjustments you make without thinking — nudging cushions, shifting a lamp, or moving a throw rug to keep sightlines clean.
How far you sit from the screen is tied to those same layout choices: closer seats amplify immersion and make small screen details more visible, while sitting farther back lets multiple people watch without craning. You’ll also find yourself managing vertical sightlines — raising or lowering pillows or the TV mount a bit to avoid looking up — and sometimes moving the seating a step or two forward when you want a more involved viewing session. the table below outlines common seating positions and the typical visual effect you can expect; use it as a quick reference when arranging furniture around the stand.
| Seating position | Typical placement | Common visual effect |
|---|---|---|
| Close | directly facing, within the central viewing zone | more immersive, greater detail, more head/eye movement |
| Moderate | main sofa position, balanced between screen and room | cozy viewing, fewer adjustments needed for neck angle |
| Far | secondary seating or across a wide room | easier group viewing, less perceived detail |
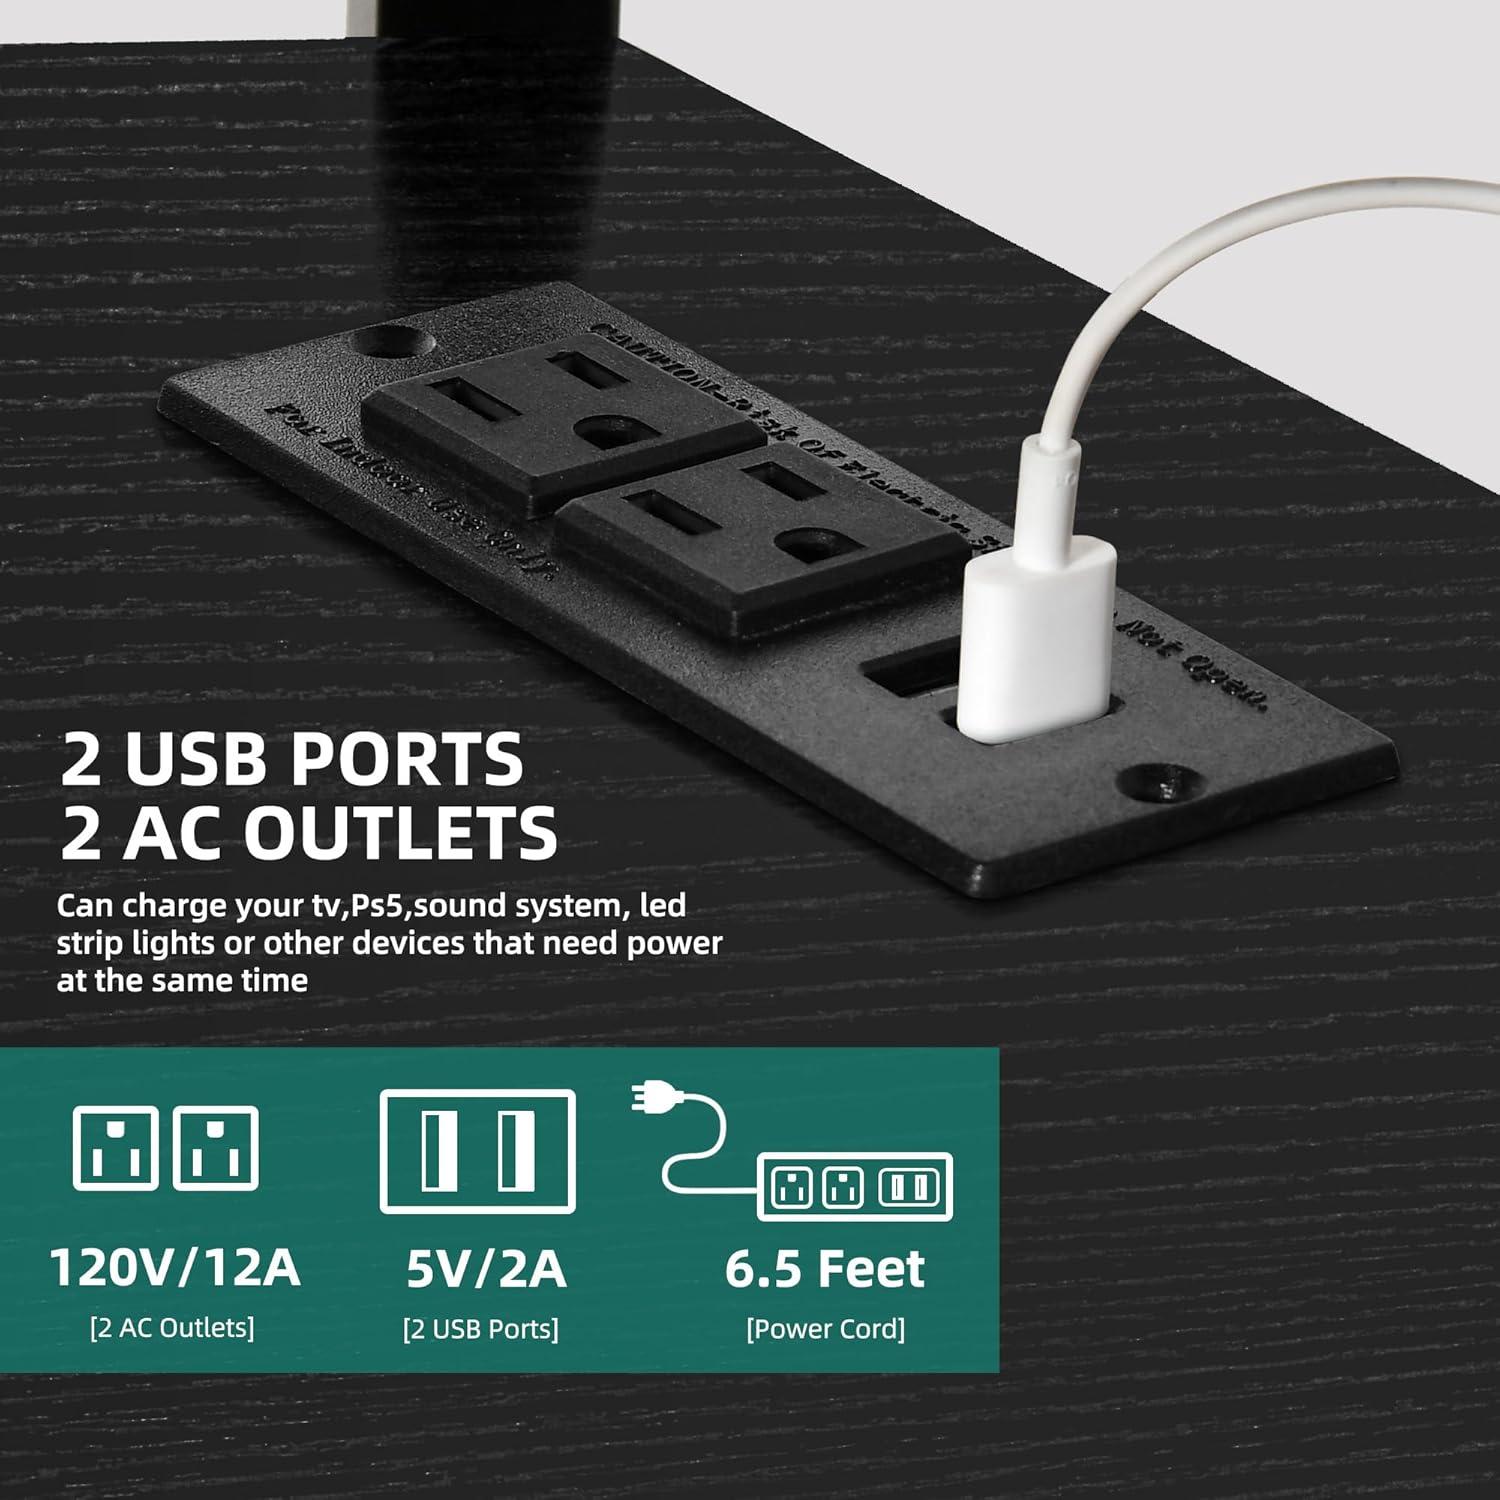
Where the built in power outlet, cable openings, and storage align with your devices
The console’s built-in power outlet and the series of rear cable openings are arranged so that most power cords and low-profile AV cables can be routed directly behind the mounted screen and into the shelving void. The back hollows line up with each open shelf, which means a power strip or a streaming box can usually sit on a middle shelf while cables disappear through the nearest opening. Because the TV mount is height‑adjustable, the relative position of the outlet to the TV’s power inlet tends to shift slightly—sometimes the TV’s cord plugs in almost flush behind the set, other times the cord drops to a shelf below.Large AC adapters or chunky multi‑output blocks often end up resting on a shelf rather than passing cleanly through the holes, and the available cutouts favor horizontal routing along the rear panel more than tight vertical bundling.
| Device | Typical placement | Routing note |
|---|---|---|
| Mounted TV (power/HDMI) | Rear/upper compartment behind mount | Power cord usually reaches the built-in outlet; HDMI runs down through center openings |
| Soundbar / streaming stick | Directly under TV or on top shelf | Low-profile cables pass through easily; wireless sticks may sit on top of the shelf |
| Game console / AV receiver | Middle or lower open shelves | Bulky power bricks may remain exposed on a shelf; AV cables route through rear cutouts |
- Outlet location: Positioned near the rear center, aligning with the mount in most common height settings but shifting with the adjustable mount.
- Cable opening clearance: Wide enough for HDMI and standard power cords; oversized adapters sometimes require placement on a shelf.
- Storage routing: The hollow back allows grouping of cords behind stored devices, which keeps faces of shelves relatively tidy while leaving some cable slack visible at shelf level.
For full specifications and configuration details, see the complete listing.
Suitability for your setup, expectations versus reality, and practical limitations you may face
Initial impressions about how the unit will fit into a room frequently enough shift once it’s in place. Assembly that looks straightforward on paper can require an extra pair of hands for aligning the mount and panels, and the mount’s height-adjustment mechanism tends to need small on-the-spot tweaks to get viewing level exact rather than arriving perfectly centered out of the box. Placing the piece in a corner changes sightlines more than expected; sightlines that seem fine when standing can feel slightly off from a seated position, and the hollowed rear for cables sometimes forces modest rearrangement of devices so plugs line up neatly. In practice, features that promise adaptability still interact with the room—floor surfaces, nearby furniture, and the profile of adjacent electronics—so minor compromises and repeated fine-tuning are common during the first few days of use.
Everyday use surfaces a handful of recurring limitations that shape longer-term satisfaction.
- Mount adjustment: works but often requires readjustment after heavier install work or when swapping source components.
- Cable access: back hollows keep things tidy visually but can make access and re-cabling a bit fiddly, especially for wider connectors.
- Lighting and power: integrated LEDs and the built-in outlet reduce clutter but their placement can create visible runs or limit where a surge protector can sit.
A short table captures common expectation-to-reality patterns observed in daily setups:
| Expectation | Typical reality |
|---|---|
| Quick, single-person assembly | Frequently enough easier with two people for mount alignment |
| Invisible cable management | neat from a distance; closer inspection shows tight routing or visible plugs |
| Plug-and-play LED control | Usually straightforward, though app pairing or remote setup can take an extra attempt |
view full specifications and configuration details
how it lives with daily use and what you’ll see day to day with dust, fingerprints, and routine adjustments
In everyday use the black surfaces tend to make small signs of life more visible: a light dusting becomes obvious along the top shelf and around the edges, glossy zones and the area near the mount show fingerprints from adjusting cables or touching the TV, and the LED trim can draw attention to any stray particles that settle on it. The open shelves collect a scatter of dust behind electronics and on the tops of consoles, so the look changes subtly from one day to the next as devices are moved or remotes are set down. Handling habits emerge naturally — plugs are fumbled at the rear power outlet, fingers linger on the mounting column when nudging the screen — and those spots are the ones that show smudges first.
- Dust build-up: visible most on horizontal surfaces and in shelf corners after a few days
- Fingerprints and smudges: concentrated near the mount, power outlet, and the front edges
- Routine tweaks: small re-centering, cable tidying, or tightening of fasteners every few weeks
Routine adjustments become part of the living pattern: cables are nudged and re-routed when a new console is added, tilt or height is nudged if the seating arrangement changes, and a quick wipe-down often follows any hands-on work with components. Over time, repeated handling can leave slightly lighter wear marks on the very edges where things are lifted or set down, and the hollowed rear openings reveal the occasional tangle that prompts a short cable-organization session. In most households these are small, periodic chores rather than daily burdens, and they tend to cluster around moments of equipment change or when the lighting highlights imperfections.
| Observation | Typical cadence |
|---|---|
| Surface dust on top shelves | Every few days to a week |
| Fingerprints near mount and outlet | Immediate visibility after handling; spot-clean as needed |
| Minor re-centering or cable tidy | Every time a device is added or moved (occasional) |
View full specifications and configuration details

How the Set Settles Into the Room
You notice, over time, how the YITAHOME Black TV stand with Mount, Modern TV Stand for 70/65 inch TV LED Entertainment Center with Adjustable mount & Power Outlet, TV Console Cabinet, Black eases into a corner of your daily life, taking its place among cushions, chargers and the small pile of magazines. In regular household rhythms it gets used in small, habitual ways — a hand reaching for the remote, a mug left on the edge, a faint scuff where keys have rubbed — and the seating and conversation flow adjust around that presence. It becomes part of the background of ordinary evenings, familiar without being forced and simply present as the room is used. It simply stays.