decordip Garden and patio decoration inspiration
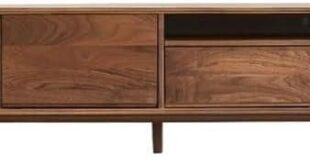
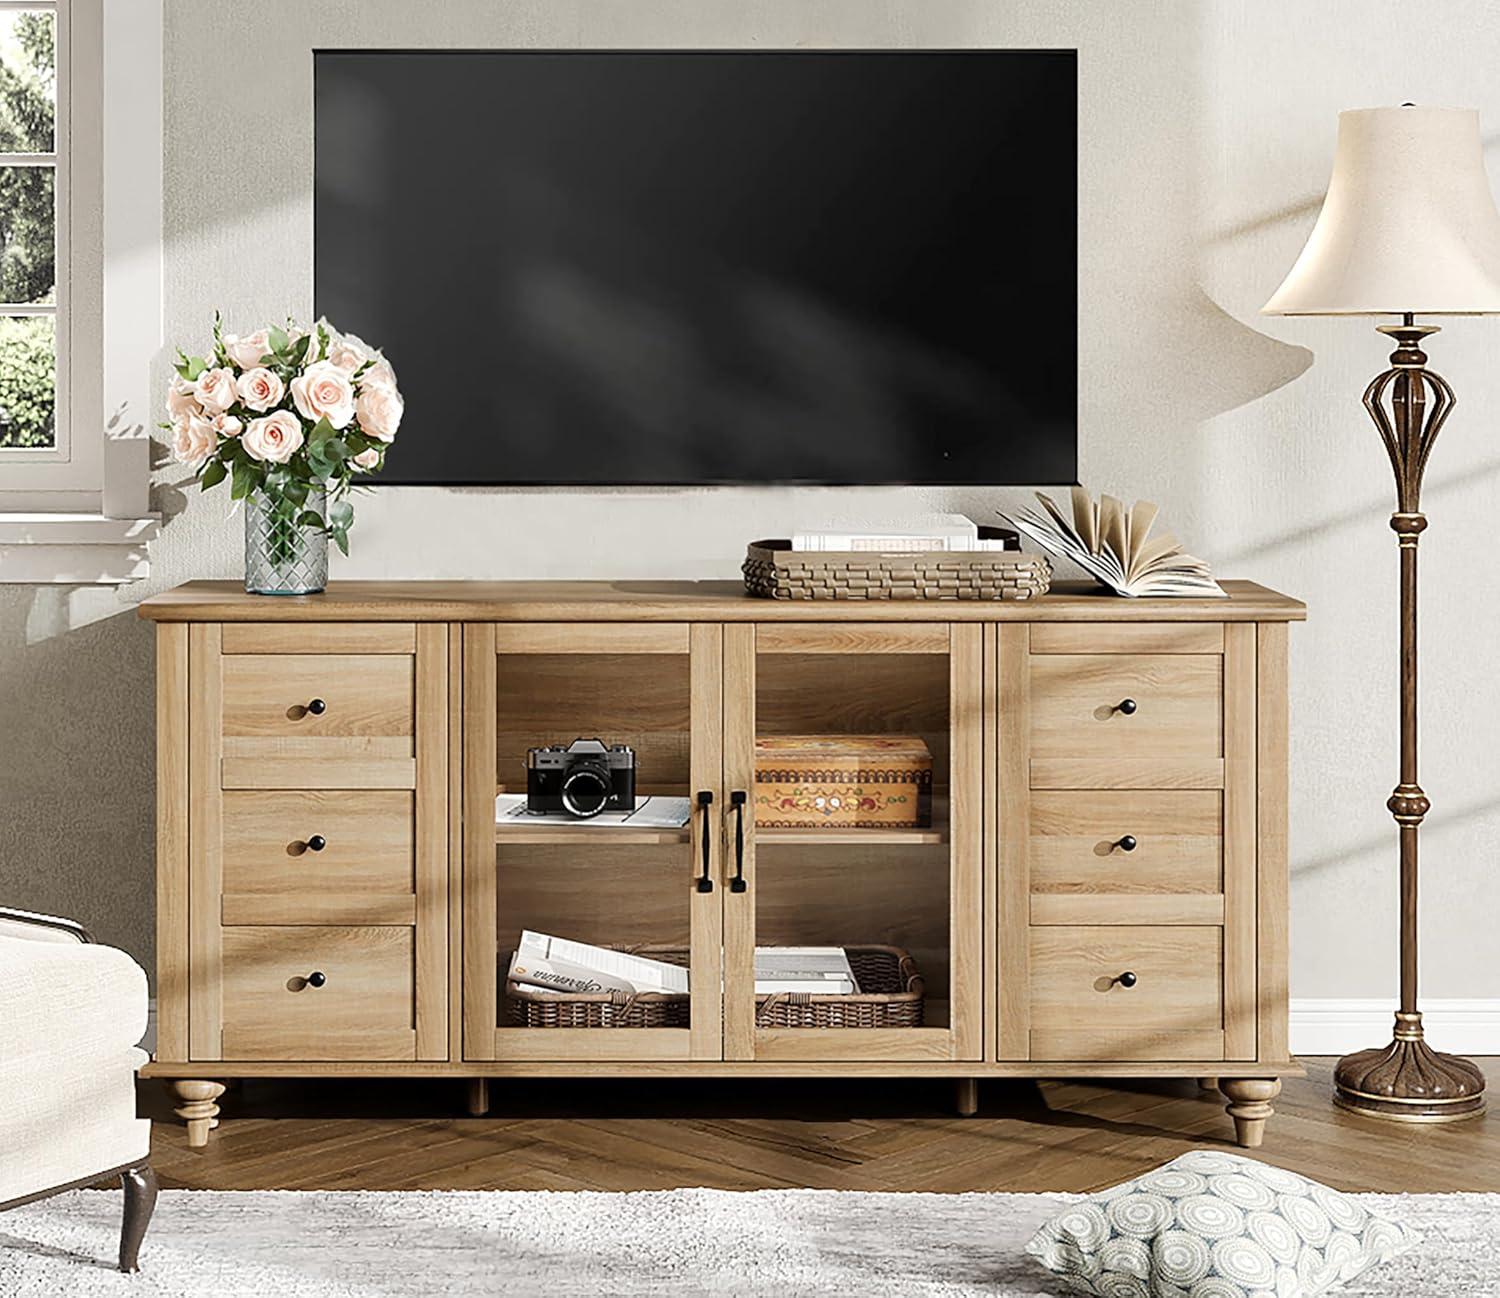
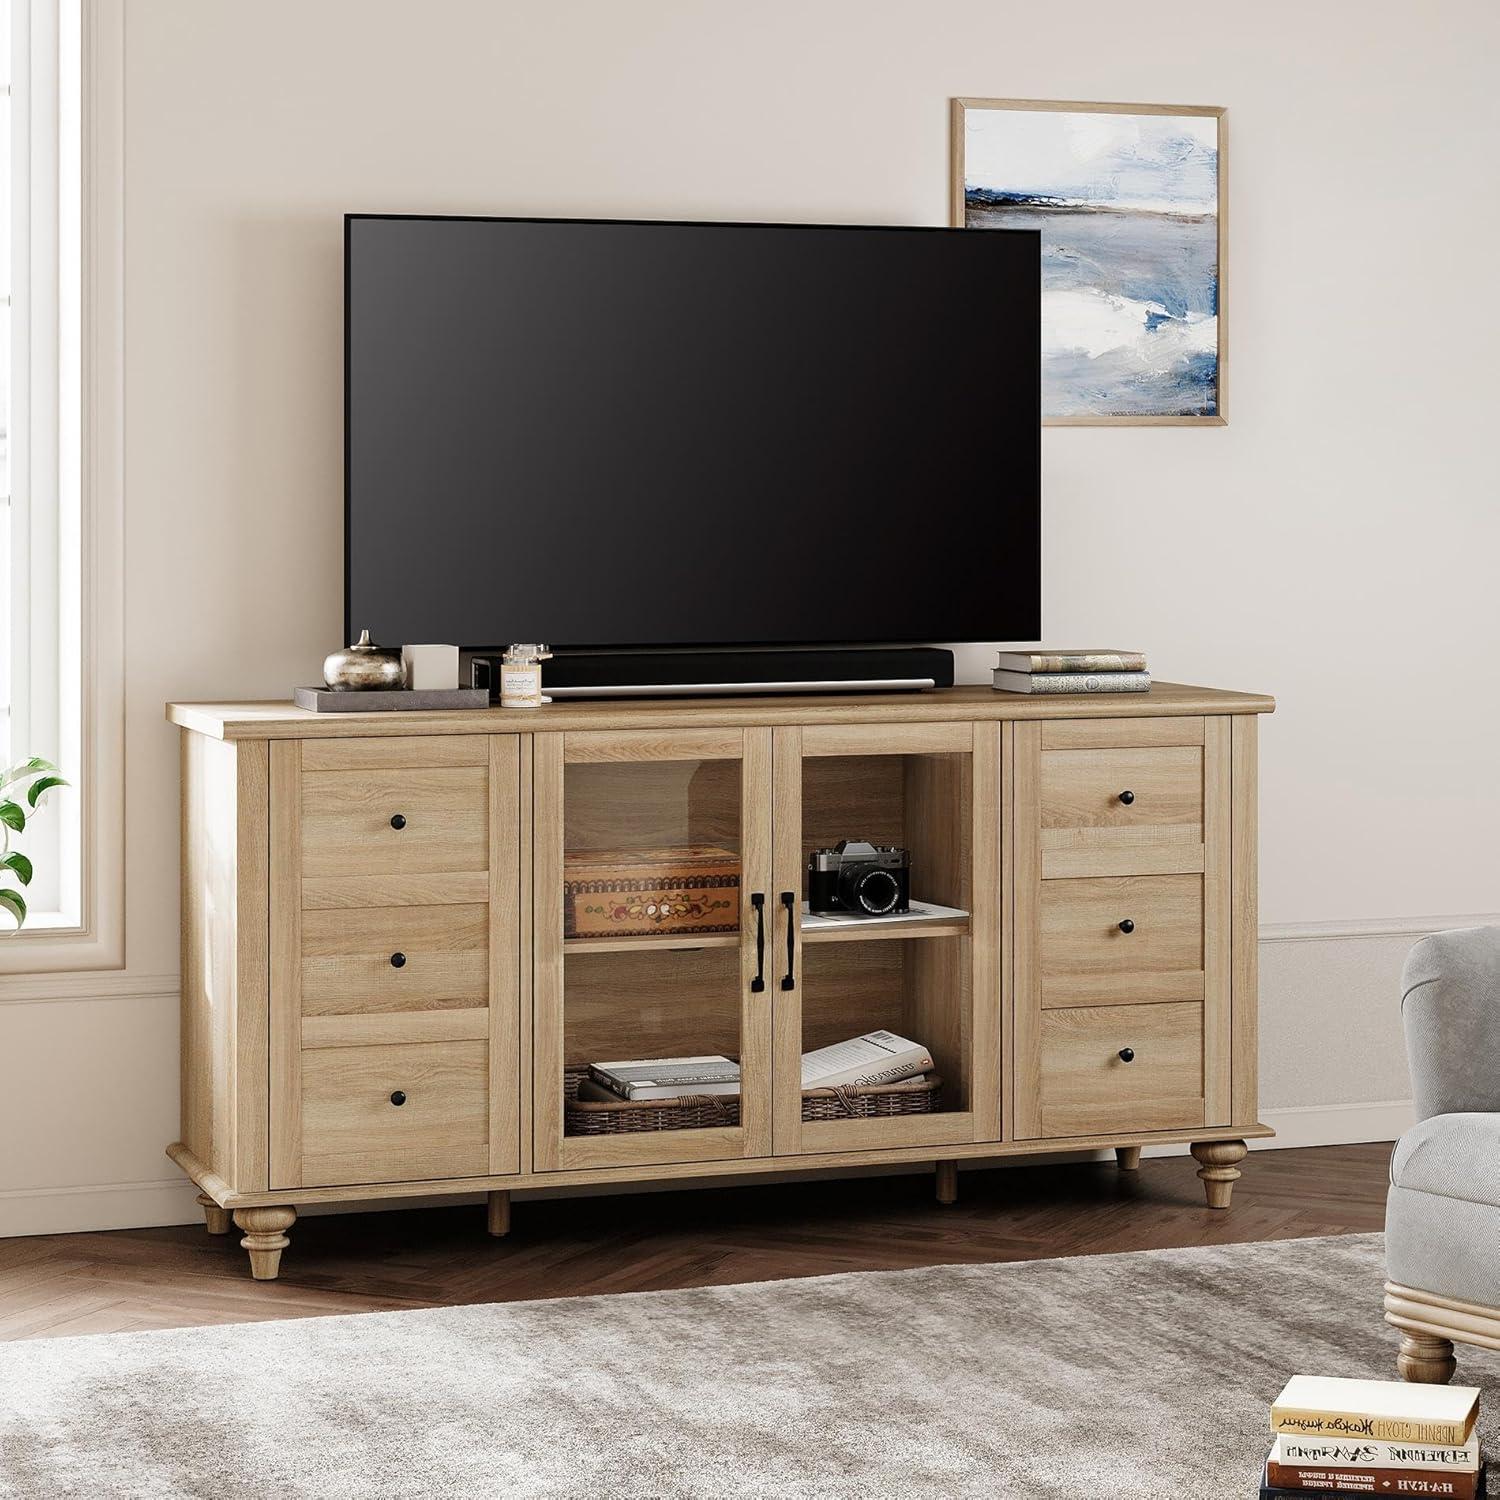
Late afternoon light finds the oak grain across the top, and you catch the faint texture under your fingertips where the finish meets the edge. The WAMPAT Farmhouse TV Stand, a 58″ oak console in the room, reads as a quietly solid piece rather than a showy focal point. From a few steps back it feels low and broad—four solid legs that give it a planted weight, glass-front doors that throw a cool reflection, and a top whose groove hints at practical use. Open a door and the adjustable shelf and round cable pass-through reveal themselves, the small, lived-in details you notice when you crouch down to sort the cords.
A quick look at the WAMPAT farmhouse TV stand and what you get
When you open the box you’ll first notice the packaging is organized into labeled boards and a handful of smaller bags — the panels are wrapped,fasteners are separated and the instruction booklet sits on top. The manual uses clear illustrations and each screw or pin has its own code, so you can frequently enough tell at a glance which pack you need next. A small anti‑tip kit is tucked in with the hardware, and the glass-front doors arrive protected so they won’t rattle against the wood during handling.Expect to move pieces around a bit as you lay everything out; you’ll probably put the largest panels on the floor and sort the bags by number before beginning assembly.
Here’s a quick inventory to help you confirm everything is present:
- Instruction manual (illustrated, labeled parts)
- Hardware pack (screws, dowels, cams, labeled)
- Anti‑tip kit and mounting hardware
- Pre-finished panels, doors, and legs
| Part | Typical count |
|---|---|
| Top panel | 1 |
| Side / support panels | 2–4 (varies by layout) |
| Glass-front doors | 4 |
| Adjustable shelf | 1 (removable) |
| solid legs | 4 |
| Hardware packs | 1 main set + small labeled bags |
| Anti-tip kit | 1 |
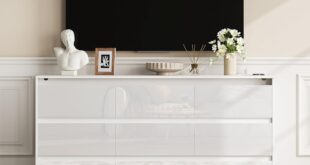
The oak finish and farmhouse silhouette that greet your room
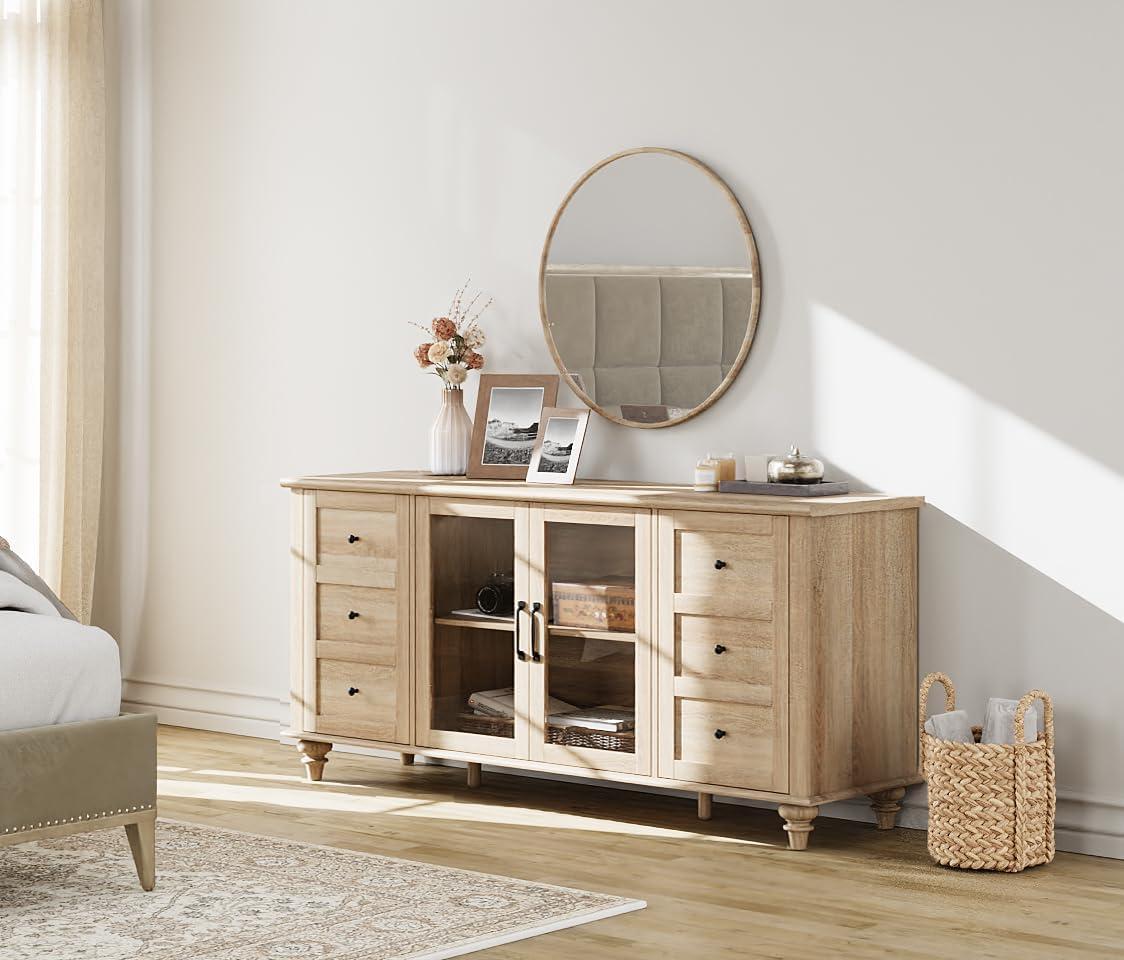
The first thing that meets you as you step into the room is the oak finish — a warm, slightly muted tone that lets the wood grain show through without calling too much attention to itself. From a short distance the piece reads as a calm, sunwarmed rectangle; up close the grain and any subtle distressing become part of the texture you trace with your eyes.The farmhouse silhouette arrives as a study in horizontal lines and gentle proportions: a long top, modest overhang, and doors set into a framed face that breaks up the mass. Glass panels and narrow muntins (visible from certain angles) interrupt the wood plane and lend a lightness to the front, while the raised legs create a small shadow underneath that keeps the piece from feeling flush to the floor.
- Tone shifts: looks lighter in morning light, richer toward dusk
- Grain presence: noticeable up close, softens with distance
- Silhouette cues: horizontal emphasis, glass breaks, raised base
In everyday use you notice how that greeting changes with routine: a lamp turned on at night warms the oak into a deeper honey, while direct midday sun can flatten the contrast in the grain. The farmhouse outline tends to make other elements rearrange around it — low seating and long rugs echo its horizontal pull, while decorative objects collect along the top in a steady line. Minor, incidental things also become part of the experience; fingerprints and dust are more visible on the glass panels at eye level, and the finish shows light scuffs in places where you habitually lean or set things down. The overall impression is of a quietly familiar presence that adapts to light and use,rather than a piece that demands attention.
| Light condition | Perceived finish |
|---|---|
| Morning (indirect light) | Warm, slightly golden |
| Midday (luminous light) | More neutral, grain less contrasted |
| Evening (lamps) | Deeper, amber-rich tones |
Construction details from board material to glass cabinet fronts you’ll notice
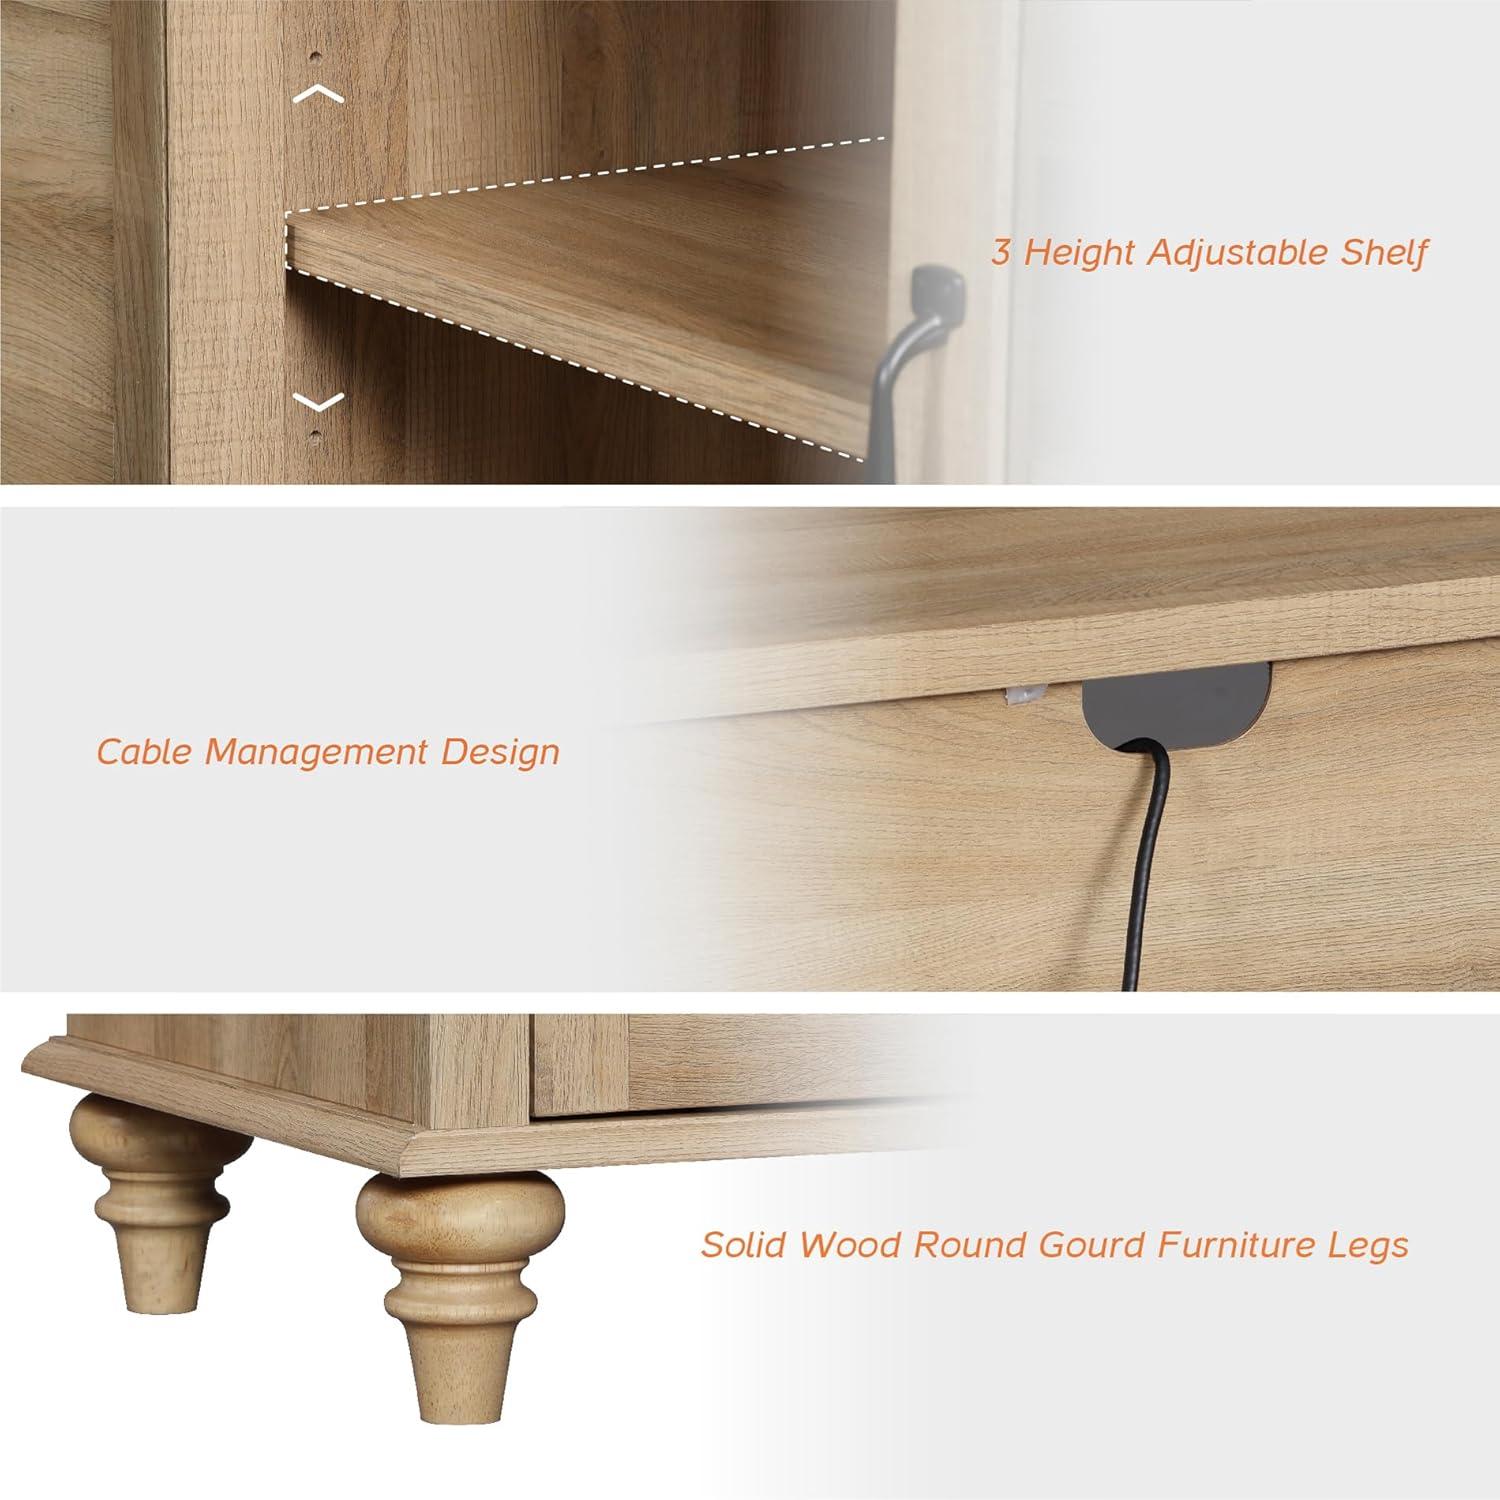
When you walk up to the unit the first things that catch your eye are the surface finishes and the way panels meet: the larger surfaces have a printed oak pattern rather than natural grain, and the board edges are sealed with a thin banding that can catch the light differently from the face. Look underneath or behind a shelf and you’ll see cam-locks and dowel holes at the joins,plus the underside of the top panel feels noticeably denser than the side panels—there’s a thicker core at the tabletop where weight-bearing matters.The back panel is a thinner hardboard with the circular cable cut-outs and the tabletop groove is routed into the veneer so cords sit in a shallow track; small plastic shelf pins support the adjustable shelf and they sit with a slight give when you nudge the shelf to reposition it.
Open a cabinet and the glass fronts become more apparent: each glass panel is set into a framed door with a small reveal around the edge and the door swings on two metal hinges that are visible when the door is open. You may notice a faint reflection difference between the glass and the wood frame and a narrow gasket or paint line where the two meet. In everyday use you tend to straighten an open door once or twice and the shelf hardware lets you change heights without tools.Observations at a glance:
- Edge banding — visible at panel seams, slightly glossier than the face
- Fastening hardware — cam-locks/dowels visible inside, metal hinges on doors
- Glass fit — clear panel seated within the wood frame with a narrow reveal
| Component | Observed detail |
|---|---|
| Body panels | Manufactured board with printed oak finish and edge banding |
| Tabletop | Thicker core, routed groove for cable routing |
| Legs | Solid-feeling wood pieces attached to base |
| Cabinet fronts | Clear glass panels set into framed doors with metal hinges |
| back panel | Thin hardboard with round cable cut-outs |
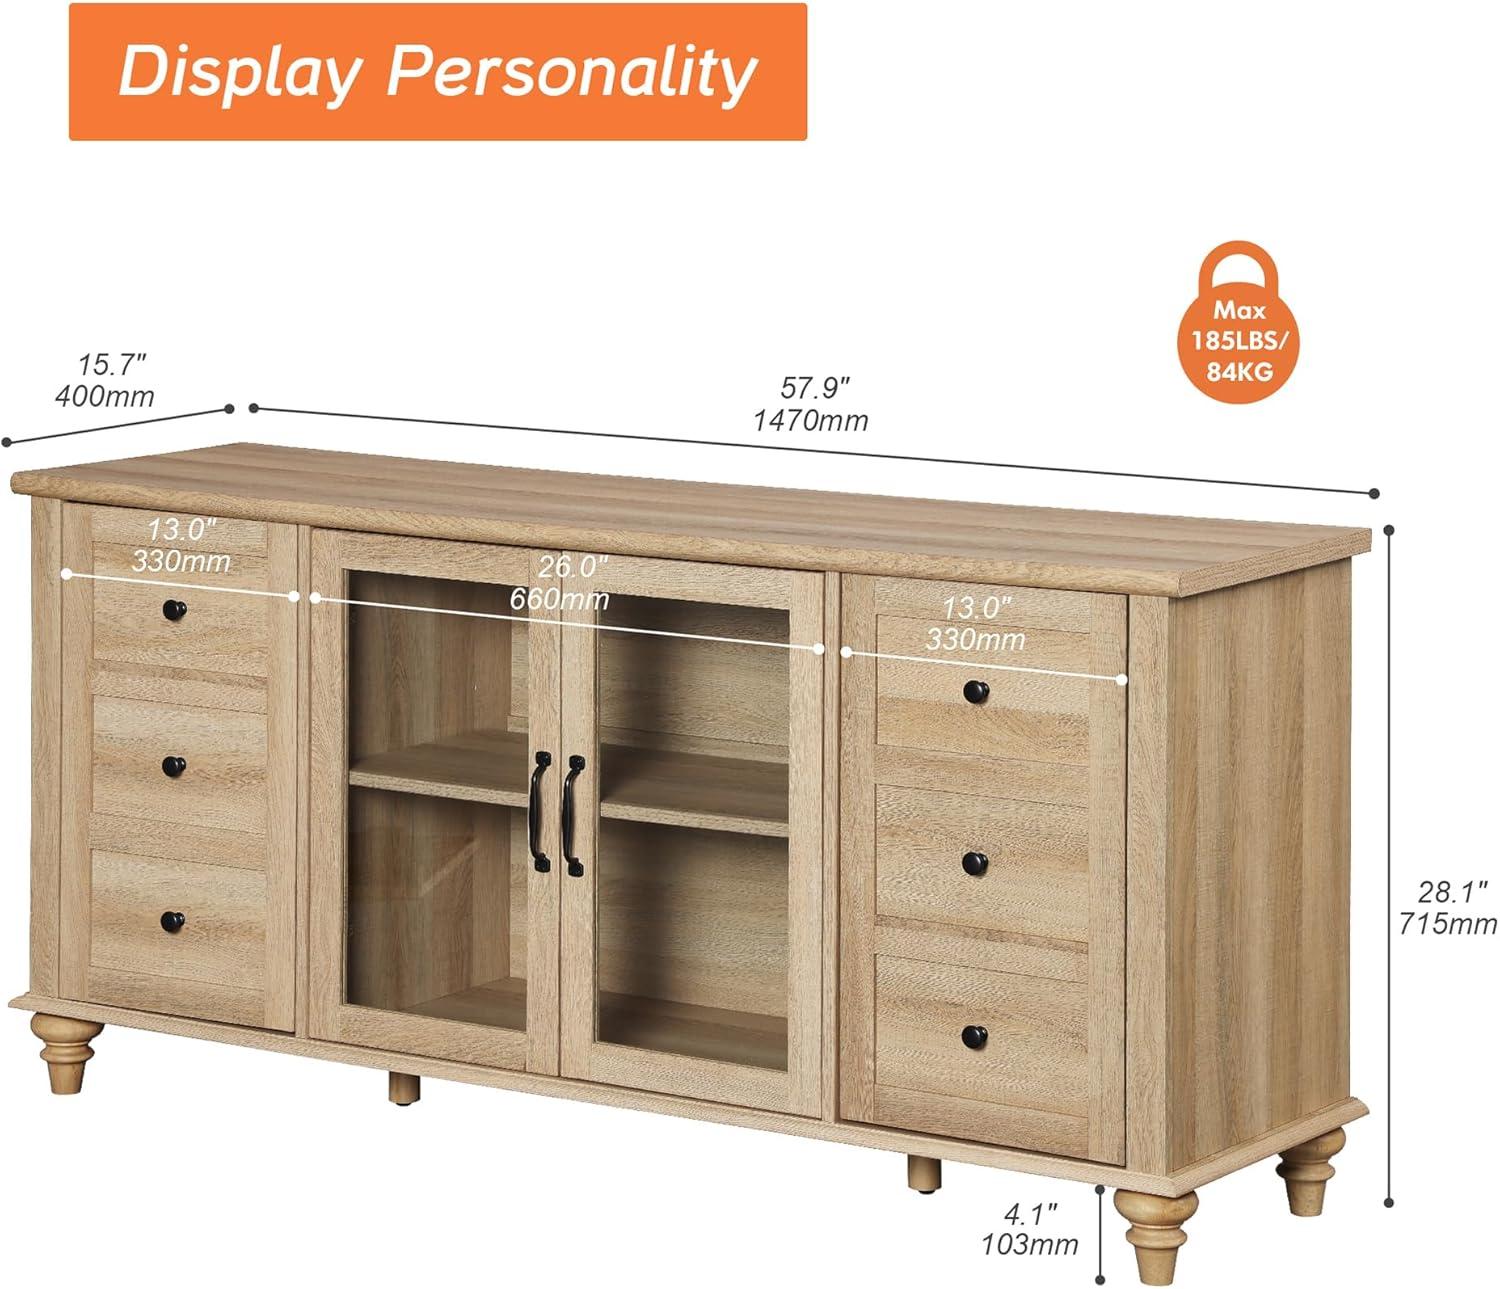
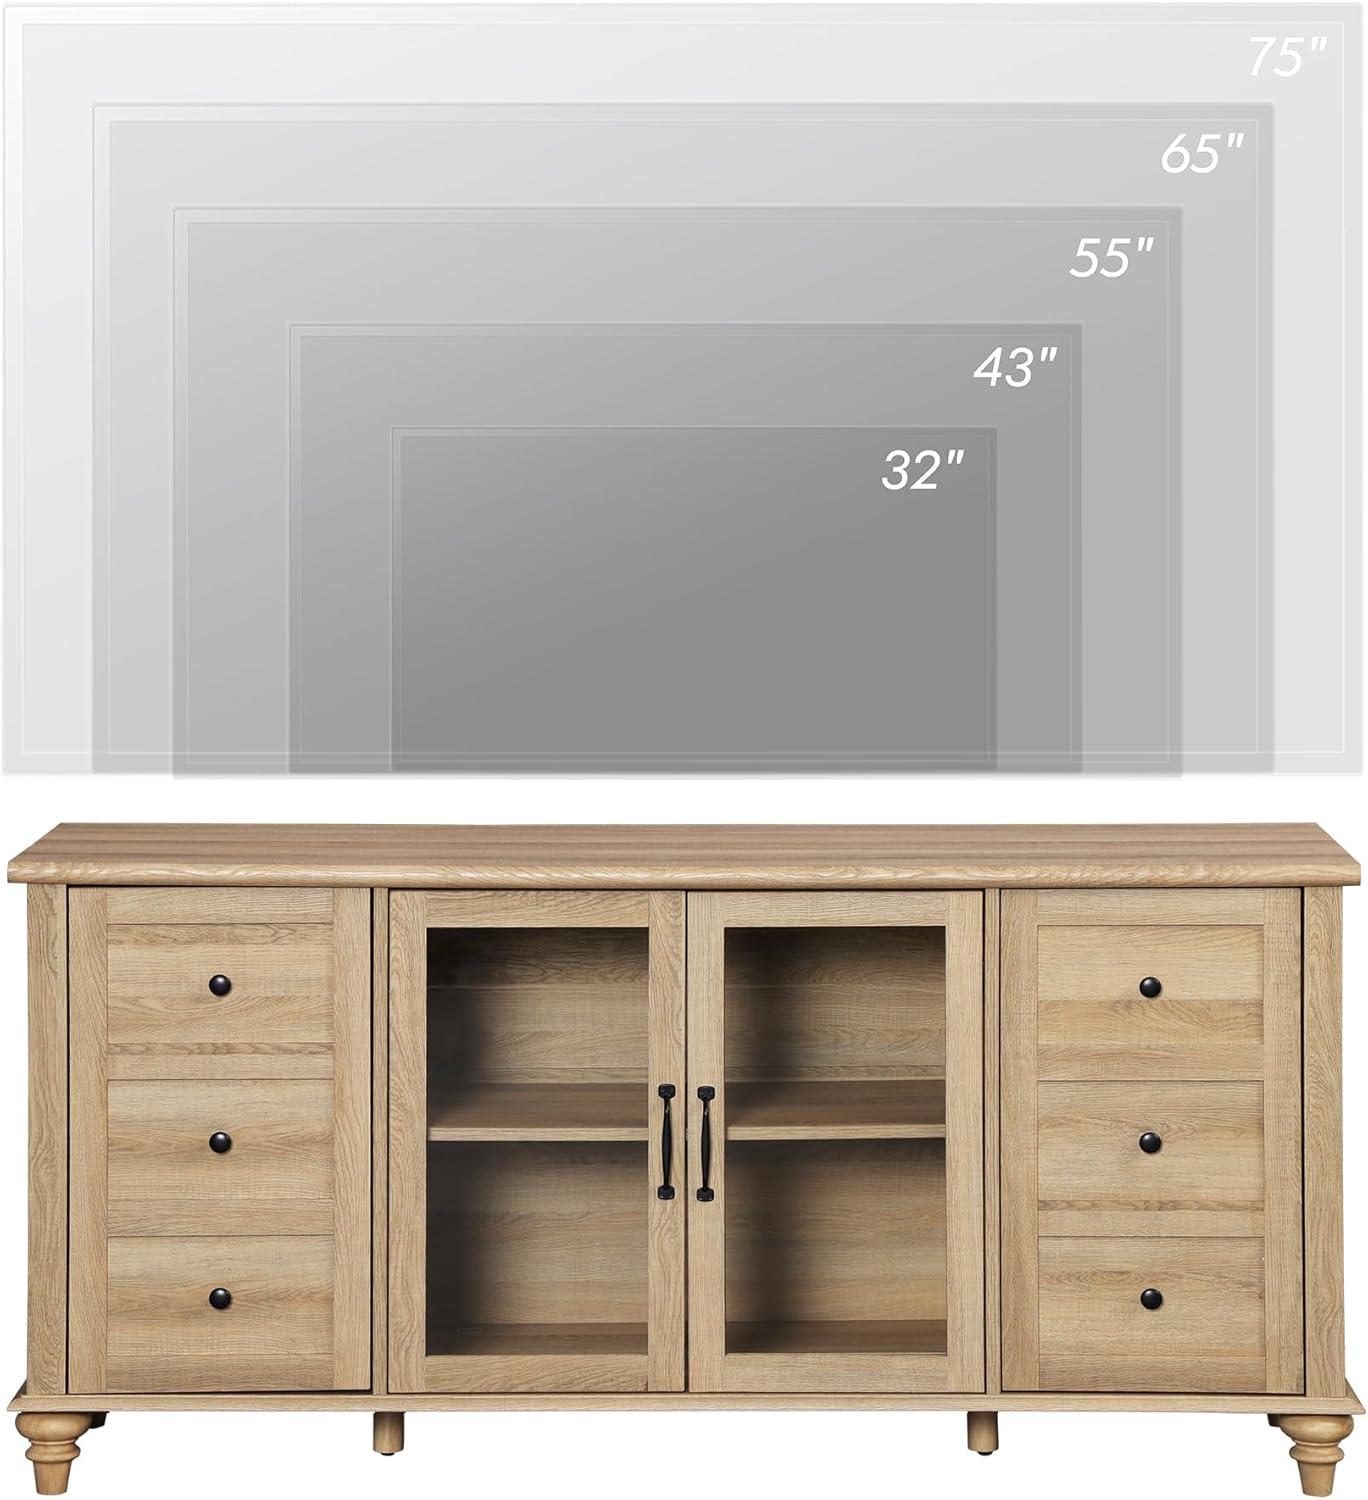
Measurements and TV compatibility so you can check the fit in your space

Before bringing the piece into your room,take a quick tape-measure walk through the space you plan to use.The tabletop spans roughly 58 inches across and is listed to support televisions up to 65″ diagonal, so measure the wall or media alcove width and the distance from floor to shelf openings where you’ll place components. Also note the maximum load of 150 lbs when considering heavy soundbars or a stacked AV receiver; a few inches of clearance left on either side usually makes placement and cable access easier. When you check the TV itself, measure the width of the stand or legs rather than relying solely on the diagonal screen size, as shallow or offset bases can change how a set sits on the tabletop.
Below are some quick, approximate widths for common TV diagonals to help you visualize fit and spacing; thes assume typical 16:9 aspect ratios and can vary by model. Pay attention to the depth of your TV base and any extra equipment you want on top, and remember the unit has adjustable/removable shelving and rear cable cutouts which affect how components and cords will sit once installed.
- Checklist to compare in your room: measure TV base width, tabletop usable depth, available wall width, and vertical clearance for shelves.
| TV diagonal | Typical width (approx.) | Notes |
|---|---|---|
| 32″ | ~28″ | Plenty of side clearance on a 58″ top |
| 43″ | ~38″ | Comfortable fit; leaves room for small décor |
| 50″ | ~44″ | Moast bases sit well near center |
| 55″ | ~48″ | Closer to the tabletop edge—measure stand footprint |
| 60″ | ~52″ | Limited side clearance; consider centering and cable routing |
| 65″ | ~57″ | Near the full width of the top; confirm base width and weight |
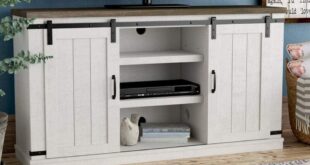
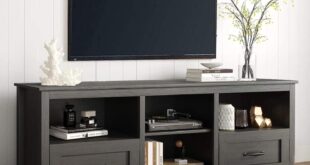
Storage, cable routing, and day to day accessibility when you use it
When you actually use the cabinet, everyday reachability and what you keep where tend to shape routines more than the printed specs. The doors open wide enough to slide a game console or stack of discs in and out without having to lean awkwardly, and the removable, height-adjustable shelf gives you a couple of ways to arrange gear — sometiems you leave the shelf in for neatly stacked boxes, other times you pull it out to make room for taller components. The glass doors make it easy to spot a particular cable box or remote at a glance, and they also encourage a habit of keeping frequently used items near the front so you aren’t constantly fumbling past decor. A few small, habitual moves you’ll notice: shifting a streaming stick to the top edge for better sensor reception, sliding controllers to the top shelf when friends arrive, or rotating a router so its lights remain visible through the glass.
- Front access: quick retrieval of remotes and small accessories.
- Behind the door: bulkier media players and infrequently touched backups.
- Shelf adjustments: occasional temporary disassembly when swapping larger devices.
The cabinet’s cable routing features influence day-to-day setup and occasional maintenance more than you might expect. Cables can be funneled through the round cut-outs in the rear and run along the tabletop groove so the view from the sofa stays tidy, but hiding everything away can make swapping devices a fiddly job — you often find yourself reaching behind a panel or unthreading a bundle to change an HDMI cable. The groove does keep power bricks and short runs from piling across the top surface, and the rear openings give enough room to route power strips without pinching cords, even though air circulation and quick unplugging for resets sometimes lead you to leave a door ajar. The table below summarizes how the routing features translate into everyday interactions.
| Routing feature | What you’ll likely notice in use |
|---|---|
| Round cut-outs in back | Centralized cable routing, easier to hide bundles but requires reaching behind for swaps |
| tabletop groove | Cleaner top surface and guided runs, can trap thin cables if not aligned |
How it measures up to your space, expectations, and everyday limits
Seen in everyday use, the stand tends to settle into predictable patterns: it carries central AV gear on the top and everyday clutter behind the doors, while the tabletop and cable grooves shape where devices and cords end up. A practical limit to keep in mind is the stated maximum load of 150 lbs, which determines how much can be safely staged on the surface without redistributing weight or relying on the legs alone. Routine interactions—opening and closing the doors, adjusting a removable shelf, or feeding cables through the back cut-outs—define how much breathing room the piece needs in front and behind it, and the assembly-anchoring instruction becomes part of the setup ritual rather than an optional extra. Small safety and maintenance notes tend to surface in daily life as well: loose small parts after assembly, the need to wipe glass more often, and occasional nudges to keep heavier electronics toward the center of the top surface.
Everyday limits show up in a few specific ways that recur across typical living-room rhythms:
- load capacity: 150 lbs maximum for the top surface, with distribution affecting stability.
- Clearance needs: door swing and shelf adjustments can require a little extra front and side space when accessing contents.
- Cable routing: the back cut-outs concentrate wiring in predictable spots, which helps tidying but can restrict placement of wider AV stacks.
| Daily constraint | Observed effect |
|---|---|
| Weight limit | Sets an upper bound on what can be placed on the top without shifting gear toward centre |
| Door access | Requires occasional small adjustments to nearby furniture when retrieving items |
For detailed specifications and current configuration options, see the full listing here: Product details and specifications
Putting it together and keeping it looking right through assembly and upkeep
When you first open the boxes, the practical bits of assembly become the main story: parts are labeled and the screws are coded, so sorting everything out on the floor saves a lot of back-and-forth. Lay pieces out where you can see the diagrams, and keep small fasteners in a shallow tray so nothing rolls away; a second set of hands helps with lifting the top and lining up the doors, though many steps can be done solo if you take your time. A few quick habits make the process feel smoother — for example, ease screws in most of the way before tightening them fully so panels mate cleanly, and handle the glass doors gently while aligning hinges to avoid chipping the finish. You’ll notice that some holes need a little nudging to accept fasteners and that the anti-tip bracket wants a firm connection to whatever wall you have; those are normal little trade-offs in everyday assembly rather than showstoppers.
- Prep: spread parts and hardware out, keep the manual handy
- Alignment: start screws loosely, then tighten in stages
- Safety step: fasten the anti-tip device during setup rather than later
Keeping the piece looking right afterward tends to be low-effort but regular: a soft duster or microfiber cloth removes dust from the oak finish and the glass, and an occasional check of hinge tension and screw tightness prevents doors from sagging over time. Small spills dry quickly if you blot rather than rub,and using coasters or felt pads under decorative items helps avoid scuffs on the tabletop; harsh solvents aren’t needed and can disturb the finish. You’ll probably tighten a couple of screws after the first few uses as the wood settles, and then only check in every few months unless the stand is heavily loaded or moved often.
| care task | Typical frequency | Time required |
|---|---|---|
| Dusting and glass wipe | Weekly to biweekly | 5–10 minutes |
| Screw and hinge check | After first week,then quarterly | 10–20 minutes |
| Spot clean spills or marks | As needed | Few minutes |
| Anti-tip anchor inspection | Annually or after moving | 5–15 minutes |
How It Lives in the Space
You notice, over time, how the WAMPAT Farmhouse TV stand settles into the corner, quietly taking on a role as the room is used. In daily routines it shapes space use and comfort: the top gathers remotes and mugs, the cabinet doors see familiar, loose-handed motions, and the surface collects small marks that map ordinary days.It becomes part of regular household rhythms, more felt in your patterns than singled out for attention. After a few months it simply stays.