decordip Garden and patio decoration inspiration
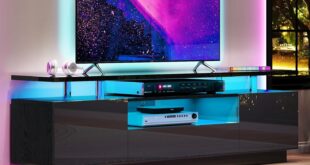
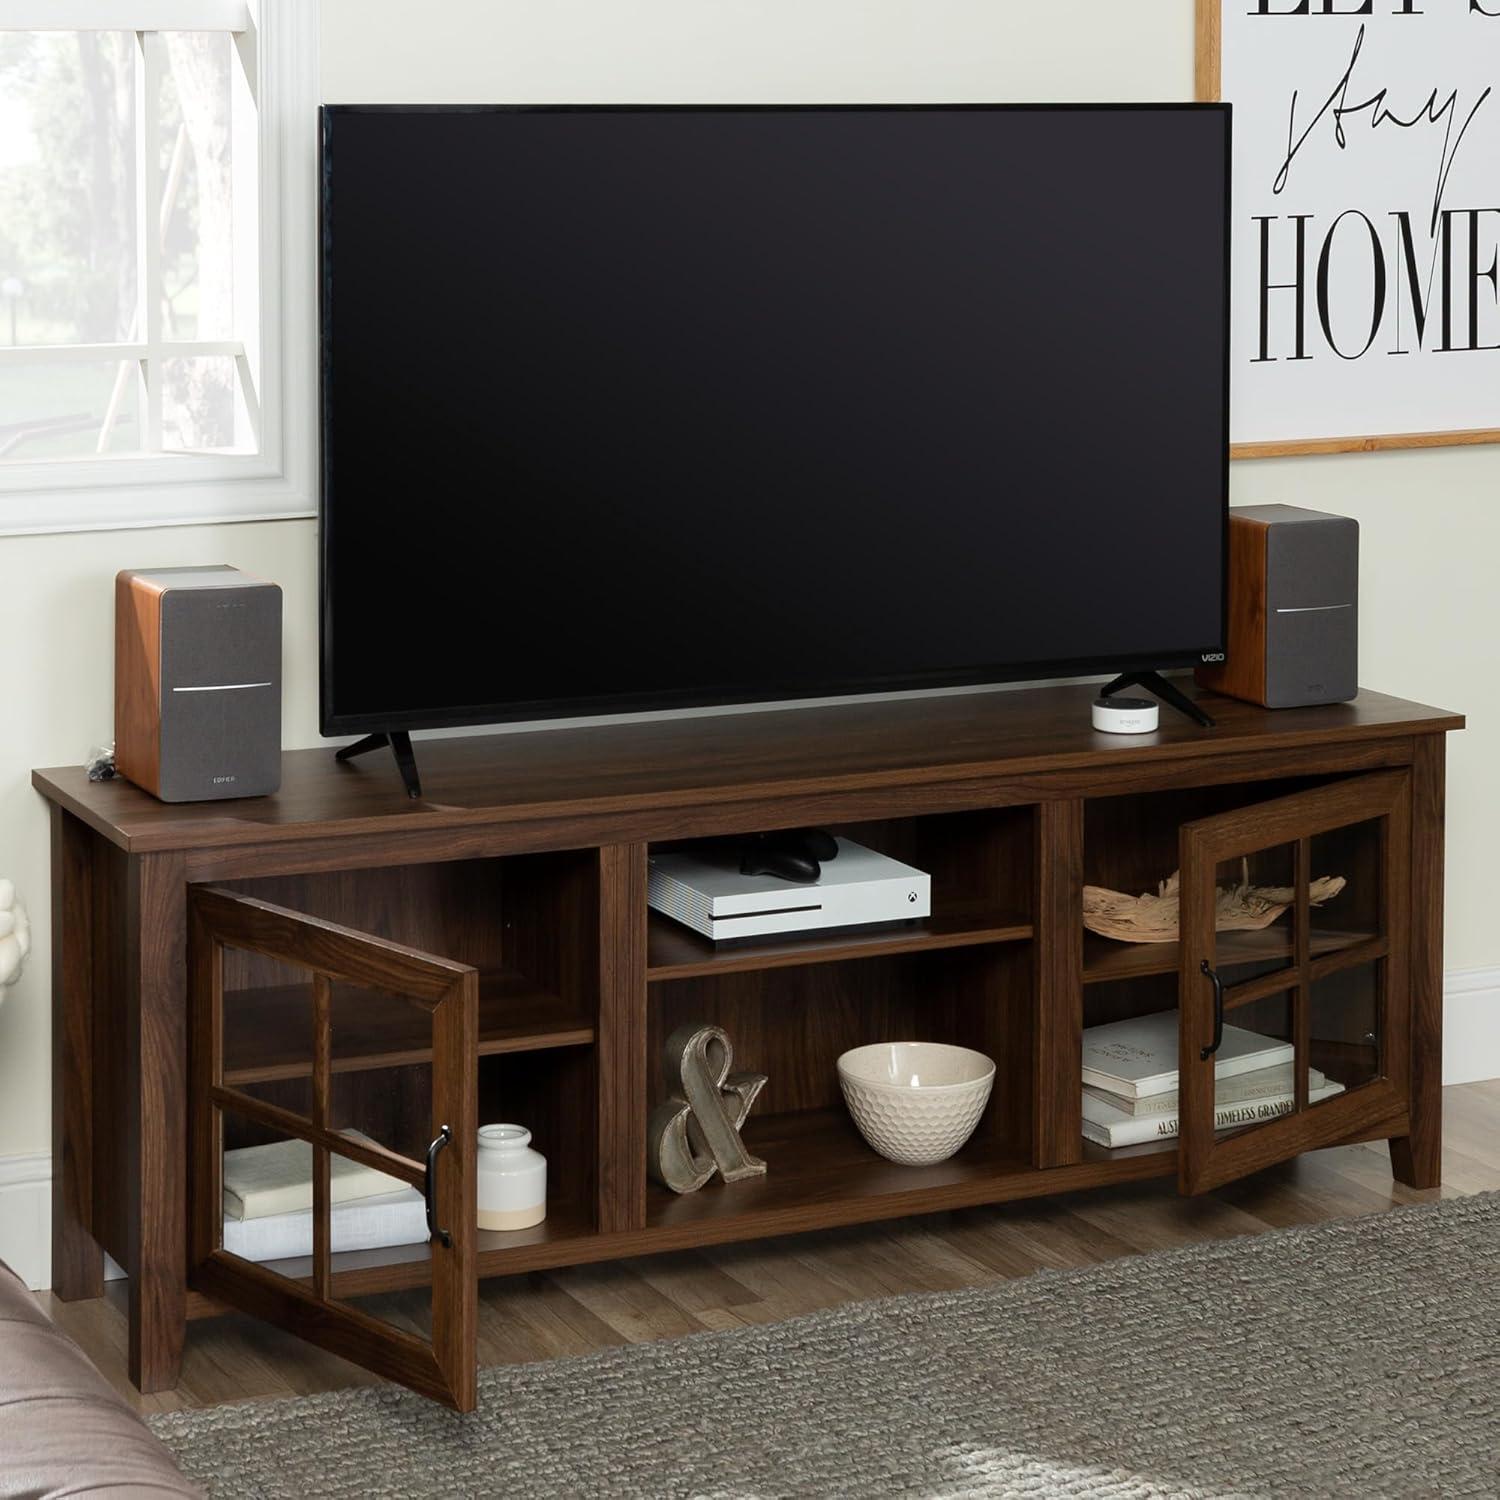
You watch light skim the dark walnut top and catch on the window-pane glass; for a moment the whole console reads like a low-slung bookcase you’ve already lived with. The Walker Edison Portsmouth Classic TV stand settles into the room with a quiet conventional grain—its edges feel solid under your hand, the finish slightly textured rather than slick. You notice the visual weight before the finer points: the panes and open center cubby break the bulk into familiar pockets where things can sit without shouting. Pull a door and it gives a soft spring click; the shelves carry that faint factory scent that fades after a day of airing. By evening the walnut deepens under lamplight and the piece starts to feel like part of the room rather than something newly assembled.
A first look at how the Portsmouth Classic sits in your room
Planted against a wall the piece tends to read as a deliberate anchor rather than something that disappears; the top surface and glass doors create a horizontal plane that naturally draws the eye across the media area and toward seating. In many living spaces the glass picks up ambient light — catching window glare at certain times of day and softening lamp glow at night — so the stand’s presence shifts slightly over the course of an afternoon. The front-facing doors mean occasional small adjustments in daily habits: a slight step to open one door when passing by, a moment spent angling remotes or game controllers in the open center so they don’t crowd the top shelf, and the occasional nudge when someone needs the extra inch of clearance to access ports or cable runs. These are the kinds of small, lived interactions that reveal how the unit integrates into movement patterns rather than just how it looks on paper.
- Lighting interaction: Reflective surfaces change the perceived depth of the unit through the day.
- Traffic flow: Front access means keeping a clear path within arm’s reach.
- Surface use: The top often doubles as a staging area for controllers, remotes, or an incidental plant.
| Placement | Typical observation |
|---|---|
| Flush against a wall | Reads as a visual anchor,minimizes side glare |
| Placed under a window | Shows more reflected light and occasional glare in late afternoon |
| Used as a room divider | Creates a low visual barrier and offers accessible top-surface staging |
Full specifications and configuration details are available here.
What greets you visually: the silhouette, grain, and finish

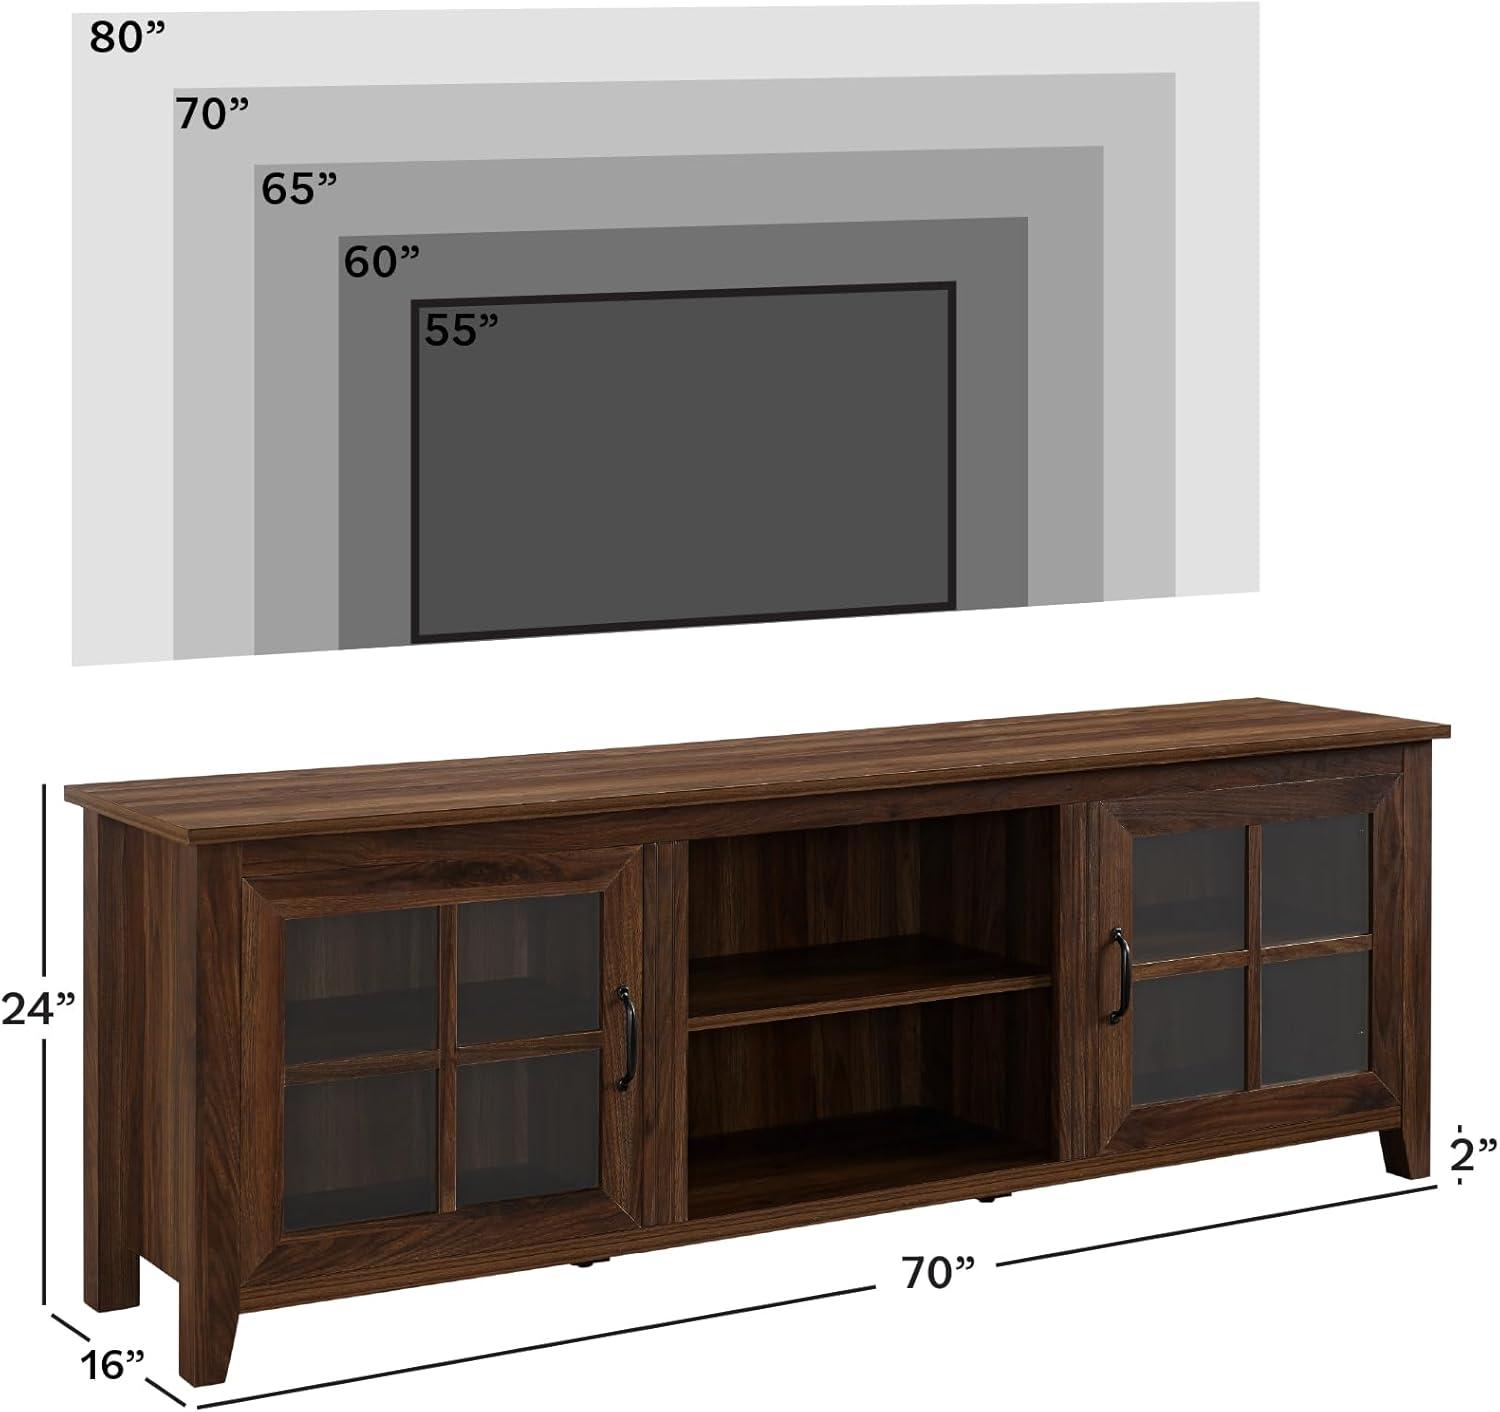
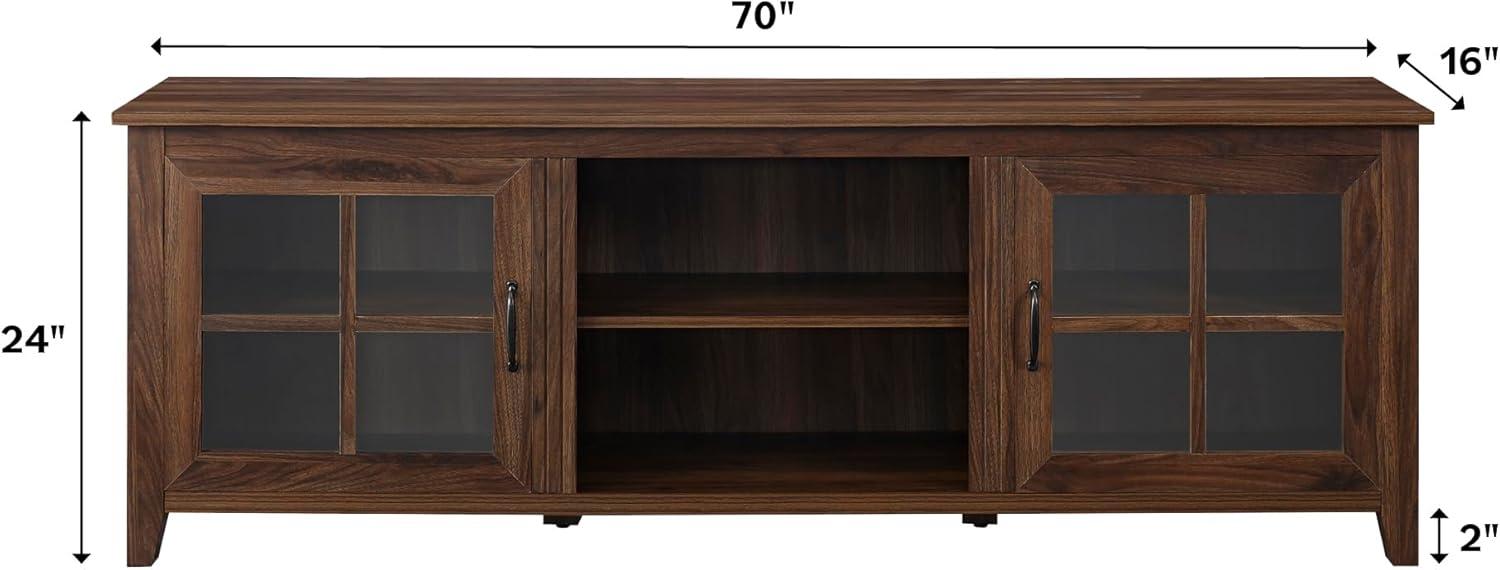
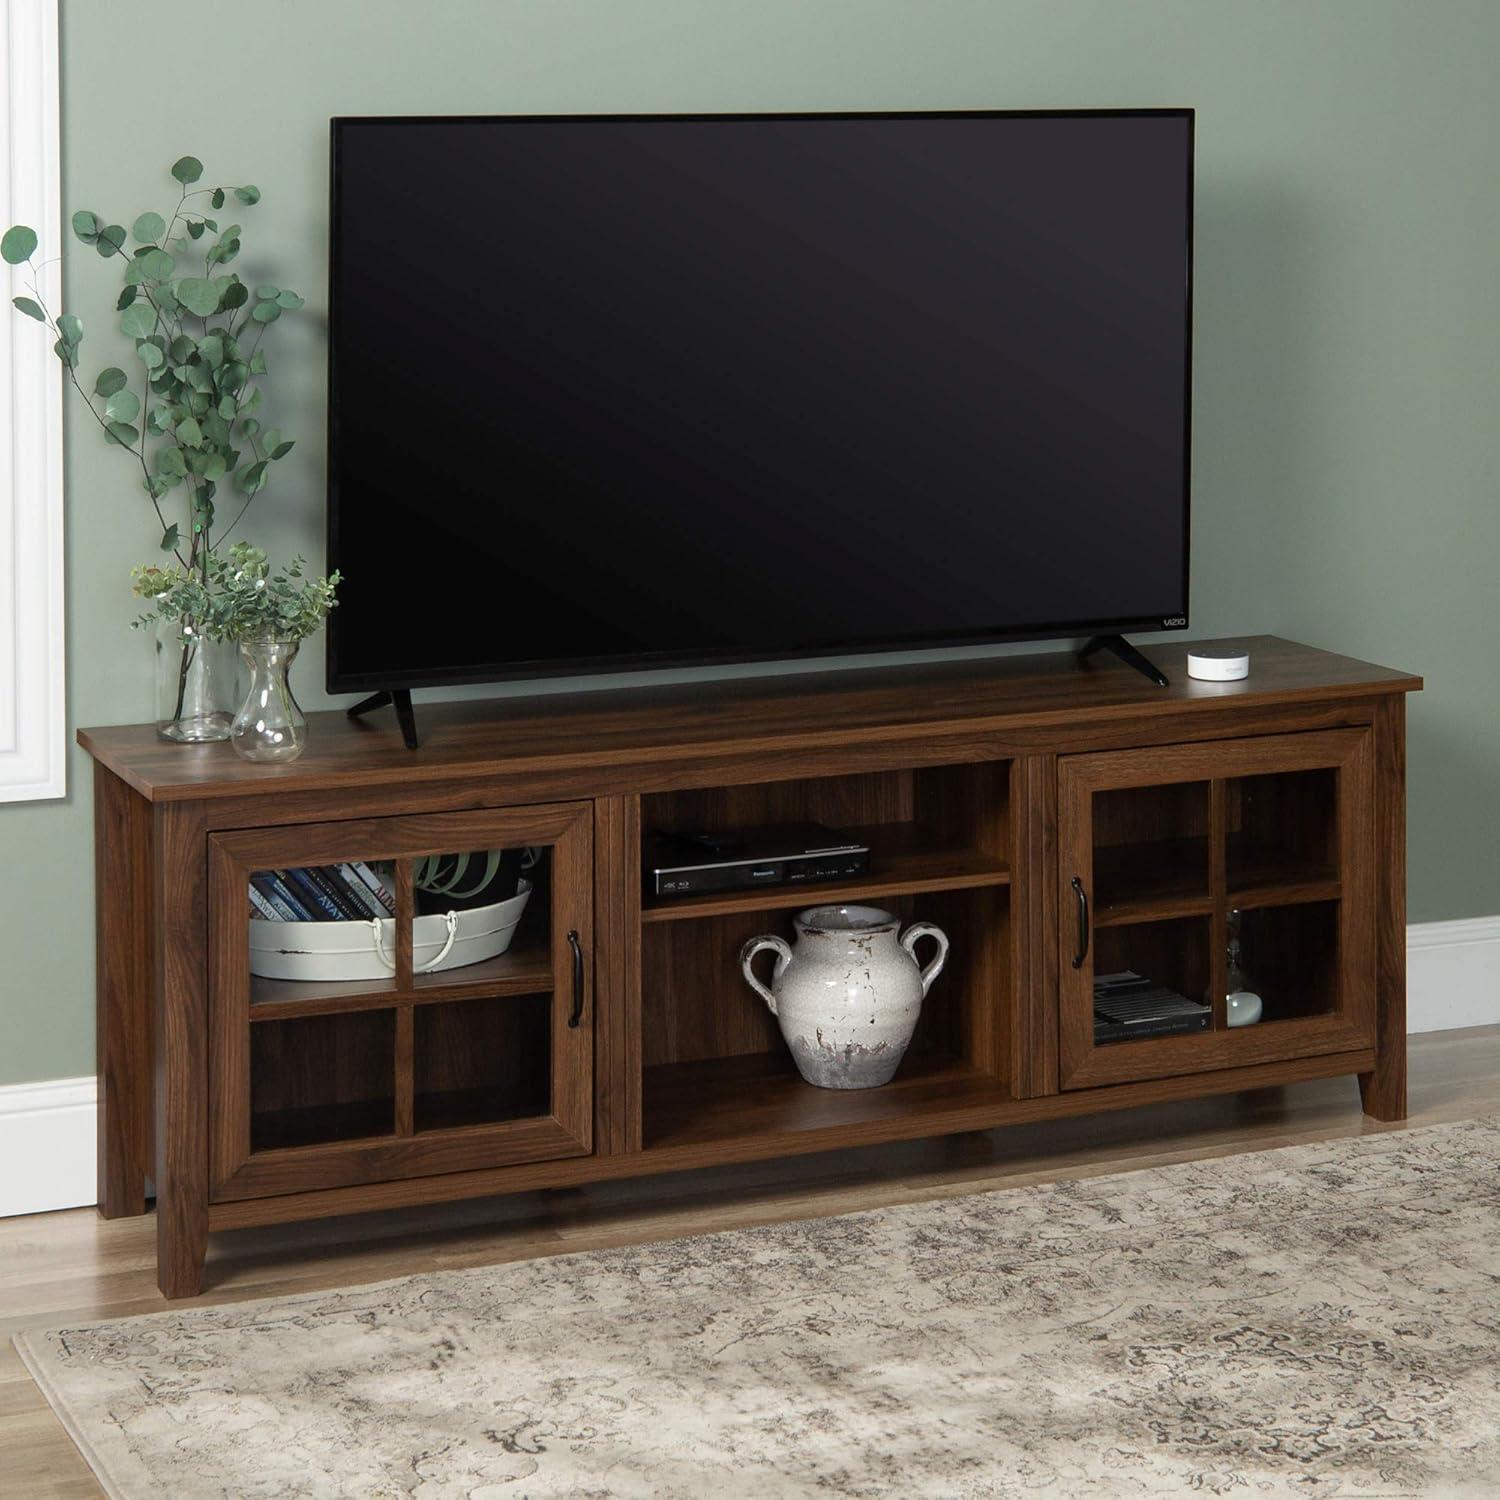
When you first walk into the room, the piece announces itself with a broad, horizontal silhouette—low and wide rather than tall or fussy—so your eye moves across the expanse rather than up. The top slightly overhangs the front edge and the base sits with a modest lift from the floor,producing a planted,anchoring profile that keeps visual attention at screen level. A few small cues break the long line: subtle beveling along the top and a gentle taper at the legs that stop the shape from feeling blocky.
- Silhouette: wide, low, and grounded; horizontal emphasis dominates.
- Grain: visible linear patterns that run along the length, with small variations and repeat motifs.
- Finish: a warm, darker wash with a muted sheen that softens reflections.
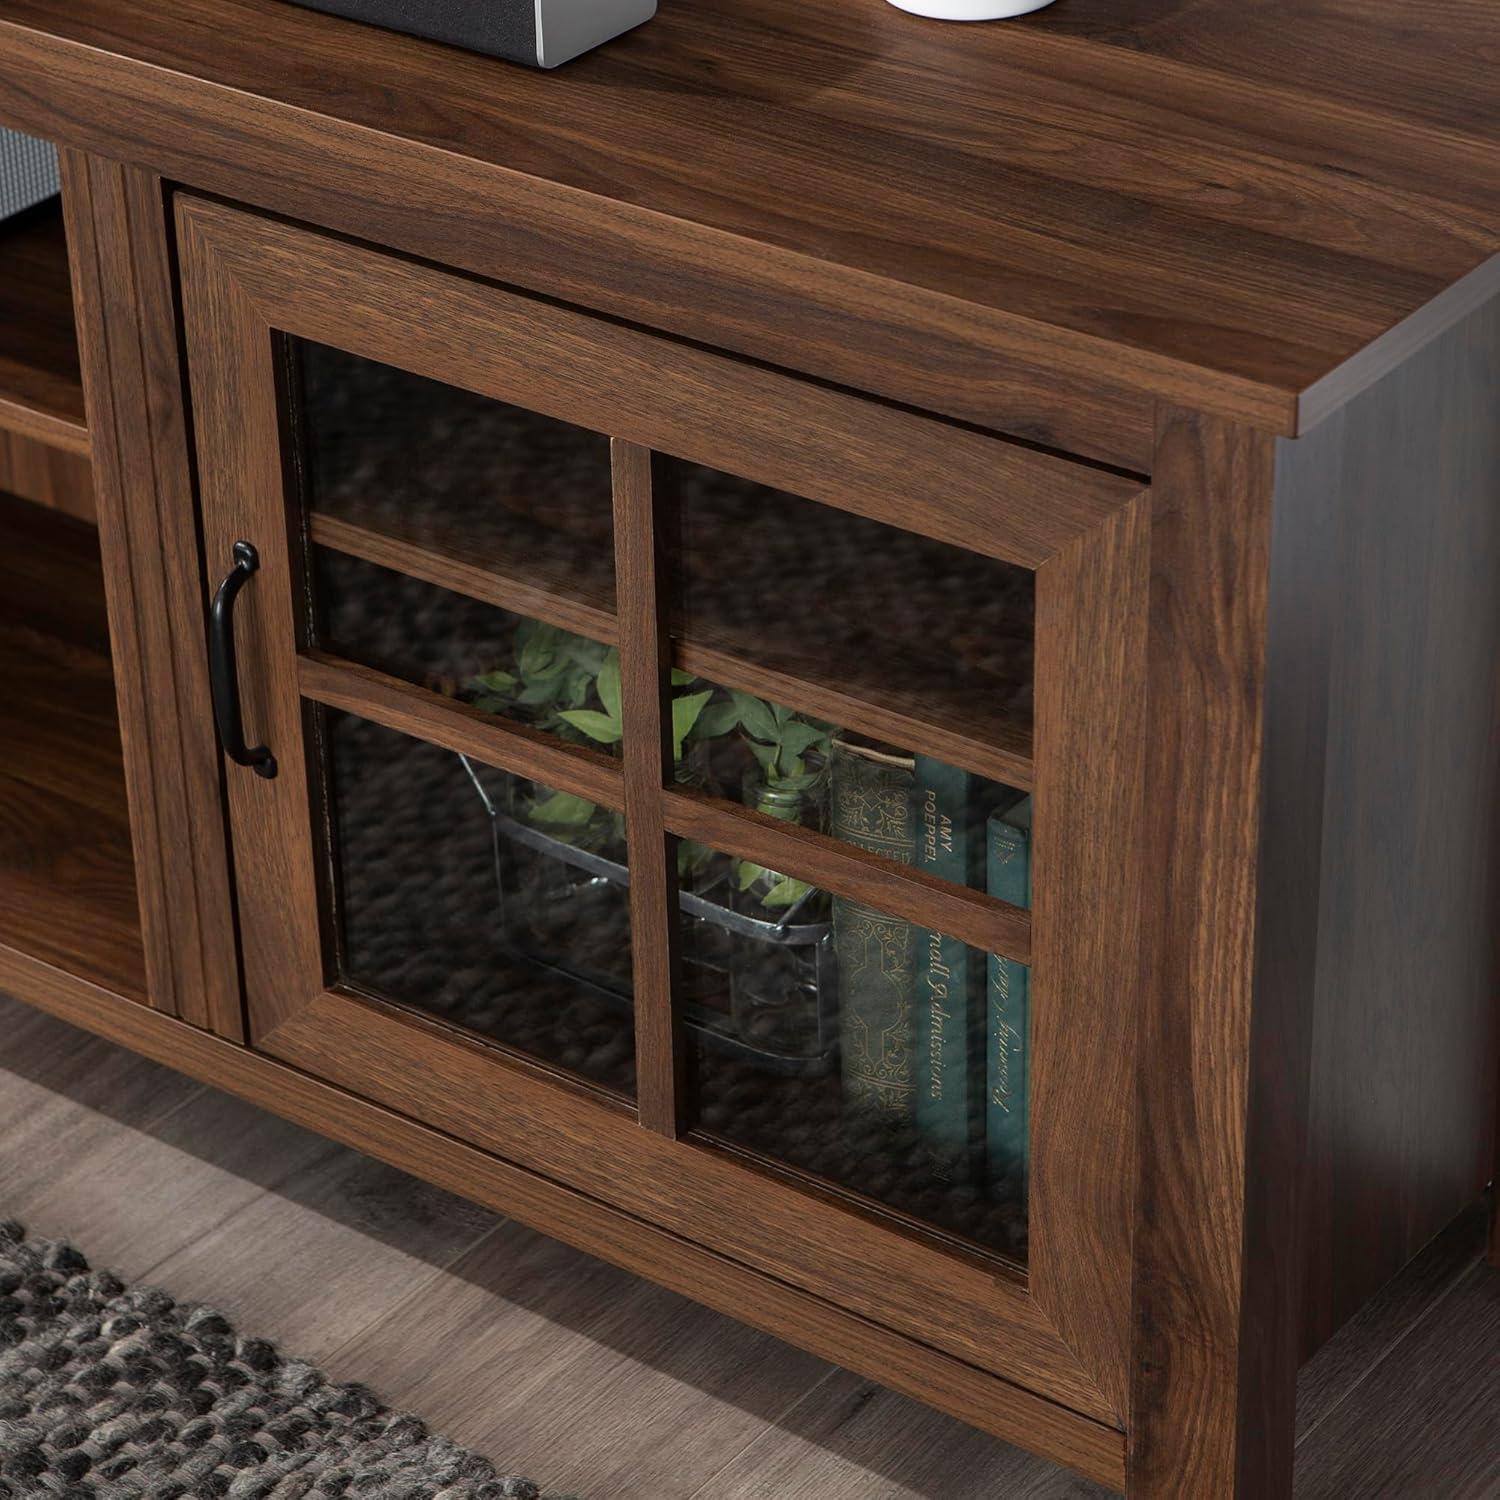
Up close, the grain reads as consistent but not identical from panel to panel—there are repeating streaks and occasional darker knots that suggest a worked surface rather than a flat print. The finish has a satin feel: it diffuses glare in bright rooms while still catching enough light to reveal the wood pattern. Fingerprints and dust behave differently depending on lighting; in low light the finish tends to hide small smudges,while direct window light will make tiny marks and seams more noticeable. Touching the surface, you’re met with a generally smooth coat with a hint of texture where grain lines run beneath the finish, a reminder that the visual warmth comes from layered tones rather than a single flat color.
What the build tells you during assembly and everyday handling
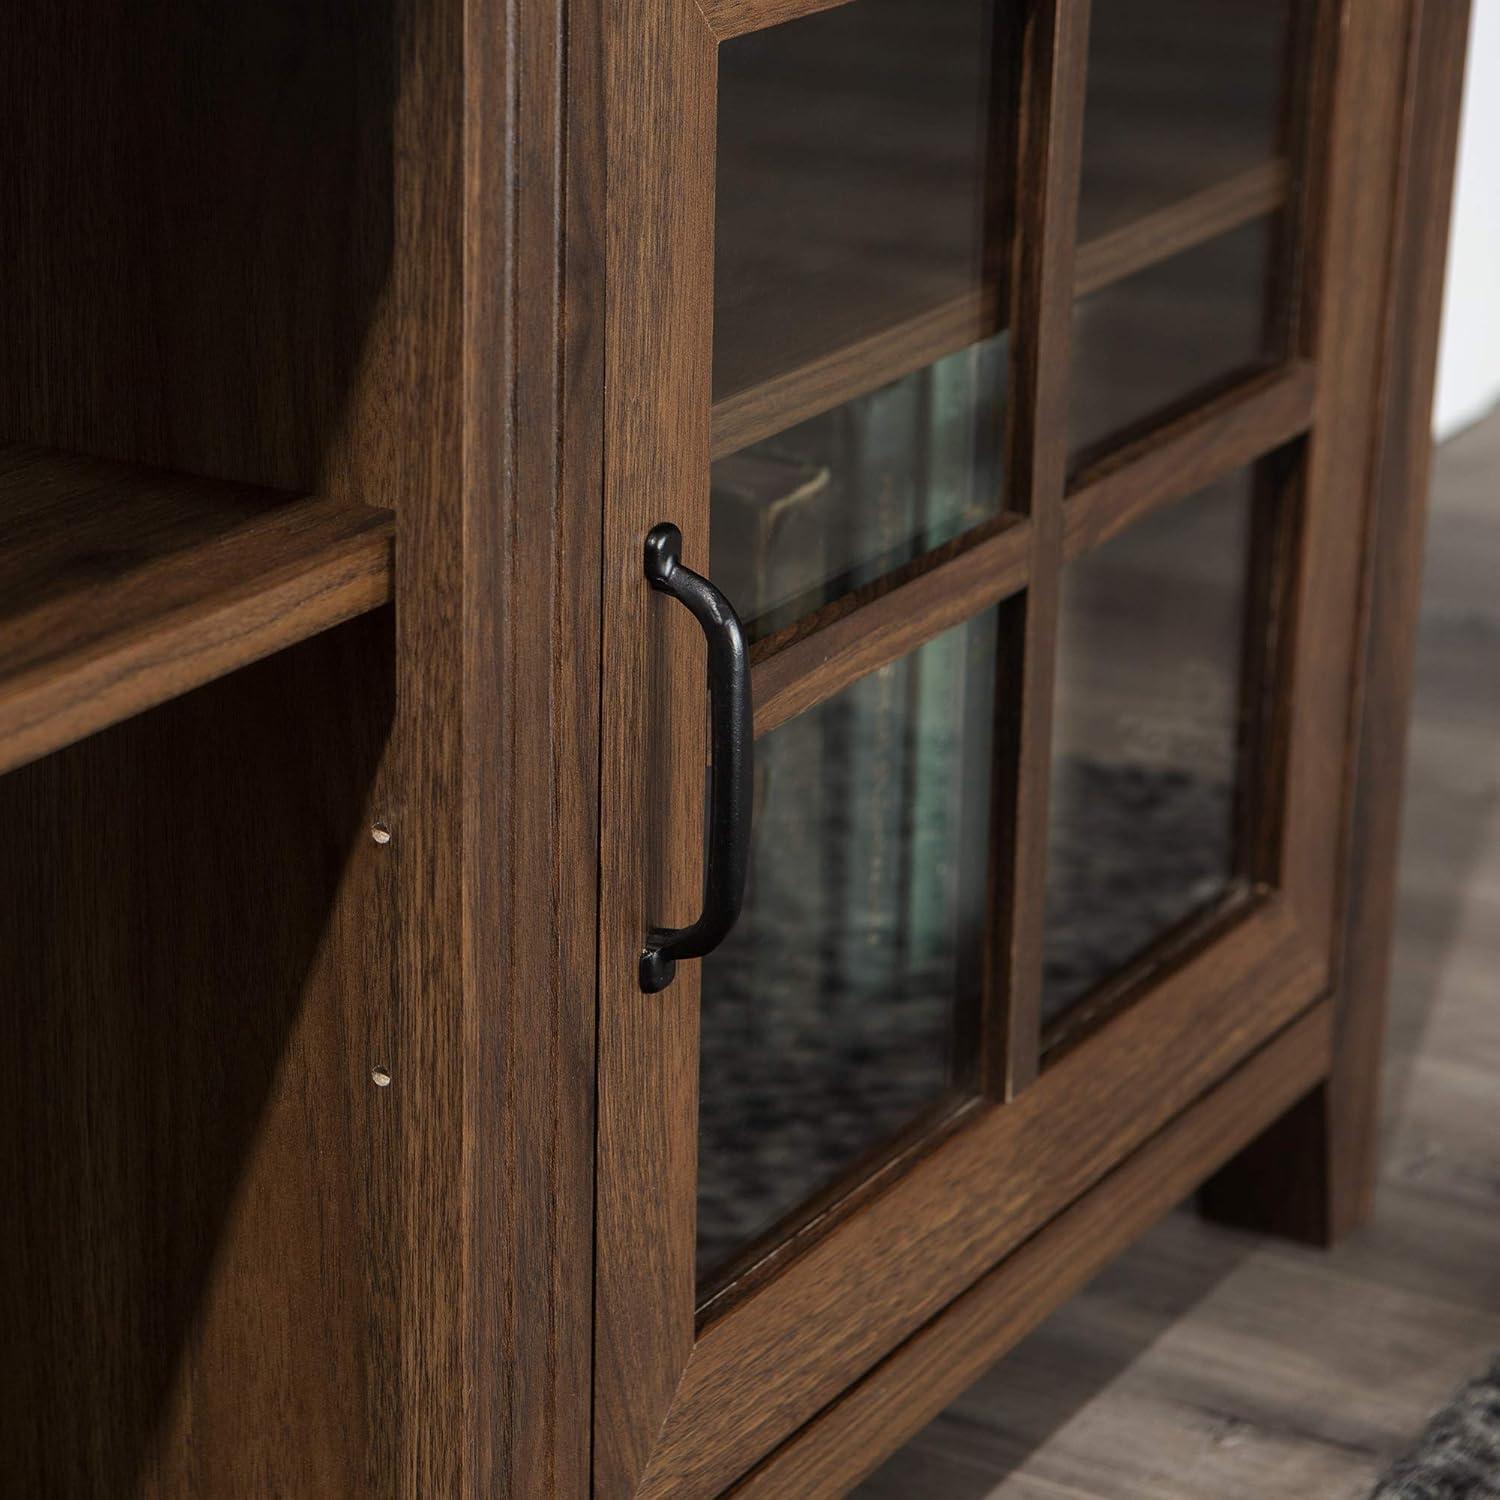
during assembly the parts and hardware speak plainly: numbered bags and labeled panels help you follow the steps, while the fit of dowels and cam locks tells you how tightly components will sit together once joined. As you line up the back panel and top, you can feel whether holes are precisely placed or need a nudge; some pieces want an extra tap with a mallet to sit flush, and larger panels tend to feel unwieldy if you work alone. The door mounting sequence reveals hinge behavior early on — when you attach a door and open it a few times you quickly learn the swing range and whether the glass sits evenly in the frame. Small, recurring cues also appear on the hardware: if screws thread smoothly the assembly proceeds evenly, but any resistance or misaligned holes becomes obvious in the torque you apply with the screwdriver.
Once in everyday use, the build continues to communicate through routine interactions. The finish shows fingerprints and dust in the obvious places around handles and glass edges, while the adjustable shelf holes make their intentions clear when you move components to accommodate different heights — the pegs click into place and hold with a small give under weight. when doors are used often they reveal the hinge tension and whether the closure is soft or springy; shelves under load may show a faint bow over time, and the base makes itself known when you shift the stand across flooring by scraping or transferring weight differently than a single-piece cabinet. A few practical notes that tend to stand out in normal handling:
- Hinges — reveal their alignment quickly when you test opening and closing.
- Shelves — state their stability the moment you place heavier objects.
- Finish and edges — pick up smudges and dust where you reach most frequently enough.
| Stage | What the build signals |
|---|---|
| Initial assembly | Alignment and hardware fit; whether parts sit flush or need adjustment |
| First week of use | Hinge action, shelf settling, and how finishes handle fingerprints |
| Ongoing handling | Longer-term flex, dust accumulation points, and movement behavior on floors |
Measuring it out in your space with clearances and shelf spacing

Before you bring the stand into the room,take a quick walk through the motions of use: imagine opening the glass doors,reaching for a player on a middle shelf,and plugging or unplugging cables while the unit sits against the wall. Measure the depth of any components with their cables attached rather than just the chassis; that extra inch or two for a bulky connector often changes where a router or streaming box can live. Pay attention to the swing of the doors and the clearance needed in front of the console for people to pass by—sometimes you’ll shift the stand a few inches away from a tight walkway to avoid bumping a door at odd hours. Also note where the TV’s center sits relative to eye level and how the shelves stack beneath it; you’ll find yourself shuffling shelf positions a couple of times as you balance a receiver’s ventilation needs against the height of decorative books or framed photos.
When you’re ready to lay out exact placements, a few practical checks help keep surprises small:
- Measure device height and depth (including connectors and remote sensor extents).
- Allow ventilation space above and behind heat-generating equipment rather than packing shelves tight.
- Test door swing and front clearance with a tape measure and by mimicking typical movements while the doors are open.
Use the simple table below as a quick reference for common clearances; these are rough, everyday figures to guide where you set shelves and route cables rather than fixed rules.
| Item | Typical minimum clearance to allow | Why it matters |
|---|---|---|
| AV receiver | about 2–4 inches above and 1–2 inches behind | Heat dissipation and rear cable routing |
| Blu‑ray / game console | around 1–2 inches front/back, 1 inch between stacked units | Disc loading and infrared/line-of-sight for controllers |
| Router / modem | leave a couple inches around vents | signal clearance and airflow |
Living with it: shelving, cable routing, and day to day interaction
Open the doors and the shelving becomes the stage for how you actually live with the piece: a mix of display and everyday stowage rather than a static showroom. The three adjustable shelves let you shuffle books, a stack of game cases, a vase, or a router into different arrangements, and moving them around takes a short pause rather than a full rework of the unit.Glass-fronted compartments make what’s inside immediately visible, which means you’ll find yourself rearranging items more frequently enough to keep things looking intentional; fingerprints and dust show up on the panes, so light cleaning becomes part of the routine. In everyday use you’ll notice small habits forming — leaving the center cubby open for the device you swap most, sliding controllers onto a lower shelf to grab quickly, or using the back of a shelf as a place to tuck seldom-used cables out of sight.
- Adjustability: shelves shift positions with moderate effort, creating varied vertical space for tall books or short boxes.
- Visibility: items behind glass are on display but also require more frequent wiping and occasional re-styling.
- Accessibility: the open center is the grab-and-go spot; enclosed shelves feel more deliberate to access.
When it comes to cable routing and day-to-day interaction, the practicalities become the background choreography of how you use the stand. Cables tend to route through the open cubby or the rear cutouts tucked behind the shelves, and without some bundling they’ll form a loose loop that nudges you during cleaning or when you pull a device forward. Heat and airflow are modest concerns in normal use — devices that run warm do better in the open center — and you’ll occasionally leave a door ajar to ease remote use or ventilation. A small,descriptive snapshot of what this looks like in practice follows:
| Feature | Observed behavior |
|---|---|
| Cable access | Most cables pass through the open center or rear openings; bundling keeps things tidy |
| Component swaps | Swapping a player or console usually requires opening a door and a quick re-route of at least one cord |
| Remote and ventilation | Remotes work in most cases from the open cubby; enclosed shelves can feel slightly more restrictive for IR-only devices |
these small interactions — tucking,rerouting,wiping — are what you’ll repeat week to week,and they shape how neatly the whole setup stays over time.
When your expectations meet the stand: where it fits your setup and what limits you encounter
In many living areas the stand functions as a visual anchor: it fills horizontal wall space without rising above sightlines, and the glass-fronted compartments make the contents part of the room’s display rather than fully hidden. In practice that means equipment placement and visual balance become part of everyday interaction — cords tend to be negotiated behind the back,items on the middle shelves get rearranged more often than planned,and sunlight from nearby windows can introduce reflections that shift throughout the day. A few typical placement patterns and the limits they reveal are shown below.
| Setup | Typical placement note | Common limitation encountered |
|---|---|---|
| Long wall in living room | Centerpiece under a wall-mounted TV or freestanding screen | Visible wiring and component depth can require tweaks to keep a tidy look |
| Corner arrangement | Angled placement to save floor space | Rear clearance and access to ports often feel restricted |
| Open-plan area | Stand also serves as informal display for décor | Glass doors make internal components more conspicuous and subject to glare |
- Component access: a hands-on habit emerges where doors are left ajar or devices are moved forward to reach controls and cables, especially during setup or when swapping discs and drives.
- Ventilation and heat: electronics placed behind glass can be fine in ordinary use, though some households report periodically leaving doors open during extended playback to encourage airflow.
- Acoustic placement: positioning a low-profile soundbar or speaker can require micro-adjustments to avoid obstructing the stand’s visual lines or the TV’s bezel.
Full specifications and configuration details are available on the product detail page.
Caring for the finish and keeping doors and glass running smoothly
Keep the finish looking even by treating it like other veneered furniture: dust lightly and often with a dry microfiber cloth, and blot spills immediately with a slightly damp cloth so moisture doesn’t sit on the surface. For everyday cleaning, a damp cloth with a drop of mild dish soap followed by a dry wipe usually removes fingerprints and smudges without stripping the sheen; spray cleaners should be applied to the cloth, not directly onto the wood, to avoid liquid seeping into seams. What to use: microfiber cloth, mild soap, a soft-bristled brush for crevices. What to avoid: abrasive pads, bleach or ammonia-based cleaners, and heavy oil polishes that can leave a sticky residue. You’ll probably find yourself paying extra attention to the edges and along the top where hands, remotes, or sunlight interact with the finish more frequently.
For the doors and glass, keep motion smooth by cleaning glass with a lint-free cloth and a non-ammonia glass cleaner (again, spray the cloth first). Wipe the frame-to-glass junctions gently to prevent grime buildup that can interfere with closing. Periodically check hinge screws for looseness and tighten them if the door feels wobbly; a small dab of silicone lubricant on moving metal parts can reduce squeaks, though it can attract dust over time so use sparingly. You might notice that quick, small tweaks—retightening a screw or wiping a hinge—solve most alignment quirks that develop with daily use.
- Quick hinge checklist: inspect,tighten,clean,lubricate sparingly.
| Task | Suggested Frequency |
|---|---|
| Dust and wipe finish | Weekly or as needed |
| Clean glass and seals | Biweekly or when visibly smudged |
| Inspect/tighten hinges | Every few months |
A Note on Everyday Presence
With the Walker Edison Portsmouth Classic 2 Glass Door TV Stand for TVs up to 80 Inches, 70 Inch, Dark Walnut in place, you notice how it settles into the room rather than arriving like a statement. Over time it quietly shapes how the space is used — a place for the remote, a landing spot for a blanket, the low edge you brush past as the room is used in regular household rhythms. The surface picks up small scuffs and fingerprints in daily routines and the doors hold the faint, familiar marks of ordinary hands, part of the quiet comfort of being lived with. It becomes part of the room.