decordip Garden and patio decoration inspiration
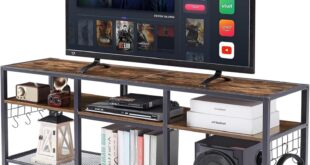
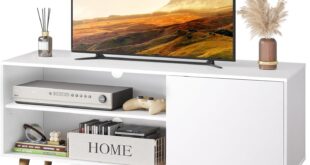
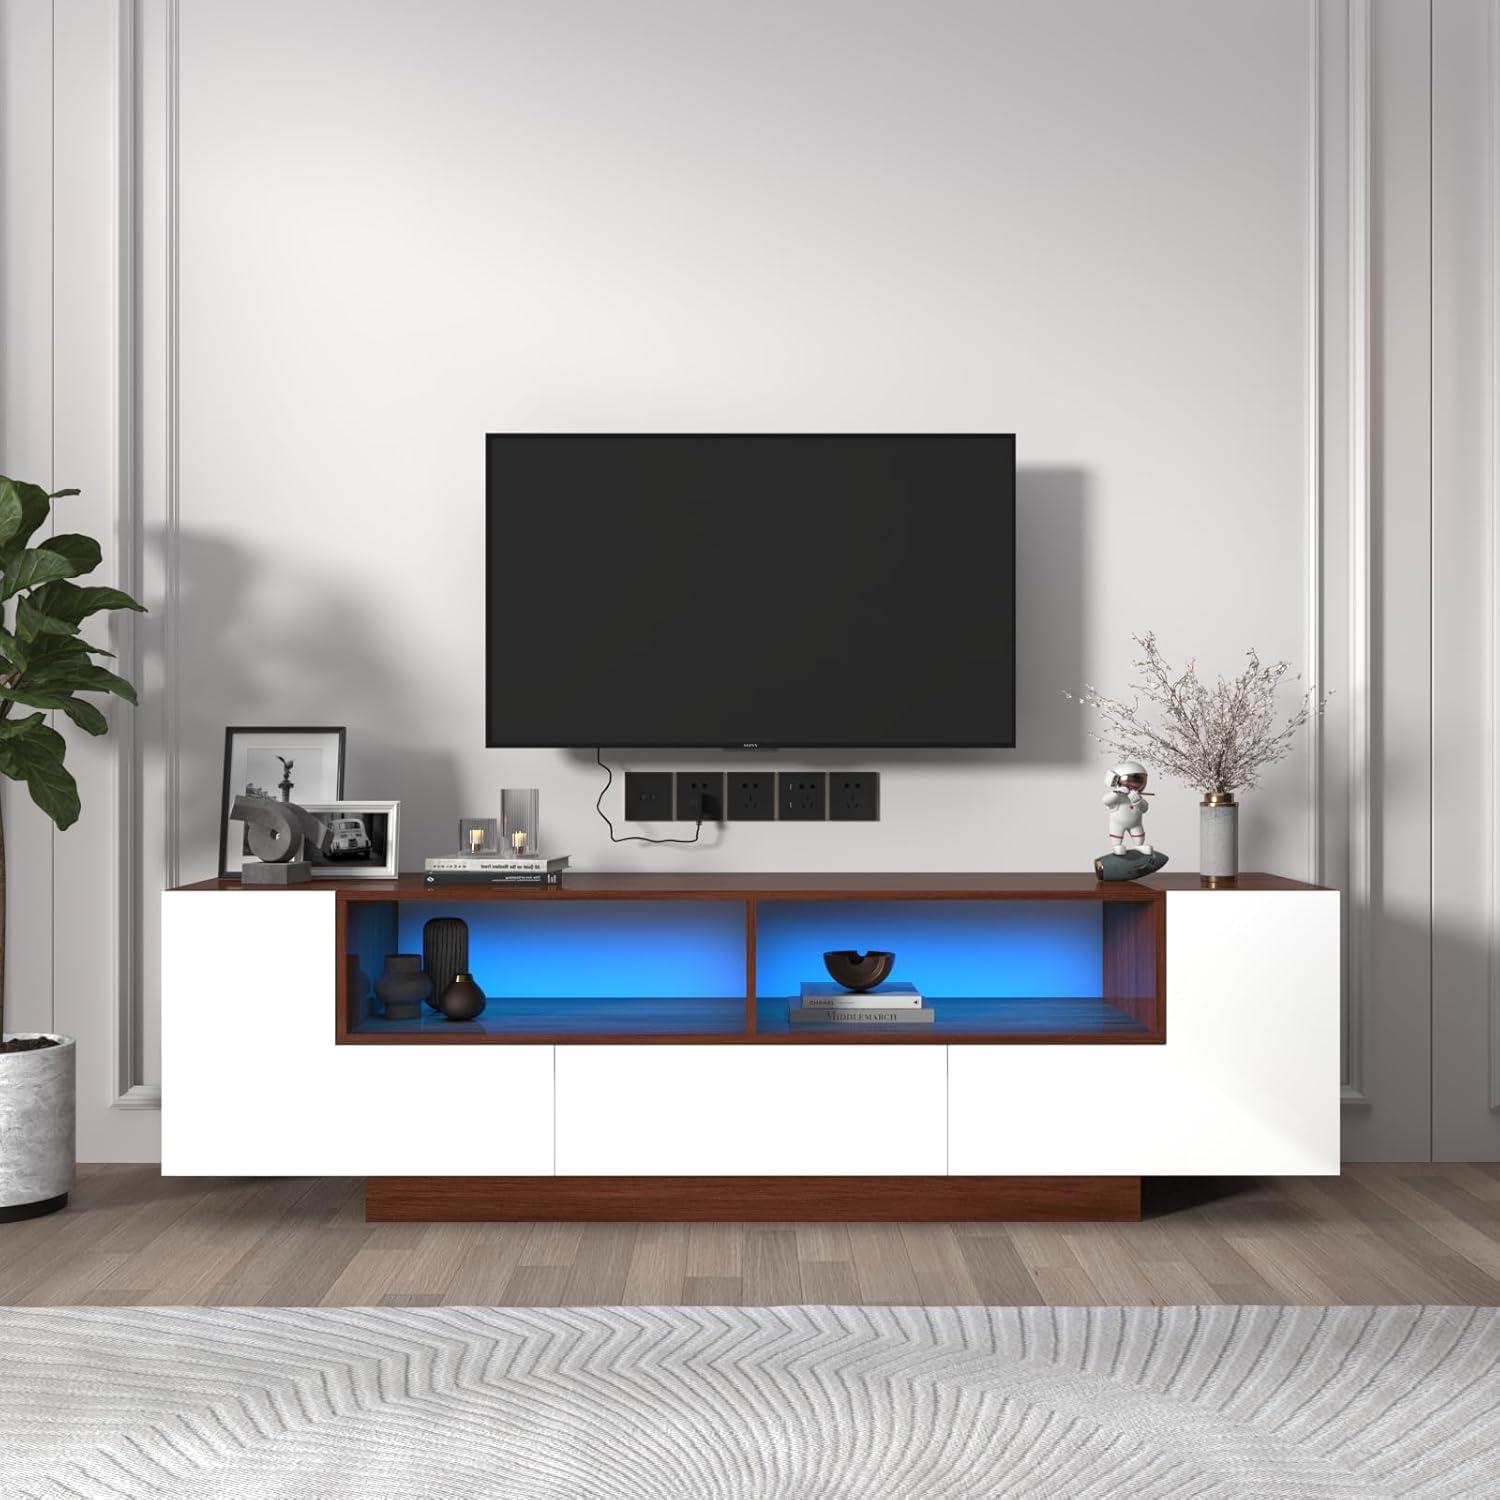
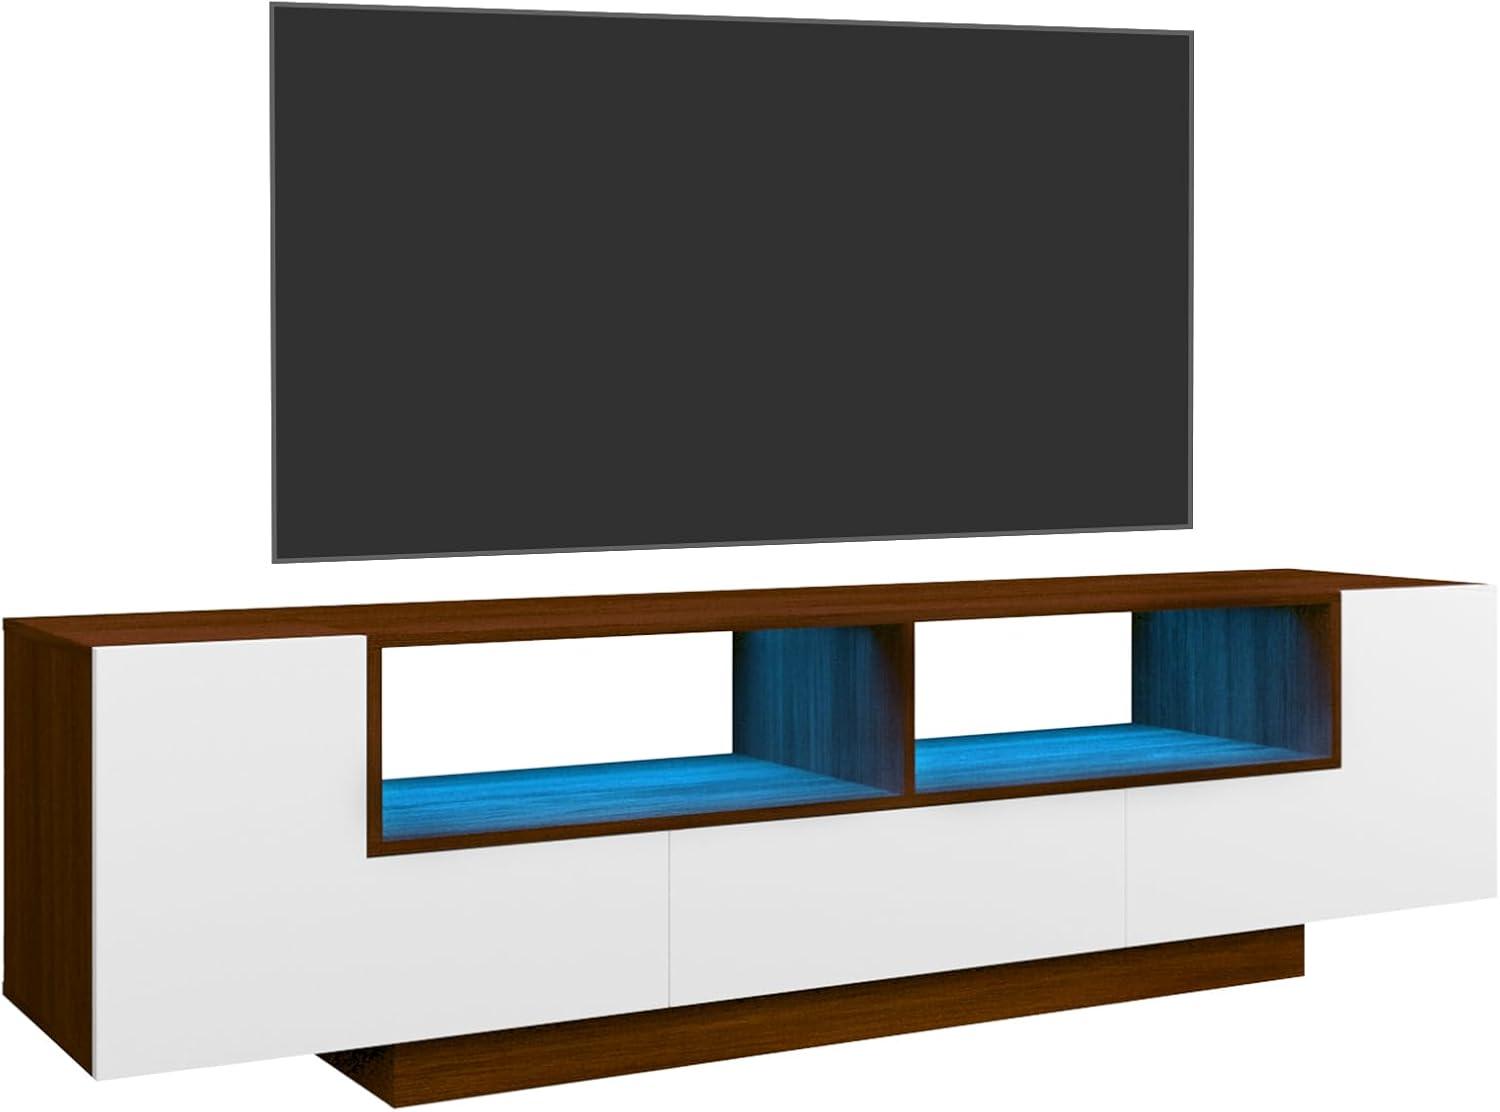
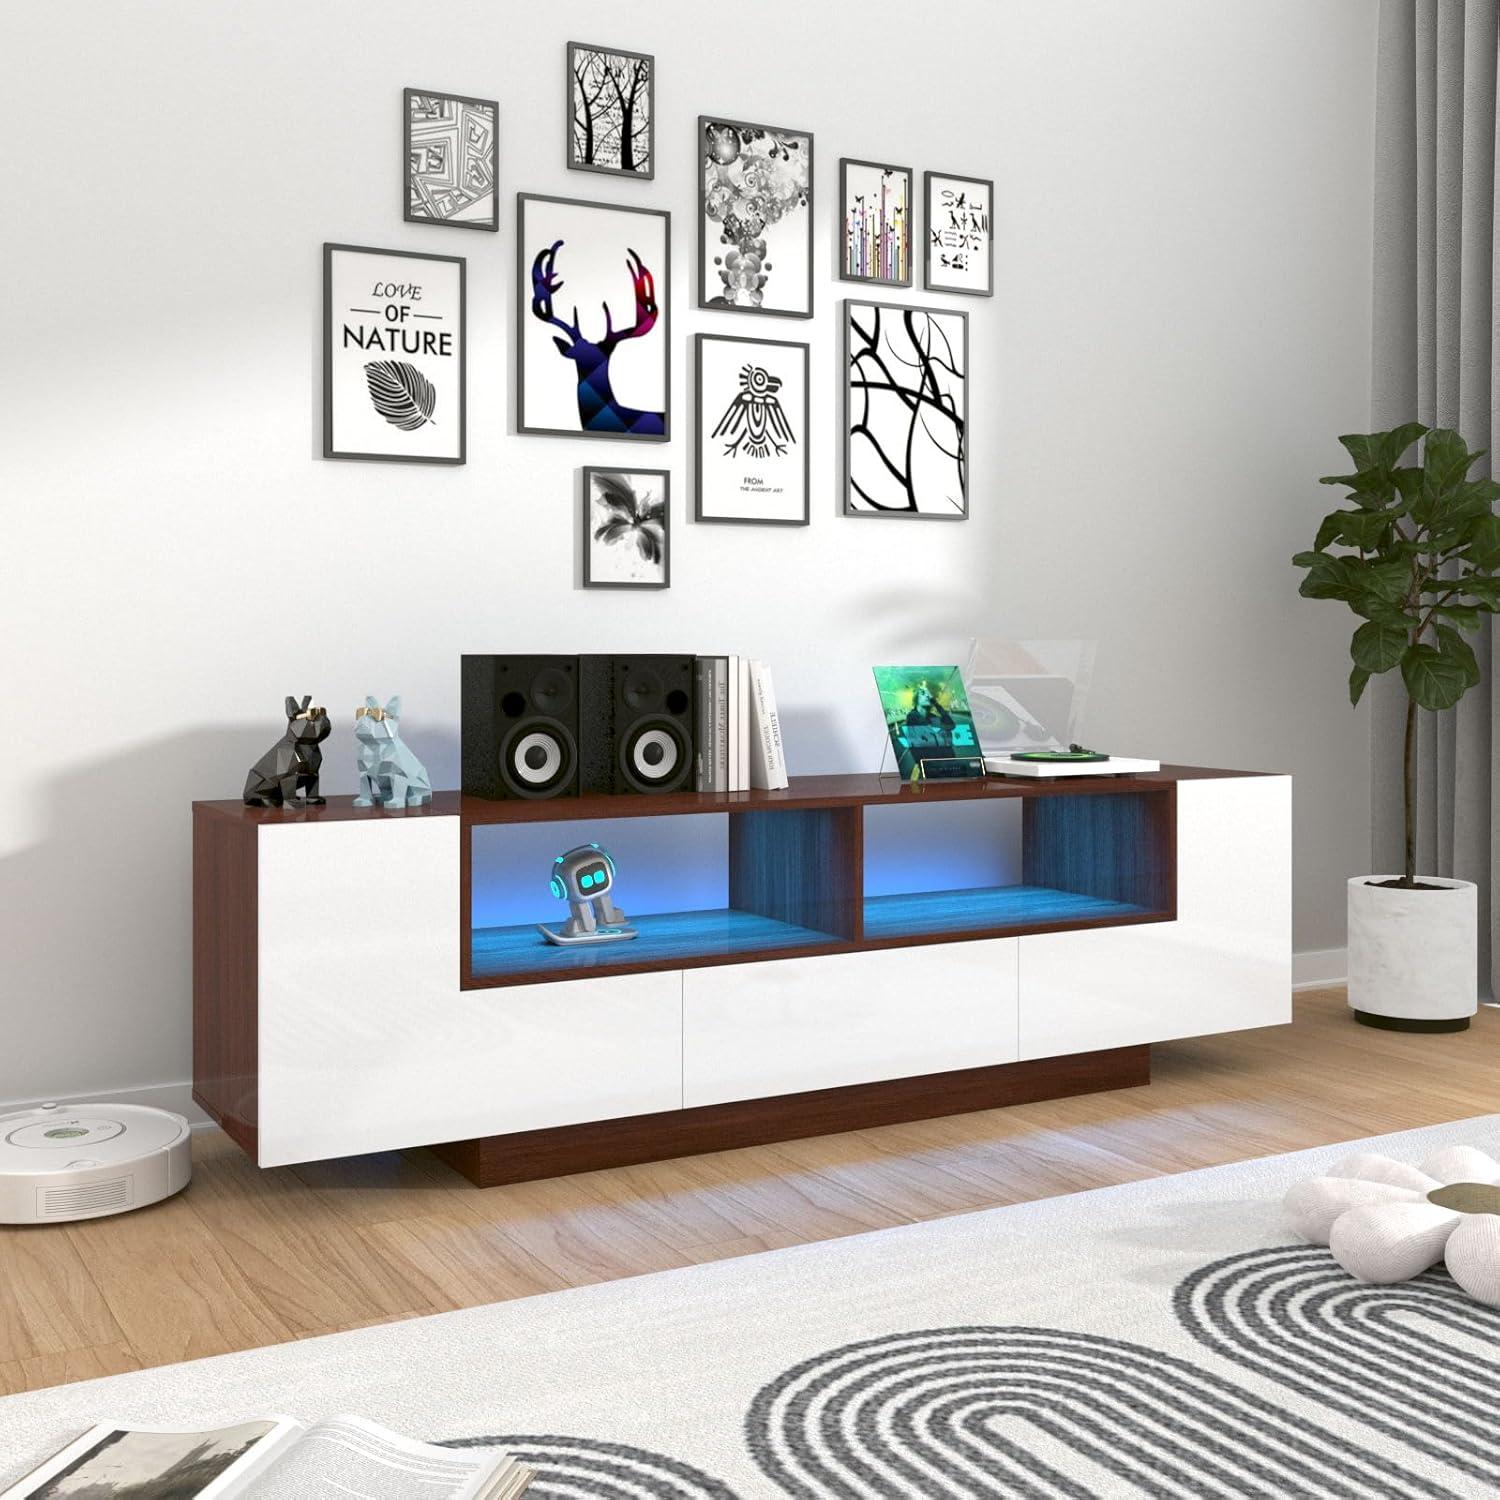
Settling in front of the TV, you notice how the Uspeedy 70in White TV Stand — the walnut-finish LED model — occupies the wall with a low, horizontal presence. Its high-gloss surface catches the afternoon light, and when you run your hand along the edge the laminate feels smooth and cool. A single wide drawer and a couple of cubby-like openings break the face; up close you can see a faint gap at one corner that changes how the piece reads. Flip on the RGB strip and a thin halo of color washes the wall behind, softening the visual weight. At this scale you can’t ignore it — it quietly claims the room’s focal plane without shouting.
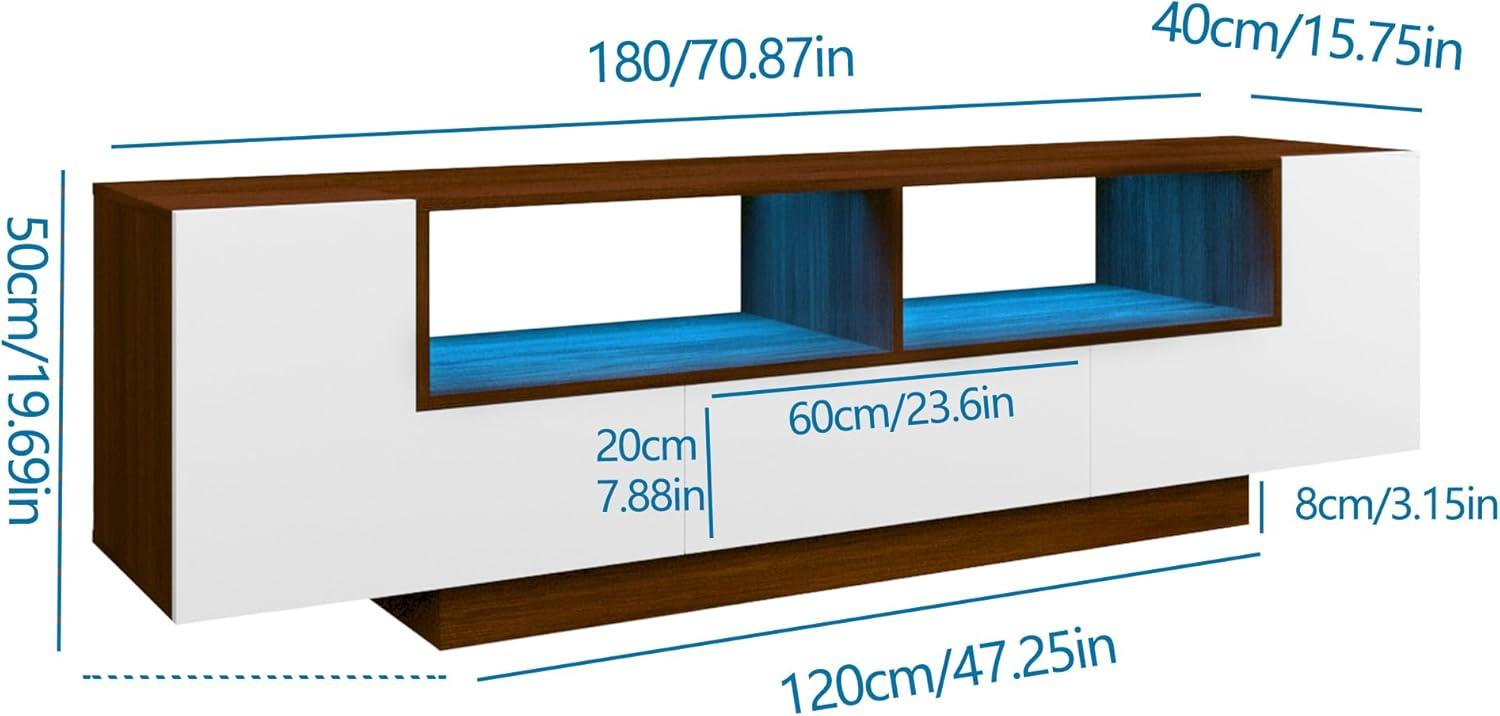
When you first place it in your living room the Uspeedy seventy inch stand in walnut and white gloss
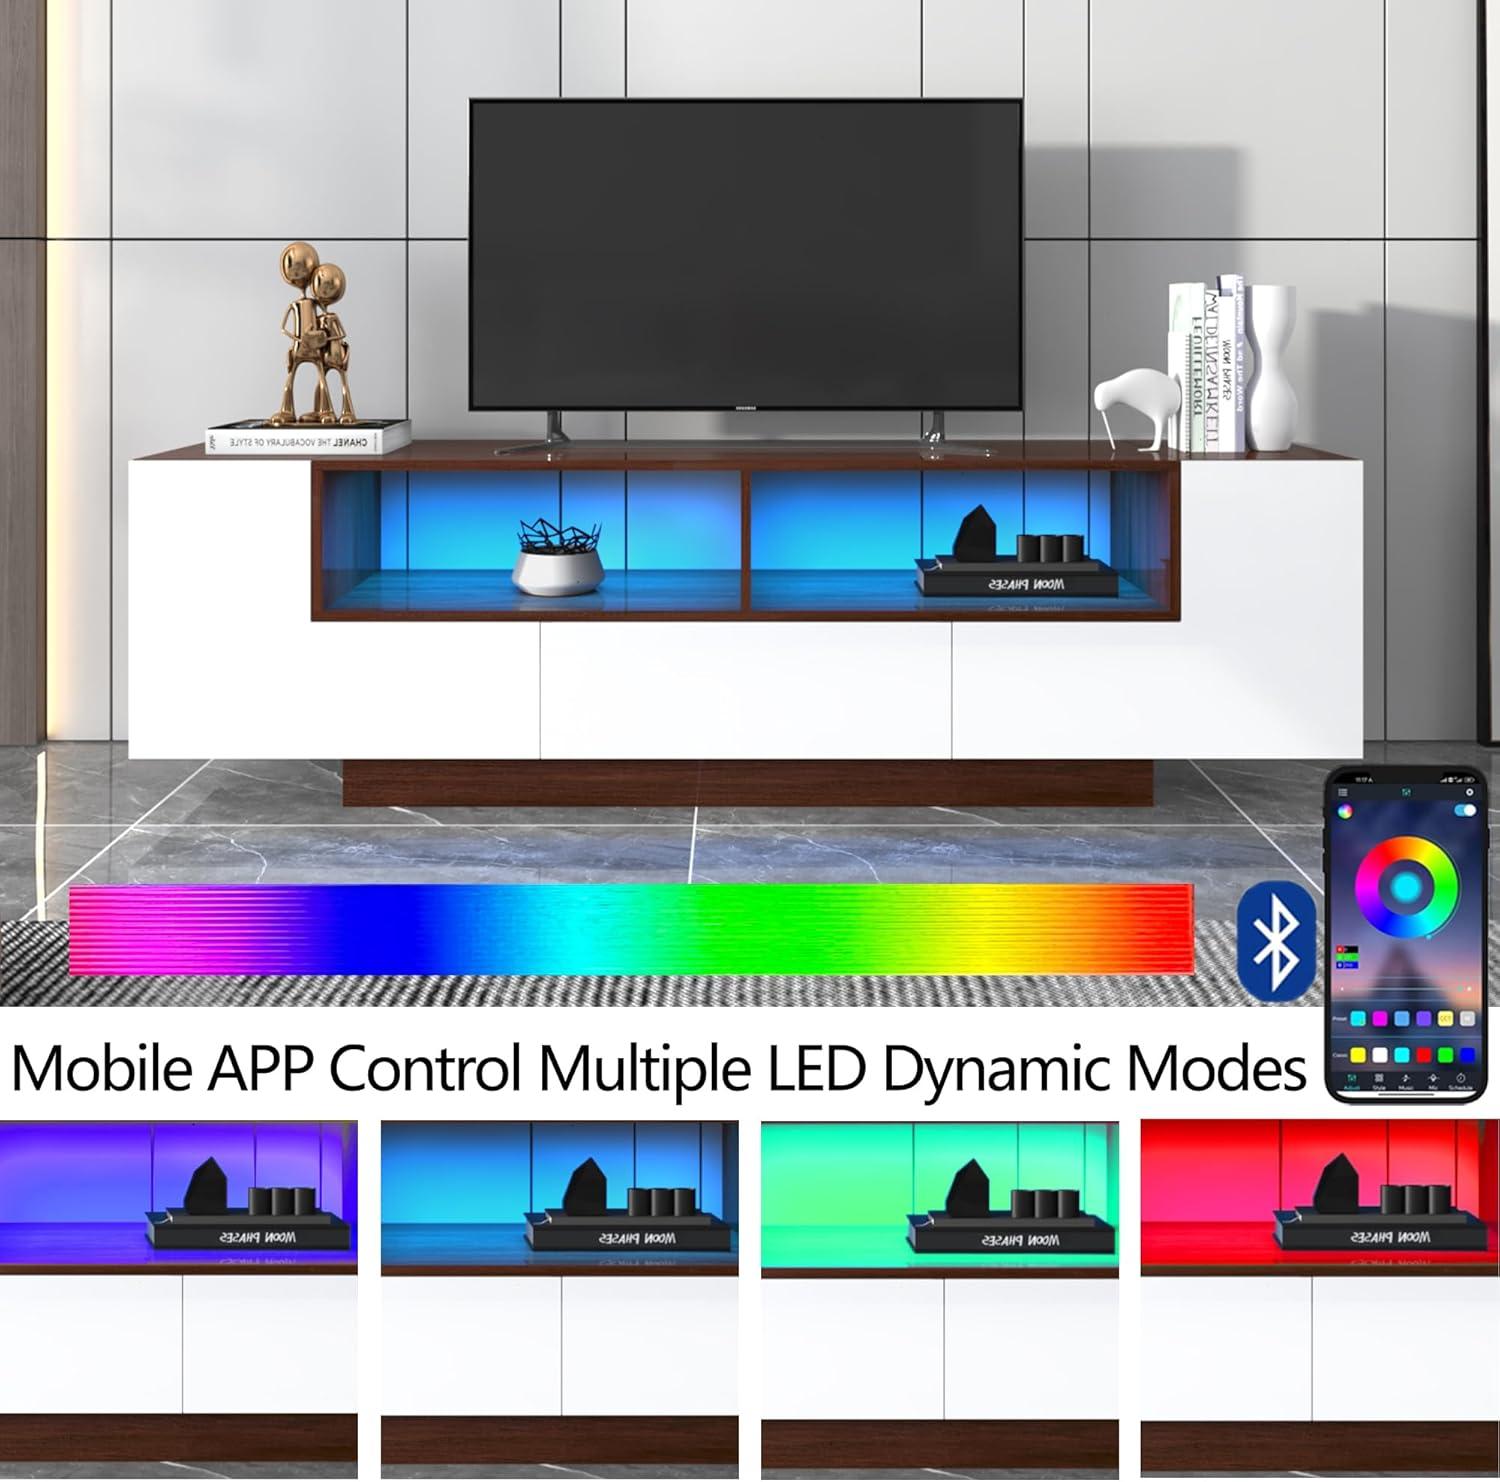
When you first slide it into place, the walnut panels and white gloss greet the room in diffrent ways depending on the light. In daylight the white sections catch and scatter window light,creating a subtle sheen across the front,while the walnut adds a warmer,grounding stripe that draws your eye to the TV area. You’ll problably step back and look from a couple of angles—straight on, from the sofa, and from the side—to see how the gloss reflects lamps and cushions; that mirrored effect can make small decorative items feel amplified and also shows fingerprints sooner than matte surfaces. The unit changes the visual balance of the space immediately, giving the wall a focal line without demanding that you rearrange the whole room.
There are a few small, practical things you’ll notice in those first minutes of use: the piece frequently enough needs a gentle nudge to sit perfectly level on uneven floors, and cords tend to collect where the back meets the wall unless you spend a little time tucking them. You might also test the integrated lighting and find yourself switching colors or brightness just to see how it alters the wall behind the TV.A quick checklist of common first actions includes:
- check viewing alignment from your primary seat.
- Manage cables so they don’t form a visible bundle at the back.
- Wipe and inspect the gloss surface for spots or fingerprints.
- Adjust lighting to see how mood and perceived contrast change.
These initial adjustments tend to be small and frequently enough happen almost automatically as you settle the stand into daily use.
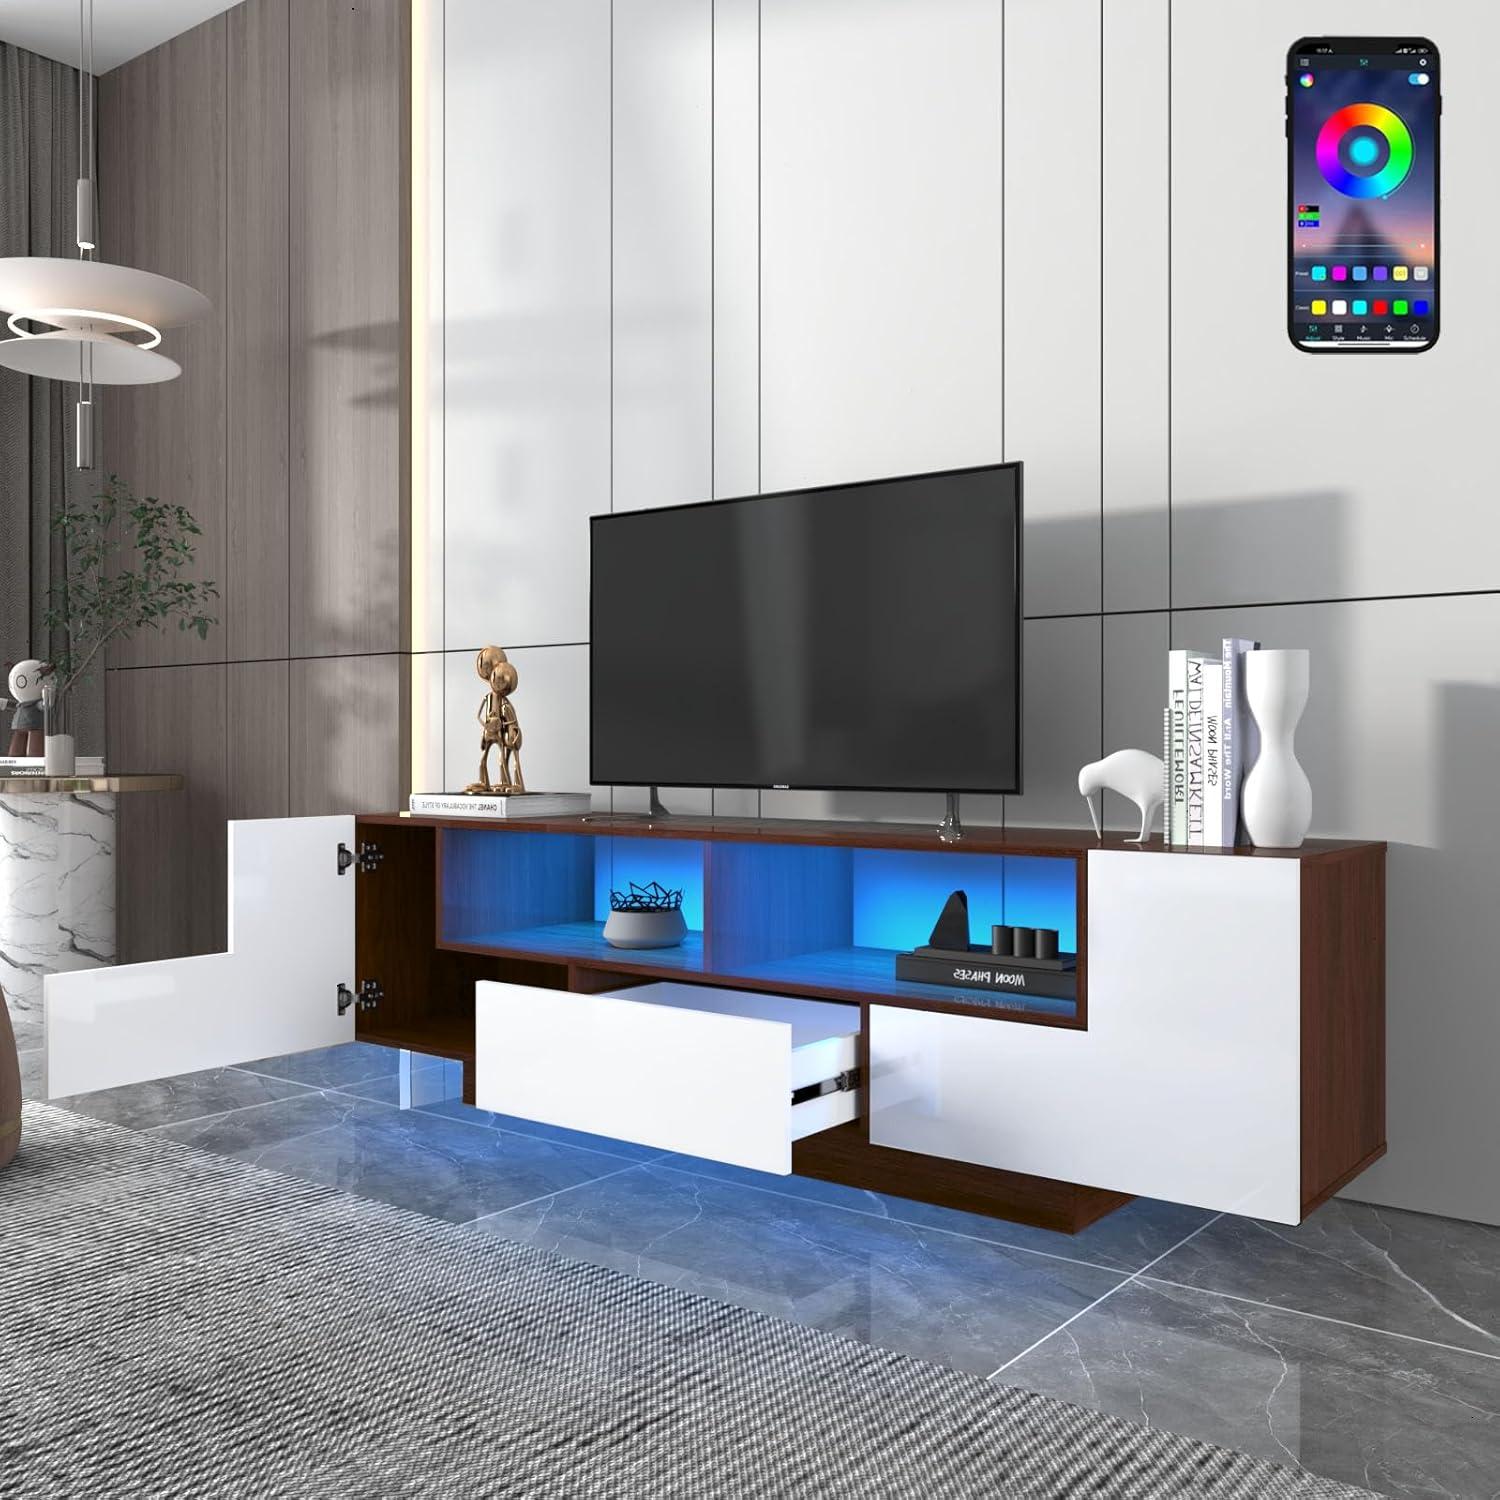
How the walnut veneer and high gloss surfaces interact with daylight and the built in LED accent
when natural light moves across the unit during the day you’ll notice two distinct behaviors: the walnut veneer tends to absorb and diffuse sunlight, bringing out the grain and warm undertones, while the high-gloss surfaces act like shallow mirrors, throwing back sharp highlights and occasional glare. In the morning, when light is softer, the veneer’s texture reads more clearly and the gloss gives low, ribbon-like reflections; by late afternoon, oblique rays can create stronger streaks on the glossy finish that track with your viewpoint. Because the gloss emphasizes specular reflection,fingerprints and dust become more apparent in direct sun,whereas the veneer hides those small marks by scattering the light—so you find yourself smoothing or angling the stand without thinking about it as daylight shifts through the room.
The built-in LED accent interacts with both finishes in different, predictable ways.In practice:
- Bright daylight — RGB colors feel muted on the veneer and appear as faint tints on the gloss rather than bold bands.
- Indirect or overcast light — colored LEDs begin to read as a soft wash across the walnut and sharper ribbons on the glossy planes.
- Evening or low light — the LED tones become the dominant visual cue: gloss panels mirror the LEDs, creating crisp, jewel-like reflections, while the veneer registers color as a warmer, more diffuse glow.
| Lighting condition | Effect on walnut veneer | Effect on high-gloss surface |
|---|---|---|
| Bright daylight | Grain and warmth are emphasized; LED tint is subtle | Strong specular highlights; LED barely changes overall look |
| Indirect/overcast | Even tonal depth with gentle color wash from LEDs | Reflections soften, LED colors become more visible |
| Low light / evening | Colored LEDs create a soft halo; wood tones deepen | Gloss mirrors LED hues vividly, producing pronounced color bands |
These interactions mean the unit’s visual presence shifts through the day in ways you’ll notice mostly as changing warmth, reflectivity, and how clearly LED colors read against different finishes.
What the frame panels hardware and drawer feel like during unboxing and assembly
When you open the box the first things that register are the protective films and the weight of the larger panels. The glossy faces are slick under your fingers and usually wrapped in thin plastic that pulls away with a soft tearing sound; the exposed edges feel firmer and a bit raw by comparison. Inside, the small hardware bags rattle when you lift the carton — a handful of screws, dowels, cam locks and a few metal brackets. As you sort these out you notice tactile differences: some screws have a chrome coolness to them, dowels are warm and wooden, and the cam locks have that slight machined click when you test-fit them. The pre-drilled holes are easy to find visually, but lining panels up can require nudging; in practice you’ll frequently enough angle a piece, start a screw by hand, then finish with the driver to coax parts into place.
Putting the drawer components together feels like a separate, slightly fussy task. The runners tend to slide into place with a gentle snap if everything is aligned, otherwise they need a firm push and a small repositioning of the case — you may set the cabinet on your knees or ask someone to steady it while you work. The drawer face usually sits flat but can show a hairline gap or off-center appearance until the mounting screws are loosened and re-adjusted; tightening the fasteners after small shifts is a common, almost automatic part of the routine. In use, the glide can feel either smooth or a touch resistant depending on how the rails were set; there’s little cushioning on the close, so your hand often absorbs the final stop.Below is a brief tactile guide to key parts you handle during assembly:
- Panels: slick finish,protected by plastic,edges firmer and less smooth
- Hardware bags: mixed metal and wood pieces that rattle,cam locks click when tested
- Drawer runners: snap-fit when aligned,require nudging if slightly off
| Component | Immediate feel during unboxing/assembly |
|---|---|
| Top and side panels | Slick,protected by film; moderate heft when lifted |
| fasteners and small parts | Cool,metallic,tactile click of cam locks; audible rattle in bags |
| Drawer assembly | Requires alignment; glides can be smooth or slightly stiff until adjusted |
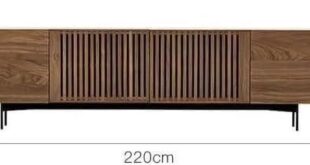
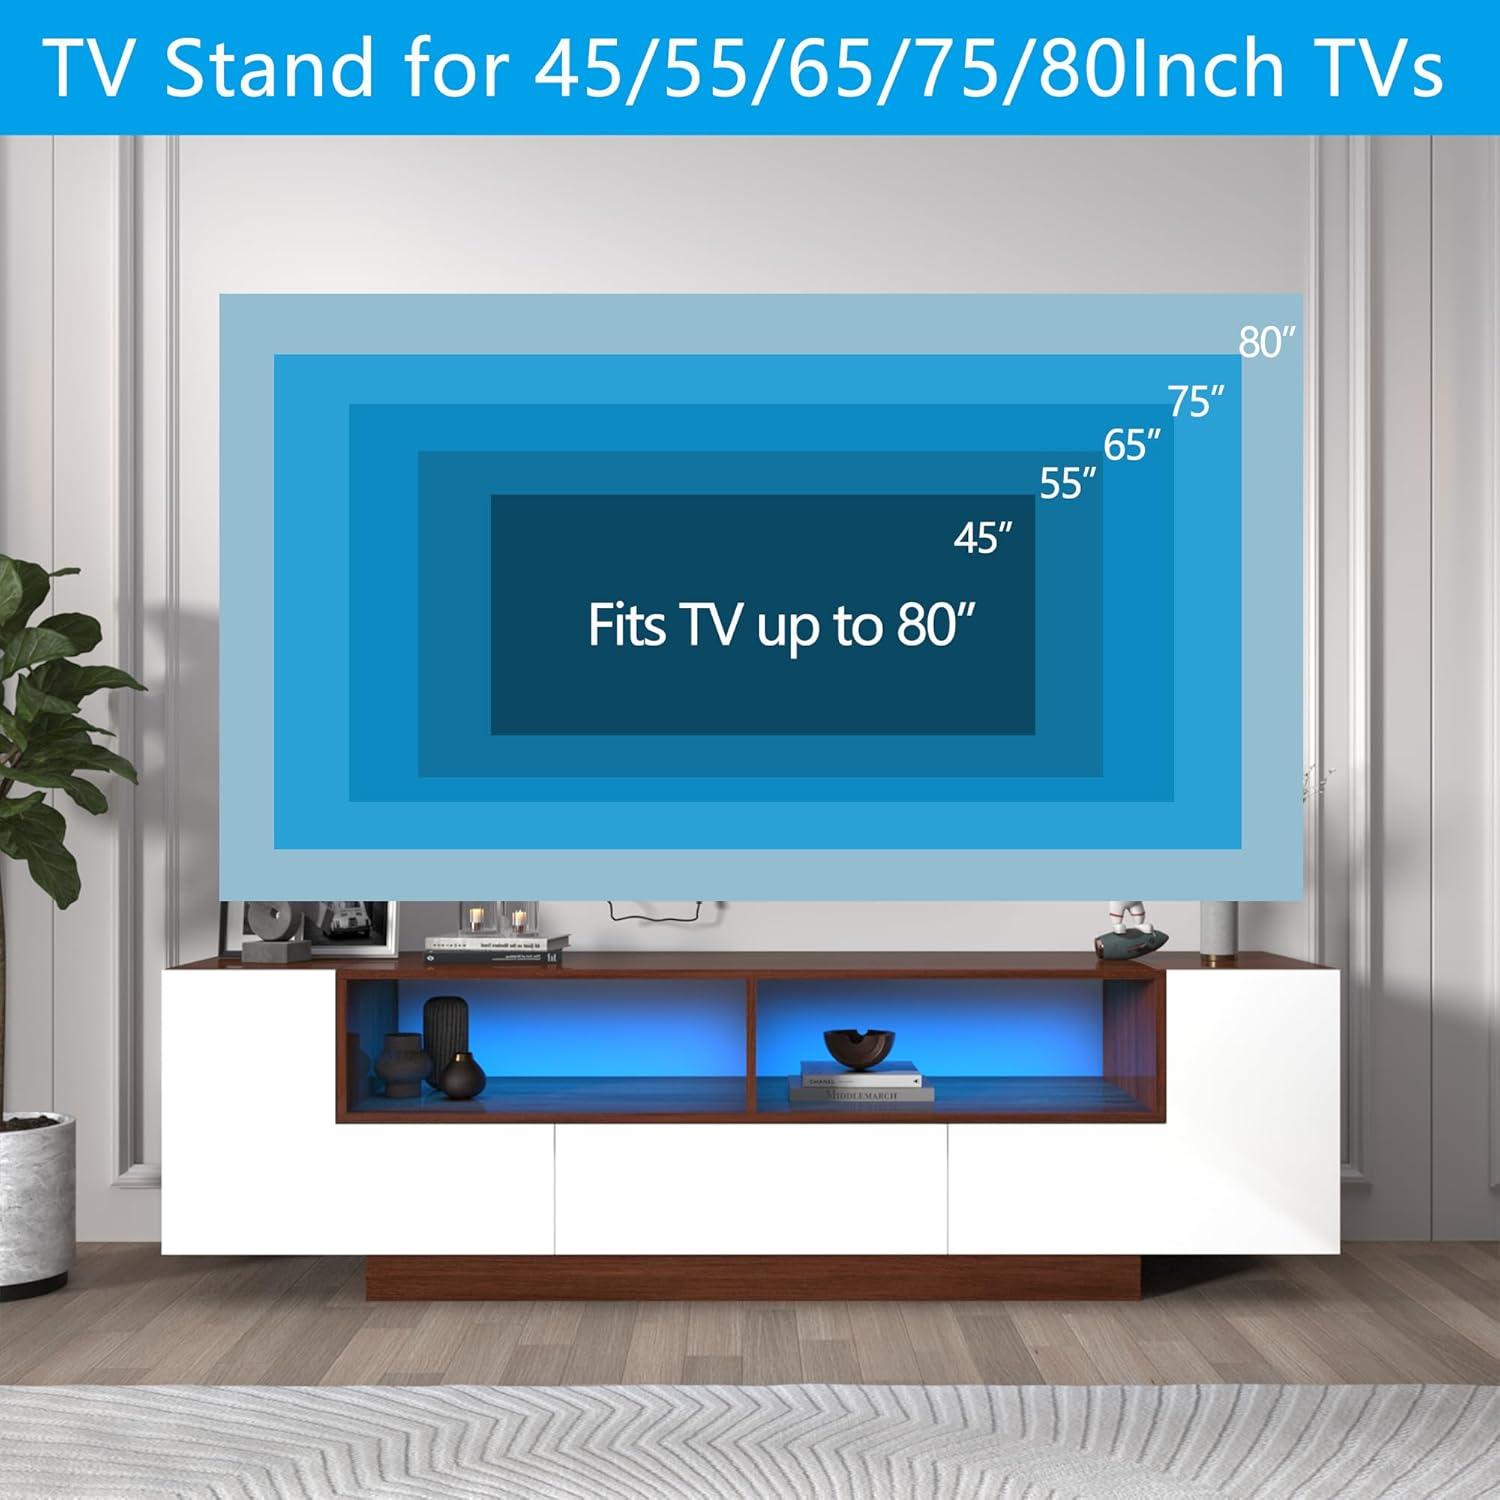
Sizing and room placement for a seventy five or eighty inch television and your seating arrangement
With a seventy-five or eighty inch screen, the TV becomes the visual anchor of the room, so where you place it will change how you sit, move and even talk in that space. Aim to have the center of the screen near your seated eye level so you’re not tilting your head up or down for long periods; many people find that small shifts—raising cushions, angling a floor lamp or nudging the stand a few inches—happen naturally the first week after setup. Viewing distance tends to determine how immersive the picture feels: too close and you’ll notice pixels or have to turn your head to take in the edges; too far and the size advantage is lost. Keep an eye on sightlines from common seats, and watch for reflections from windows or glossy surfaces that you end up compensating for by relocating lamps or shifting blinds. Common placement checks people make soon after installation include:
- Centering: align the screen with the primary seating axis so viewers don’t sit off to one side.
- Glare control: note bright windows and rearrange lighting rather than moving the TV every time the sun shifts.
- Traffic flow: ensure walkways aren’t blocked and that people can pass without cutting across your viewing angle.
Seating around a large screen usually settles into a modest geometry: one main couch directly opposite, with secondary chairs set at shallow angles so viewers aren’t twisting for long. Seats placed within a roughly 30-degree arc to either side of center keep the image looking consistent; beyond that, color and contrast can feel different and people tend to rotate thier bodies or swivel chairs during long viewing sessions. In many rooms you’ll notice informal adjustments—an ottoman slid forward for a kid, a two-seat loveseat angled slightly inward for conversation during commercials—rather than wholesale rearrangements. the simple table below gives a quick reference for typical viewing distances people use for these screen sizes; the ranges are approximate and often shaped by room layout and seating habits rather than strict rules.
| Screen size | Typical viewing distance | Approx. metric |
|---|---|---|
| 75 inches | About 6–10 ft | ~1.8–3.0 m |
| 80 inches | About 7–11 ft | ~2.1–3.4 m |
Daily use of the large storage drawer cable management and the console controls in real life
In everyday use you end up treating the large drawer like a halfway point between “in sight” and “out of sight.” You’ll toss remotes, spare HDMI cords, and charging cables in there after movie night and later sift through the jumble when you need a different lead. The drawer’s front shows fingerprints and dust more readily than the rest of the unit, so you sometimes wipe it off while grabbing something.As there aren’t built-in dividers, smaller items shift when you pull the drawer; on busy nights you find yourself nudging controllers into a corner so they don’t clatter when the drawer closes. Opening and closing is a routine motion—often done with one hand while you hold a snack in the other—and occasionally the front sits a hair off, so a quick realignment becomes part of the habit.
Cable management and the console-area controls shape how you set up devices and how you live with them day to day. You route power strips and chargers through the rear pass-throughs and then tuck excess length into the cavity behind the drawer; this keeps most cords out of sight but means the space behind the drawer fills up quickly, which can make accessing the console ports feel a little cramped.The open shelves let infrared remotes and small consoles remain usable without moving cables, and you’ll notice a short pause in routine when a new device requires a different routing—sometimes a tiny twist or an extra zip-tie. Small patterns emerge: you tend to leave the drawer slightly ajar when charging controllers,you check the cable runs if a device flickers,and you sometimes adjust cables to improve airflow around consoles.
- Rear pass-throughs — most cables follow this route and generally stay hidden.
- Behind the drawer — useful carcass for excess length but can become crowded.
- Open shelves/front access — keep console buttons and IR signals reachable without disturbing wiring.
| Routing path | Typical observation |
|---|---|
| Top surface to rear pass-through | Cables remain tidy but may need re-tucking after moving equipment |
| Direct through open shelf | Easy access to ports; cables more visible |
How the stand’s suitability for your space and its performance compare with your expectations and room constraints
The stand often behaved like a predictable piece of furniture once placed: it occupied a clear line along the longest wall and established a visual anchor without demanding constant adjustment. In tighter layouts,the unit’s shallow profile reduced available walking space beside a couch and made access to side cabinets a little more purposeful; in rooms with low windows the top surface pushed visual balance upward,which shifted where screens and speakers ended up in relation to seating. Assembly quirks reported by other owners—misaligned screw holes or small gaps at top joins—came up in practice and sometimes required an extra bracket or a brief rework to tidy the fit, so those interactions with the room’s existing geometry changed the installation rhythm and time spent finishing the setup.
Performance in everyday use aligned with common household patterns: the LED lighting system integrated into ambient lighting plans and tended to respond well through the app, though occasional lag or a need to re-pair showed up in some sessions; drawer and door movement mostly allowed easy access but a slightly off-set drawer front sometimes meant a small catch when opening. Observed trade-offs were present — the glossy surfaces show dust and fingerprints more readily, and cable routing choices at the back affect whether cords remain discreet or end up visible along the baseboard — while weight-bearing and stability under typical television loads appeared adequate. Below are a few succinct, situational notes linking room constraints to observed effects:
- Narrow depth: reduced circulation and tighter reach to rear cable access.
- Low window / high mantle: shifted sightlines and speaker placement relative to seating.
- Assembly inconsistency: occasional need for minor fixes (brackets, re-drilling) that lengthen setup time.
| Common Room Constraint | observed Effect |
|---|---|
| Limited side clearance | Doors/drawers require angling to open fully |
| Visible power outlet placement | Cable runs may be exposed along the wall |
| Soft flooring or uneven surfaces | Minor wobble without shims or adjustment |
See full specifications and available configuration details on the product listing
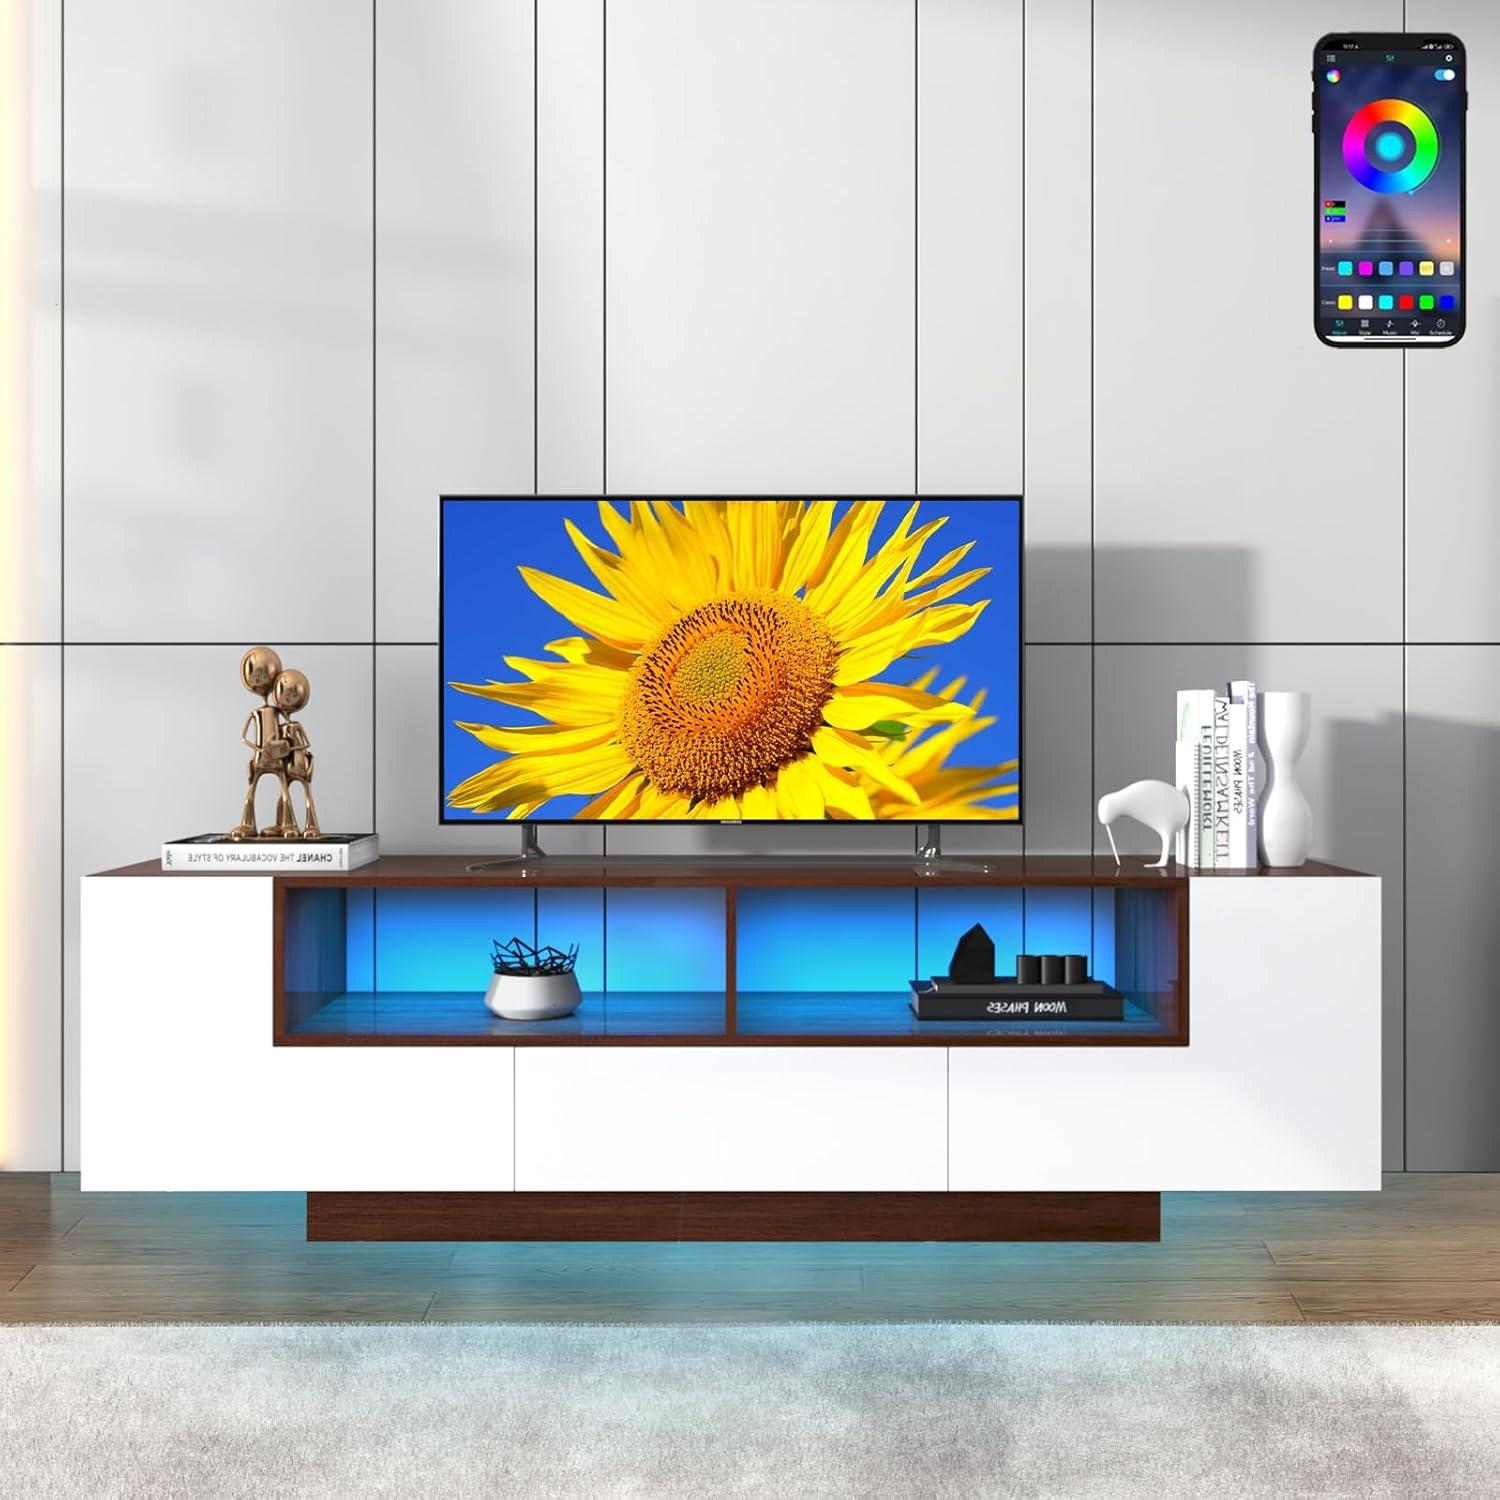
Living with the RGB app lighting cleaning the high gloss finish and simple upkeep over time
When you live with the app-controlled RGB lighting, it becomes part of the room’s routine more than a one-off trick. The app lets you switch scenes, save a few favorites and set timers, so you’ll find yourself using presets for movie nights and brighter colors for casual gatherings. The light reacts to sound in short bursts rather than perfectly following every beat, and occasionally the strip or the app will need a quick reconnect after a power cycle; that tends to happen most often when the console is unplugged or the Wi‑Fi drops for a moment.At night you’ll notice colors cast onto the wall and floor differently depending on where you sit,and lowering the brightness or choosing warmer tones cuts that spill and is easier on the eyes. Behind the stand, the LED strip and its wires collect the same dust as everything else, so plan a quick once‑over when you clean the surfaces so the lights keep looking even and bright.
- Quick tips: save two or three go‑to scenes in the app, use a schedule for evening dimming, and run the sound‑sync only when a party mode is desired to avoid constant flashing.
The high‑gloss finish looks striking but shows fingerprints,dust and micro‑abrasions more readily than a matte surface,so your upkeep will be a mix of light daily wipes and occasional gentle treatments. Use a soft microfiber cloth for daily dusting and a damp cloth with a few drops of mild dish soap for smudges; wipe along the grain or in long, steady strokes to reduce streaking. Avoid ammonia‑based cleaners and anything abrasive — those are the common culprits that leave fine scratches or dull the sheen over time. Small hardware checks every few months (tighten visible screws, glide the drawer to feel for rough spots) help prevent wear that can make the finish look uneven. The table below summarizes typical care items and how often they tend to be needed.
| Task | What to use | Typical frequency |
|---|---|---|
| Dusting | Dry microfiber cloth | Weekly |
| Remove fingerprints/stains | Damp microfiber + mild soap | As needed |
| LED strip & cable check | Soft brush / dry cloth | Monthly |
| Hardware check (screws/drawer) | Screwdriver / silicone lubricant | Every 3–6 months |
How the Set Settles Into the Room
Over time, as the room is used in regular household rhythms, you notice the stand settling into a familiar place where small habits gather and the room’s traffic routes feel slightly adjusted. The uspeedy 70in White TV Stand for 75/80 inch TV,Modern LED TV Stand,High Gloss Entertainment Center with Large Storage Drawer,APP RGB Light,TV Console,Television stands for Living Room(Walnut) becomes less a focal object and more a bearer of everyday traces — the pale rings from mugs, soft scuffs where things are slid across the top, the way it quietly takes on the household’s pace. In daily routines it holds the loose things that shape comfort and use, and your movements bend around it without much thought. It stays.