decordip Garden and patio decoration inspiration
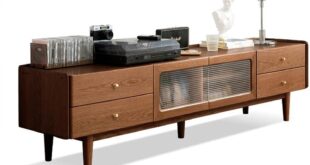
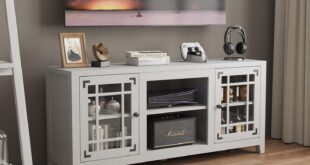
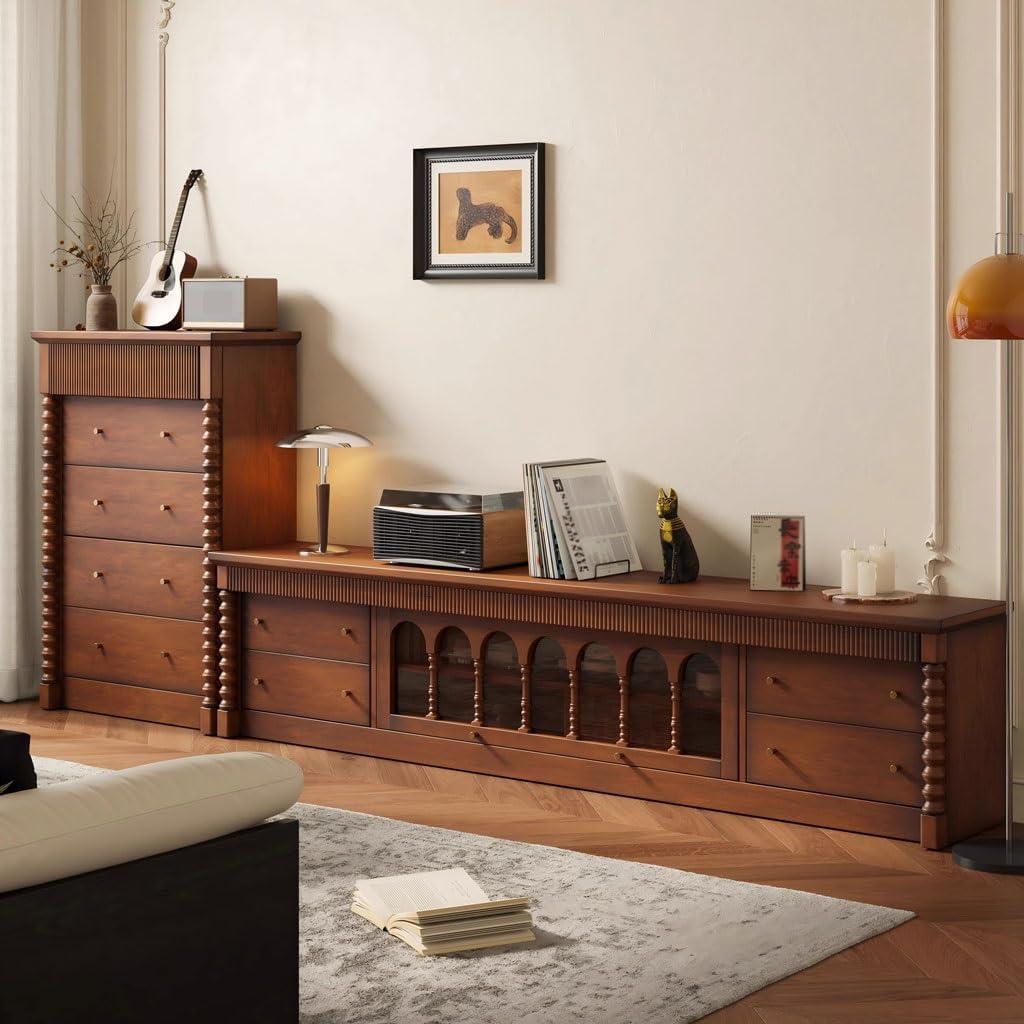
Light catches the long,low silhouette and brings the pine grain to life as you step into the room; it reads more like a quietly confident built-in than a separate piece. Listed simply as the “Tv Stand Cabinet Retro” TV cabinet, it lays a steady horizontal line beneath the screen that changes how the room feels. Under your hand the wood is warm and mildly textured, and the doors close with a solid, muffled thud rather than a brittle clack. Open a drawer and the hardware gives just enough resistance; the mix of open shelving and cupboards organizes both sight and stuff in a way that feels lived-in rather than staged.
When you first place it in your living room you notice its scale and retro vibe
When you first slide it into place,the most immediate thing you register is scale — it stretches low and long along the wall and quickly becomes the horizontal anchor for the room. the retro vibe arrives more quietly: a low-slung silhouette, subtly tapered legs, softened corners and simple, unadorned hardware that pull the eye into a mid-century rhythm. These cues present themselves as visual shorthand rather than loud decoration, so the piece reads as a period nod even before you start arranging anything on top of it.
In everyday use you notice small, practical consequences of that presence: you step back to check sightlines, nudge a coffee table over, or angle a chair to respect the new focal plane. The top becomes a stage for a few well-spaced objects,while the length tends to flatten competing vertical displays nearby,so wall art and shelving get rearranged or pared down. It can feel commanding in a compact layout and, in most cases, prompts a slightly more restrained approach to surrounding decor; under softer lighting the TV glow highlights its profile and the room settles differently than it did before.
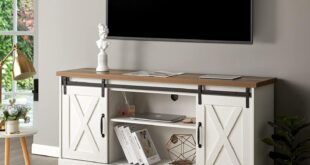
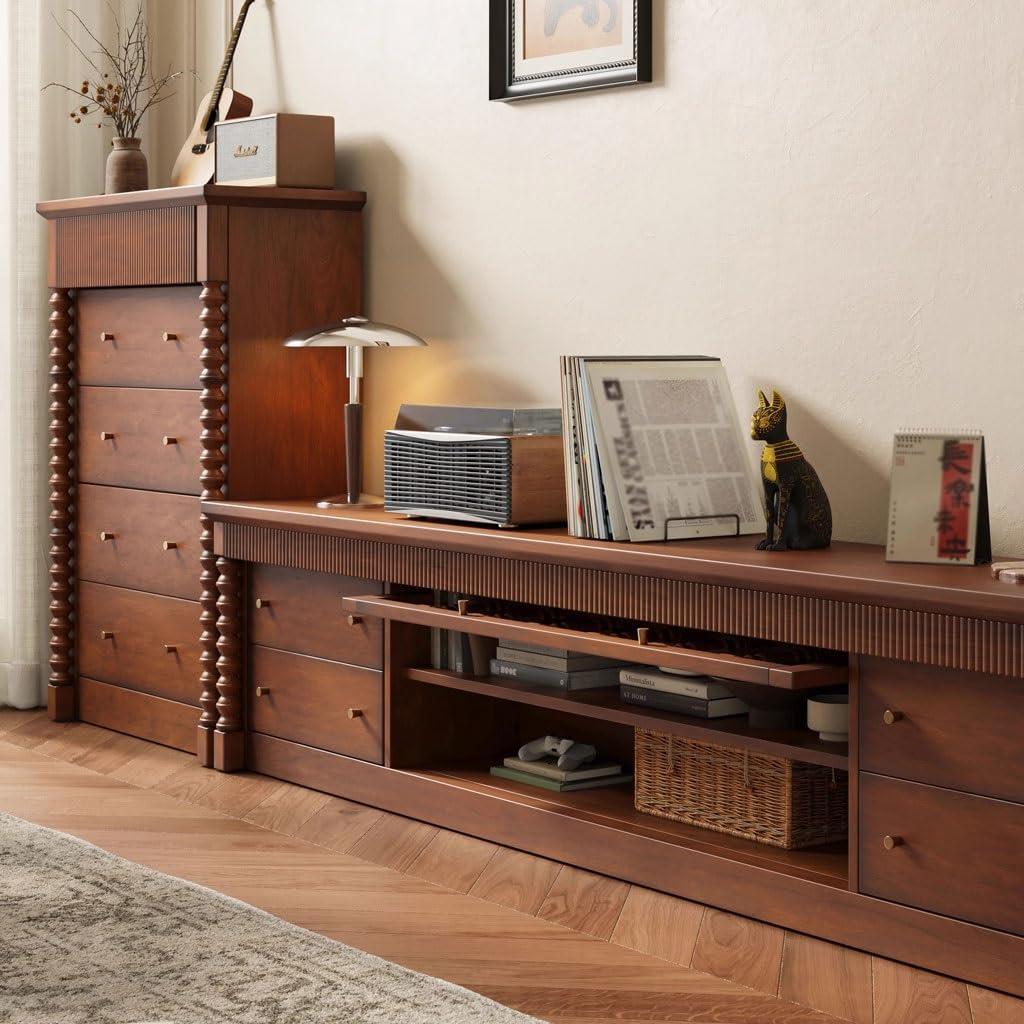
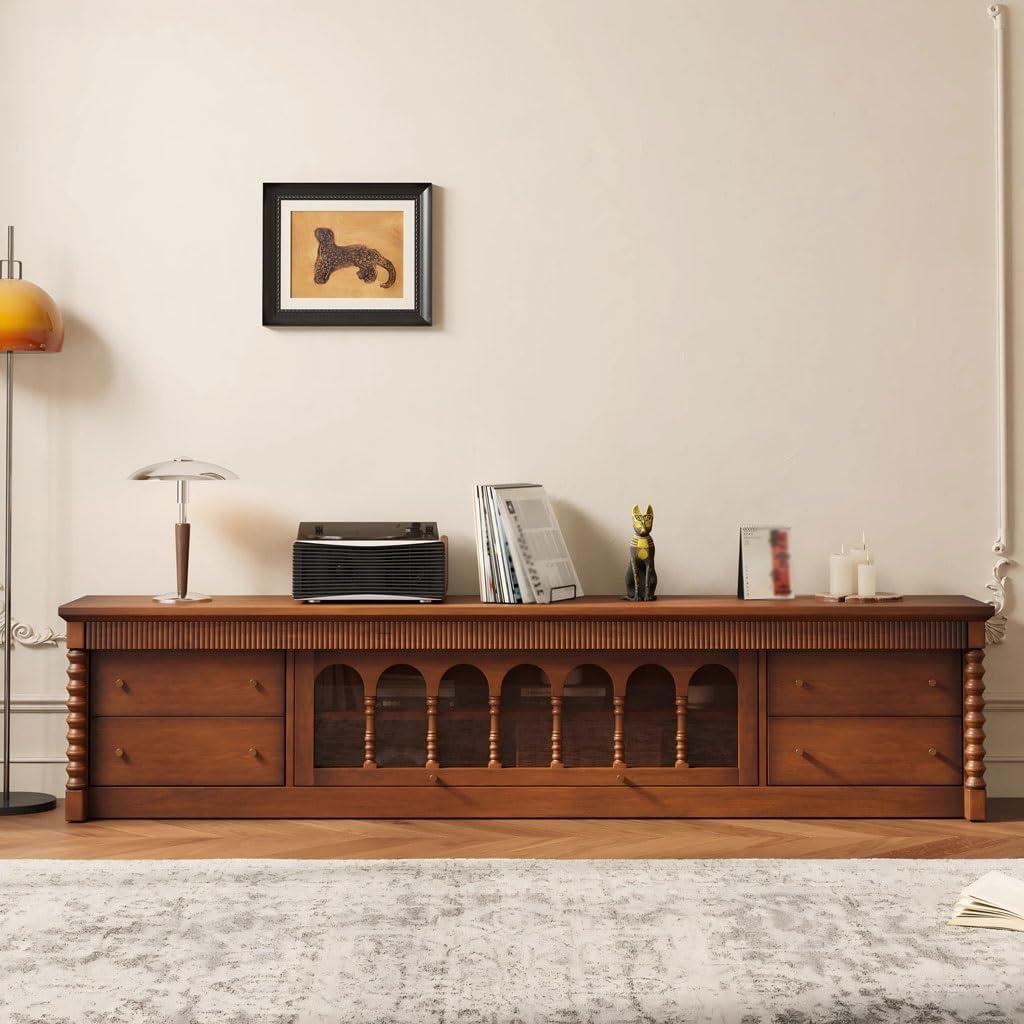
See how the villa inspired lines and brass toned hardware sit alongside your existing decor

The villa-inspired lines and brass-toned hardware register as a distinct layer in a room rather than a neutral backdrop. In most arrangements the gentle profiles create a subtle rhythm along the wall — vertical grooves or softened edges that catch light differently as the day changes — while the brass accents punctuate that rhythm with small flashes of warmth. Owners frequently enough move a lamp or a framed print a few inches to balance those highlights; in everyday use the hardware tends to become a focal point if other finishes are matte or muted, and it can sit more quietly when paired with textured fabrics or plants that diffuse attention. There are moments when the metallic details read brighter than expected, and in those cases simple shifts in lighting or accessory placement usually recalibrate the visual balance.
- Against warm woods: the brass blends and the lines echo customary carpentry, creating a layered, cohesive look.
- With cool, modern palettes: the brass reads as a warm accent that can soften stark geometry but can also draw the eye away from ultra-minimal pieces.
- Mixed-metal environments: the hardware tends to pair best when other metals are brushed or aged rather than high-polish, which helps avoid competing gleams.
| Existing element | Typical interaction | Small adjustment |
|---|---|---|
| Textured linens | Soften the cabinet’s lines | Add folded throws or a low runner |
| Dark painted walls | Brass pops,lines read more sculptural | Introduce a mid-toned art piece nearby |
| Polished chrome fixtures | Creates mixed-metal contrast | Include a small brass accessory to bridge finishes |
View full specifications and configuration details
The wood under your fingertips the grain finish and joinery you can inspect up close
Run your hand along the top and the first thing you notice is the way the wood answers pressure and movement: some sections slide under your fingertips with a glassy, even surface while others reveal the soft, rolling relief of open grain. the pattern of light and dark lines is noticeable at arm’s length but becomes an almost tactile map up close — shallow ridges where the grain runs across a board, occasional knots that you can feel as slight bumps, and the faint drag of sanding lines where the surface was smoothed. The finish sits either as a thin, hard skin over the fibers or as a stain that has settled into the pores; in use this means parts of the top can feel cool and slick at first touch, while edges and undersides tend to feel warmer and a touch more fibrous. Small, everyday things show up here too: the way a thumbprint sits on a sheen, or how a tiny scuff catches when you glide your nail across a corner.
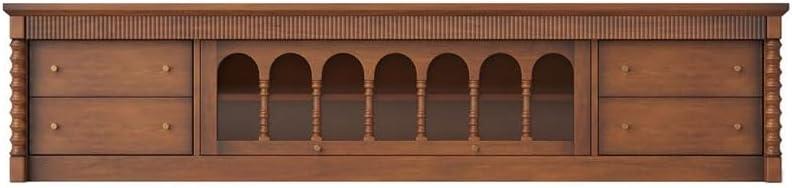
Up close the joinery tells more of the story than a single glance. Seams between panels reveal whether glue was flush or left a hairline gap,hinge mortises are visible if the door has been fitted in place,and drawer fronts may show dovetail tails or simply dowel plugs depending on the construction — these details are what your fingers find when you inspect the unit for a minute. Look for these tactile cues as you move around the piece:
- Edge feel — rounded and worn or crisp and machined
- Seam tightness — continuous contact or micro-gaps
- Hardware set — countersunk screws, flush hinges, or visible plates
| Surface cue | What you encounter under the fingertip |
|---|---|
| Satin sheen | Subtle texture, hides small scratches |
| High gloss | slick feel, fingerprints more visible |
| Visible joints | Small gaps or raised edges at seams |
These moments of close inspection tend to reveal small trade-offs — a very smooth finish can mask the grain you came to feel, while pronounced texture can trap dust — and they’re the bits your fingers notice before your eyes do.
Measured dimensions and interior clearances you can note down for reference
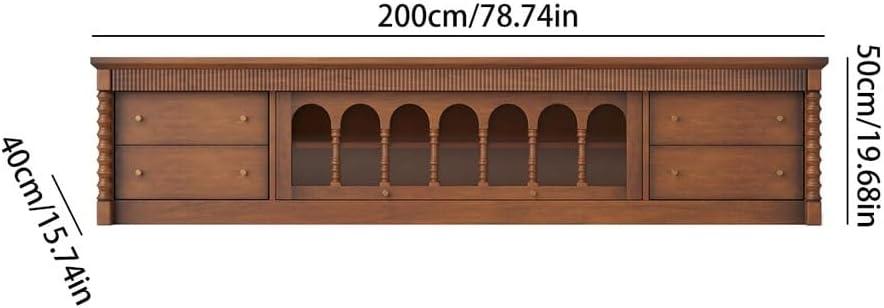
When you measure the unit for a room or an AV setup, it helps to note both the overall footprint and the smaller interior clearances you’ll actually use. Start with the external length, depth and height and mark the manual-measure tolerance (the manufacturer notes a possible 0–5 cm difference). From there, take a speedy set of targeted measurements so you know what will fit without trial-and-error:
- Overall footprint — the full length × depth × height of the cabinet as placed against a wall.
- Top usable depth — the distance from the front edge to the back panel where a soundbar or decorative items will sit (this is frequently enough a few centimetres less than the external depth).
- Internal shelf/compartment clearances — vertical height between shelves, and the usable depth inside each cabinet or drawer.
- back panel openings — size and position of cable pass-throughs and any gap behind components for ventilation and cables.
- Floor clearance — height from the floor to the underside of the cabinet or plinth, useful for vacuuming clearance or placing low-profile electronics.
Write these down in the room where you plan to set it up; you might find yourself adjusting one dimension slightly to make a component slide in, which is normal.
| measured item | Approximate value (cm) | approximate value (in) |
|---|---|---|
| External (L × D × H) | 200 × 40 × 50 | 78.7 × 15.7 × 19.7 |
| Top usable depth | ~36–38 | ~14.2–15.0 |
| Typical internal shelf height | ~20–24 (per compartment) | ~7.9–9.4 |
| Internal depth (behind doors/drawers) | ~32–35 | ~12.6–13.8 |
| floor-to-base clearance | ~4–8 | ~1.6–3.1 |
These figures are working references rather than precise certainties — keep the stated 0–5 cm measurement variance in mind and note where you measured (center vs. edge, inside vs. outside). A quick tape-measure routine in the actual placement spot usually reveals the small adjustments people make when loading components or running cables.
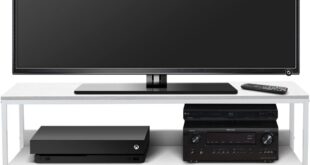
How you operate it day to day with doors drawers and cable access laid out
When you use the cabinet day to day, interaction is mostly tactile and rhythmic: you pull drawers out to grab remotes or game controllers, swing the doors open to reach a streaming box or a stack of discs, and tuck excess cords toward the back. The motions are straightforward — a firm pull on a drawer or a quick push on a door — and you’ll find yourself developing small habits, like leaving the center shelf slightly ajar if an infrared receiver sits inside. A few small observations that tend to matter in normal use:
- Top shelves usually host the active devices you reach for most often (set-top box,console); access is quick and sightlines are clear.
- Lower drawers are where you end up storing spares, batteries, cables and manuals; pulling them fully out reveals their contents but can require both hands when loaded.
- Cabinet doors keep things out of sight but you sometimes open them just to check indicators or reset a device behind the panel.
Small, routine adjustments—shifting a power strip a few centimeters or angling a set-top box—are part of how you keep everything working smoothly without rearranging the whole unit.
Cable management is handled mainly at the rear of the compartments, so running power and HDMI lines becomes a background task rather than a daily chore. There are cutouts and gaps that let you thread cords through while leaving the front clean; because cables are mostly hidden, you’ll occasionally open a door to swap inputs or check a loose connection. The arrangement tends to trade immediate accessibility for a tidier look—if you swap devices often, you’ll notice the small friction of reaching behind panels. The table below sketches how the layout maps to typical use:
| Compartment | Typical items | Cable access |
|---|---|---|
| Open/central shelf | Streaming box, game console | Rear cutout; short, visible runs |
| Side/inner cabinets | Receiver, amp, less-used electronics | Rear access holes; cables tucked downward |
| Drawers | Remotes, spare cables, manuals | No direct pass-through; cables stored coiled |
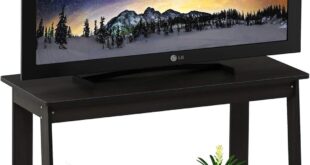
How it matches your space performs with your equipment and where it reaches its limits
In everyday use the cabinet behaves like a low,continuous platform that shapes how a media wall comes together: the broad top leaves room for a television and surface devices side‑by‑side,the front-facing doors and drawers influence how quickly components can be accessed,and the back openings determine whether cables can be routed cleanly or need short extensions. Observations that frequently enough matter in lived setups are visible right away — such as, placing a long soundbar flush with the front edge changes the sightline to devices behind it, and stacking multiple boxes in one compartment can reduce natural airflow. A few practical points stand out in use:
- Cable access: rear access points keep cords mostly out of sight but can become congested when many devices share one opening.
- Line-of-sight: remote receivers placed inside a closed compartment may need to be positioned near the front or use an IR extender.
- Service access: the door/drawer arrangement makes quick swaps (like replacing a console) easier for some components and more fiddly for others.
there are also predictable limits that emerge after the cabinet has been in regular service: deep or tall AV receivers and some tower speakers tend to occupy a lot of the internal volume and can leave little room for ventilation or cable bend radius, and multiple heat-generating devices grouped together can make passive cooling feel marginal. The back spaces that keep the installation tidy can also create pinch points where adapters and power bricks compete for space.A short reference table captures typical behavior observed with common gear:
| Equipment | Typical fit / performance |
|---|---|
| Soundbar | Sits well on the top surface; may interfere with low-profile displays or IR paths. |
| AV receiver | Often fits but benefits from leaving front clearance for vents; cable routing can be tight. |
| Gaming console | Fits into shelves but rear ports may become crowded; draws attention when swapped frequently. |
For full specifications and listing details, see the complete product listing here.
Maintenance notes and how finishes evolve as you live with it
routine attention is what shapes how the finish looks day to day: light dusting and wiping up spills promptly tend to keep the surface even while fingerprints and stray scuffs collect in predictable places such as the top and around the cabinet pulls. You’ll notice the highest-touch areas — edges, drawer faces, and the area directly beneath the screen — develop a slightly different sheen from the rest of the piece as oils from hands and frequent contact mellow the lacquer or surface coating. Seasonal shifts in humidity can make doors sit a little tighter or looser and can bring out tiny hairline gaps at joints that weren’t obvious at first; these shifts are part of how the piece settles into regular use rather than sudden failures. Small nicks and surface scratches often sit in the grain and, over time, contribute to a subtle patina rather than uniform damage, while repeated exposure to direct sun can cause gradual lightening along the most exposed horizontal planes.
Alongside those everyday observations, a few straightforward patterns emerge if you watch the cabinet over months and years: satin or lower-sheen finishes tend to mask small abrasions, high gloss surfaces show every fingerprint, and interior cavities age more consistently as they’re sheltered from light and touch. Typical changes at a glance are summarized below for reference, with the most common indicators people notice first.
- Weeks: surface dust, light fingerprints, very faint settling of hardware.
- Months: gentle sheen variation on tops and around pulls, minor drawer track smoothing.
- Years: mellowed overall colour in exposed areas, small patina from everyday wear.
| Timeframe | Typical changes | Common indicators |
|---|---|---|
| First few months | Surface evens out with touch; dust accumulates in creases | Fingerprints near handles, slightly quieter drawer action |
| 6–12 months | Sheen differences between high- and low-touch zones | Lighter top finish in sun-exposed spots, darker pull areas |
| 1+ years | Patina develops; small scratches blend into the grain | General mellowing of color, minor edge wear |
How It Lives in the Space
Over time you notice how the tv Stand Cabinet Retro Solid Wood TV Cabinet Villa settles into the room, less an announcement than a steady presence as the living room is used.It quietly reshapes how space is used—shelves collect remotes and magazines, the top takes on lamps and the occasional laptop—and the surfaces pick up faint scuffs and the soft darkening of regular touch. In daily routines it becomes part of the small movements you repeat: setting down a cup, reaching for a cord, leaning against it while the TV is on, folding itself into regular household rhythms. After a while it simply rests.