decordip Garden and patio decoration inspiration
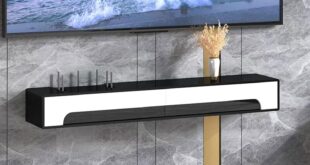
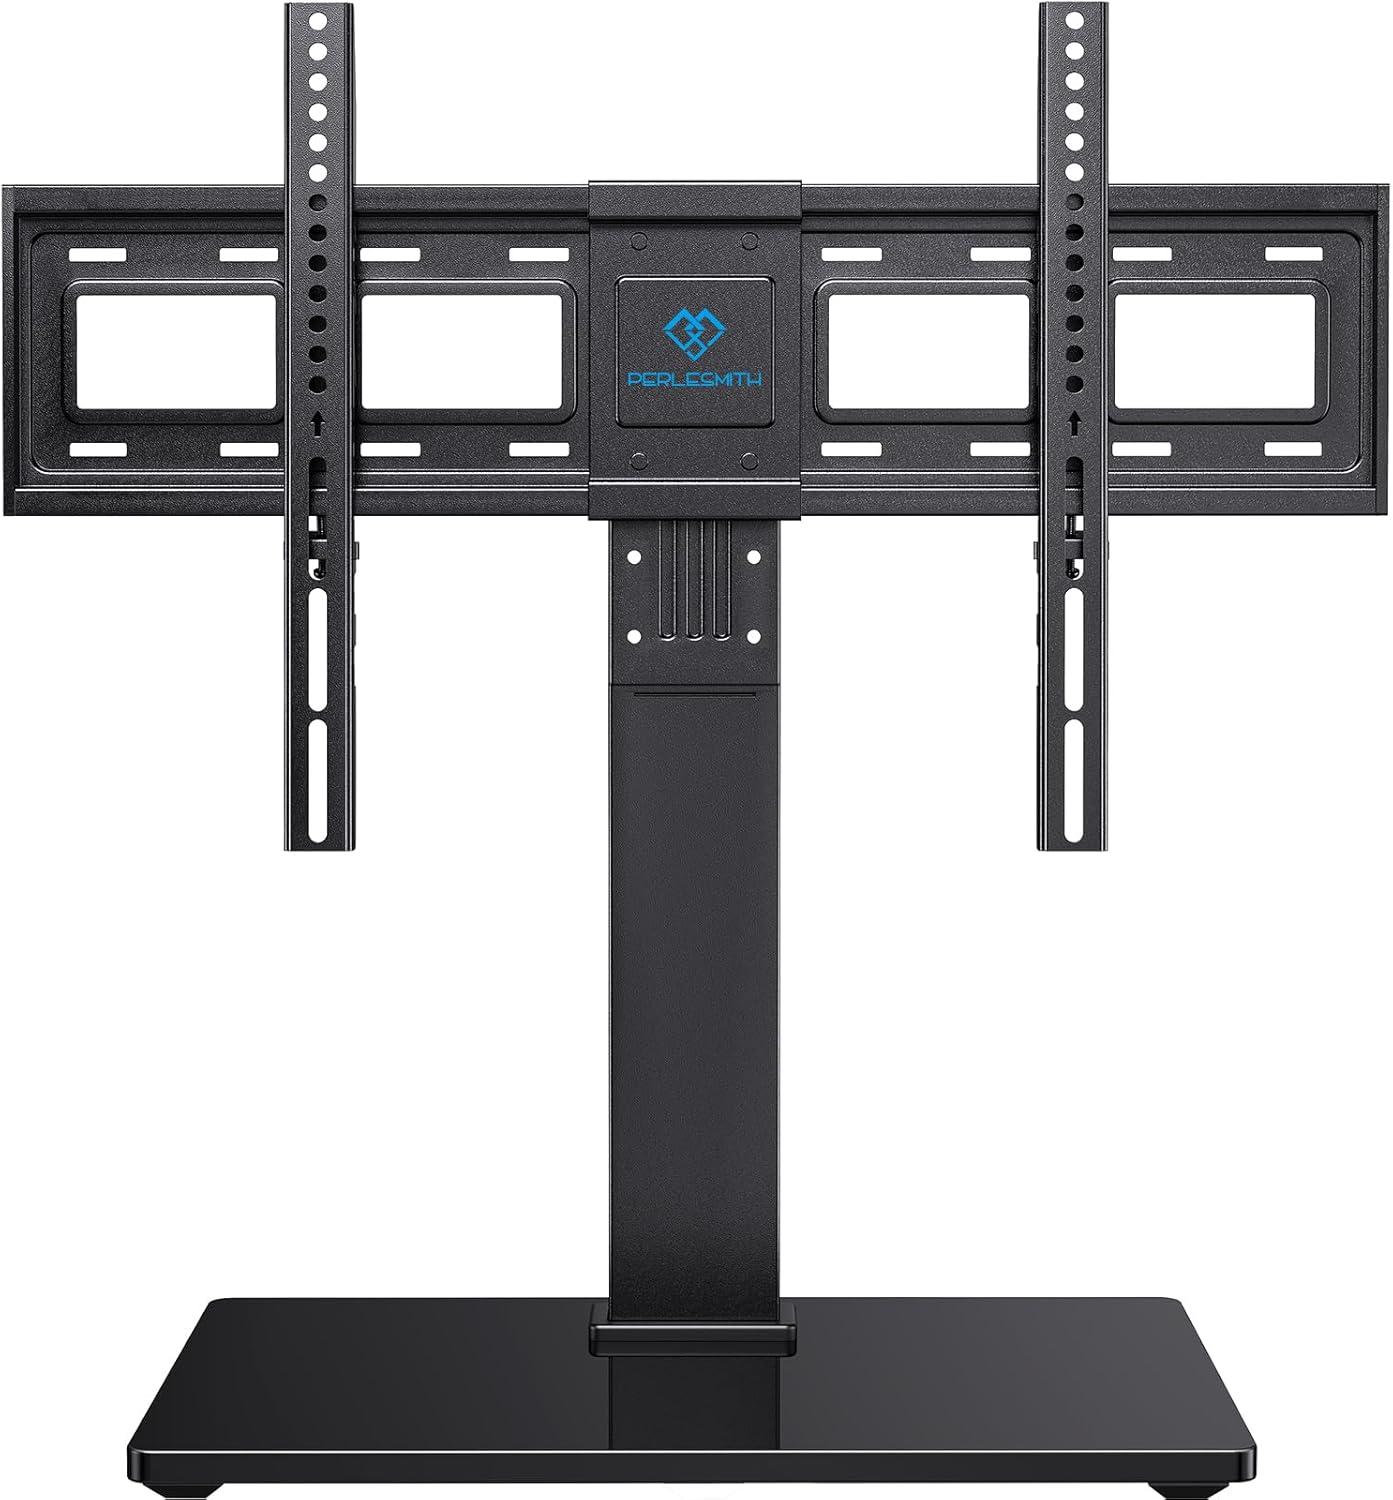
Late afternoon light catches the tempered glass base and throws a thin reflection across your coffee table, making the whole setup feel a little more purposeful than usual. Up close the steel legs have weight under your hand — matte, cool, and reassuringly stiff — and nudging the screen produces a measured swivel rather than a slack wobble.You notice the height column clicks into place with small, definite steps, giving the TV a low, stable posture that reads heavier than it’s silhouette suggests. It’s the PERLESMITH PSTVS13 TV stand here, seen less as hardware and more as a quiet platform that alters how the screen sits in the room.
A first look at the PERLESMITH swivel TV stand and what you find in the box
When you open the shipping box, the first thing you notice is that the parts are laid out rather than jumbled — the largest piece (the glass base) sits flat at the bottom, wrapped in foam and plastic, with the two upright legs and mounting rails stacked on top. A folded instruction sheet lies on top of everything, and several small, labeled plastic bags contain screws, spacers and washers. The overall unboxing feels orderly: smaller items are grouped together, the heavier pieces are cushioned, and the only loose item you might shuffle around is a short hex key that tends to sit on the instruction page until you start assembling.
In plain view you’ll find the main components and the hardware neatly separated, including a few extras like longer screws and small rubber pads. The list below captures the typical contents as they appear out of the box,with the moast visible pieces bolded for swift identification.
- Tempered glass base — wrapped and cushioned
- Two vertical stand legs — pre-drilled and packaged together
- Mounting rails / VESA brackets — bagged with small fasteners
- Hardware assortment — screws, washers, spacers in labeled bags
- Small tools & instruction manual — hex key and printed guide on top
| Item | Approx. Quantity |
|---|---|
| Glass base | 1 |
| Stand legs | 2 |
| Mounting rails | 2 |
| Hardware packs | 3–5 bags |
| Hex key & manual | 1 each |
When you first look at the stand from across the room, the tempered glass base reads like the visual anchor: a dark, low-profile plane that picks up reflections of the TV and nearby light sources. Up close the glass shows fingerprints and dust more readily, and the beveled edge catches a thin line of highlight as you move around it. You’ll notice the way light skims the surface differently depending on viewing angle—sometimes nearly mirror-like, other times a subdued sheen—and small rubber feet or pads peek out where the glass meets the tabletop, breaking the silhouette in a practical, unobtrusive way.
The metal legs introduce a textural contrast you can spot promptly: a manufactured, slightly cool finish against the glass’s gloss. From a few steps away the legs appear uniformly dark and linear, and if you crouch or change viewpoint you can make out fasteners, the plate where the mount meets the legs, and any minor seams or welds. A quick visual checklist you might use at a glance:
- Glass: reflective, shows smudges, beveled edge visible
- Legs: matte-to-semi-gloss metal, straight lines, hardware visible on close inspection
- Overall finish: cohesive contrast between glossy base and metal, small gaps or joins may become apparent nearby
| Element | What you’ll notice from a short distance |
|---|---|
| Tempered glass | Reflective plane, fingerprints and dust show, edge catch |
| Metal legs | Linear silhouettes, uniform color, hardware visible up close |
How the mounting hardware, VESA compatibility and height adjustment line up with your TV
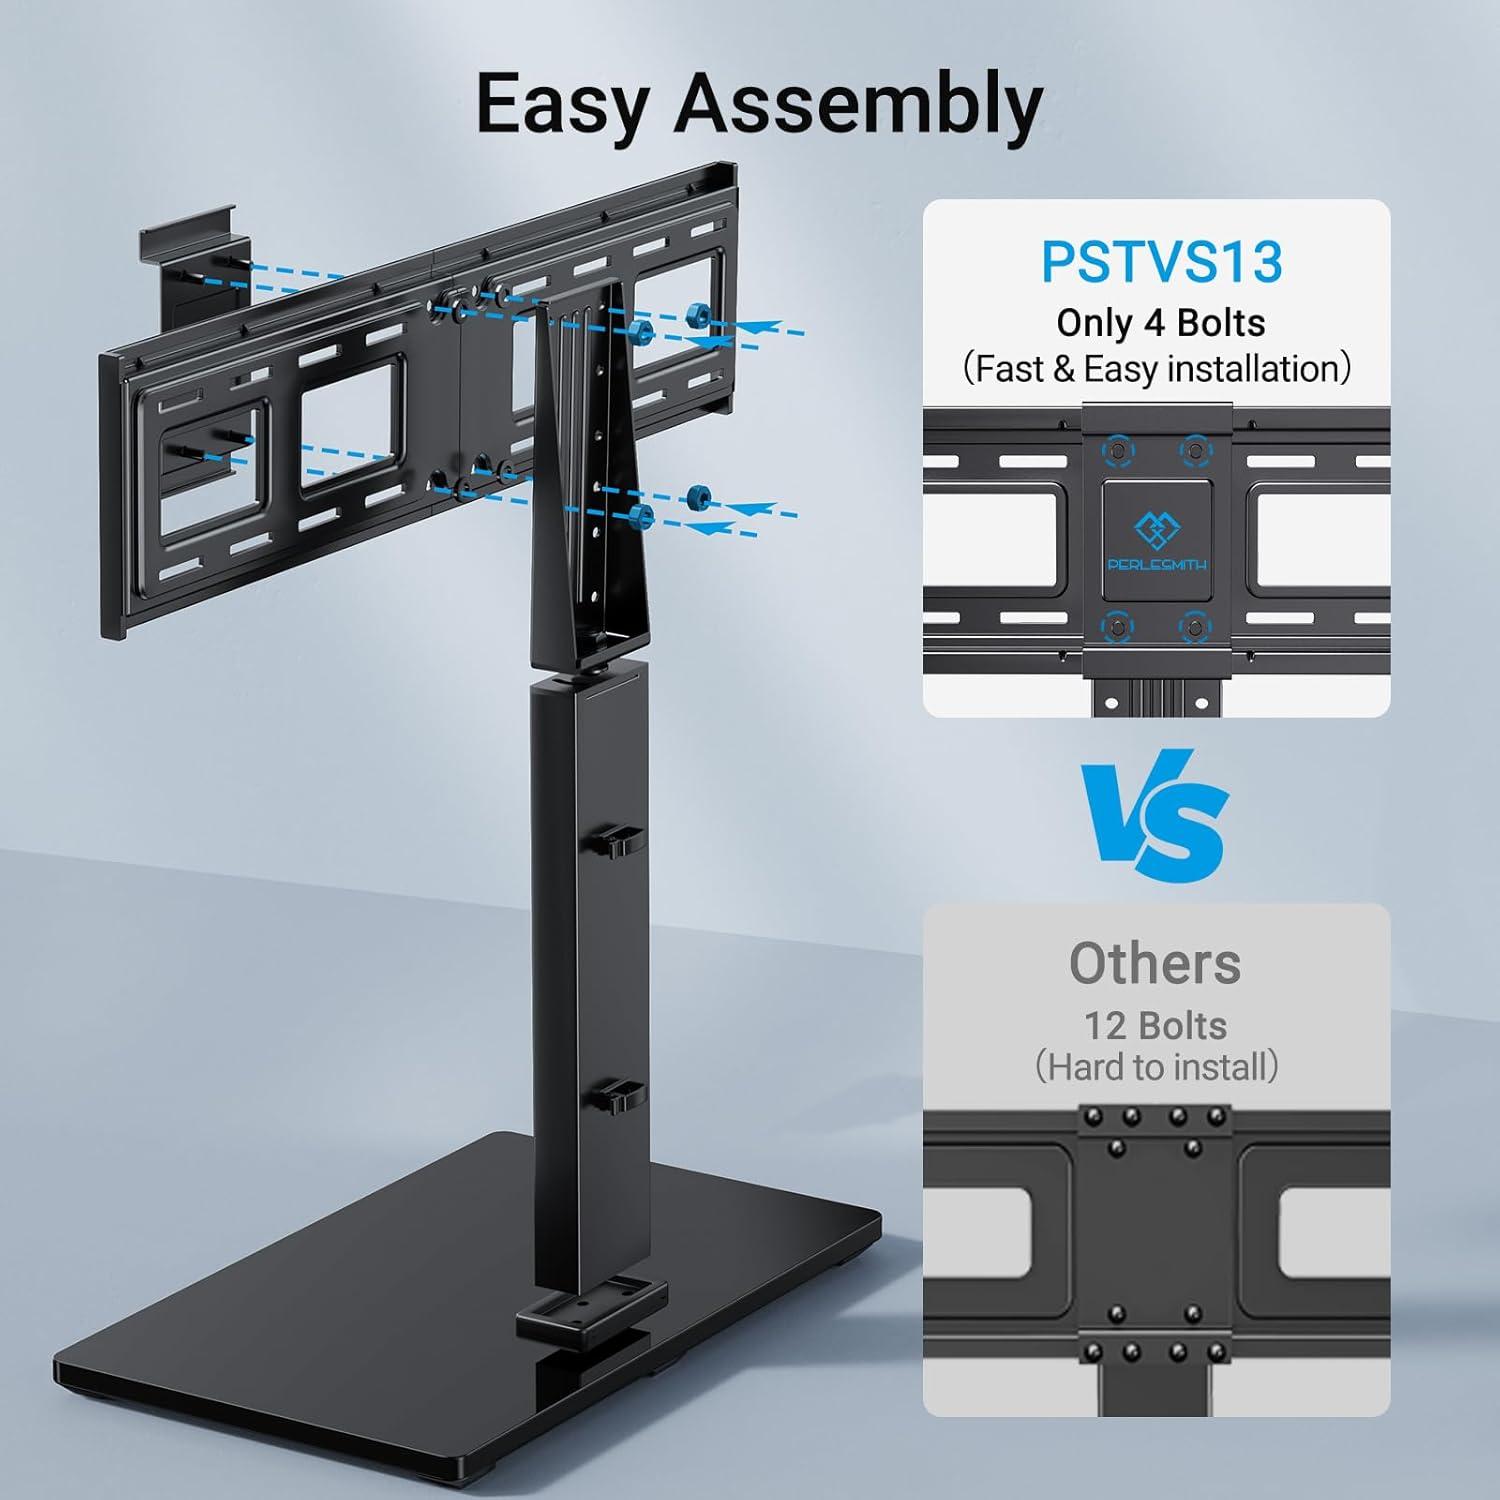
Mounting hardware and VESA coverage — the package arrives with the typical assortment of screws,spacers and washers that match most common VESA screw threads (M4,M6 and M8) and hole layouts. In practice, the metal mounting plate lines up directly with the listed patterns from 200×100 up to 600x400mm; on flat-back sets the bolt holes accept the supplied fasteners without auxiliary parts. For TVs with deeply recessed mounting inserts or irregular back contours, longer screws or extra spacers are sometimes needed, and installers tend to swap in a different length from a household hardware kit when the supplied length falls short. Observed behavior: the brackets seat squarely on standard flats and curved panels alike,while recessed ports can change which detent of the height column gets used to keep the TV level and clear of the stand base.
- included fastener sizes: covers the usual M4, M6, M8 range
- VESA patterns fit: spans from smaller 200×100 up to 600x400mm
- Common adjustment: extra spacers or longer screws may be required for recessed mounts
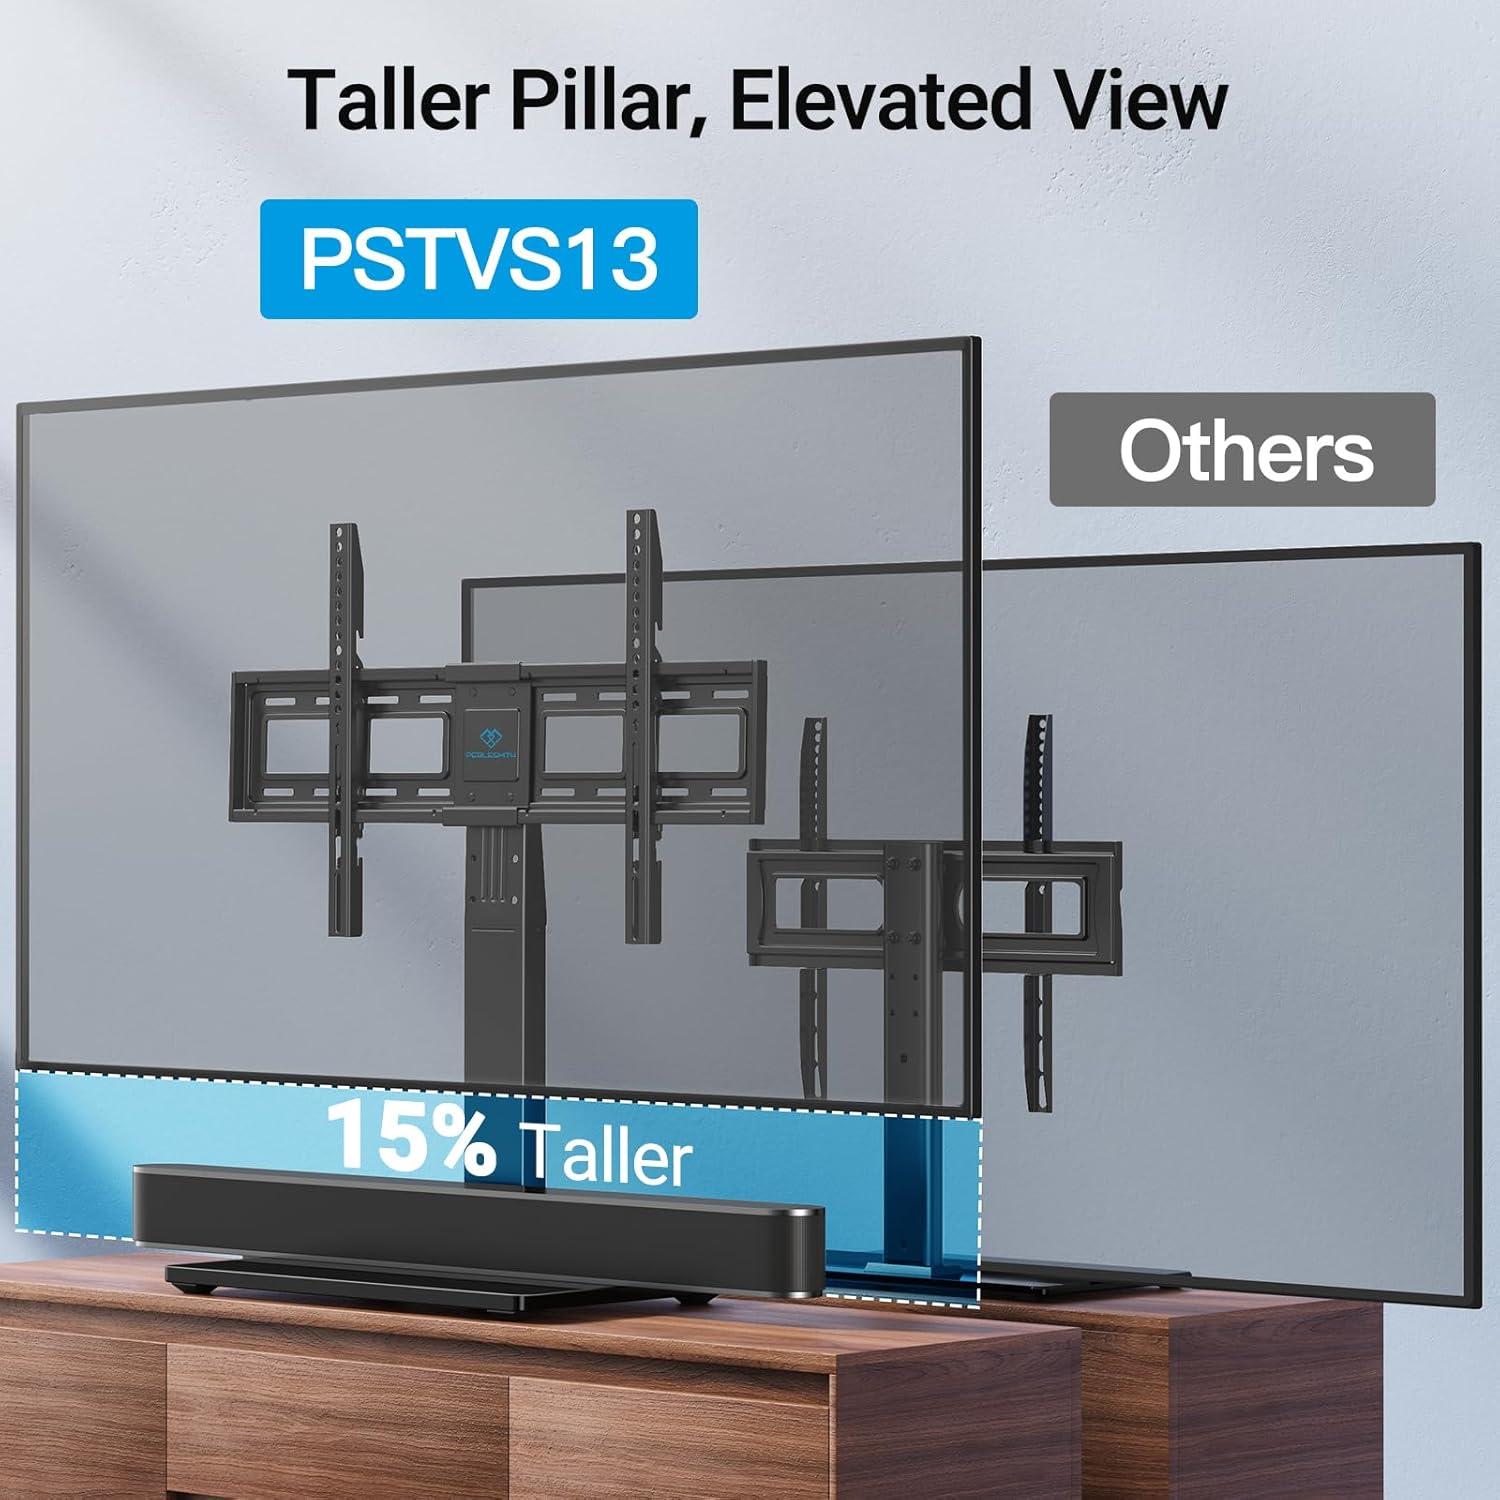
How the height adjust feature lines up with screen centers and furniture — The nine-position column provides about 8 inches of total vertical travel, distributed in small, repeatable steps; this tends to place a TV’s center near mid-cabinet height on the mid-range detents and requires the highest few positions for very large panels. in hands-on setups the detents hold firmly, though achieving perfectly level alignment sometimes needs minor final tweaks with both hands on the mount.Cable access and IR sensor alignment are affected as the screen moves: higher settings increase clearance between the back of the TV and the surface but can push the TV forward relative to shallow furniture, while lower settings keep a lower visual center but reduce space for bulkier input connectors.
| VESA pattern | Typical TV sizes | Mounting note |
|---|---|---|
| 200×100 / 200×200 | 37″–50″ | Usually fits with supplied screws |
| 300×200 / 300×300 / 400×300 | 43″–65″ | Middle detents center screen for typical consoles |
| 400×400 / 600×200 / 600×400 | 55″–75″ | Higher detents frequently enough necessary; recessed mounts may need longer fasteners |
View full specifications and mounting hardware details
Measurements, weight capacity and how it sits on your tabletop
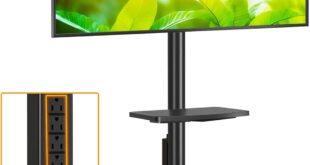
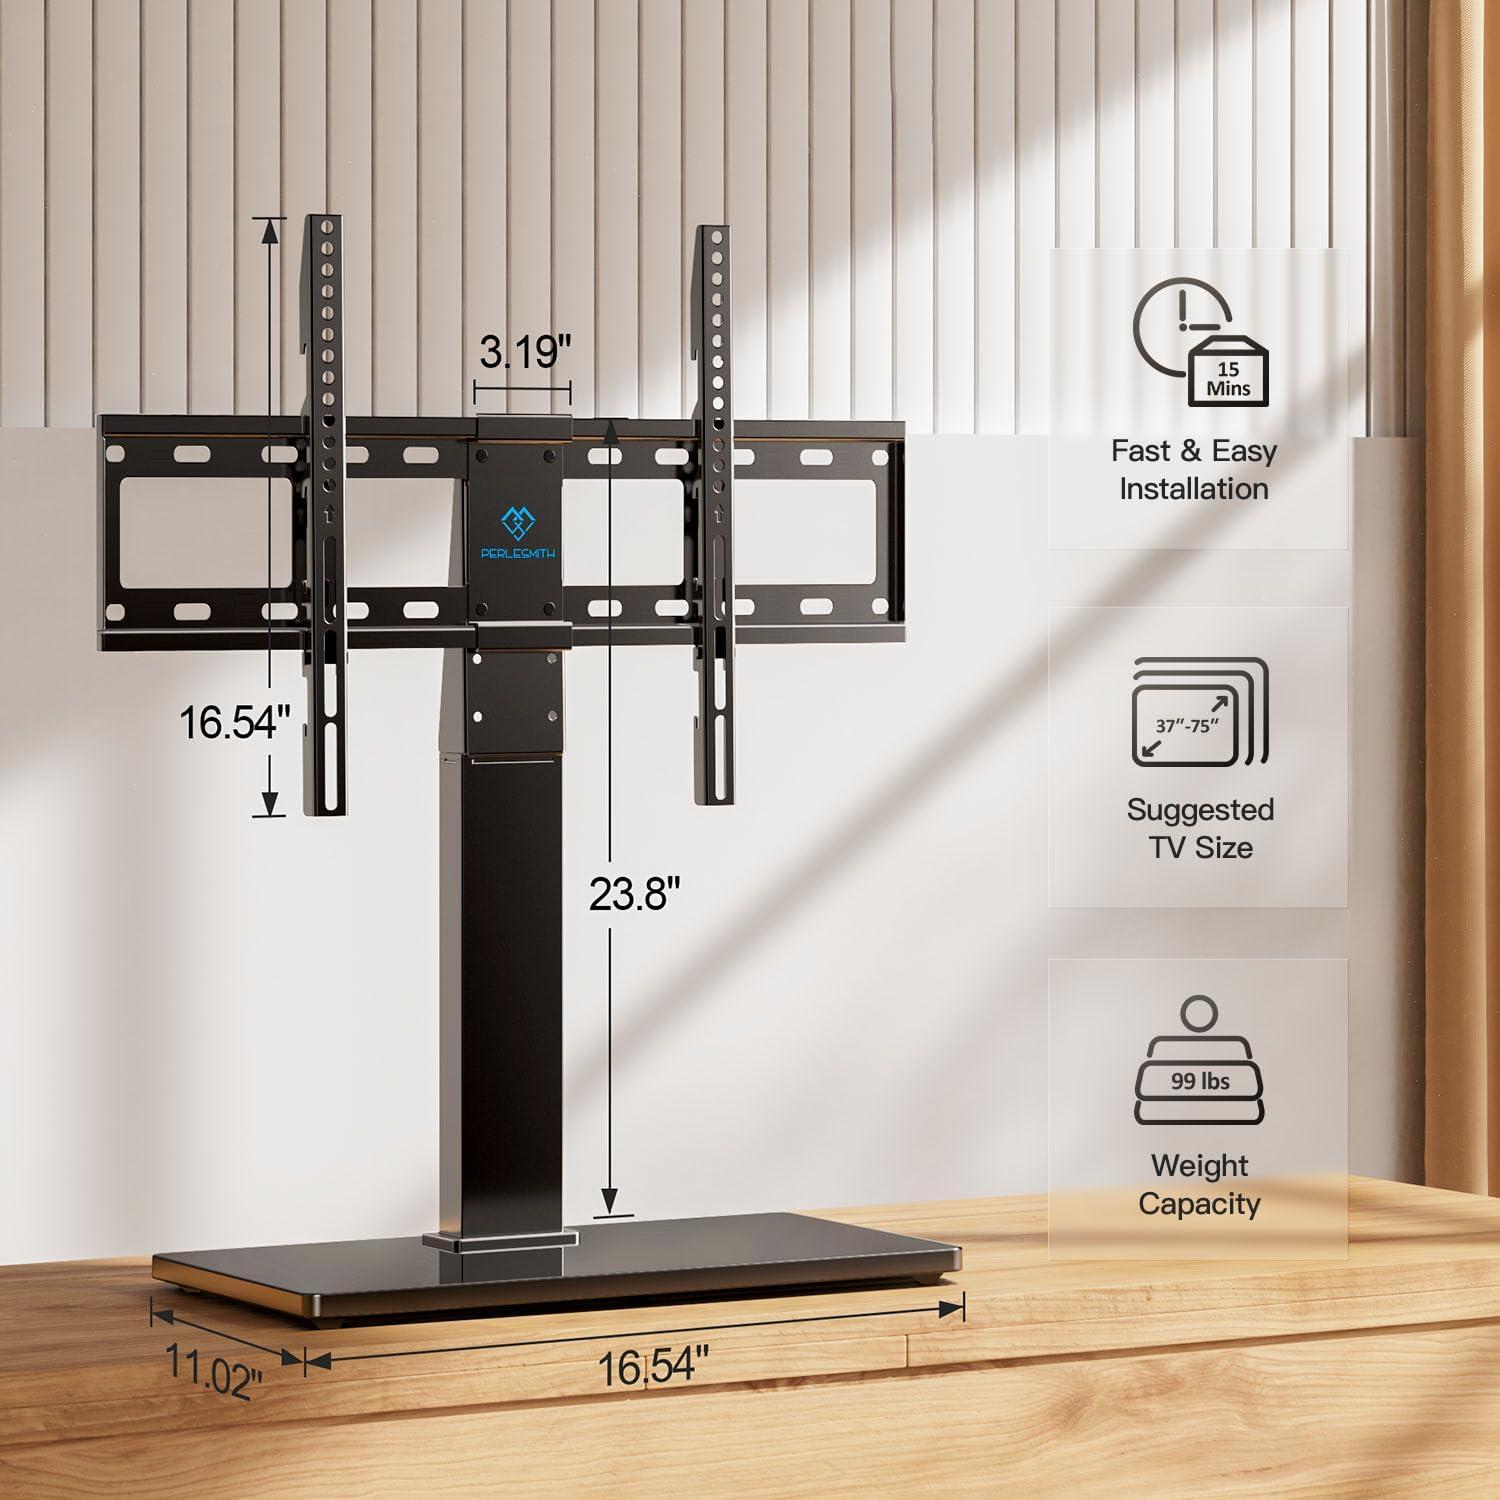
The tempered glass base measures roughly 16.5 × 11 × 0.3 inches and the upright posts offer about 8 inches of height travel across nine detents, so you can change the screen height in small steps without moving the whole stand. The mounting plate handles common VESA layouts up to 600 × 400 mm and the rated load is 99 lbs; those figures matter most when you’re aligning screw holes and thinking about how much mass the base must hold. Below is a compact reference of the main numbers you’ll interact with while setting this up:
| Measurement | Value |
|---|---|
| Glass base footprint | ~16.5″ × 11″ × 0.3″ |
| Height adjustment | ~8″ total (9 positions) |
| VESA compatibility | up to 600 × 400 mm |
| Maximum load | 99 lbs |
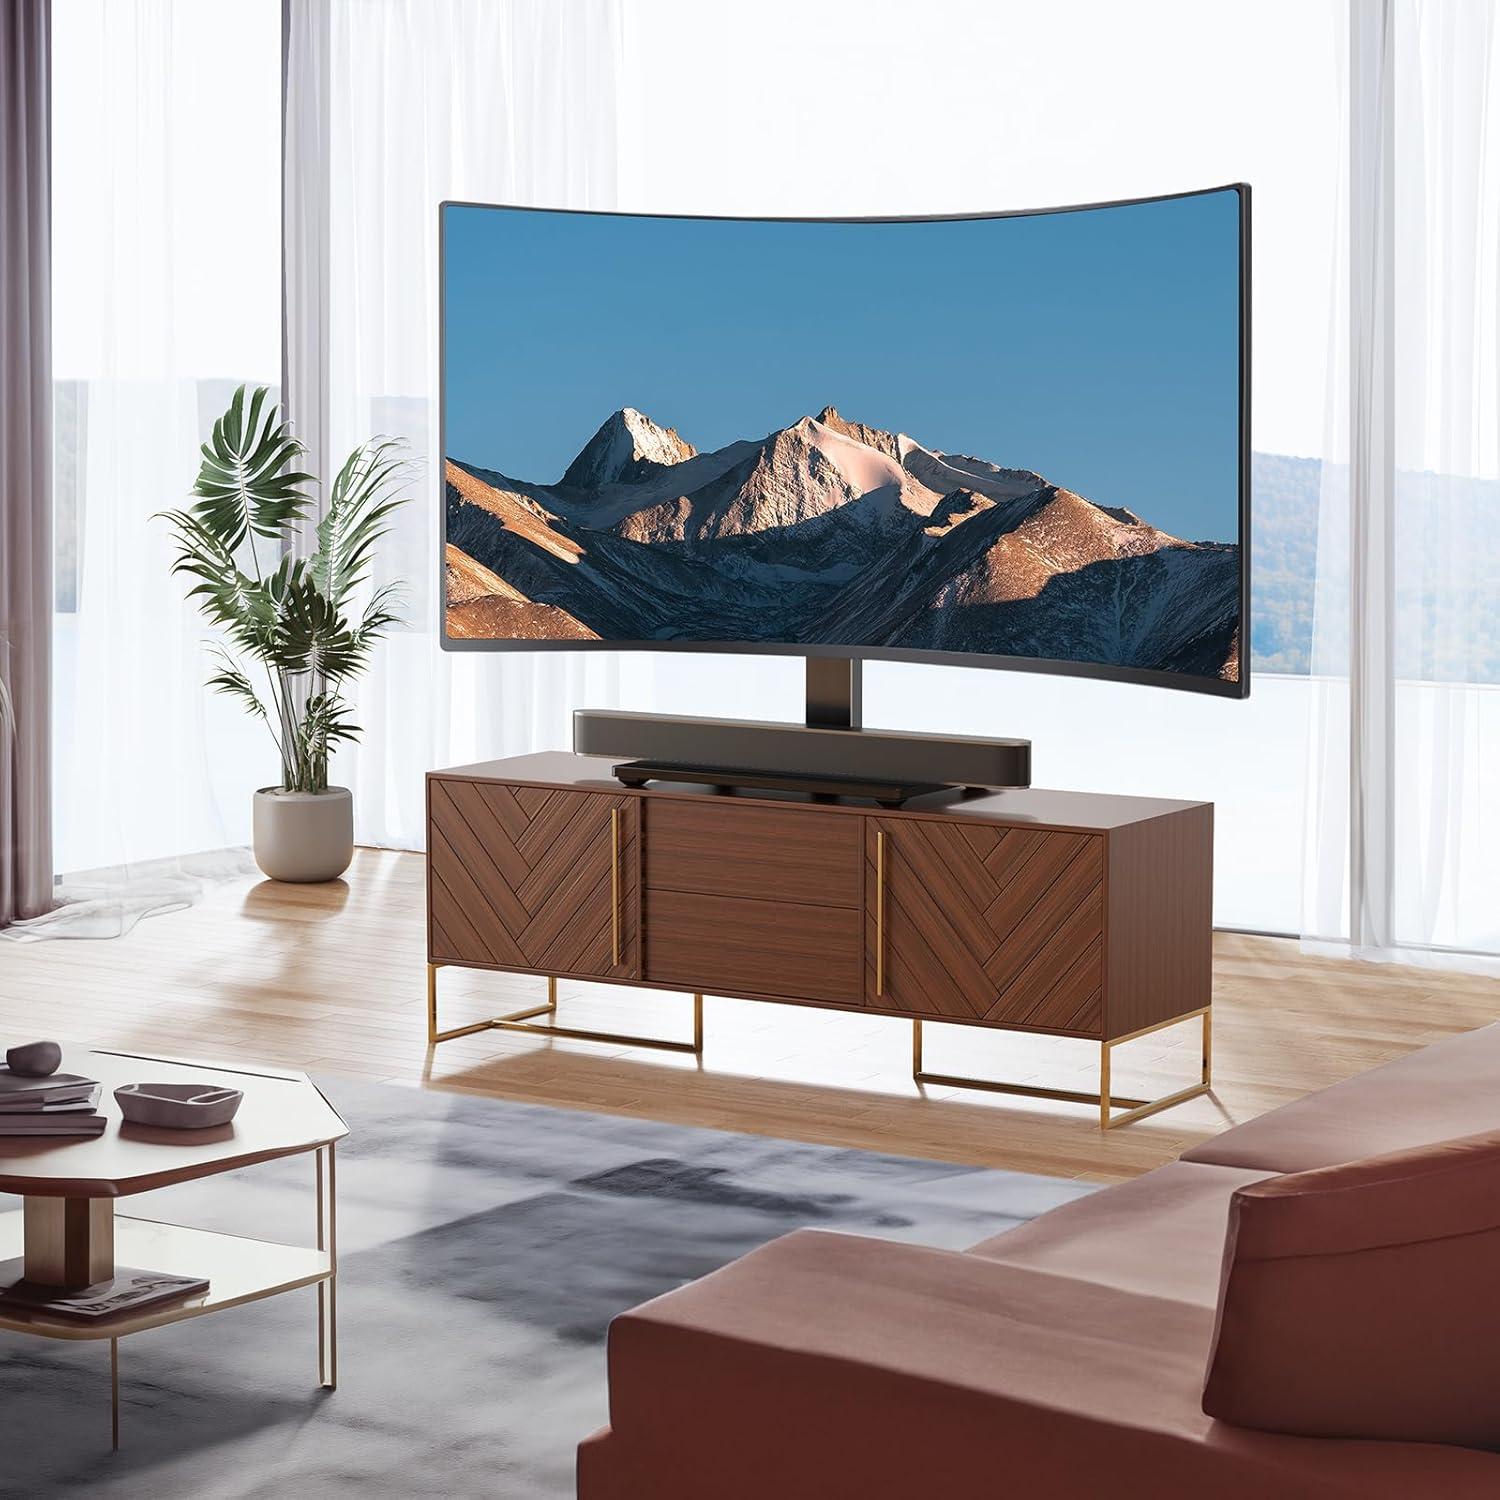
On your tabletop the stand presents a low, wide profile: the glass sits flat and the weight is distributed across that rectangular footprint, so in most cases you’ll notice little rocking when you nudge the screen or swivel it a few degrees. as the base is relatively compact, it can feel concentrated on narrower consoles — you may find yourself shifting the stand a few inches back or forth while aligning cables or hiding a soundbar.The glass shows dust and fingerprints easily; ordinary wiping during setup becomes part of the routine. When you make small viewing adjustments the assembly tends to stay put, though heavier setups near the 99 lb figure transmit more torque into the base and into the surface beneath it.
Living with it for a week: how cable access, swivel movement and stability behave in your room
After a week with it in your room you’ll notice how the wiring settles into a small handful of practical routes rather than staying precarious.There is enough space behind the screen to reach the main ports, though in practice you frequently enough tilt the set forward a little when you need to swap an HDMI or USB. Excess cable tends to collect at the foot of the uprights and under the glass platform; if you don’t tidy it right away the loop becomes visible from some angles.In daily use you fall into a few habits: tucking adapters under the base, routing long HDMI runs along the left upright, or temporarily resting a power brick on the glass when no outlet is directly behind the cabinet.
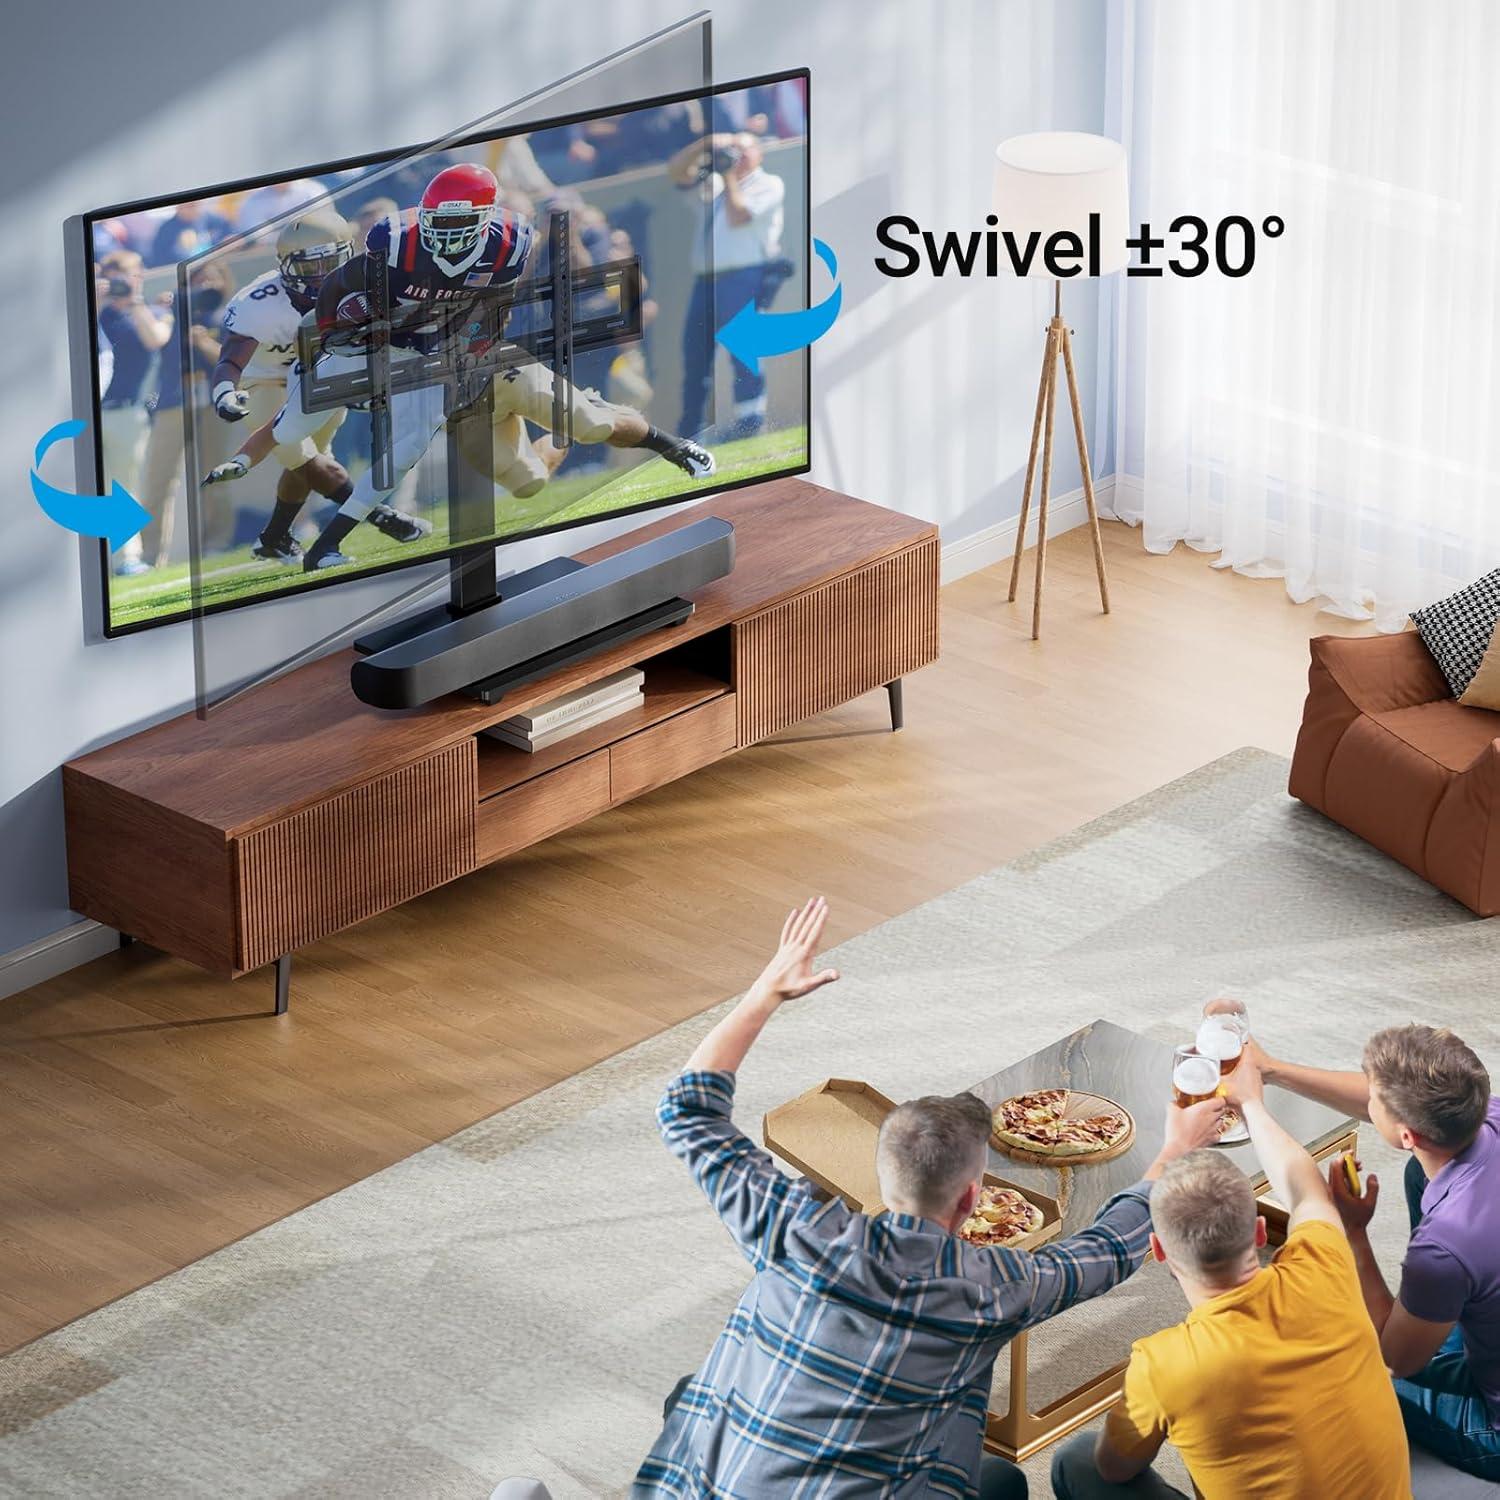
The swivel and stability show their character in ordinary traffic patterns—small nudges from changing viewing angle are easily handled, but larger, one-handed swings take a deliberate push. The swivel feel is smooth for fine adjustments and holds a position well once you stop moving it, though a firm tap on the screen transmits a little motion through the stand. Foot traffic nearby and leaning on the tabletop will cause a short, gentle wobble rather than a sustained shake; over the week that meant you habitually give the screen a light second push if you want it precisely centered. A quick reference of common interactions and what to expect appears below.
| Interaction | Observed behavior |
|---|---|
| Plugging or swapping cables | Accessible with a slight forward tilt; loose cables collect under the base |
| Rotating for different seating positions | Smooth for small adjustments, holds position after settling |
| Casual contact (brushing past, leaning on table) | Minor wobble transmitted; usually dampens quickly |
How the stand matches your expectations and where your setup might meet limitations
In everyday use the stand tends to behave like a straightforward tabletop mount: the vertical adjustment and swivel allow the screen to be repositioned without elaborate tools, and the assembly gives the impression of a solid connection once the fasteners are tightened. Movement is deliberate rather than loose, so small realignments after placing a set-top box or reconnecting cables are common. The glass base sits flat and resists sideways shifting on typical media consoles, though the mass of larger displays can make fine trimming of the screen’s angle necessary to avoid a slight bias in one direction over time.
There are a few situational limits that show up once the stand is placed into a real room.
- Surface depth: shallow or narrow furniture can leave the base overhanging or force the legs into an awkward position, which tends to require a rearrangement of other items on the tabletop.
- Bottom-profile TVs: sets with protruding speaker housings or low-lying sensors can sit higher than expected, changing sightlines and affecting clearance for soundbars.
- Cable visibility: open-back consoles and devices with many connections may leave wiring exposed because the stand doesn’t hide cabling behind the screen.
| Setup element | Typical observed constraint |
|---|---|
| Console depth | May need ≥ minimal clearance to avoid overhang |
| Accessory clearance | Soundbars or low remotes can conflict with leg placement |
Full specifications and configuration details are available here: Full specifications and configuration details.
Practical notes on placement, clearance and the space you need around your screen

Where you put the screen will change small daily routines more than you expect. Position it so the back edge is not pressed directly against a wall — a little breathing room makes it easier to reach cables and helps air move around the set, and it also means you won’t be shifting the whole stand every time you plug something in. The tempered glass base sits flat and can reflect light from windows or lamps, so take a moment to test different angles during daylight; reflections often shift as the sun moves across the room. When you swivel the screen to catch a different seat in the room you’ll usually make minor adjustments to nearby objects — plants, remotes and small speakers will need enough distance to avoid rubbing the glass or getting knocked over.
Think about three practical clearance needs as you arrange the table or cabinet where the screen will sit:
- Ventilation: leaving a modest gap behind and above the screen helps with heat dispersion and keeps vents accessible.
- Port and cable access: allow space to reach HDMI, power and other connectors without pulling the screen forward each time.
- Swivel range and side clearance: the screen’s sideways movement needs room on both sides so cables and decorations don’t get caught when you turn it.
| Need | Typical clearance to allow |
|---|---|
| Rear ventilation and cable access | ~2–4 inches |
| Side clearance for swivel and hand access | ~10–18 inches each side (varies with viewing angle) |
| Front clearance for viewing and remote use | enough depth so the base sits fully on the surface and remotes or soundbars aren’t crowded |
How the Set Settles Into the room
After living with it over time, you notice the stand settling into the room’s rhythms — the TV shifts to where people tend to sit, and light picks out a thin trail of dust across the base. the PERLESMITH PSTVS13 becomes part of how you use the space: cushions are angled, remotes find their usual places, and small habits organize themselves around that spot. Tiny signs of wear — faint fingerprints, a smudge at the edge, the occasional swipe to clear dust — fold into your daily routines and the gentle background of comfort behavior. After months of regular use it stays.