decordip Garden and patio decoration inspiration
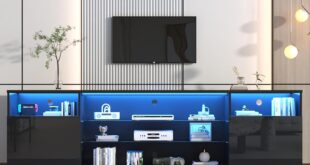
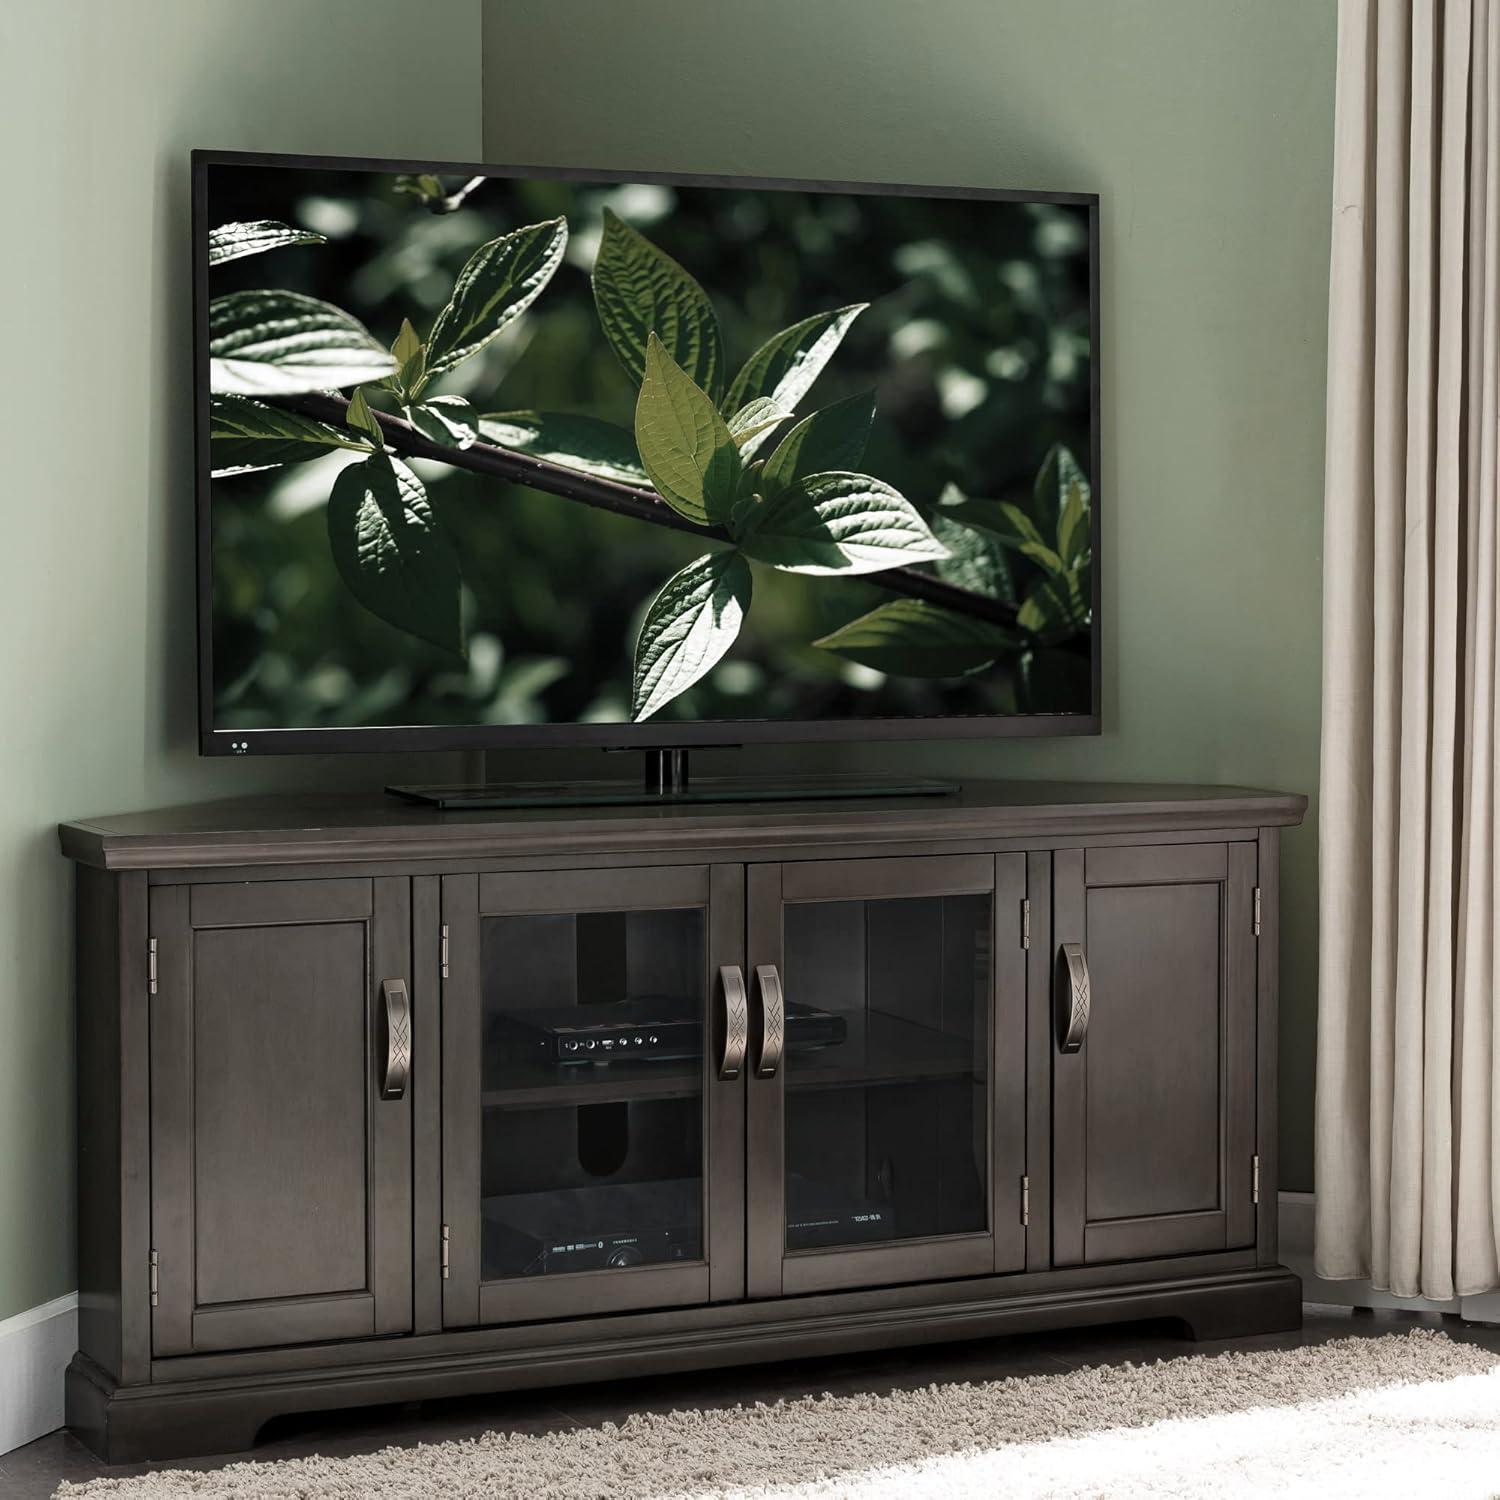
Light skimming the tempered glass doors picks out the pewter pulls and the soft veining of the Riverstone Grey finish, giving the piece a quietly considerable presence. You notice the top’s cool, smooth veneer under your palm and the reassuring weight when you shift it—solid rather than airy—while the clipped corners keep the silhouette from feeling blocky. The Leick Home 84386 corner TV stand settles into the room like a practiced host: it frames the screen, tucks a few devices and remotes behind glass, and lets cords slip out of sight thru a gap in the back. From were you sit it reads as everyday furniture first and media hub second, a tidy, lived-in anchor for the space.
At a glance what you get with the Leick Home corner TV stand in Riverstone Gray
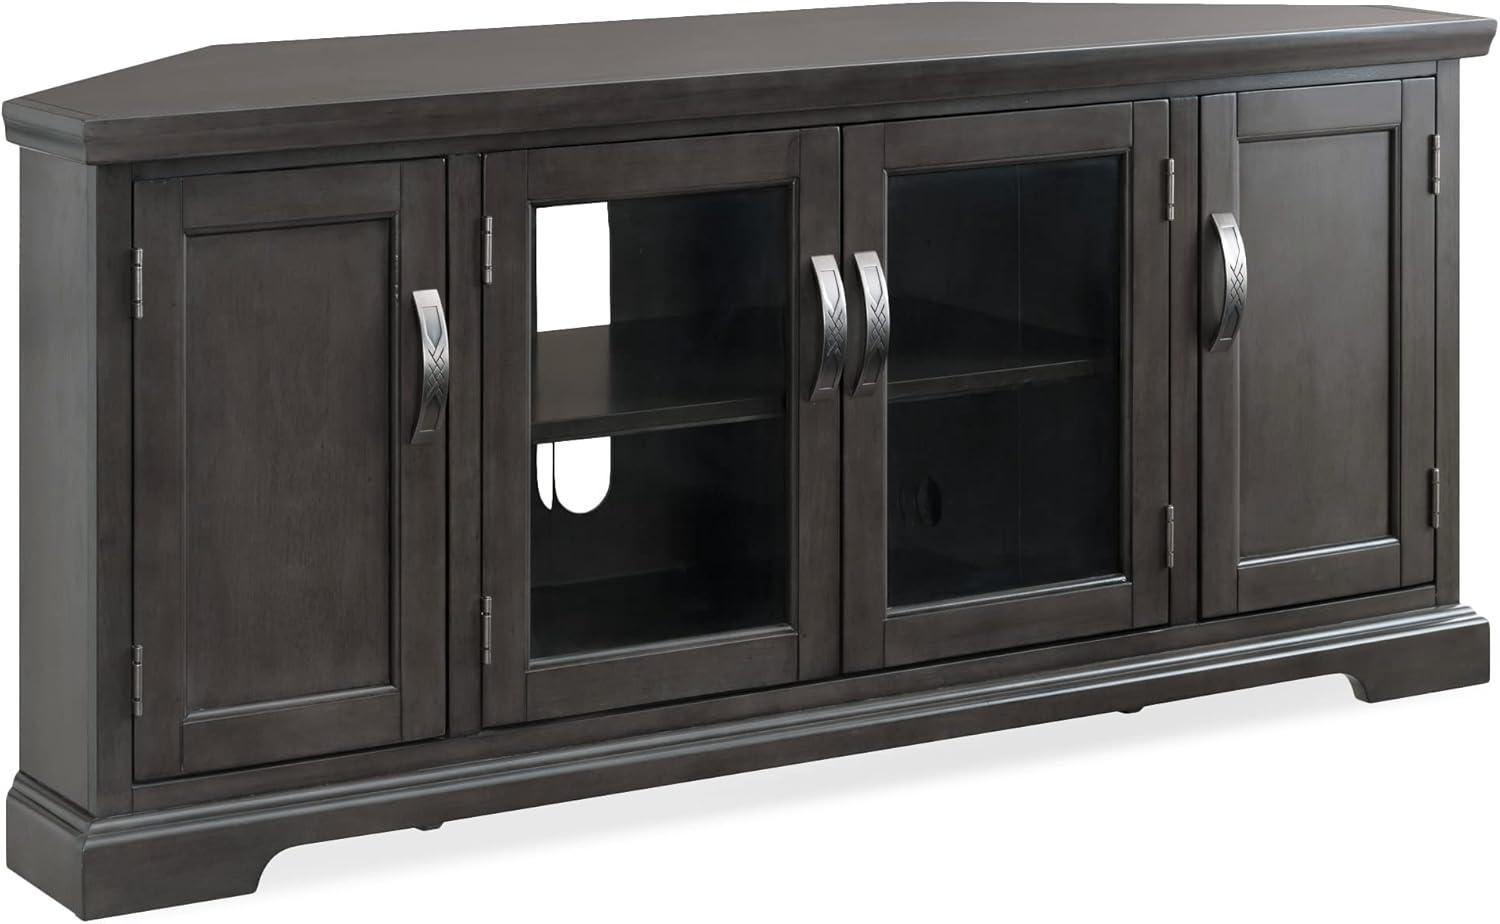
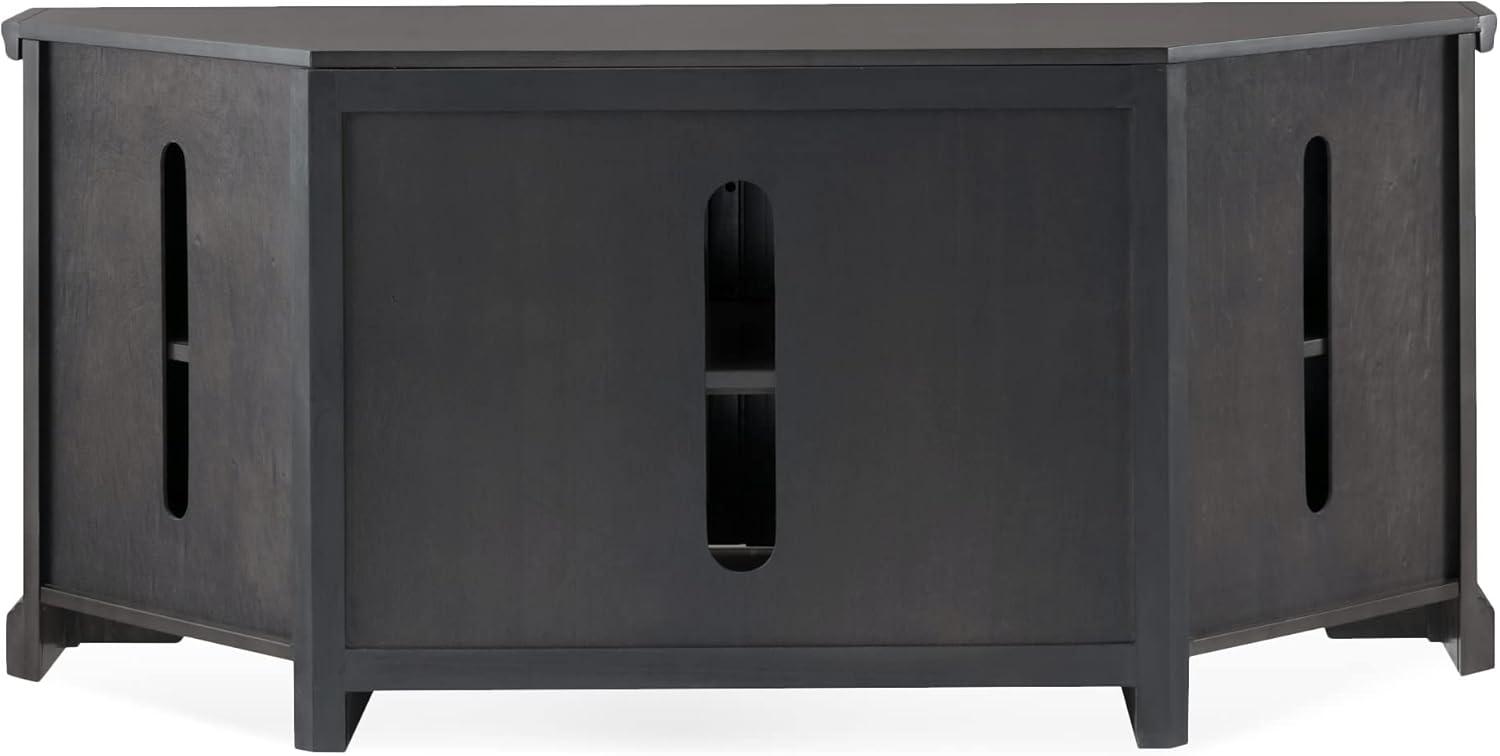
At a glance you get a finished corner console that arrives ready to tuck into a nook and present a tidy media face. The unit comes with the doors, shelves, hardware and an instruction booklet in the box, plus a warranty card; the hinged glass doors and pewter pulls are promptly visible and set the tone for daily use. A perforated back panel and simple cutouts are already in place for routing power and AV cables so devices sit in front of you with cords mostly out of sight. assembly is straightforward in most cases, though aligning the doors and shelving can take a bit of patient tweaking once everything is on the floor.
In everyday life the piece behaves like a modest, organized media hub: the top gives you a broad surface for a screen and some decorative items, the enclosed sections hide consoles and remotes, and the glass fronts let small lights and displays show through while still shielding components from dust. Expect the glass to pick up fingerprints and the finish to show dust more readily than raw wood, so occasional wiping becomes part of the routine; moving or repositioning the unit usually requires two people. What’s in the box and visible features in use are straightforward, with basic fasteners and an instruction sheet included and a one‑year warranty card for reference.
When you inspect the Riverstone Gray finish and the materials up close
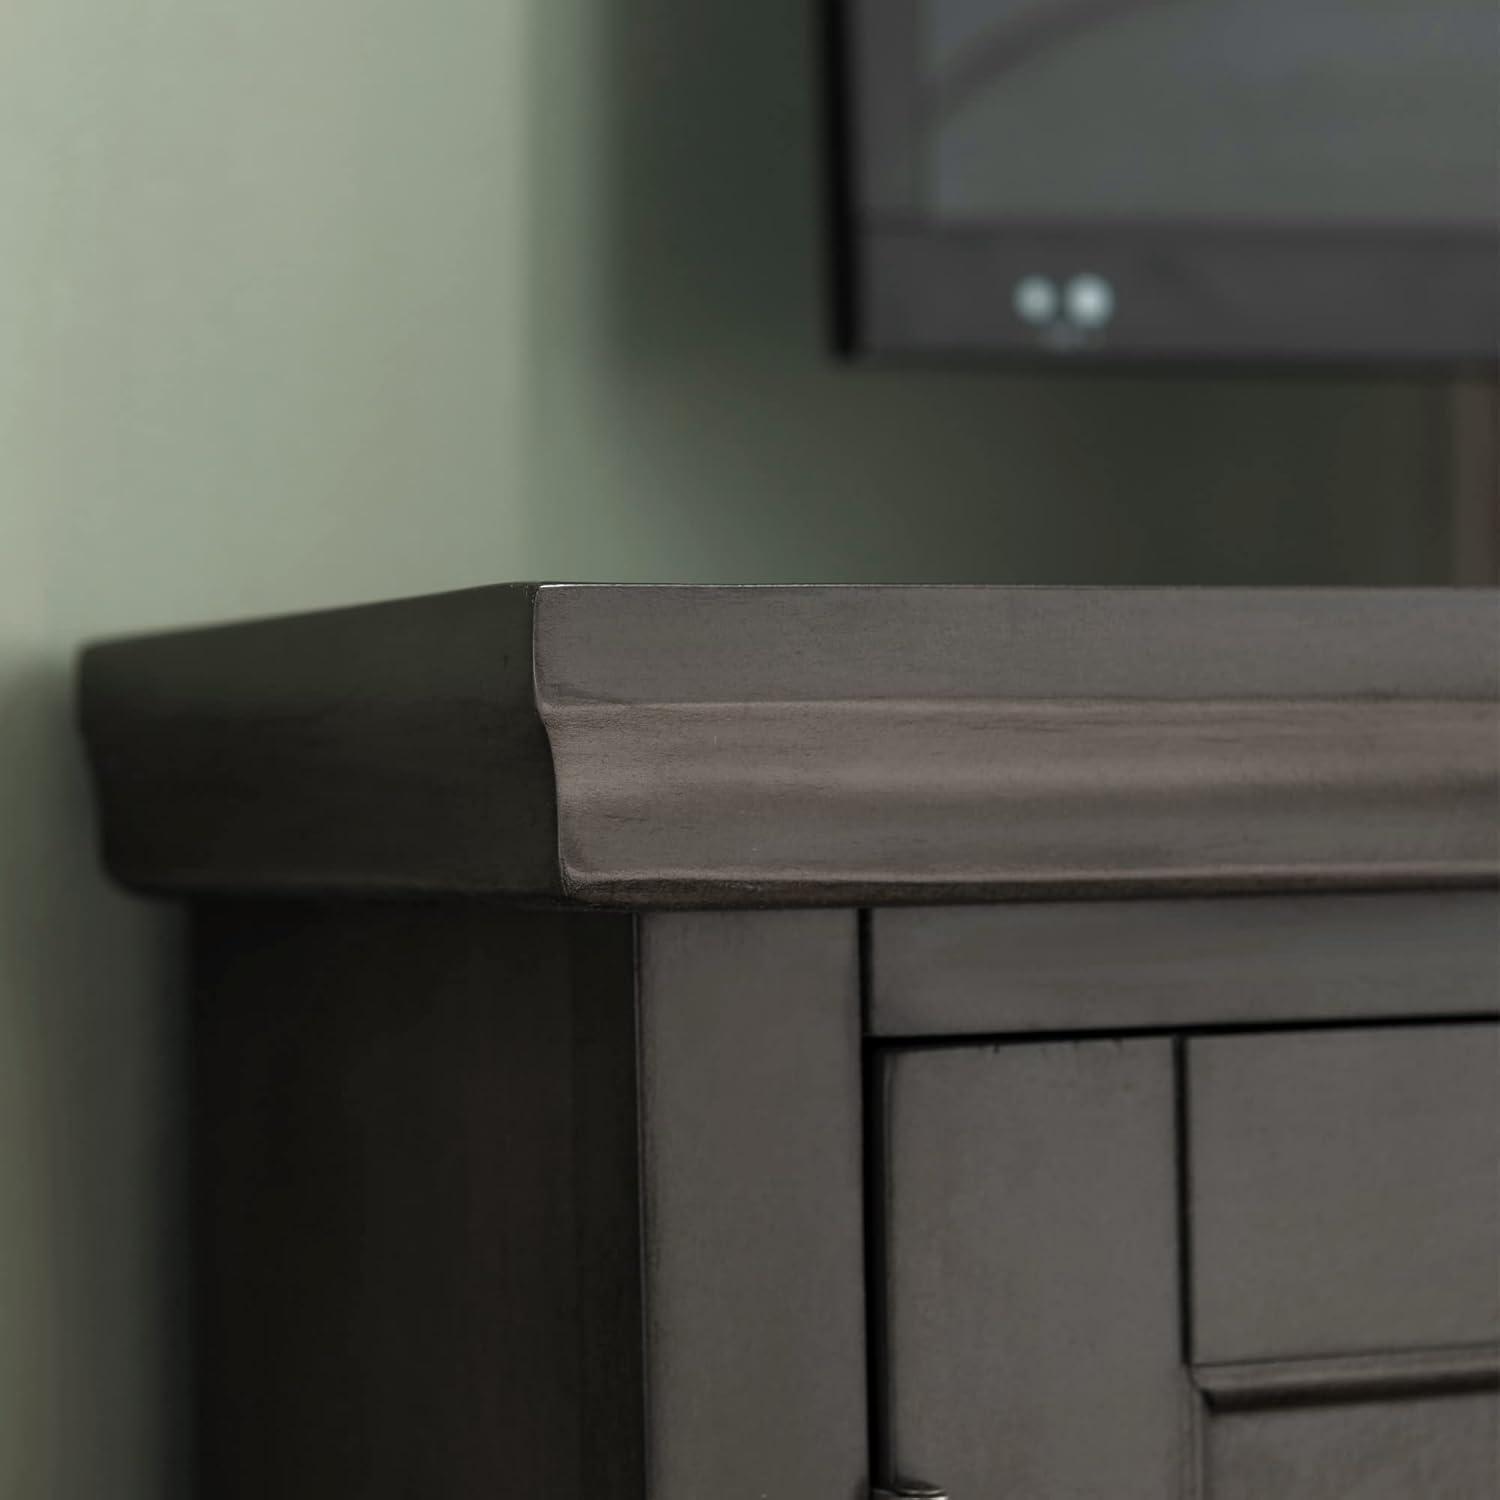
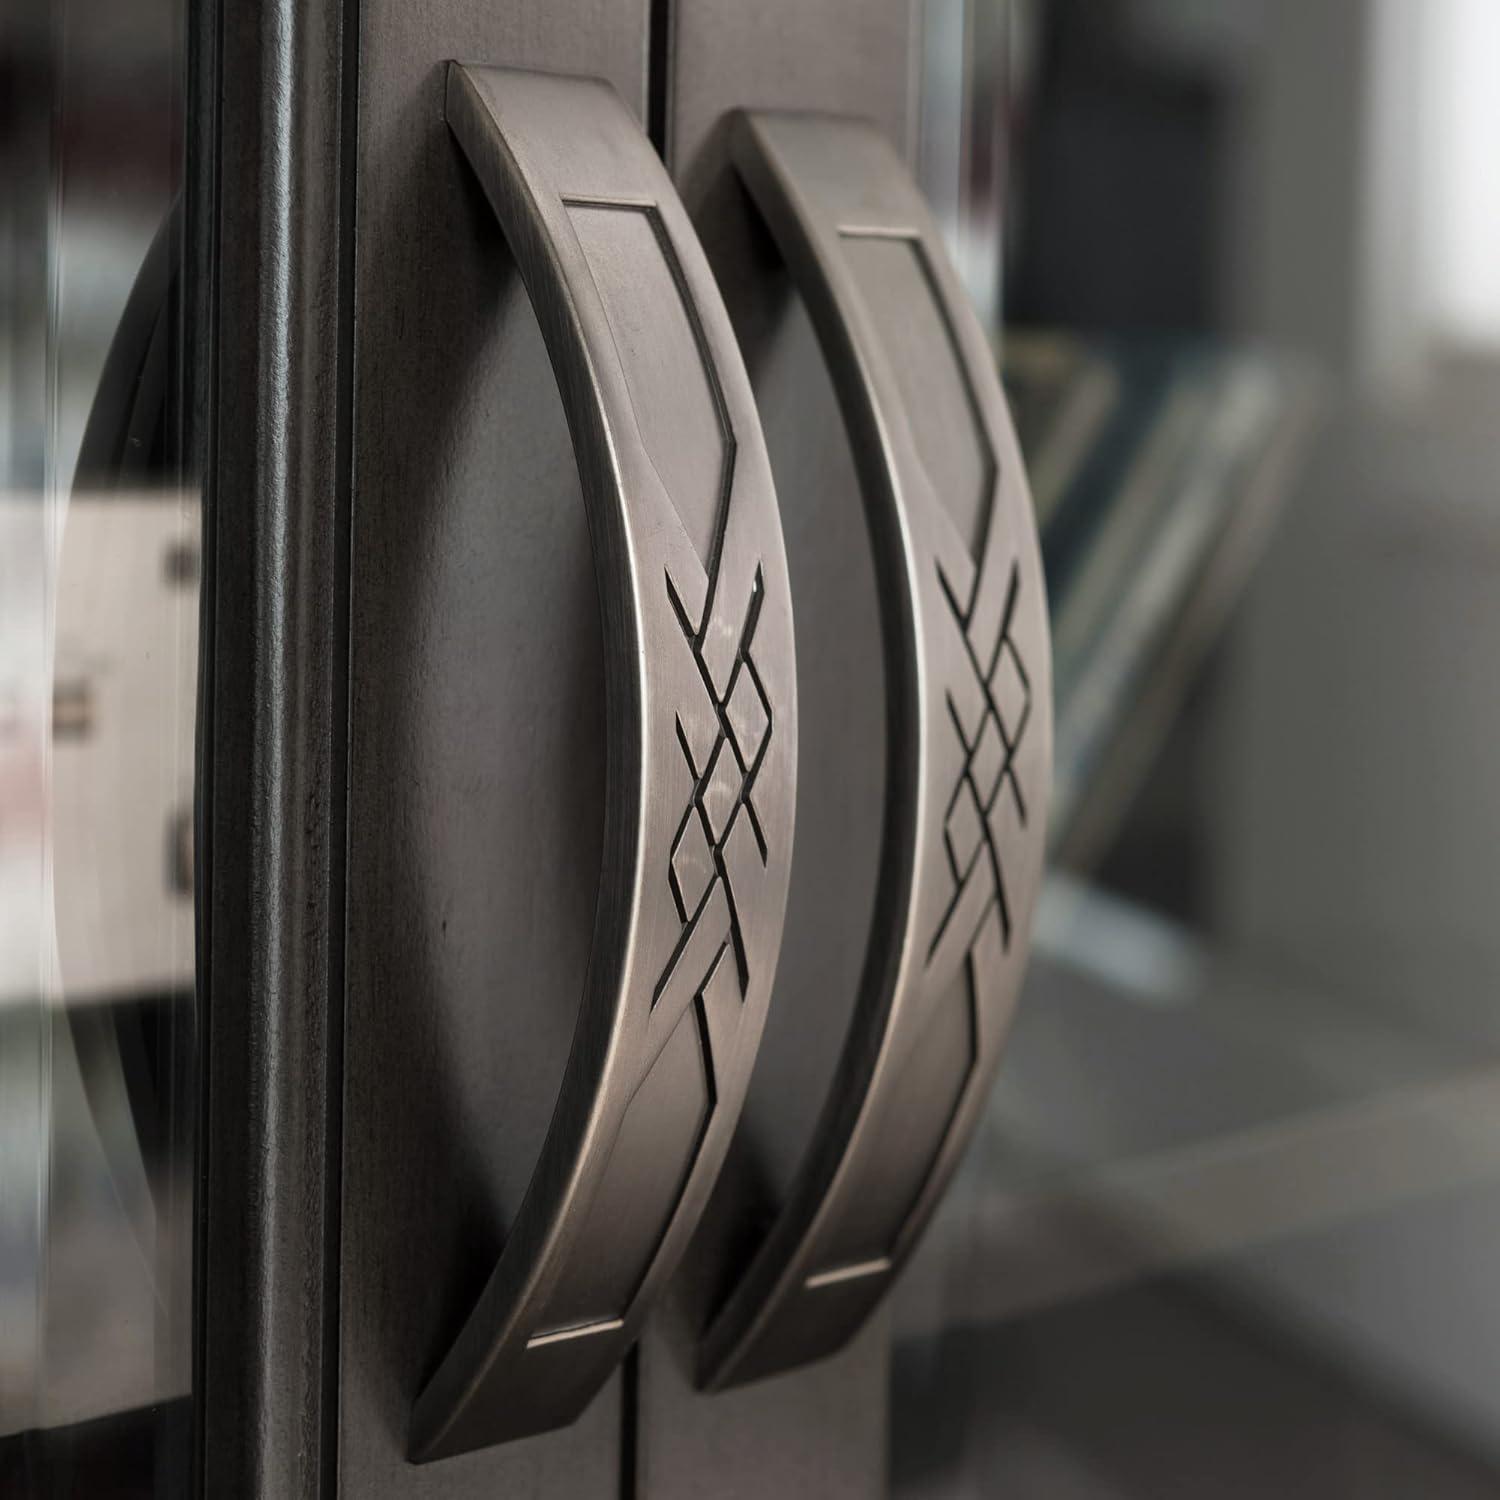
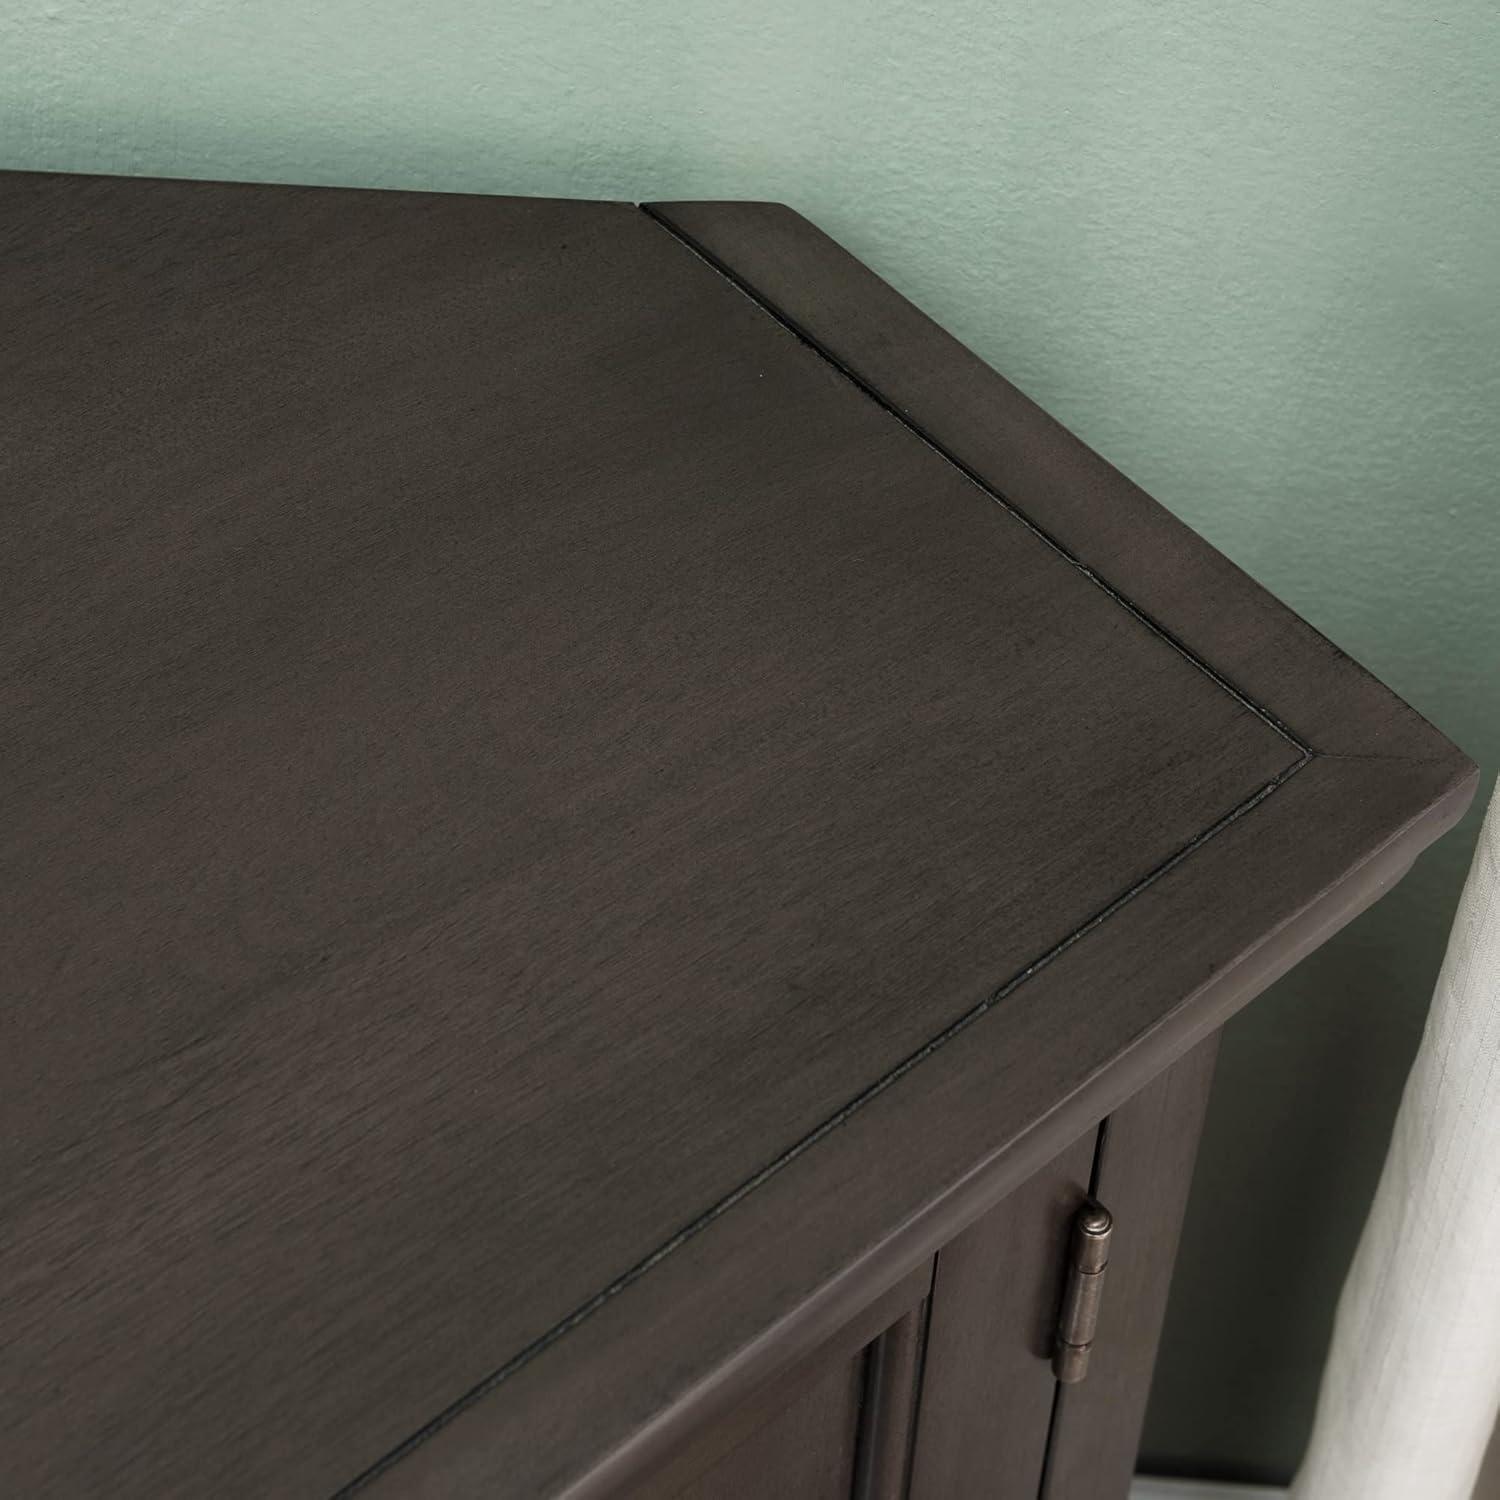
Up close, the Riverstone Gray reads as a soft, mid-tone gray with faint woodgrain that is more visible at certain angles. Under natural light you may notice subtle warm undertones; under cooler artificial light the color can lean slightly bluer. the finish is closer to satin than gloss—smooth to the touch but not slick—so fingerprints show less boldly than on glass but small dust and smudges become apparent over time. When you pass a fingertip along the cabinet faces, the veneer’s texture is perceptible in places and the finish wraps around the edges with a narrow seam where panels meet; those joints sometiems display a small color shift or a tight line where veneer meets solid edging. The tempered glass doors are clear with the usual faint green edge and pick up occasional streaks, while the pewter hardware has a muted, brushed look that shows tiny machining marks if you bring it very close.
You’ll find a few recurring visual cues when inspecting different parts of the unit:
- Surface finish: satin sheen, light grain visibility, slight tonal variation across panels
- Edges and joins: wrapped veneer with narrow seams, minor color shifts at miters
- glass and metal: clear tempered glass with subtle green edge; pewter pulls with a brushed texture
| Feature | What you see or feel |
|---|---|
| Top surface | Even finish, slight grain texture under close inspection |
| Cabinet faces | Soft gray tone with small variations in streaking or direction of the veneer |
| Door edges | Narrow seam where veneer wraps; seams can catch a bit of dust |
| Hardware | Matte pewter appearance, faint tool marks visible up close |
Light and everyday use reveal these details—smudges on the glass, dust along tight seams, and occasional differences in grain direction—so you’ll likely find yourself wiping or adjusting things in normal routines.
Putting it together what you’ll encounter during assembly and how the pieces interlock
When you open the boxes the first thing you’ll notice is the small hardware packets and a handful of large panels that already have pre-drilled holes and recessed slots. The instruction sheets use exploded diagrams, so your early minutes will be spent matching labeled parts, laying out the bags, and deciding whether to start on the cabinet carcass or the doors first. You’ll fit dowels into round holes, drop cam fasteners into their countersinks, and then bring panels together before turning the cams to lock things in place; occasionally a dowel needs a light tap to seat fully. Hinges arrive partly assembled so you can screw them to the door first, then clip the door onto the cabinet — getting the glass doors seated squarely against the frame is a bit fussy and sometimes you’ll loosen a screw to nudge alignment.Typical tools you’ll use are simple:
- Phillips screwdriver (or a driver bit)
- Hex key or allen wrench for included bolts
- soft mallet or light hammer for gentle taps
The way pieces interlock is pragmatic and repetitive: dowels register panels, cams clamp them, and the rear panel slips into a groove to square the whole assembly. The back panel acts like a spine — once it’s slid into the dado and secured it holds angles true while you tighten cams and through-bolts. Shelves sit on metal or plastic pins that drop into a matrix of holes so small adjustments are easy, and the hinge plates attach to pre-positioned mounting plates with short machine screws so the doors can be micro-adjusted after the carcass is assembled. The table below outlines the common fastener-to-joint relationships you’ll see on the job:
| Component | How it connects | What to watch for |
|---|---|---|
| Side/top panels | Wooden dowels + cam locks | Seat dowels fully before turning cams |
| Rear panel | Slides into grooves + screws at edges | Ensure grooves are clean so panel sits flush |
| Shelves | Shelf pins in pre-drilled holes | you can reconfigure heights quickly |
| Doors (glass) | Hinges to mounting plates; screws allow adjustment | Tighten incrementally to avoid binding |
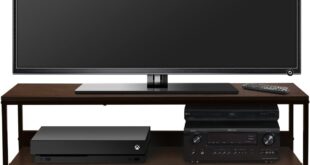
Where it sits in your room and how a sixty five inch TV occupies the corner
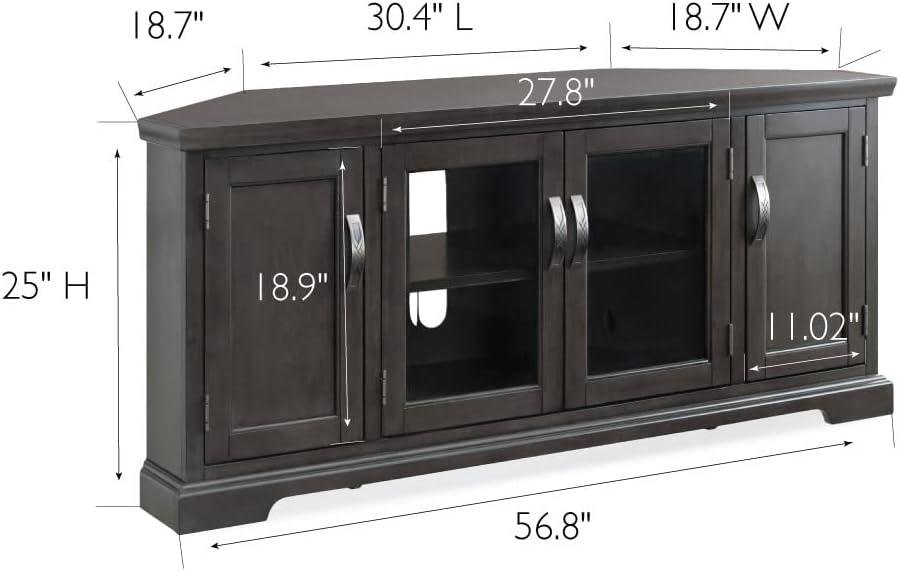
Placed in a corner, a sixty-five-inch television immediately becomes the room’s visual anchor, the screen pushing the focal point out from the walls and into the seating area. The combination of TV and stand tends to create a compact media alcove: cables, boxes and remotes end up clustered behind or beside the cabinet so the corner looks purposeful rather than cluttered. Setup often includes a few small adjustments — angling the display a degree or two, nudging a console back, or shifting a speaker — as people work to balance sightlines from the couch with clearance for foot traffic along the wall. Light from side windows and lamps is noticed more on a larger screen, so occasional repositioning to reduce glare is a familiar, unplanned part of settling the pair into the corner.
- Sightlines: viewers seated opposite the corner get a broad,almost-center image,while those on the room’s sides usually make a slight head turn.
- Traffic and access: the unit and screen together occupy the corner footprint visibly, which can make passing close by feel a bit tighter and places cable access and device doors in a concentrated spot.
- Integration with other furniture: adjacent chairs or a small side table will often be nudged a little to keep sightlines clear or to create a slim pathway.
| Viewing position | Typical observation |
|---|---|
| Centered across the room | Full-face viewing with the screen feeling prominent in the space |
| Along the side wall | Image still usable but requires a modest head turn or slight recline |
View full specifications and configuration details on the product listing
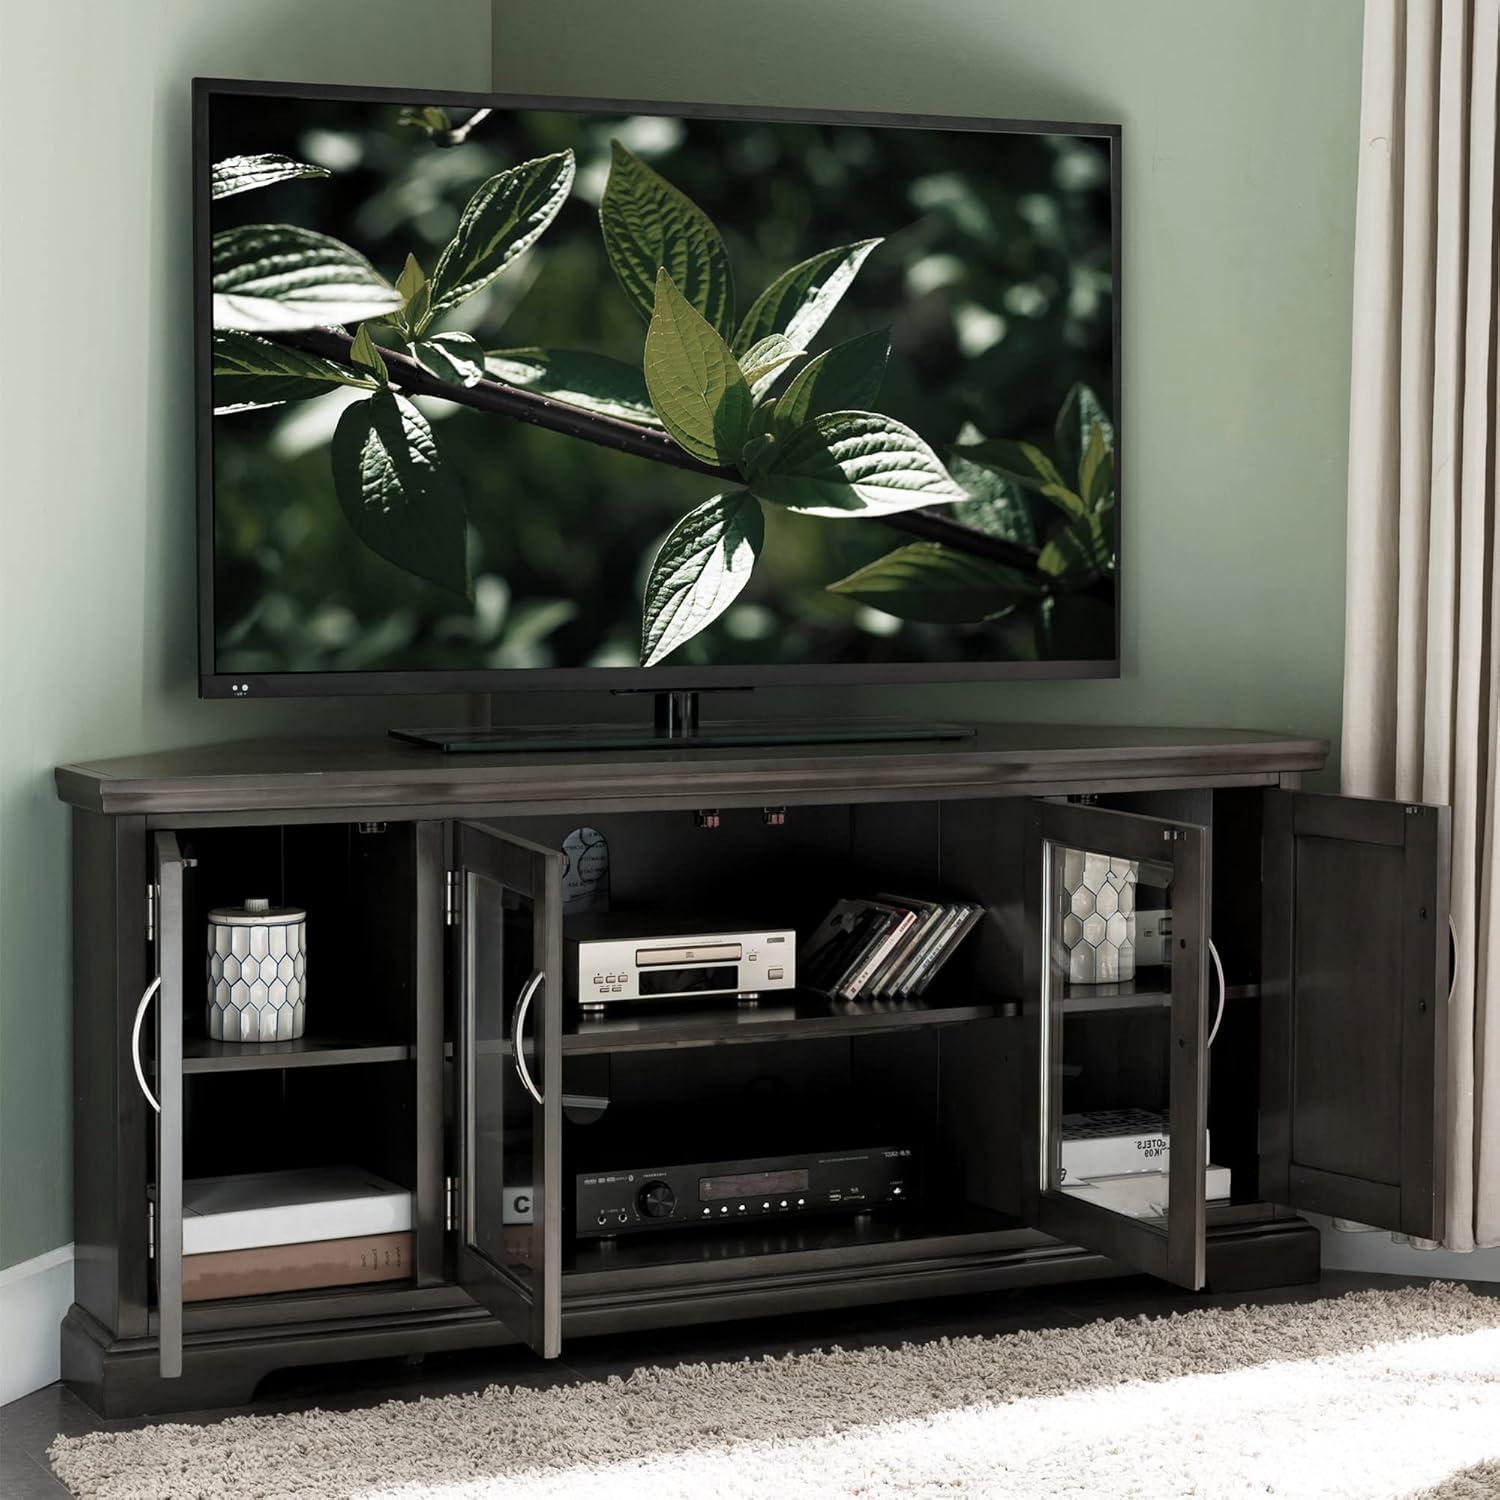
Everyday use and enclosed storage what you can place inside and how doors and shelves operate
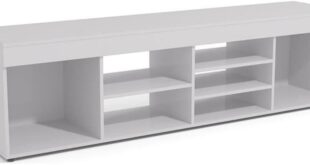
The enclosed compartments tend to behave like a small media closet: swing-open glass-front doors reveal adjustable shelving and a cord-accessible back that keeps devices tidy though not invisible. The doors open with a predictable hinge motion and sit flush when closed; they don’t have an obvious soft-close mechanism, so closing them takes a deliberate motion to avoid a snap. Moving the shelves requires removing whatever is on them and lining up the support pegs — a speedy task but one that frequently enough becomes part of an occasional weekend reorganization rather than a daily habit. With the doors shut, IR remotes may be less reliable unless an external IR repeater or a device with RF is used, and stacking multiple heat-producing components under an enclosed panel can feel constrained without intermittent breaks in use for ventilation.
Common items that fit and how they’re best arranged
- Streaming boxes,small consoles and disc players — placed on open shelves near the perforated back for cable routing.
- Media collections and controllers — stored vertically or in small baskets to keep remotes and cables from tangling.
- Power strips and routers — tucked toward the rear so cords exit through the back panel; airflow should be left uncompromised.
| Item | Placement note |
|---|---|
| Streaming stick/box | Fits on a shelf with direct access to ventilation cutouts |
| Game console (standard size) | Typically fits alone on one shelf; stacking may restrict cooling |
| AV receiver or large components | May be cramped; measure clearance first if planning to store full-size units |
For full specifications and configuration details, see the complete product listing here.
How the stand measures up to your expectations its suitability for typical layouts and real life limitations
In everyday rooms the stand generally behaves like a space-saving corner solution: it tucks into an angle without calling attention to itself but also nudges the screen off-center relative to long seating arrangements, so sightlines and seating placement often shift a bit to compensate. The enclosed doors and adjustable shelving keep components out of view, though accessing certain devices while they are in use can feel slightly fussy as some rearranging or a short pull forward is usually required to reach rear ports. Cable routing works in practice, but larger cable bundles or oversize power bricks tend to need a little extra slack or an intentional gap at the back; that trade-off between a tidy look and quick access shows up in routine use more than in static photos.
| typical layout | Practical note |
|---|---|
| Corner living room | Maintains floor space but frequently enough requires angling seating toward the corner for agreeable viewing. |
| Short wall or alcove | Can visually anchor the room, though the front profile may feel dominant if other furniture is low or asymmetrical. |
| Open-plan area | Helps define a media zone but may force traffic patterns to skirt around the piece if placed near walkways. |
- Sightlines: Angled placement improves corner viewing but reduces a perfectly centered focal point in many rectangular rooms.
- Access: Doors and shelves conceal clutter; occasional shifting is needed to change connections or swap discs.
- Maintenance: Keeping cords tidy usually means planning a little extra slack or periodically pulling the unit out for a quick tidy.
See full specifications and configuration details on the product listing
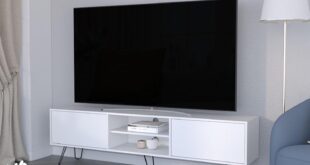
Seeing it in your space how it blends with different decor and TV setups
Placed in a corner, the piece tends to read as a low-profile anchor rather than a focal ornament, especially when surrounding furniture is visually busy. In cooler light the gray finish can look slightly slate-like and more pronounced against pale walls, while warmer lamps soften the tone and let the grain settle into the background. With a wall-mounted television the unit most often reads as an architectural base that organizes the lower visual plane; when a screen sits on the surface the composition feels more layered and substantial. There are moments—late evening with lamps on, or in rooms with a lot of patterned textiles—when it quietly disappears into the room, and others, such as luminous minimalist settings, where its clean lines become an intentional counterpoint.
- Light walls: soft contrast that highlights silhouette without dominating.
- Warm woods: the gray typically cools the palette and balances richer tones.
- Contemporary electronics: creates a cohesive, streamlined grouping around screens.
| TV setup | Typical visual effect |
|---|---|
| Wall-mounted | Functions as a grounded base and concealment zone,letting the screen float visually. |
| TV placed on surface | adds presence to the media area; creates a layered focal point with display and storage. |
| Corner installation | soften angular room geometry and fills peripheral space without crowding the center. |
View full specifications and configuration details on the product listing.
How It Lives in the Space
Over weeks of ordinary use you notice how the stand moves from new-furniture shape to part of the room’s cadence. That quiet shifting shows itself in the Leick Home 84386 Corner TV Stand with Enclosed Storage For 65″ TV’s, Riverstone Gray as it gathers scuffs, holds a lamp or a pile of books, and makes room for where people sit. In daily routines the surface takes small marks of comfort, the doors open with familiar ease, and the corner becomes a background for ordinary evenings. Over time it stays.