decordip Garden and patio decoration inspiration
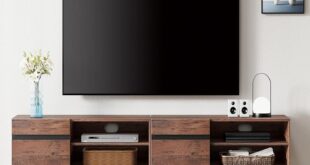
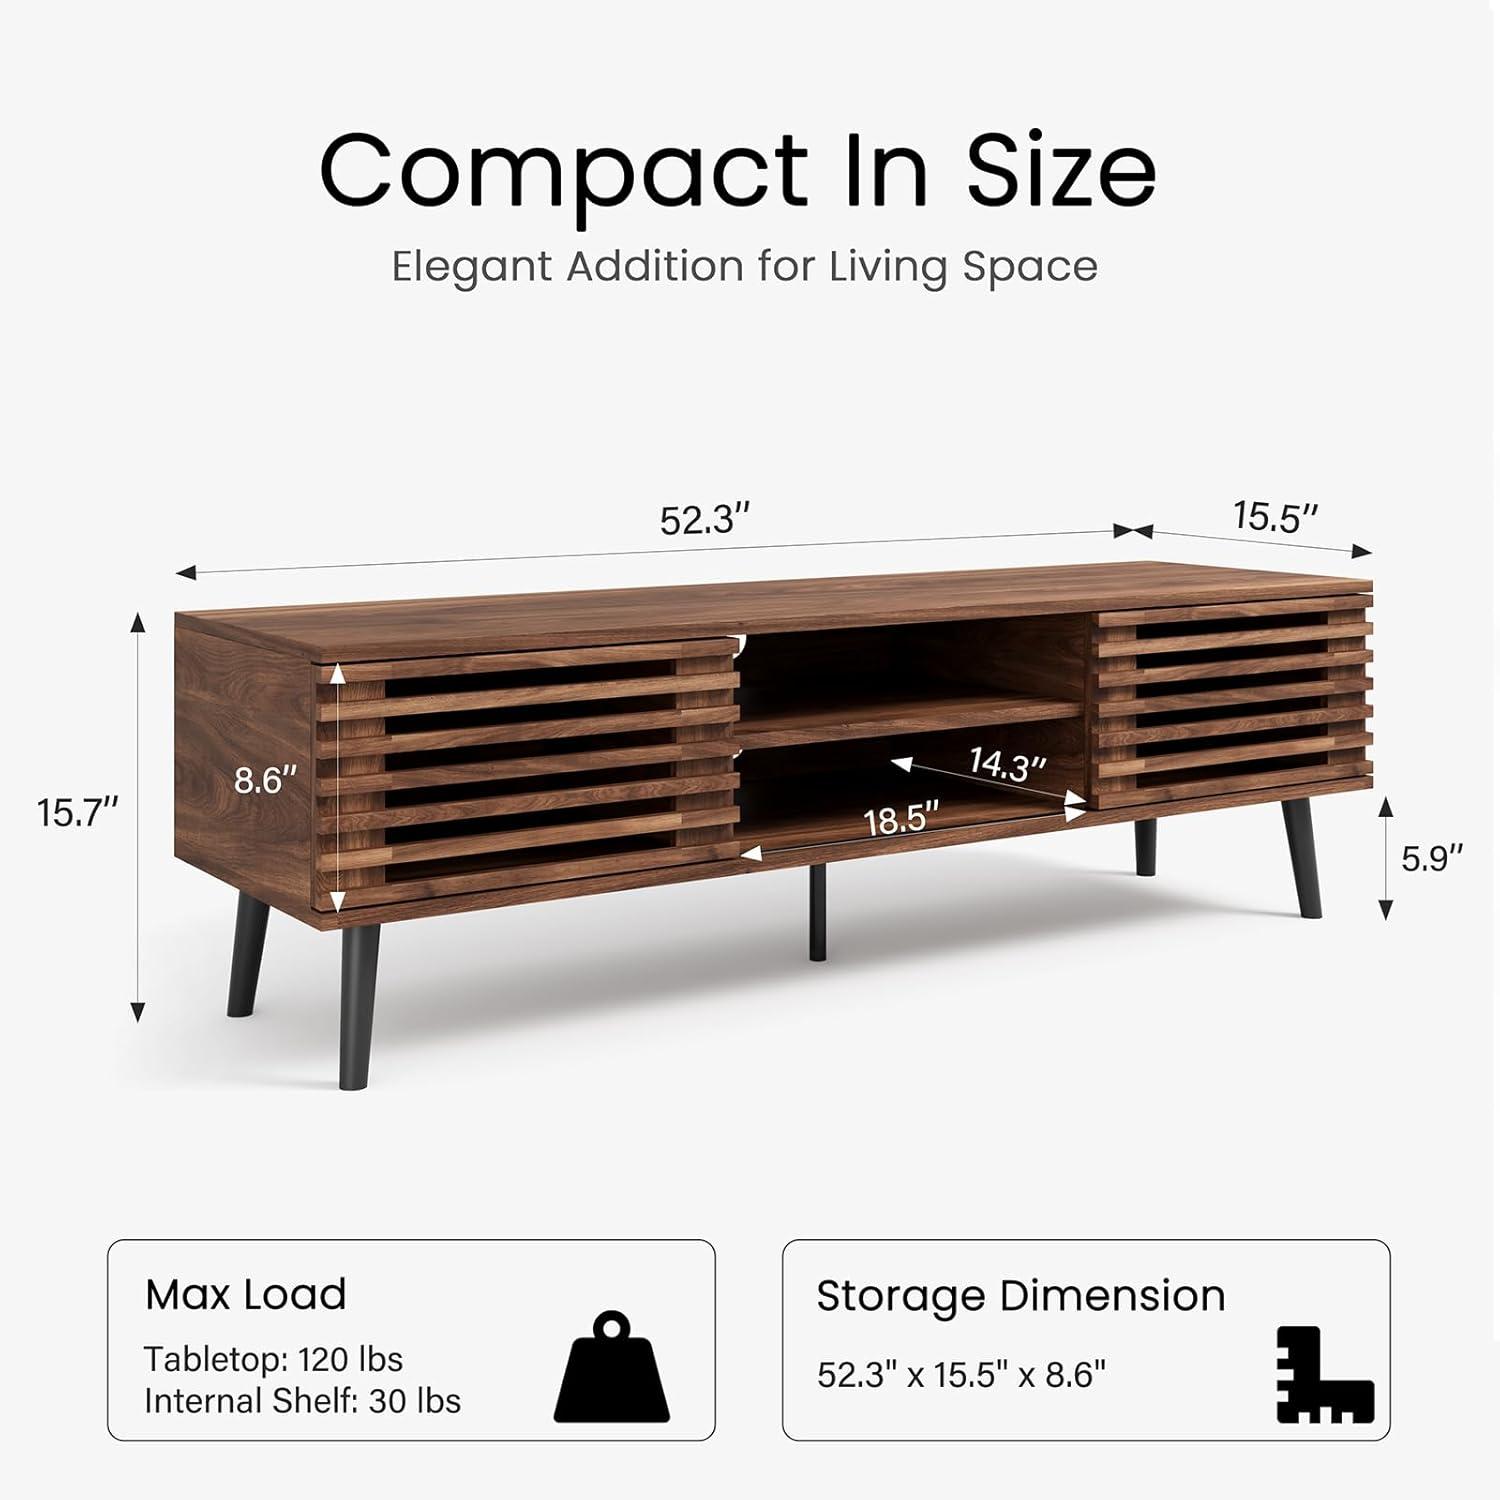
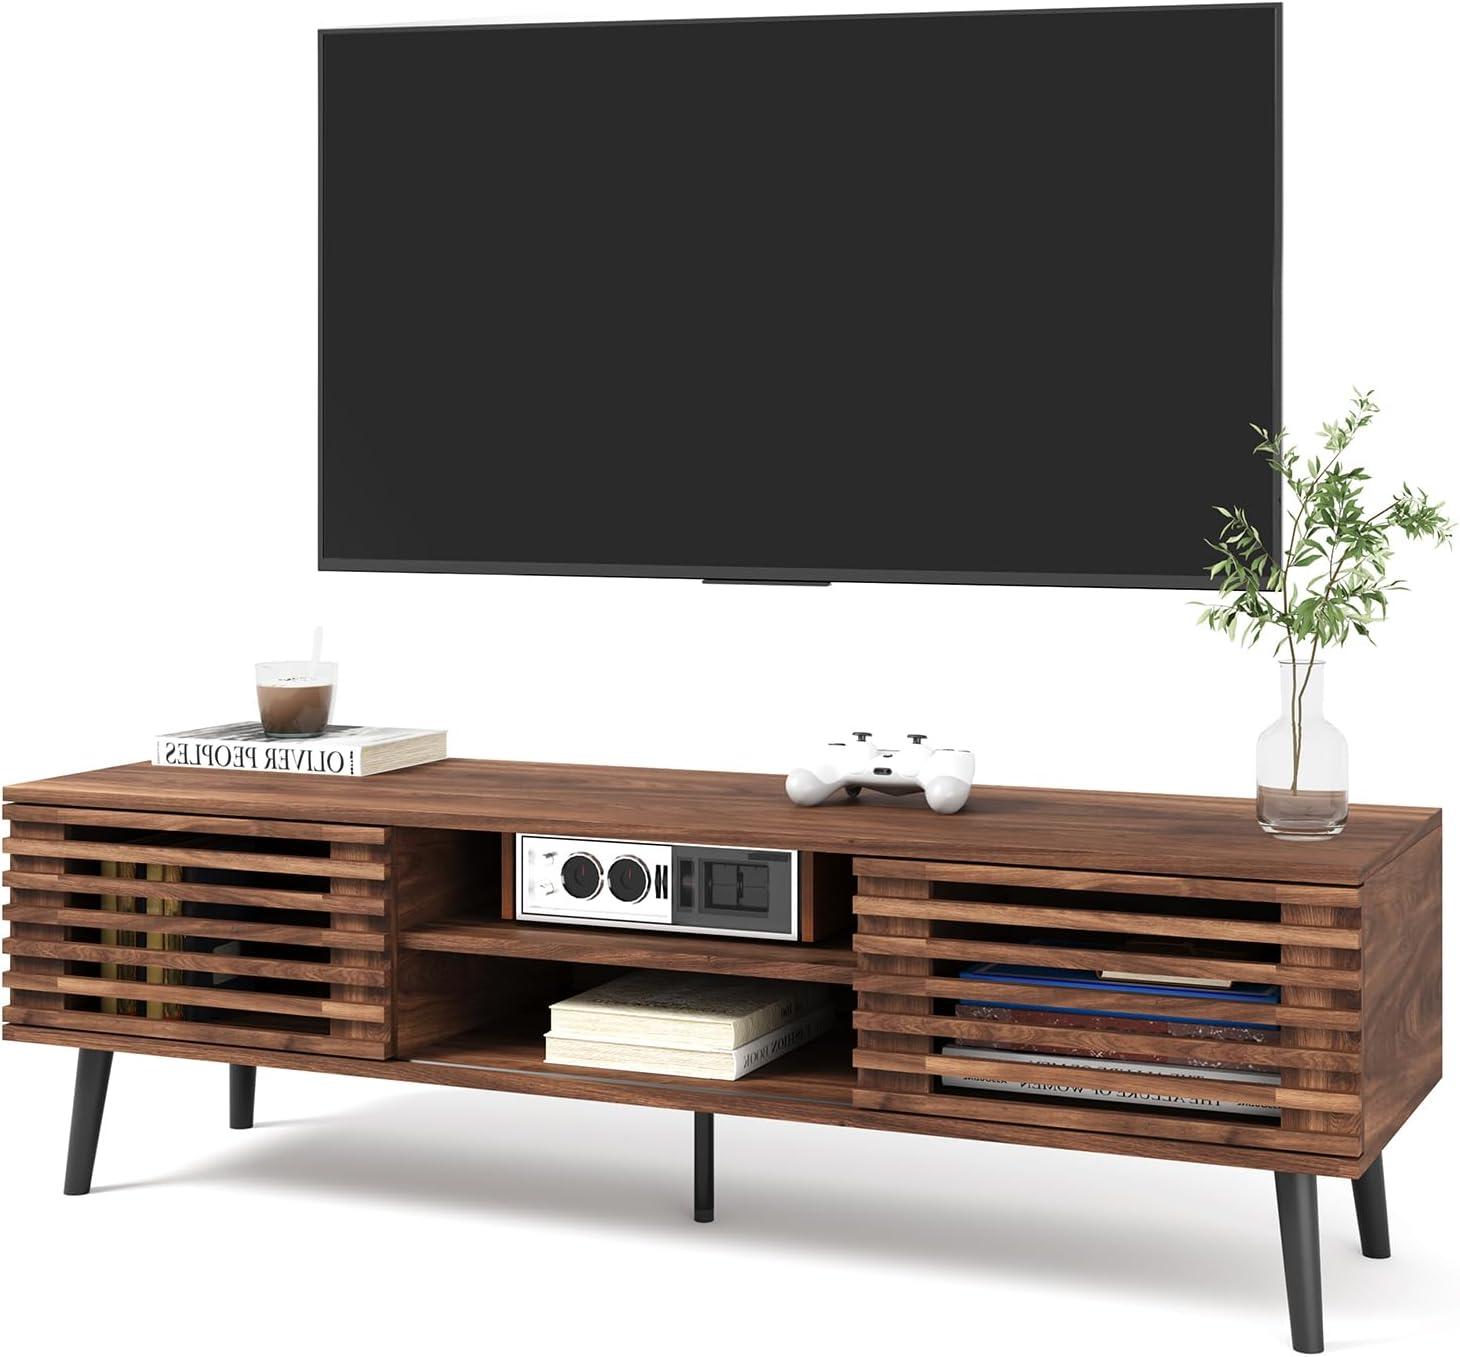
Light skims the walnut grain of the HAIOOU Mid Century Modern TV Stand, throwing the slatted doors into a pattern of thin, shifting shadows across the floor. Up close you notice a slightly textured veneer under your palm adn a reassuring visual weight that sits low in the room without feeling bulky. The black, tapered legs lift the piece just enough for the space to breathe, and the slatted sliding doors glide with a soft, mechanical whisper when you ease them aside. At about 52 inches across, the console reads like a quietly intentional presence—practical details like the adjustable middle shelf and back cutouts reveal themselves as you move things in and out, rather than shouting for attention.
A quick look at the walnut brown mid century TV console and how it fits your living room
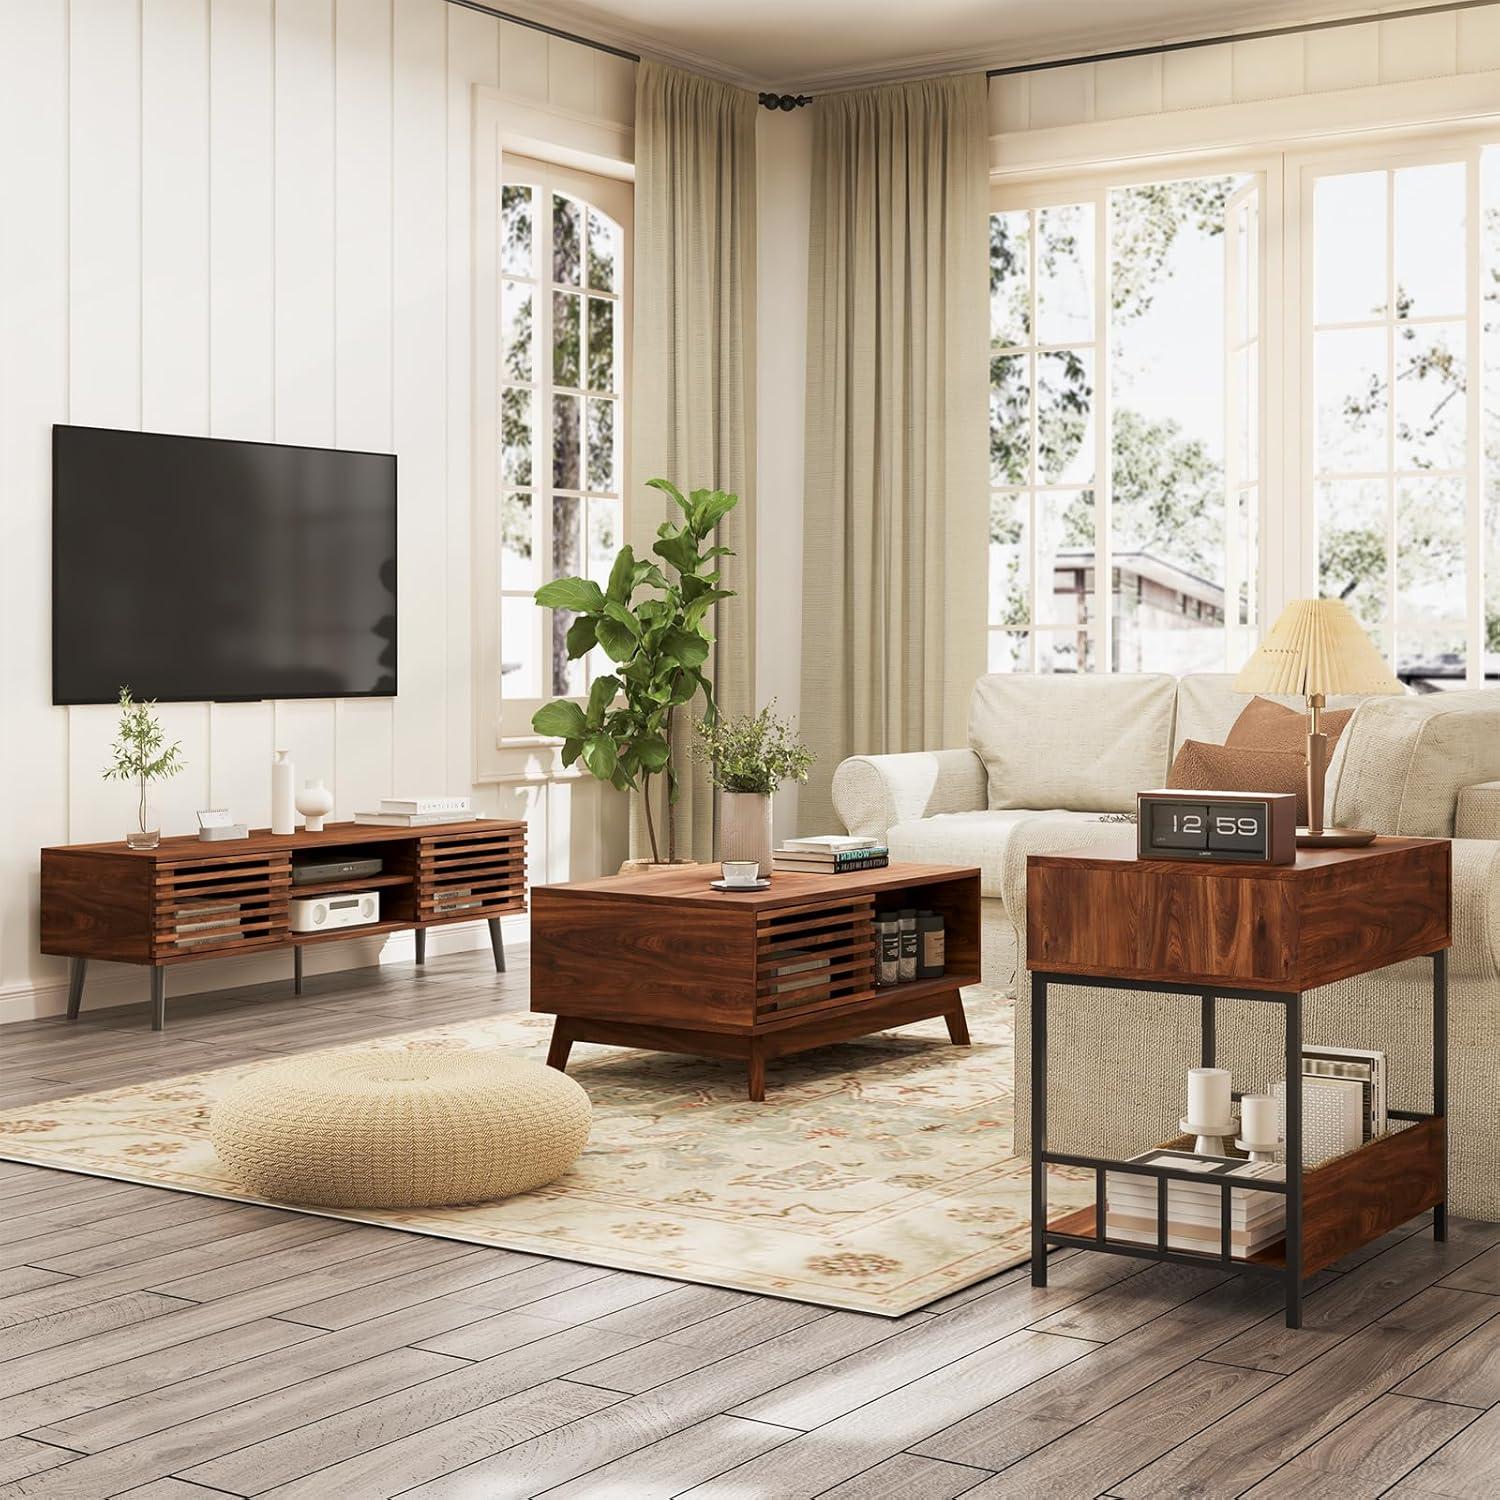
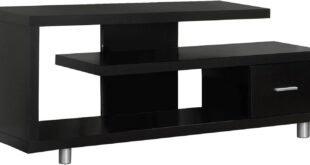
In many living rooms the console reads as a low, horizontal anchor that shapes where furniture gets arranged.Its profile encourages placing seating opposite or slightly angled rather than stacking layers of furniture nearby; that tendency can open circulation paths and make the room feel more intentional. The slatted front and the long top surface create subtle visual lines that break up blank walls, and sliding access options mean adjustment of what’s visible happens casually — a quick nudge rather than a lift — which affects how often compartments are opened during daily routines.One natural trade-off is that the low silhouette leaves vertical space above, so mounting a screen or adding wall art often becomes part of the finished arrangement rather than an afterthought.
Practical fit shows up in small behaviors: electronics and charging cables tend to be routed behind the unit, items brought out for movie night are set on the top, and little rituals like rotating decor or sliding a door halfway to reveal devices become part of regular use. For quick reference, common placement patterns and likely outcomes can be summarized as follows:
- Against a long wall: creates a tidy media axis and defines a viewing area.
- Under a mounted screen: balances vertical emptiness and keeps devices accessible.
- In a narrow room or hallway: can act as a low-profile console but may require slight spacing for door movement.
| Placement scenario | Typical lived effect |
|---|---|
| centered on a focal wall | Feels intentional; encourages symmetrical seating and a tidy cable run |
| Off to one side of a room | Works as a display surface; can create an informal media nook |
For full specifications and configuration details,see the product listing here.
The slatted sliding doors, wood grain and construction details you can inspect
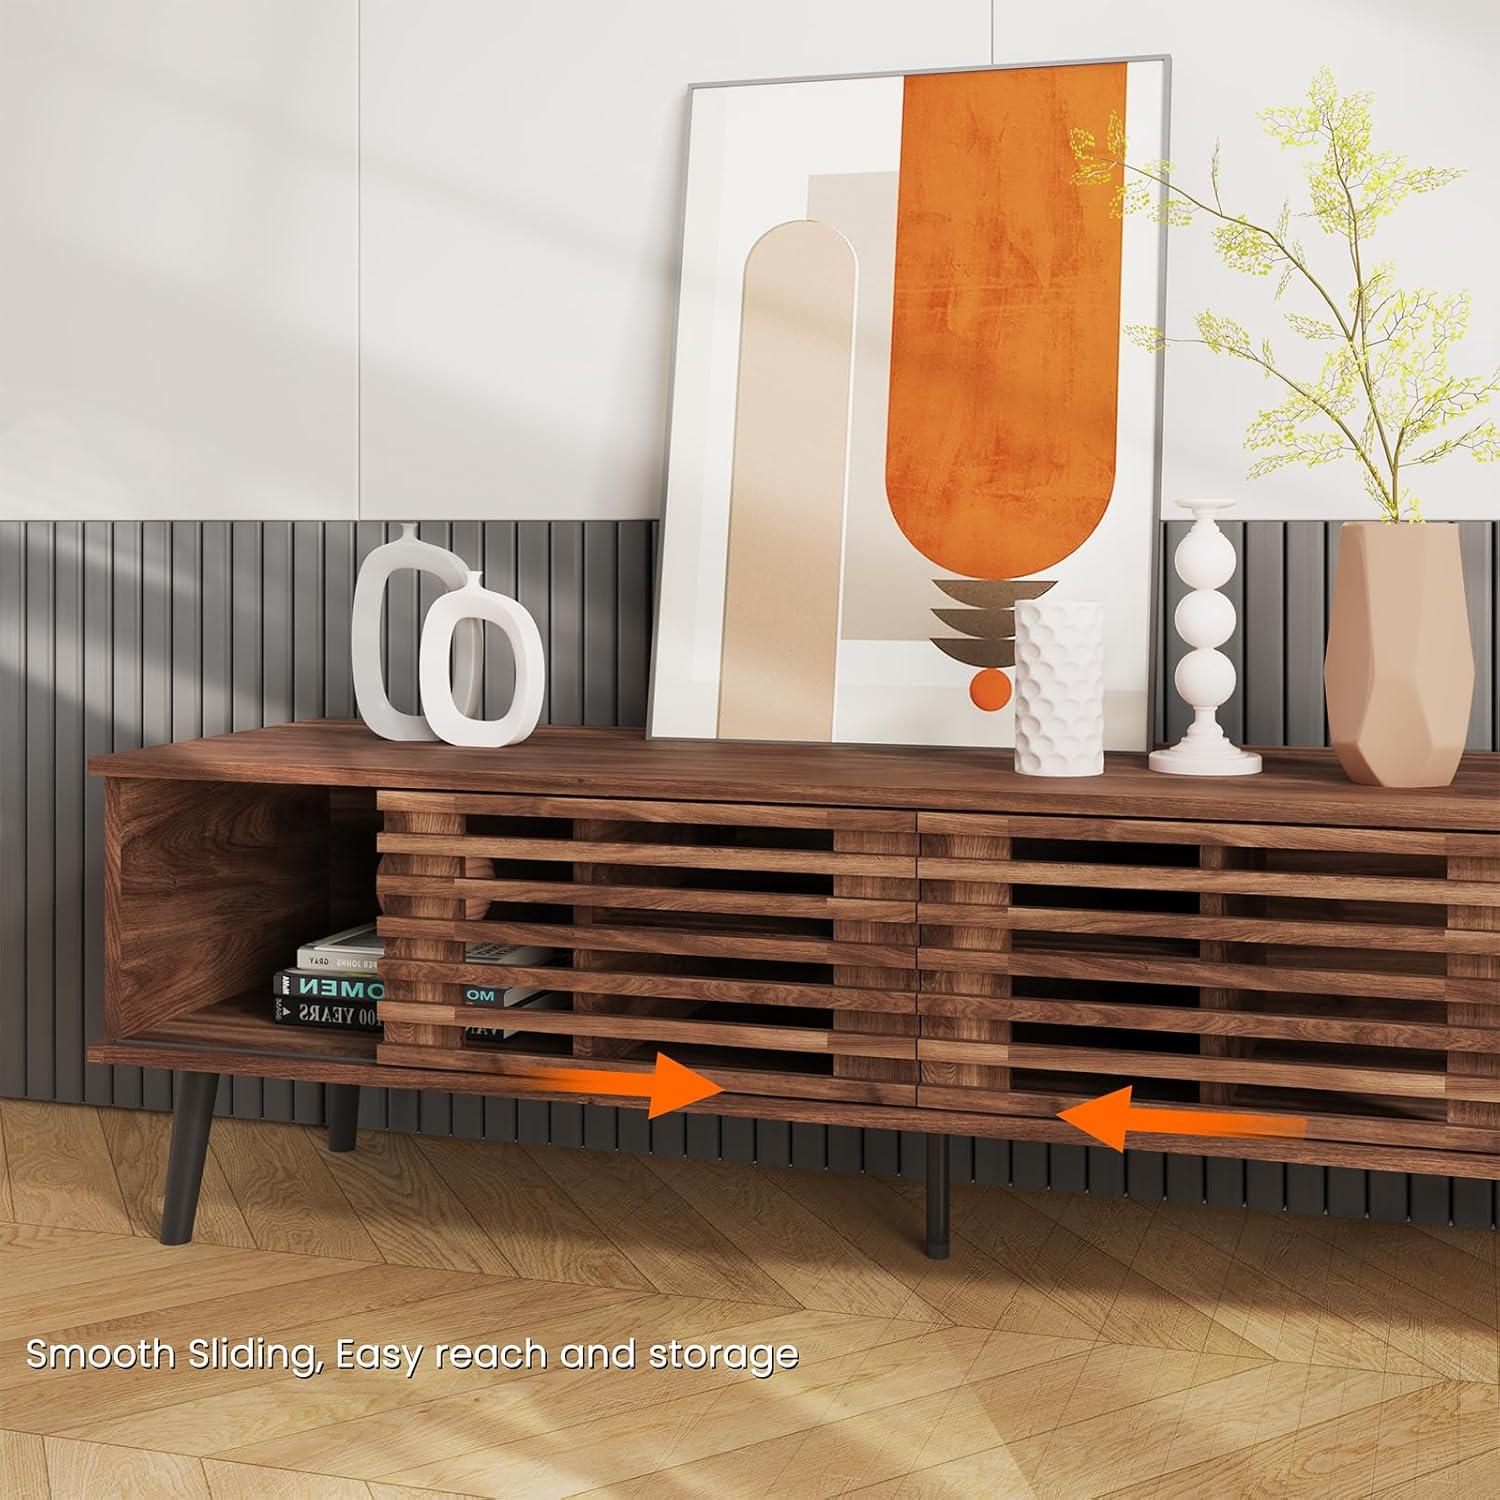
When you run a hand along the slatted sliding doors, the first things that register are movement and surface. The doors glide on a simple rail system and the slats themselves are lightweight enough that a nudge repositions them without fuss; you can hear a soft scrape if the track catches a bit of dust. The spacing between slats lets light and a partial silhouette through, so stored devices or cables are faintly visible when the doors are partially open. Up close, the walnut-toned wood grain reads as a consistent decorative layer: fine streaks and slightly darker knots appear across panels in a repeating pattern, and the finish has a low sheen that softens fingerprints but still shows the direction of the grain.inside and along edges you can spot construction cues — banded veneer at corners, pre-drilled peg holes for the adjustable shelf, and the occasional filled screw indentation — all the little details that tell you how the cabinet went together without opening up a toolbox.
For a quick inspection, a few focused checks reveal most of what the construction will feel like over time. What to look for:
- Door alignment: slide each panel fully to both sides and note any binding or uneven gaps.
- Surface finish: run a fingertip to sense sanding marks,sheen uniformity,and whether the grain pattern repeats.
- Interior joinery: peer at shelf peg fit, visible screws, and how the back panel is secured.
| Area | What you’ll notice |
|---|---|
| Sliding rails | Track position, smoothness of travel, and any looseness at the ends |
| Slat faces | Grain direction, color consistency, and small finish imperfections |
| Edges & joins | Veneer banding, filled holes, and visible fasteners on interior surfaces |
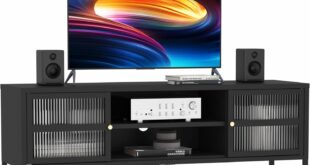
Televisions are sold by diagonal measurement,so the way a set sits on top of a console often surprises people once the panel is in place. Smaller screens such as 32″ and 43″ typically leave a noticeable margin on either side of a modest console surface, while 50″–55″ panels tend to align more closely with a medium-width tabletop and create a more balanced silhouette. A 60″ panel often reaches the visual edges of many medium consoles and can appear flush or slightly overhung depending on the TV’s bezel and stand geometry. The relationship between diagonal size and actual panel width matters most when planning wall space: a wall that looks roomy with a box on paper can feel tighter once the TV’s true width and thin bezels are visible.
Depth and stand footprint affect real-life placement as much as horizontal span. TVs with wide, outboard feet need more tabletop clearance than those with a single central pedestal, and a shallow entertainment surface can leave feet overhanging the edge or force a TV to sit forward of the backboard, changing cable routing and screen height. Common lived patterns include small adjustments to speaker or soundbar placement, shifting the middle shelf height for cable boxes, and nudging the TV a fraction forward or back to hide cords behind slatted doors. Observations worth noting:
- Feet placement: sets with edge-mounted legs usually require extra lateral space beyond the panel width.
- Wall-mounting: wall-mounted panels change the console’s role to a purely storage/visual anchor rather than a direct support surface.
- Soundbar and devices: shallower tops can limit where a soundbar sits; small adjustments to shelf height or device orientation are common.
Below is a quick reference showing how diagonal measurements translate to approximate panel widths for common sizes.
| TV Diagonal | Approx. Panel Width |
|---|---|
| 32″ | ~28 inches |
| 43″ | ~37.5 inches |
| 50″ | ~43.5 inches |
| 55″ | ~48 inches |
| 60″ | ~52 inches |
See full listing and specifications
Storage compartments, shelf arrangement and cable routing in daily use
When you arrange devices and media inside the console, the sliding slatted doors shape how often you interact with each compartment. the middle space with its height-adjustable shelf lets you stack a game console above a streaming box or place a soundbar and remote-kind devices at a convenient eye level; moving the shelf up or down changes how easily you can reach rear ports or swap discs. Sliding a door to one side in the morning and leaving the other closed is a small routine you may fall into — it keeps frequently used gear within reach while hiding less-used items. The two cord openings on the backboard concentrate cables in predictable spots,so you tend to route power and HDMI behind the center or behind each outer bay and then tidy them with a clip or tie; note that ther aren’t integrated grommets,so wires can rub against the board edges unless you add protective sleeves. For quick reference, common placements and typical routing patterns include:
- Adjustable shelf: stacked consoles or a receiver — cables usually run down through the rear hole nearest the unit.
- Lower cubby: power strips and bulkier plugs — these sit low and hide most of the slack.
- Behind sliding doors: remotes and discs — you’ll frequently enough leave a small gap for infrared sensors or run a single extension out to the nearest outlet.
| compartment | Typical use in daily setup | Cable-routing note |
|---|---|---|
| Left bay (behind door) | Occasional devices,storage boxes | route to nearest rear hole; allow some slack for door movement |
| Center bay (adjustable shelf) | Main console(s),streaming boxes | Feeds into central cord hole; power strip placement frequently enough on the floor of the bay |
| Right bay (behind door) | Discs,controllers,small accessories | Use short cables or tie excess to keep ports accessible |
how the console sits in a lived room when you style it,place devices and use it day to day

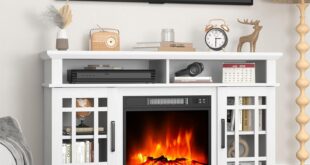
When you style this console in a living room it reads as part furniture, part stage — the tabletop becomes a place to anchor a TV and a few layered objects rather than an expanse that needs filling. Small decorative pieces, a potted plant or two and the occasional stack of magazines tend to cluster toward one side while a soundbar or speaker sits centered under the screen, leaving a narrow strip of usable surface. The slatted doors create a subtle, changing backdrop as you open or close them: left slightly ajar they let the shapes and lights of devices show through, closed they break up reflections and add texture. In everyday life you often find yourself nudging controllers into a shallow tray, balancing a charging phone against a corner, or shifting a plant when a guest leans on the console — little adjustments that become part of the routine.
Day-to-day use highlights practical habits as much as design. The adjustable inner shelf means devices get rearranged more than once — a game console moved forward for access, a streaming box tucked back to avoid cables — and the two rear access holes generally keep cords routed behind the cabinet though cords still collect and require occasional tidying. The sliding doors let you hide a jumble quickly, but they also tend to be used as a quick-access flap when you reach for a disc or controller; the slats can collect dust in narrow grooves and get a quick brush now and then. Below is a simple snapshot of how devices commonly sit within the unit in typical setups:
| Device | Typical placement and behavior |
|---|---|
| soundbar / Speaker | centered on top or directly beneath the TV, left visible for remote line-of-sight |
| Streaming box / Console | Tucked on adjustable shelf, moved forward for inserts and airflow |
| Routers / Small hubs | Placed toward a rear corner to keep antennas clear and cables behind |
how the console measures up to your space and needs and where constraints become apparent
The console tends to sit low and unobtrusive, which changes how an AV setup is arranged around it: screens read as anchored, seating lines up closer, and wall art above it falls into a tighter visual band. As the back panel includes cutouts for cables, placement right up against a wall is frequently enough practical, though the shallow footprint can make placing deep receivers or oversized speakers awkward — those components may protrude or require external shelving.The pair of slatted sliding doors produce a partly open feel even when closed; that affects how hidden the storage really is and how well remote signals and ventilation behave when components are tucked away. Small real-world habits show up quickly (sliding one door open to reach a game controller, nudging the console a few inches for cleaning, or angling a component to clear a leg) and reveal where the design is flexible and where physical limits appear.
A few common spatial observations tend to repeat across different rooms and setups:
- Close-to-wall routing generally keeps cables tidy but can leave little room for oversized power bricks
- Slatted doors allow partial visibility and airflow,while also collecting dust between slats over time
- Low-profile height changes sightlines and can require slight reclustering of seating or decor
| placement scenario | What to expect |
|---|---|
| Against a solid wall | Neat cable routing and compact footprint; limited rear clearance for large adapters |
| Beneath wall-mounted TV | Tight vertical banding; sliding doors offer quick access but not full-width simultaneous access |
| Corner or angled setup | Visual balance changes; one sliding door may be easier to operate than both |
Minor adjustments — shifting a box a couple inches,angling a speaker,or routinely dusting slats — often become part of daily use rather than one-off fixes. full specifications and current configuration details can be found on the product page: See full product listing
Assembly, hardware and surface care notes you notice while setting it up and maintaining it

When you open the box, the first thing that stands out is how the parts and fasteners are bagged and labeled — that packaging makes laying everything out more straightforward than it otherwise would be. The instruction booklet pairs diagrams with part codes,and you’ll notice most holes are pre-drilled and line up without forcing the panels. The sliding door rails need a little patience: the slatted panels are light, so they glide easily once seated, but getting the track alignment right can require small nudges and a couple of trial slides. During the initial build you’ll probably tighten cam locks and screws firmly, then back off slightly to allow the doors and shelf to settle; after a day or two it’s normal to revisit a few fasteners and snug them again as the joints settle into position.
- Labeled hardware — small bags with matching codes make inventory simple, but some screw heads look very similar so double-check the part numbers.
- Common tools used — a Phillips screwdriver and a rubber mallet are usually sufficient; an electric driver speeds things up but use low torque near cam fittings.
- Adjustment points — the middle shelf peg positions and door track alignment are where minor tweaks are most often needed after the initial assembly.
As you live with the piece, surface and hardware care become routine. Light dusting with a microfiber cloth keeps the walnut-toned finish even; the slatted doors in particular trap fine dust between grooves, so an occasional soft-bristled brush or compressed-air puff helps more than vigorous rubbing. Avoid saturating surfaces — pooling water or heavy sprays will darken edges and can lift veneer over time. Fasteners will loosen slowly with household vibration and use, so checking screws and the door track after the first week and then periodically afterward is a common maintenance habit.
| Cleaner type | Notes |
|---|---|
| Dry microfiber cloth | Safe for daily dusting; gentle on finish and slats. |
| Mild diluted dish soap | Use sparingly for sticky spots; wipe with a damp cloth and dry immediately. |
| Abrasive or solvent cleaners | Tend to dull or strip the finish and are best avoided. |
How It Lives in the Space
You find that, over time, the HAIOOU mid Century Modern TV Stand becomes less a new arrival and more a steady part of the room’s cadence. In daily routines it gathers small signs of use — a faint ring, a paperback left for later, the soft habit of sliding doors as you reach for the remote — and those traces make it feel lived in rather than displayed. The way you move around it, how seating settles and the surface collects the day’s ordinary items, folds it into familiar household rhythms. After a while it simply stays.