decordip Garden and patio decoration inspiration
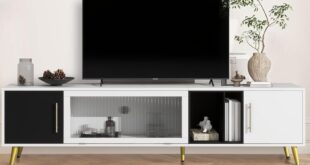
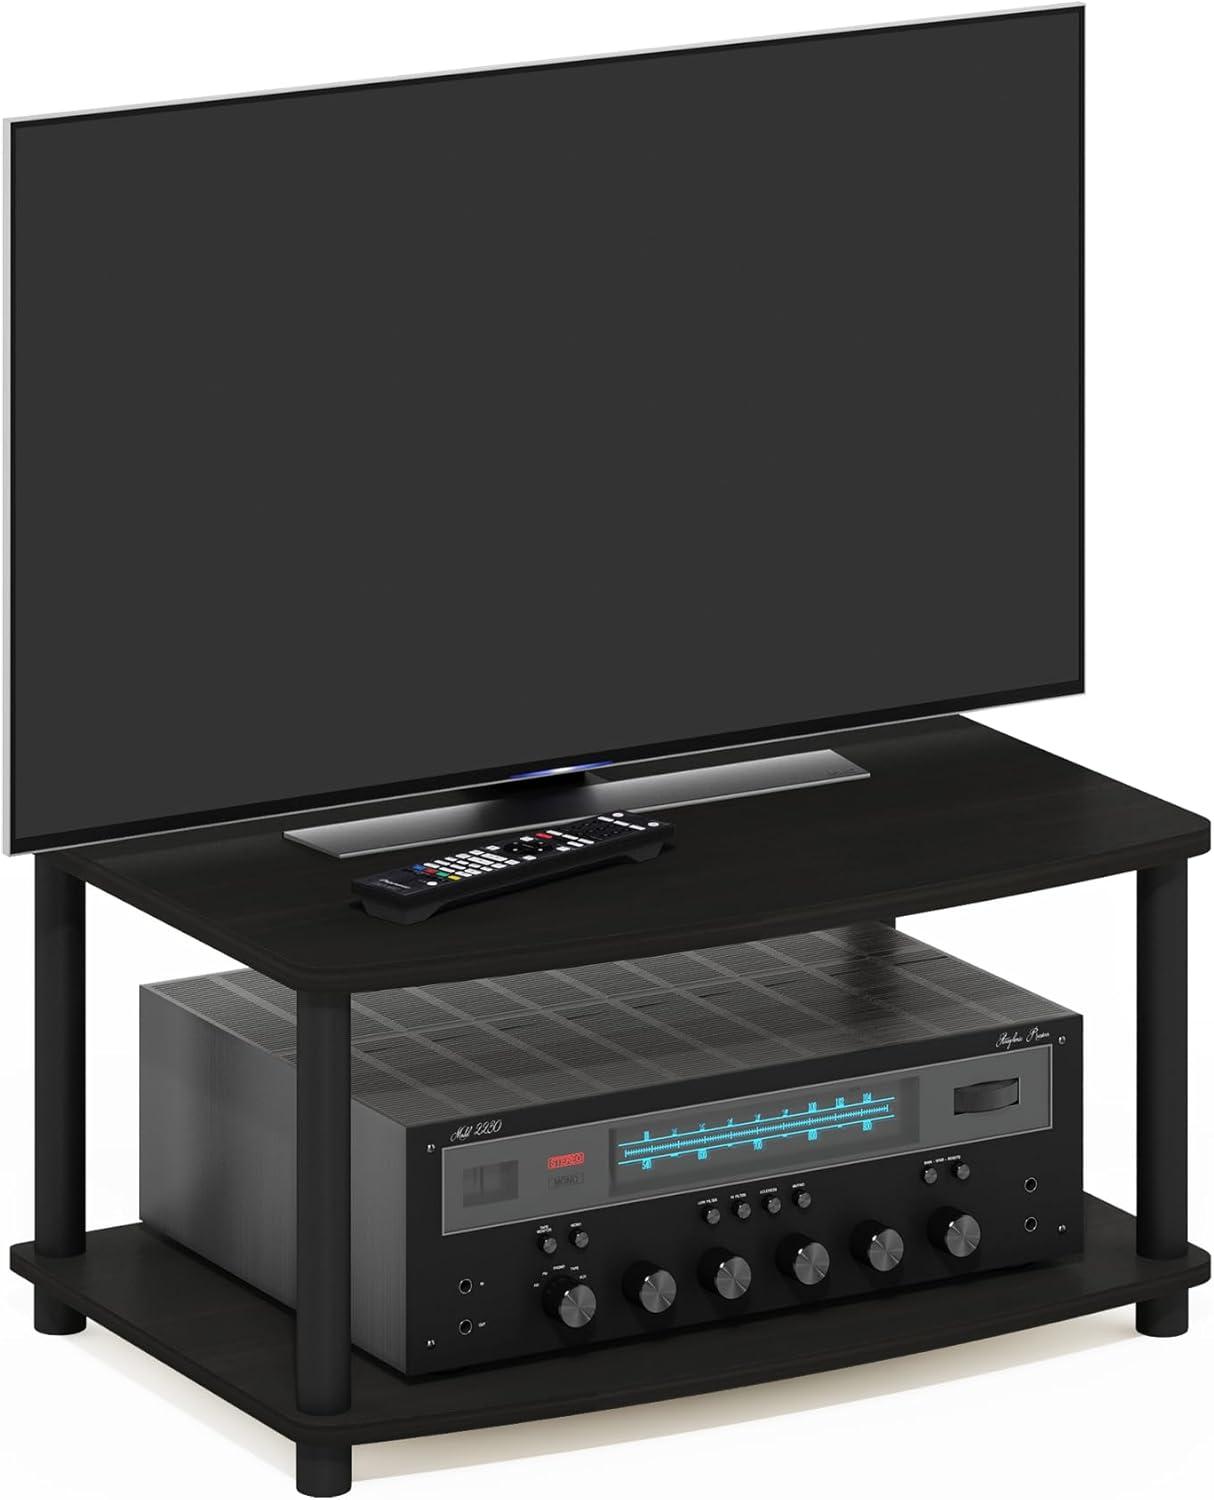
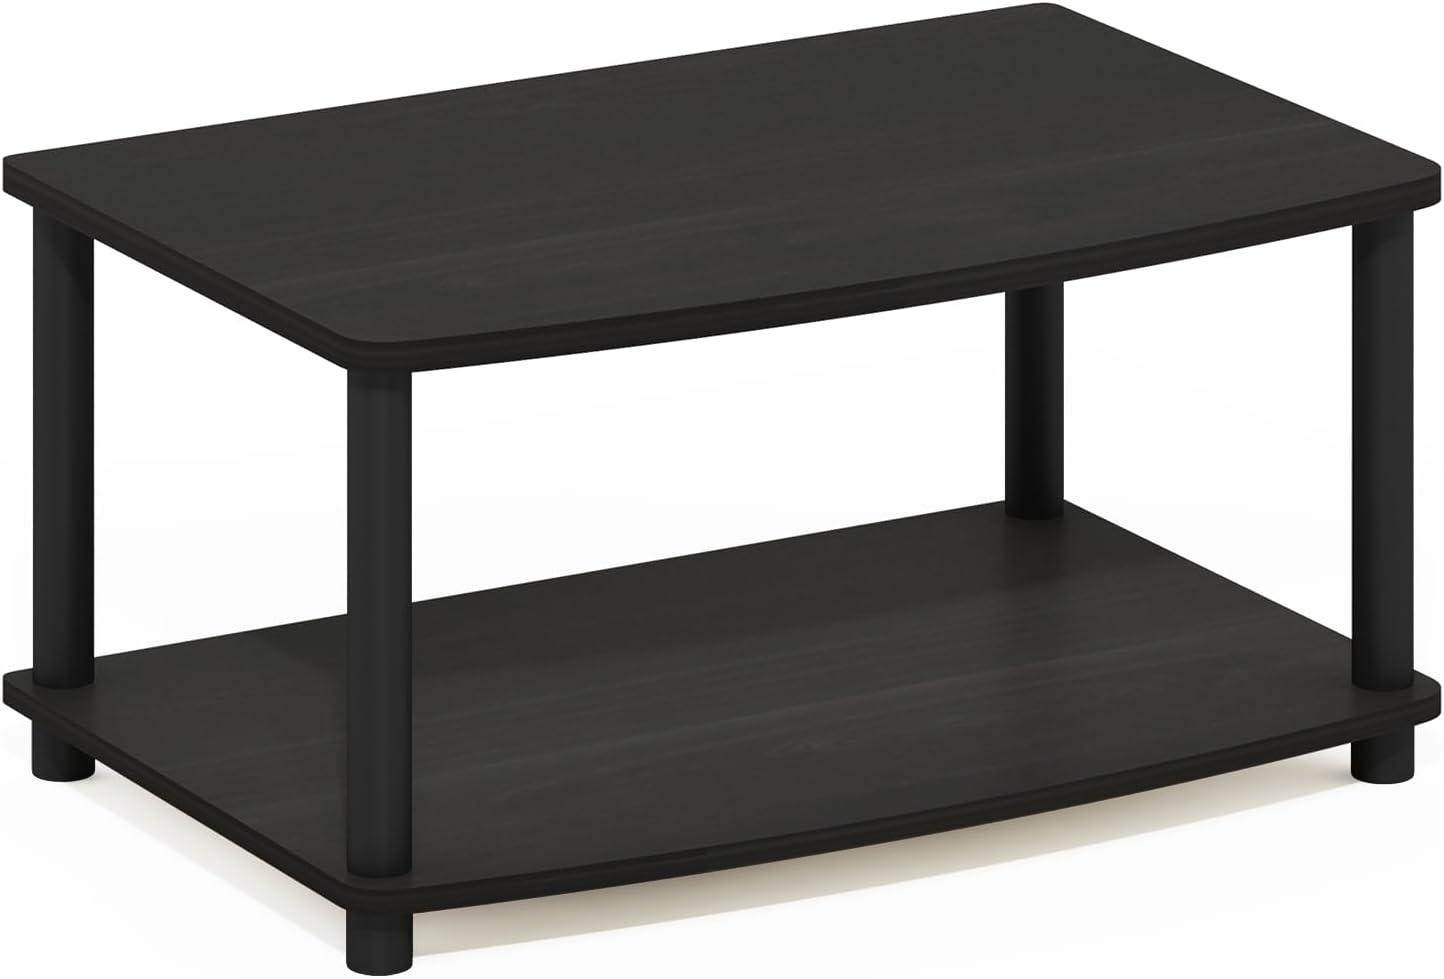
You set your palm on the low platform of the Furinno TURN-N-TUBE TV Riser Stand and the piece reads as quietly practical rather than flashy. In the room’s light the espresso laminate shows a subtle grain, and the plastic tubes under the corners give a slightly airy, engineered feel when you bump the stand. The two-tier silhouette keeps the screen sitting just above eye level, while the lower shelf takes on the look of a small, useful stage for a streaming box and a stack of remotes. Up close the edges are rounded and the surface feels cool and clean under your hand—an immediate impression of modest scale and unfussy materials that settles into the space.
A first look when you open the box and place the riser in your space
When you lift the lid and set the riser onto your table or entertainment surface, the first thing that hits you is the small, deliberate presence it creates — a low, flat plane that sits quietly rather than shouting for attention. Unpacking tends to be quick: parts are easy to orient and, once in place, your eye promptly notices a few practical things about how it occupies the area.
- Footprint: it leaves a neat rectangle of cleared surface around electronic gear and decor.
- Profile: the riser’s low height keeps sightlines open rather than blocking a window or wall art.
- Shelf visibility: the lower shelf is visible from the front, so whatever you put there becomes part of the room’s foreground.
These small impressions shape how you start to reposition nearby items — nudging a lamp an inch left, angling a router so cords fall more naturally behind the unit, or sliding the riser a few centimetres to centre it under the television.
Once placed, you notice how little shifting is required to make it feel “right” on the surface: a couple of tiny adjustments and it sits flush, aligned with other furniture edges and the room’s visual rhythm. From different vantage points the riser reads differently — from across the room it’s a subtle elevation; up close you see the negative space beneath the top shelf and how that space organizes small devices and remotes. The act of placing it also surfaces practical,everyday habits: you tend to tuck cables toward the back,test the remote range,and leave a small clearing for quick dusting.
| View | Immediate observation |
|---|---|
| Front | Clean, horizontal line across the tabletop; lower shelf content is visible |
| Side | Low-rise silhouette that preserves sightlines and keeps the surface feeling open |
How the espresso finish and compact two tier silhouette sits in your room
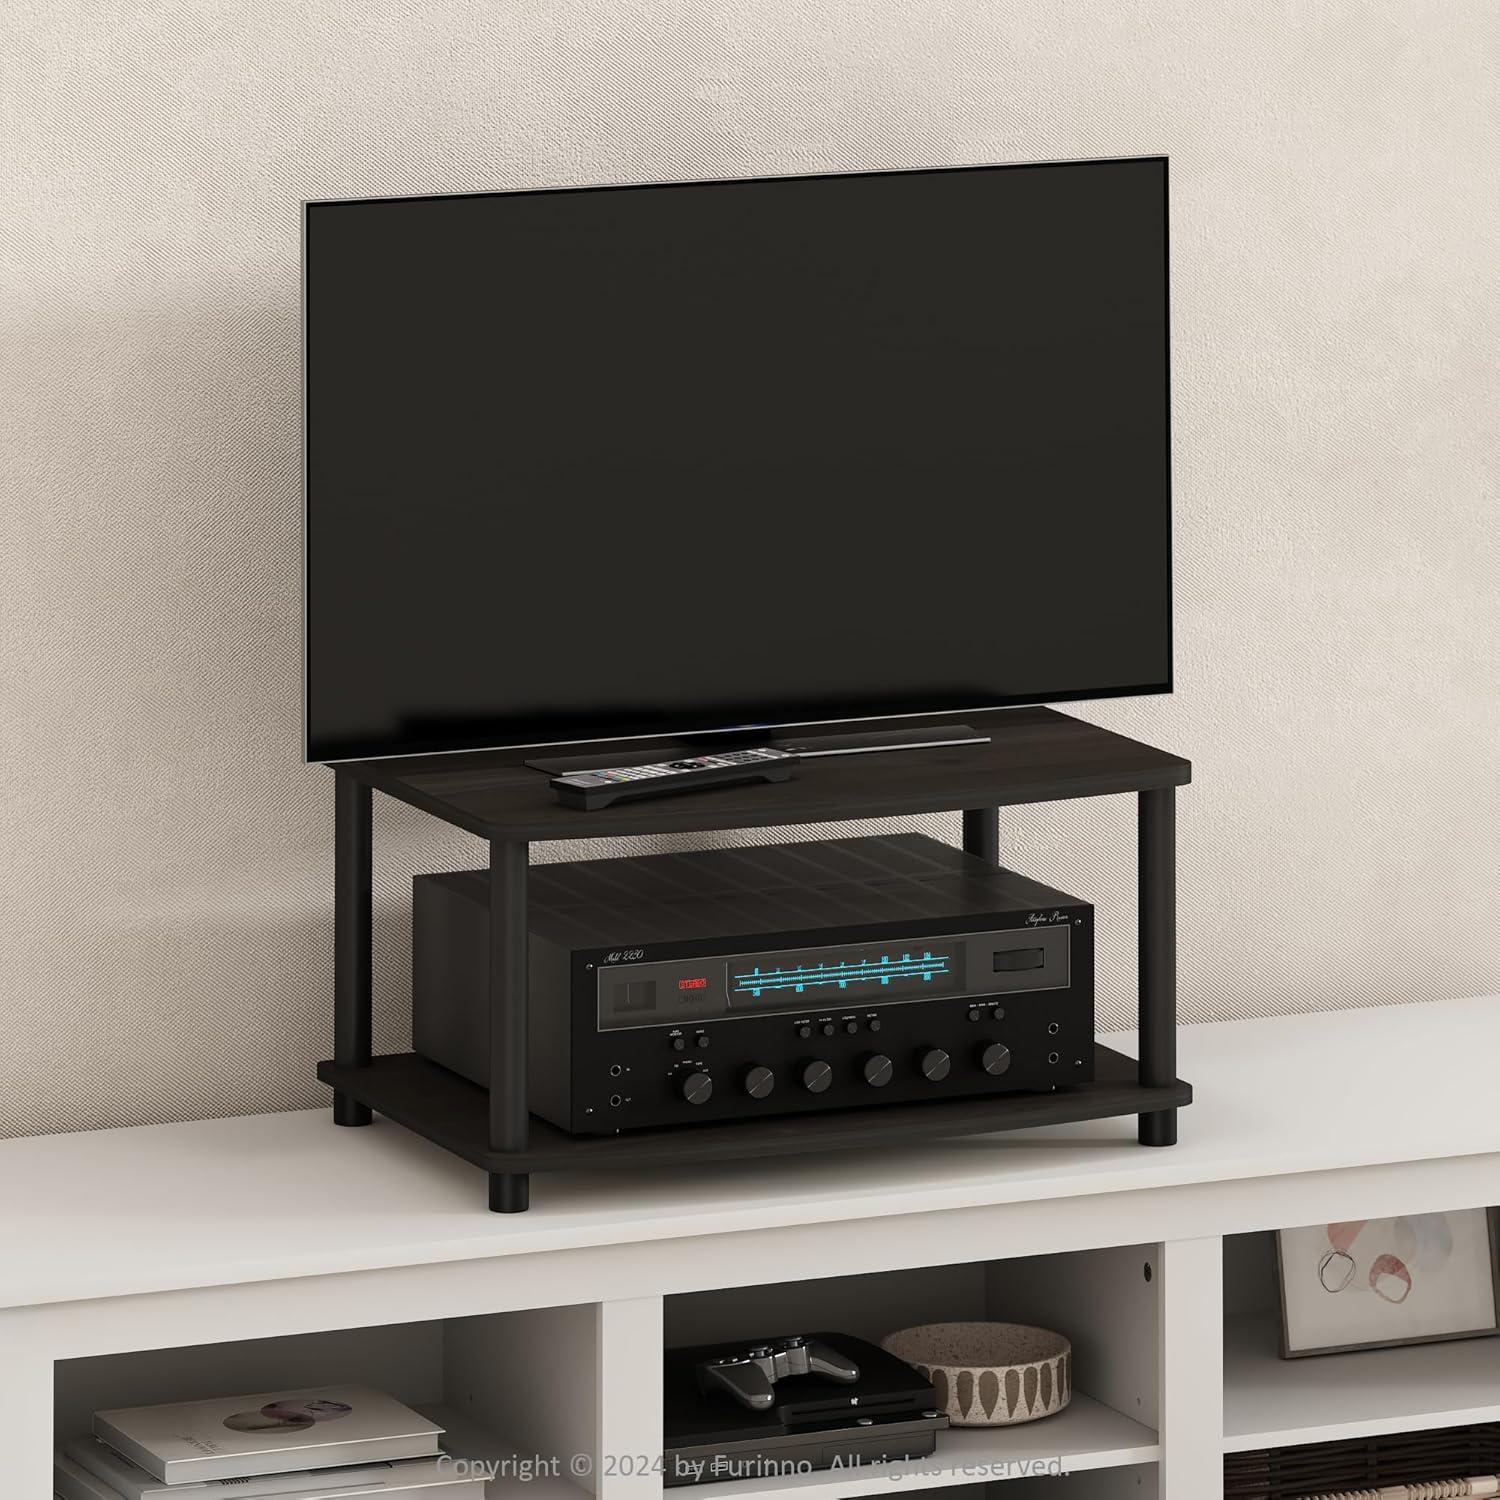
The espresso finish often reads as a quiet, grounding element in a room: it absorbs light along the lower edge and throws the eye to the horizontal plane rather than up. When you glance across the seating area the two-tier silhouette behaves like a low visual anchor,creating a neat break between floor and wall without demanding vertical attention. Around other surfaces the finish can either pick up warm undertones from nearby lamps or sink into shadow in dimmer corners; those shifts happen gradually as daylight moves through the space, and you may find yourself nudging decorative items or a plant onto the top shelf to catch the light in different ways. Visual cues
- Against pale walls the espresso creates clear contrast and frames small electronics or décor as darker silhouettes
- Next to other wood tones it tends to read as a complementary depth rather than a match
- Under soft lighting the finish softens; under bright, cool light it can look closer to a near‑black band
The compact two‑tier profile sits low enough to stay out of the main sightline, which means it often becomes part of everyday habits — slipping remotes onto the lower shelf, angling the unit slightly to line up with a rug pattern, or tucking it a half‑step closer to the wall when you sweep the floor. In most rooms the silhouette creates a short horizontal plane that makes small displays feel intentional rather than cluttered, though its darker tone can also show dust or light scuffs more quickly than lighter finishes. The table below sketches how typical lighting conditions tend to change the way the finish registers in a room.
| Lighting | How the finish reads |
|---|---|
| Bright, indirect daylight | Richer brown with visible depth and subtle highlights |
| Warm lamp light | Chocolate tones soften edges and warm surrounding colors |
| Low or cool light | Appears as a near‑black horizontal band, receding into the background |
Materials up close — PVC tubes, particleboard surfaces, and the hardware free assembly
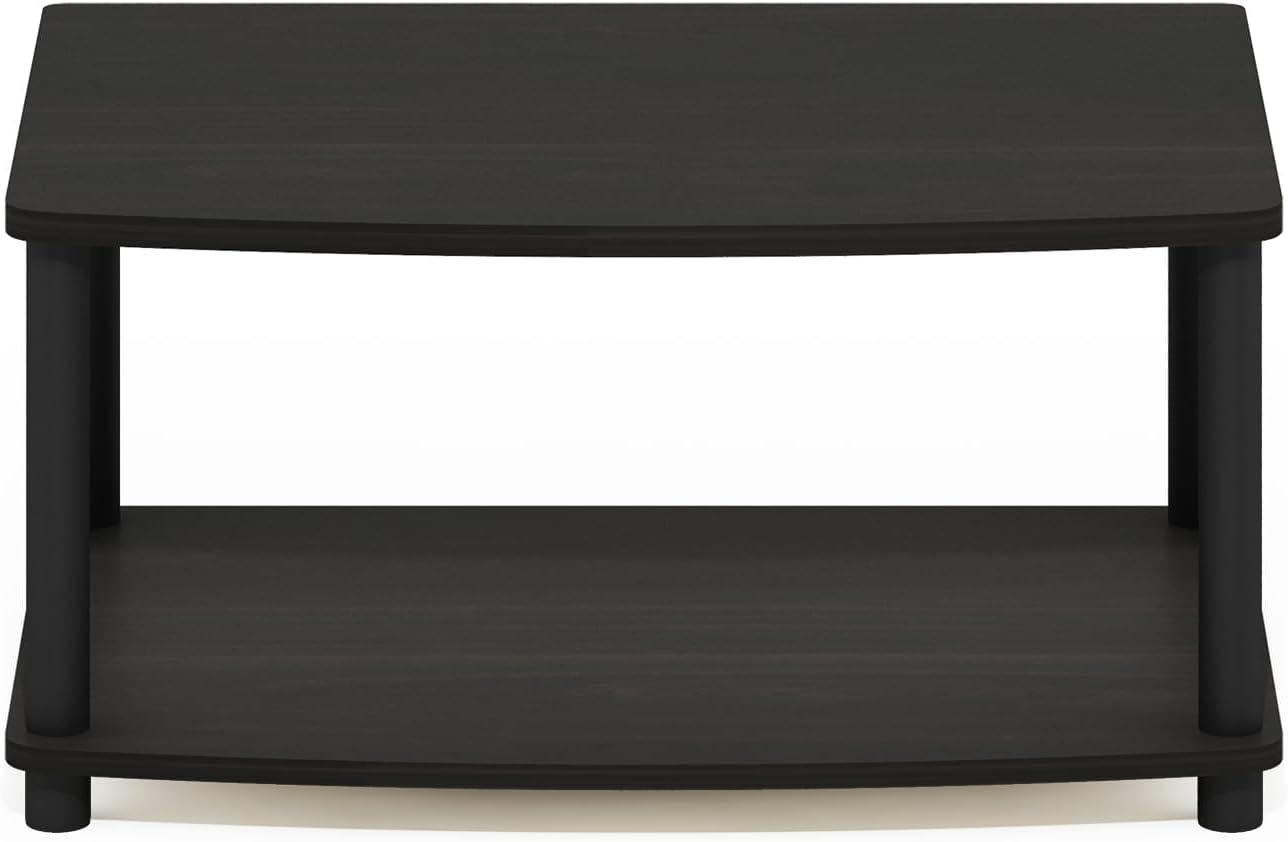
Up close, the unit reads as a mix of smooth laminated board and matte plastic. The PVC tubes have a slightly chalky finish and a hollow weight that becomes obvious when you lift a leg to slide it into place; they make faint clicking sounds as they seat into the shelf holes. Where the tubes meet the particleboard you can see the lamination wrap and the circular cutouts; the fit is mostly snug but there are small seams and paint joins that show if you crouch and look along the edge. The horizontal surfaces are finished particleboard — the top layer feels like a thin veneer over compressed core, so spills bead differently than on solid wood and the surface shows dust and fingerprints in a way that catches the eye under soft lighting.
The hardware‑free assembly is apparent from the first carton: labeled plastic tubes, predrilled panels, and a handful of dowel-like connectors. In practice the pieces stack together with a simple push-and-twist; a small, dull thump with the palm or a brief shimmy of the tube into the hole usually settles things. Observations that tend to come up while working through the setup:
- plastic-to-board friction is the main locking mechanism, so a little patience lining the holes makes a difference;
- the particleboard edges reveal the core where cutouts are made, which can snag fabric if you brush past while moving the assembled unit;
- once assembled, the joins allow tiny rotational play until all parts are seated and the weight is distributed.
| Component | Visible characteristics in use |
|---|---|
| PVC tubes | Hollow, lightweight, matte finish; friction-fit connection points; audible seating clicks |
| Particleboard surfaces | Laminated veneer look, thin edge seams at cutouts, shows dust and fingerprints differently than solid wood |
| Assembly method | Tool-free push/twist fitting; small amounts of wiggle until fully seated and loaded |
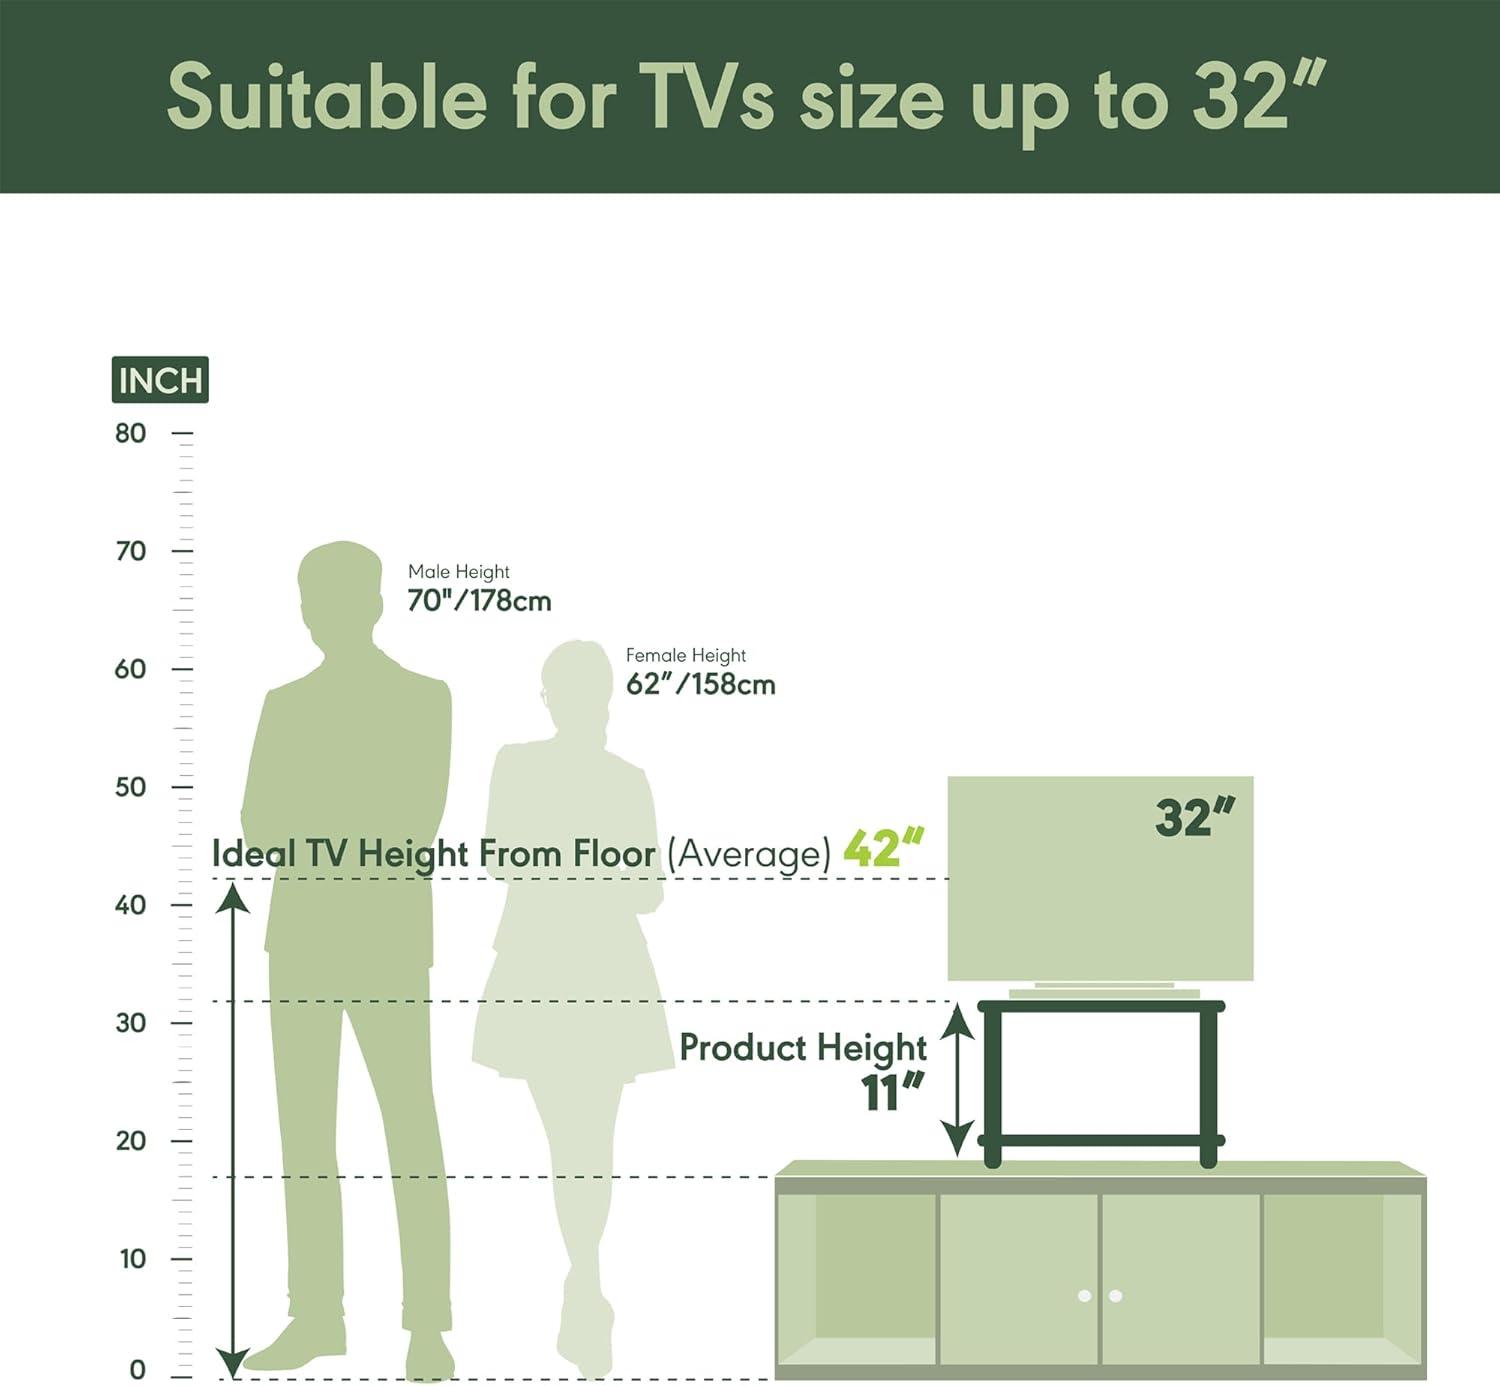
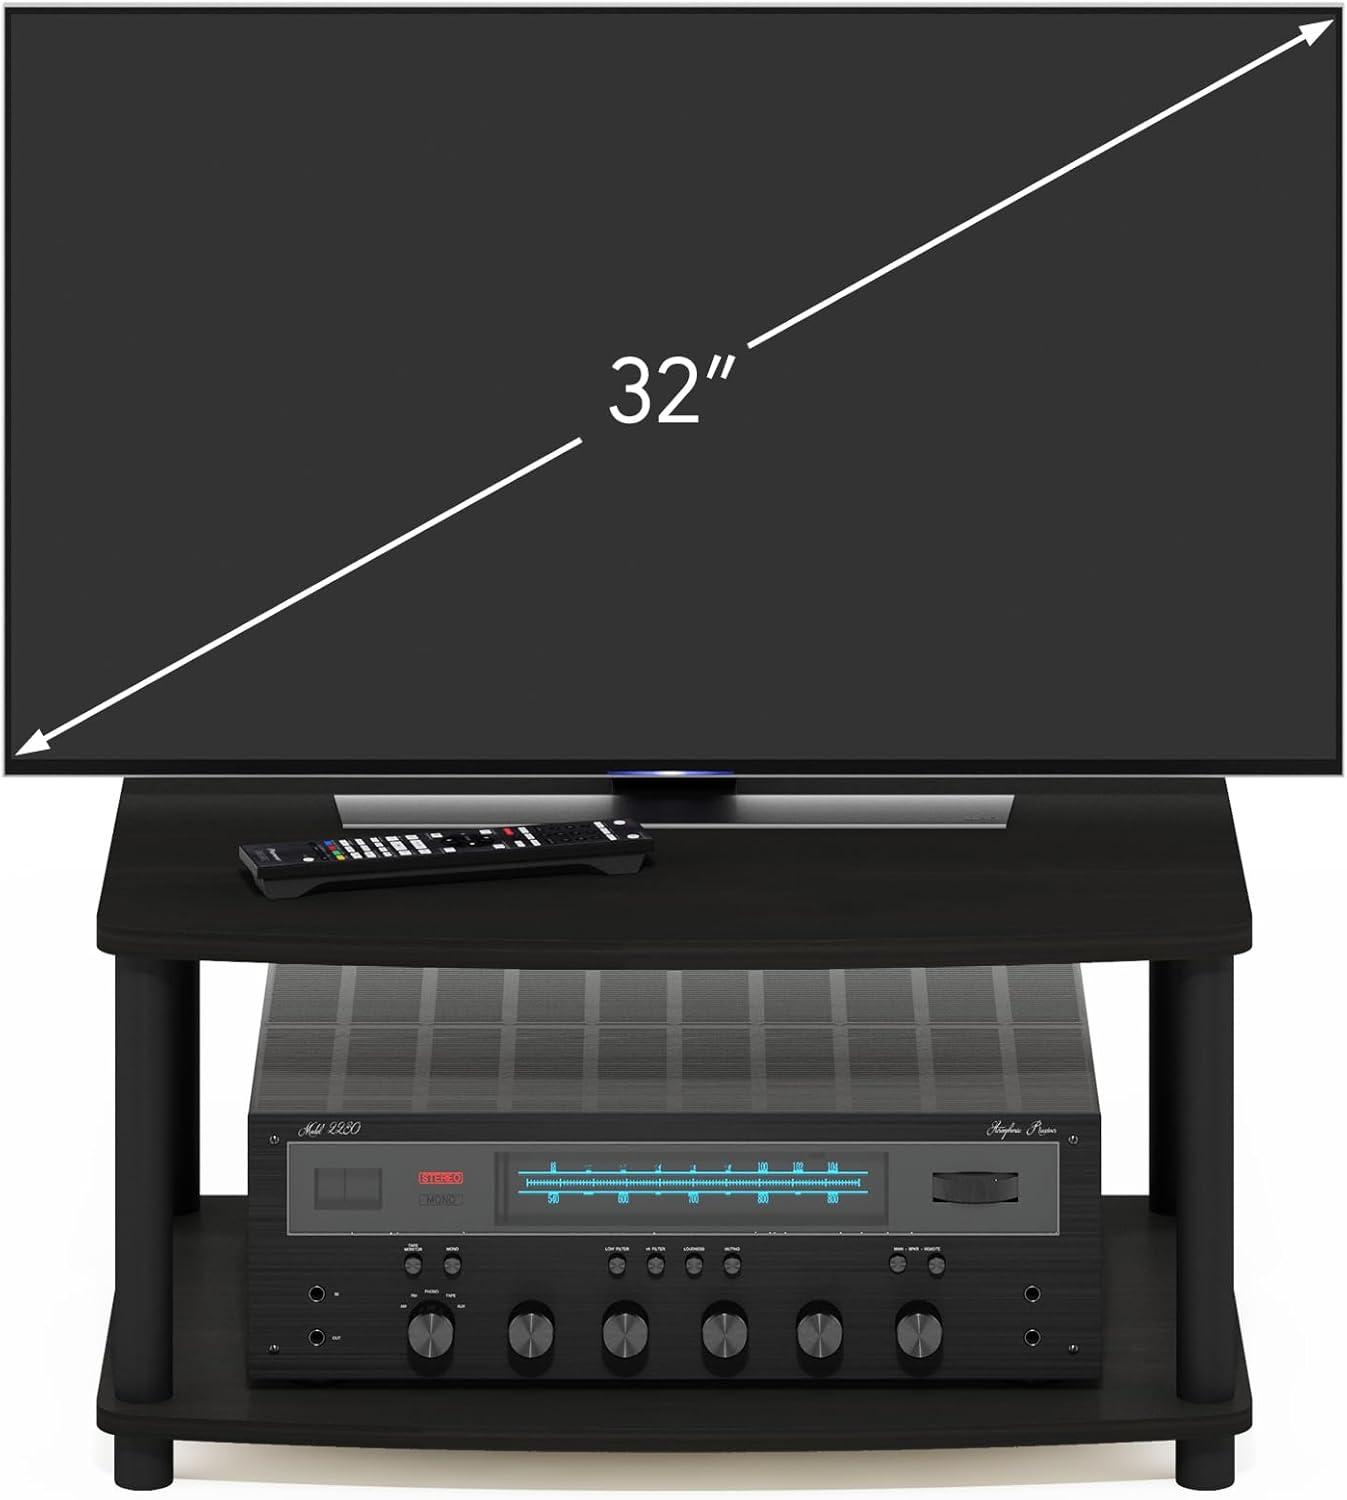
Measurements, assembly steps you follow, and how your TV and devices occupy the tiers
You’ll usually start by measuring the footprint of the electronics you plan to put on and under the riser rather than re-checking the stand’s nominal size. I mention this as you tend to leave a little breathing room — an inch or two at the back for cables and ½–1 inch at the front so the screen doesn’t feel cramped — and those small clearances change where you place smaller boxes. When putting the unit together you’ll commonly sort the parts out on the floor, slide the plastic tubes onto the posts, and press the panels into place following the pictogram instructions. A short sequence you’ll find yourself repeating is helpful:
- Unpack & sort: lay out shelves, tubes, and fittings.
- Assemble lower shelf: fit tubes into the bottom panel so the stand sits level.
- Drop on the top shelf: align the top holes and press the tubes in firmly.
- Settle & adjust: nudge the stand level and route cables before final placement.
It’s a compact, no-tools approach in practice — some parts need a firm push, and you’ll occasionally rotate a tube a fraction to line up a hole — but the overall order of steps stays the same and doesn’t demand extra hardware.
How your TV and accessories occupy the shelves comes down to depth and footprint rather than a checklist of parts. In everyday use you’ll put the screen on the upper tier and use the lower shelf for slim players, a streaming puck, a Wi‑Fi router, or a few remotes; bulky boxes will either overhang or end up beside the stand. the table below gives a rough sense of what typically fits and how it sits on each tier:
| Device | Typical footprint (approx) | How it occupies the tier |
|---|---|---|
| Small streaming stick / puck | 3–4 in. diameter | sits easily on lower shelf, little clearance needed |
| Slim Blu‑ray / small console | 9–11 in. wide × 7–9 in.deep | fits front-to-back with a bit of cable room behind |
| Router / modem | 6–9 in. wide × 4–7 in. deep | usually sits side-by-side with other small devices |
You’ll also notice small habits appear: tilting the TV base a hair to center it,tucking power bricks toward the back,or stacking two slim devices with a thin foam pad between them to avoid scratches. Those little adjustments are part of settling the setup rather than formal steps, and they tend to determine whether everything sits comfortably on one tier or needs redistribution.
Daily life with the riser in the living room or bedroom: cable routing, dusting, and device access

When the riser sits in your living room or bedroom, cables rarely stay perfectly hidden — they tend to collect where the supports meet the shelf and behind whatever device you place on the lower tier. You’ll notice runs of HDMI, power, and speaker wires often congregate at the rear edges, and small adjustments (shifting a plug an inch, looping slack) become part of regular handling. In everyday use you may find yourself working around three common routing zones:
- Back center — where most cords exit the TV and head for a wall outlet.
- Along the legs — cables tuck into the narrow gaps beside the support tubes.
- Under the lower shelf — a place where power strips and adapters usually end up sitting.
These patterns mean you’ll periodically pull devices forward a bit to reach ports or to straighten a cable, and small, pragmatic fixes tend to accumulate into a routine rather than a one‑time setup task.
Dusting and device access follow a similar, low-effort rhythm. The raised profile leaves a shallow cavity beneath the top tier that collects dust in a predictable band, so you’ll often wipe the visible surfaces while sliding a console or streaming stick forward to reach its ports; occasionally you’ll notice that decorative items on the lower shelf block an IR receiver or a fan inlet and nudge them aside. A few common cleaning tools and moments tend to recur in day-to-day life, shown below for quick reference:
| Tool or moment | Typical use |
|---|---|
| Microfiber cloth | Quick wipe of top surfaces and screens |
| Vacuum crevice/brush | Reach dust under the lower tier and around cables |
| Sliding devices forward | Access ports, clear vents, or dust behind consoles |
you’ll probably adopt small habits — angling a cable, tucking a connector, or pulling a device out for a minute — and those little adjustments are the most common ways the riser fits into everyday maintenance and access routines.
Suitability for your TV and space, expectation versus reality, and real life limitations you might encounter
In practice, many users find the stand behaves like a compact platform rather than a full console; it lifts a screen and provides a lower plane for small boxes or remotes, but it does not create the wide footprint people often picture when imagining a TV cabinet. Placement against a wall or on a narrow shelf tends to work best, though televisions with deeper bases or chunky bezels can feel less centrally supported than expected and may require slight repositioning. Everyday use often reveals small habits: sliding a soundbar a few inches forward to clear the front edge, rotating a router’s antenna to squeeze it alongside a game console, or nudging the riser back a fraction to hide cords — these minor adjustments are part of setting it up rather than signs of failure.
Observed limitations in routine settings include modest weight tolerance for heavy, unbalanced setups, limited room for cooling larger devices on the lower tier, and a tendency for plastic tube fittings to need occasional tightening after moving. Typical in-use notes:
- surface wear can show more quickly in high-traffic spots, especially when devices are slid on and off the shelf.
- Cable routing often ends up visible unless extra clips or ties are used, since the open-back design doesn’t hide wires.
- Flooring interaction matters: on thick carpet the unit can feel less steady than on hard floors.
| Expectation | Reality |
|---|---|
| Neat, hidden cable management | Cables usually remain partially exposed without added organizers |
| ample shelf space for multiple consoles | Two-tier layout fits one or two small devices comfortably; larger consoles may overhang or block airflow |
| Completely wobble-free on any surface | Stability is good on flat, hard surfaces; minor rocking can occur on soft or uneven flooring |
View full product specifications and listing details on Amazon
Cleaning, moving, and long term care notes from hands on use
In everyday use you’ll find the cleaning routine is fairly straightforward: a quick pass with a microfiber or slightly damp cloth removes dust and fingerprints, while the seams where the tubes meet the shelves can trap crumbs and pet hair if you don’t get into them occasionally. The finish tends to show dust more on horizontal surfaces, so those top-and-bottom faces get attention more often than the sides; spill marks usually lift with a damp cloth but prolonged rings from hot mugs can leave a faint shadow if not attended to. Small scratches and scuffs can appear around edges from moving items on and off, and the plastic tube ends pick up smudges that respond best to gentle wiping rather than abrasive scrubbing.In most households you’ll develop a simple cadence — wipe weekly,spot-clean as needed,and run a cotton swab or compressed-air burst down the seams every month or so.
- Quick wipe: microfiber or damp cloth for daily dust and fingerprints.
- Seams and tubes: cotton swab or soft brush for trapped debris.
- Avoid: abrasive pads and strong solvents that can dull the finish.
When it comes to moving and longer-term care, the unit’s light weight makes one-person repositioning possible but awkward if you try to slide it across the floor — you’ll usually lift it or enlist a second pair of hands to avoid dragging and scuffing. Over months of use the press-fit connections may loosen slightly; you’ll notice a bit more wobble after repeated moves or heavy handling, and occasional reseating of the tubes restores alignment. If you disassemble and reassemble it for storage, keep the small plastic caps and screws together so reassembly is quicker and less fiddly; stacking anything heavy on the lower shelf for extended periods can accentuate sag, so a quick visual check every few months helps catch gradual changes.the table below briefly summarizes common issues people tend to notice and the simple actions that typically follow from them.
| Observed issue | Typical in-use outcome |
|---|---|
| Dust and light fingerprints | Clears with a microfiber or damp cloth |
| Debris in tube joints | Requires a swab or soft brush to remove |
| Loosened fit after moves | Re-seating parts restores alignment in most cases |
How It Lives in the Space
you notice, over time, how the Furinno TURN-N-TUBE TV riser stand settles into a corner of the room, taking on a quiet, ordinary presence in daily routines. As the room is used it quietly shapes where you set things and how you sit, the top collecting coffee rings, a stray remote, the small scuffs that steady its newness into familiarity. Comfort shows up in tiny, repeated gestures—an easy glance, the habit of reaching without thinking—folding into regular household rhythms. It simply becomes part of the room.