decordip Garden and patio decoration inspiration
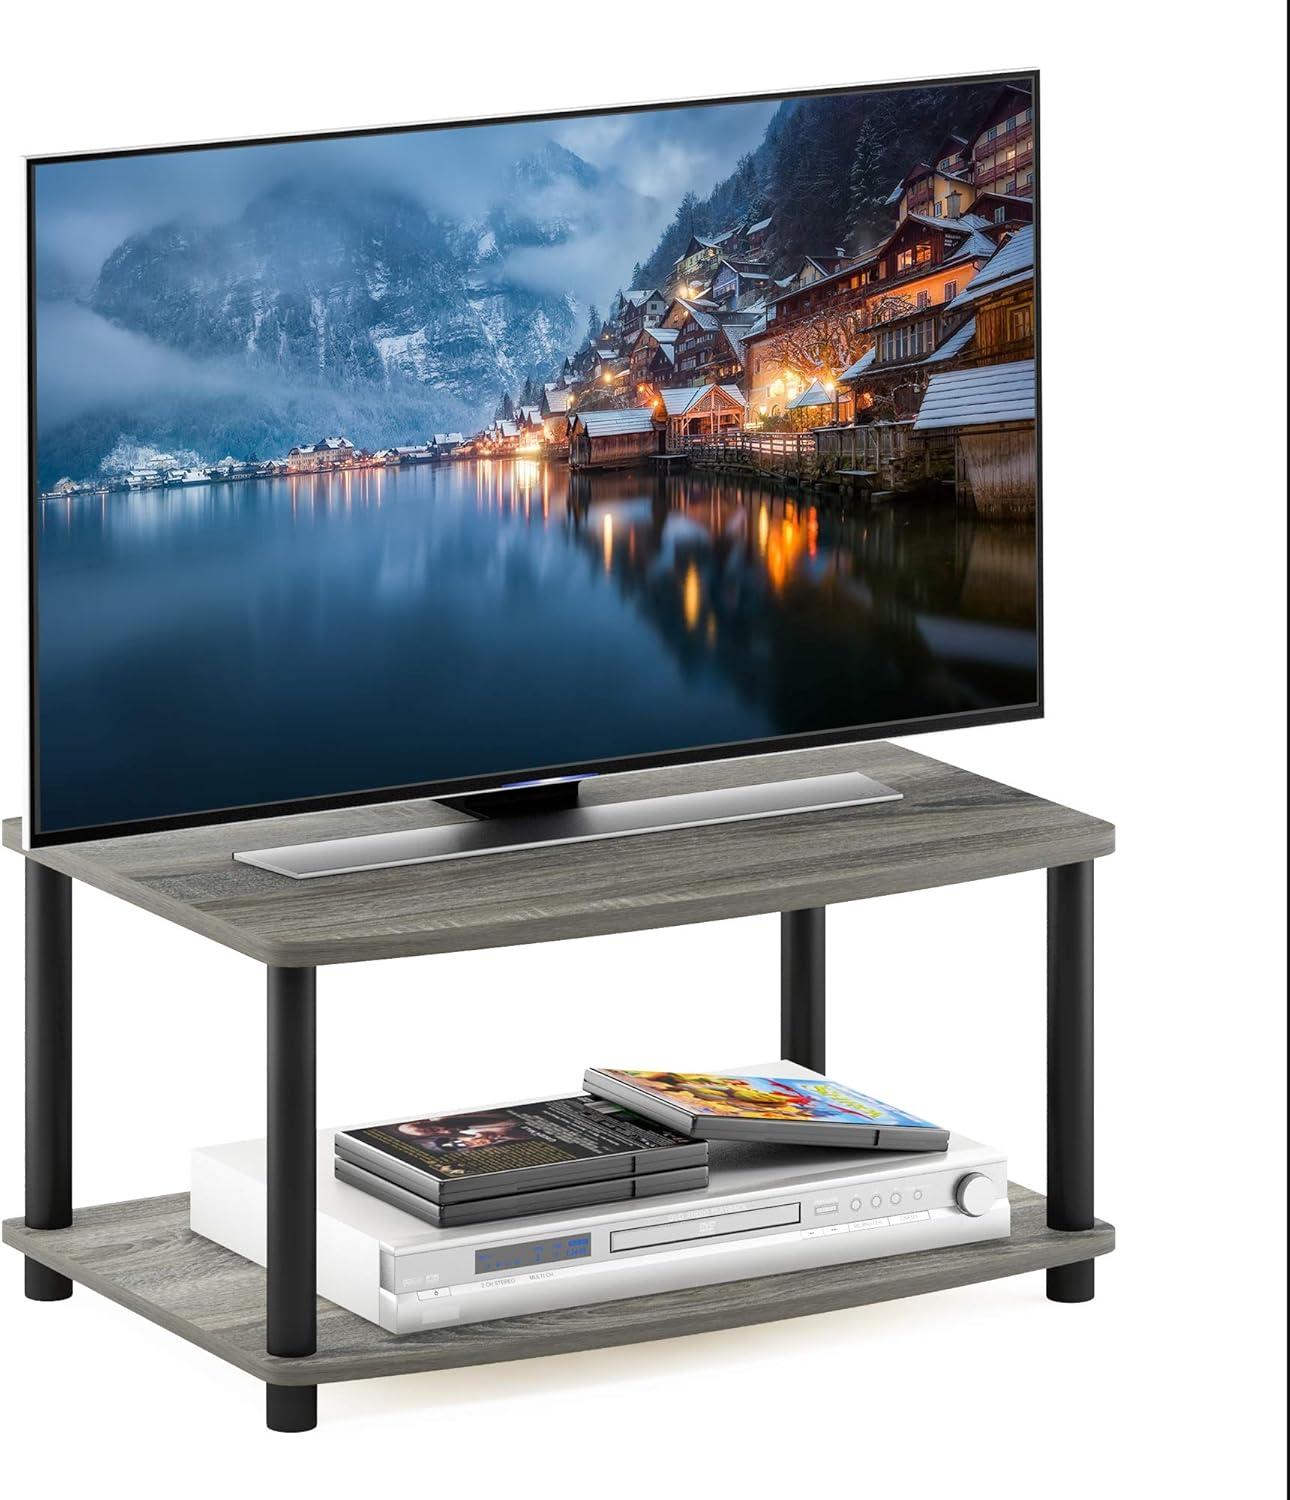
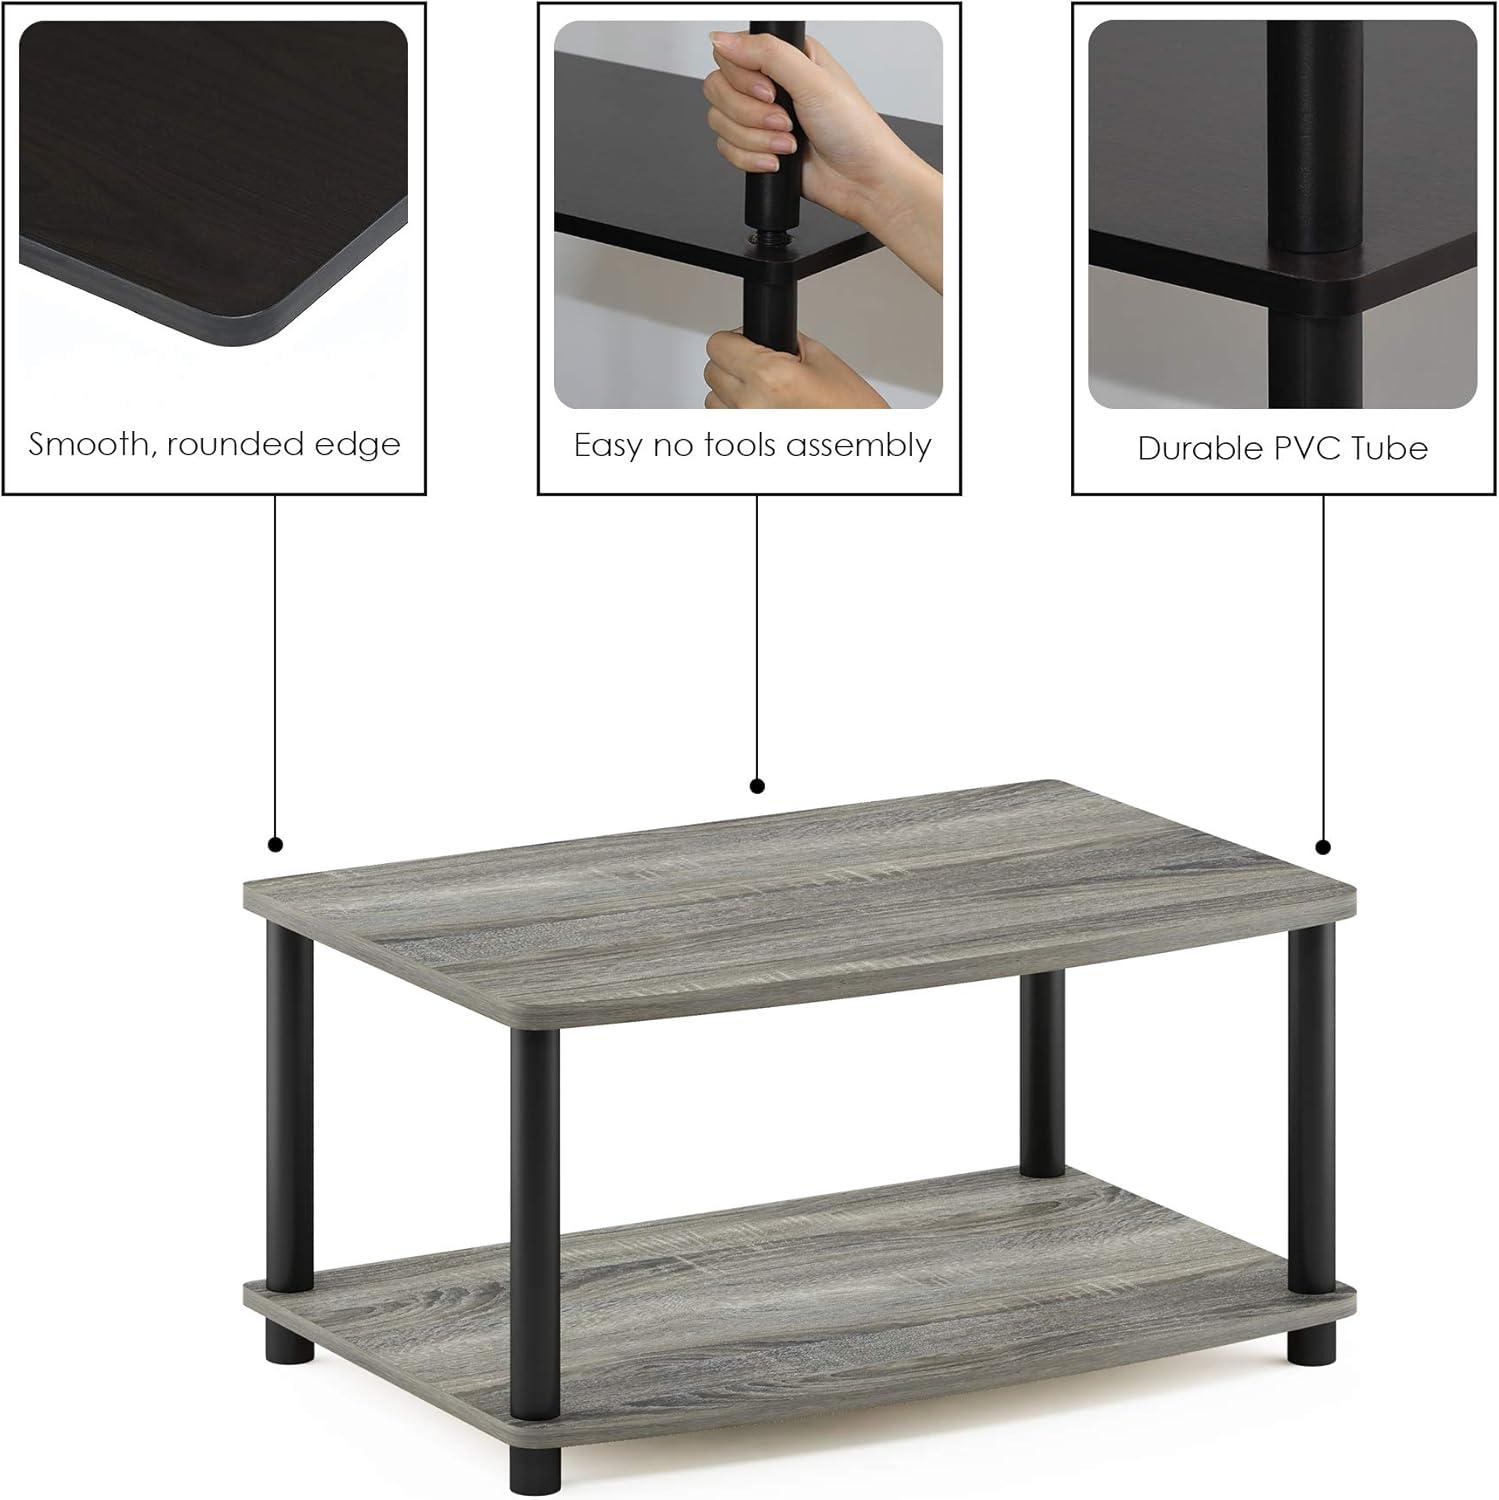
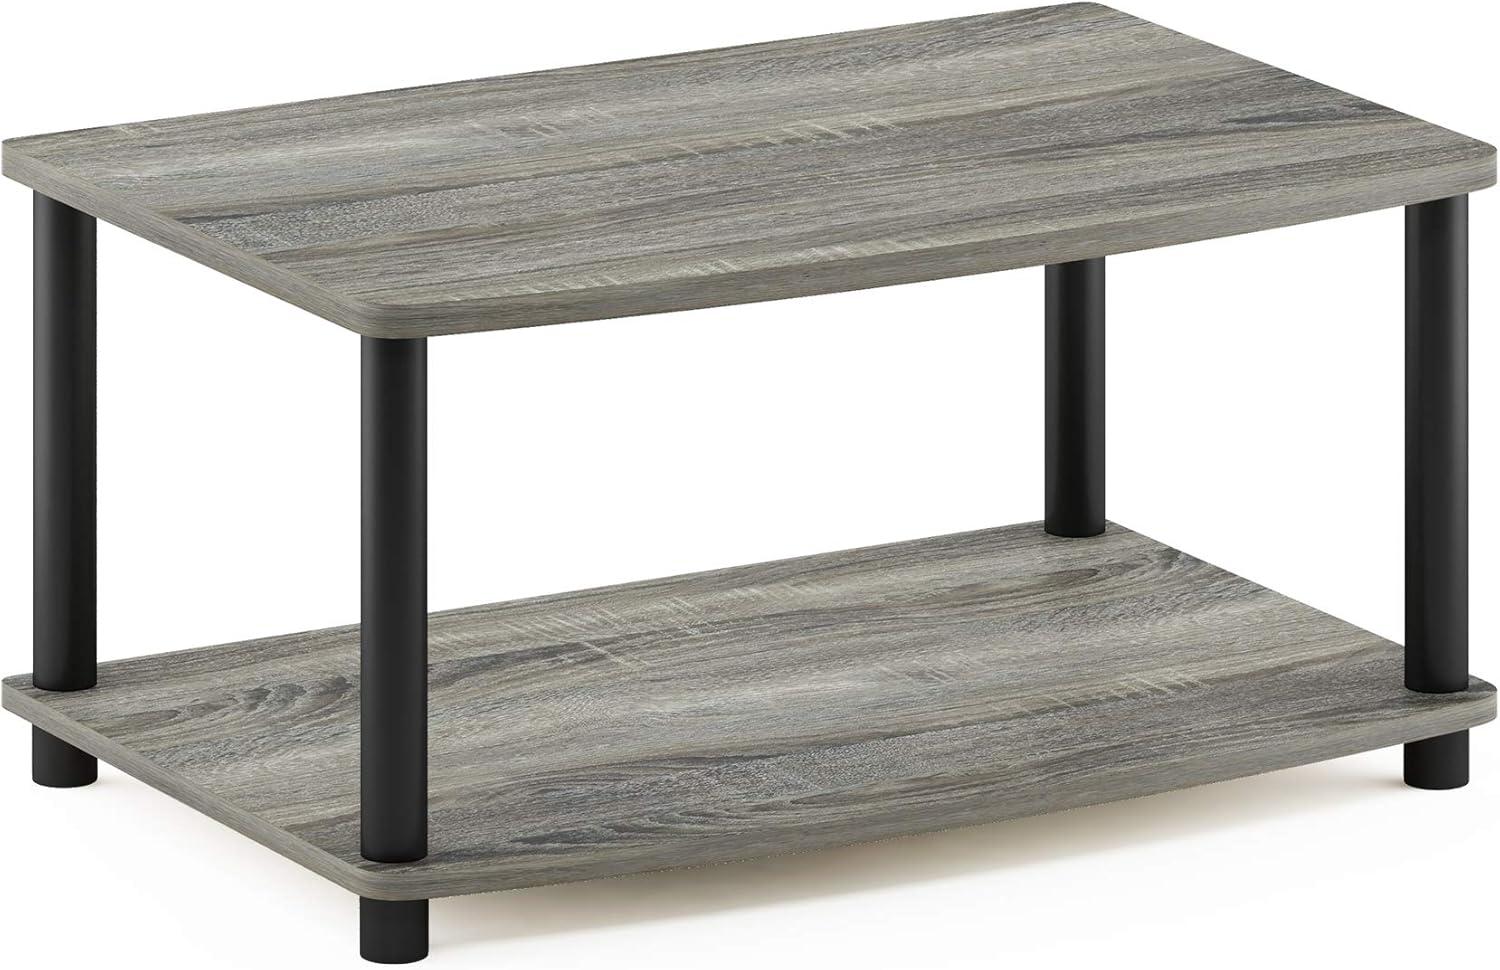
You notice it when the afternoon light pools on the warm French oak laminate, a low silhouette that stops being an object and starts feeling like part of the room.It’s the Furinno Turn-N-Tube printer stand, but you think of it simply as the little two-tier shelf by your desk — unobtrusive, modest in scale. Slide your hand along the top and the composite wood has a faint tooth, while the PVC posts feel hollow but reassuringly rigid; from a step back it reads lighter than a boxed cabinet. The lower shelf sits close to the floor enough to hold a few loose stacks without crowding the workspace, and altogether it settles into the corner with a practical, no-fuss presence.
A first look at the Furinno Turn N Tube printer stand in French Oak and what arrives in your box
When you lift the flaps, the French Oak top is the first thing you notice: a warm, lightly grained face with a thin protective film still in place and clean-cut edges that make the panels look ready to slot together. The finish sits against a set of contrasting support tubes and small plastic fittings,so the visual impression is of separate components rather than one assembled piece. Parts are neatly nested inside the box, with foam or corrugated dividers keeping the panels flat; small adhesive labels on a few pieces help you match left/right or top/bottom during the first pass at assembly. You’ll probably peel a strip of film from each board and shift pieces around on your desk or floor as you prepare a workspace.
What arrives in your box is presented in a compact, orderly way: the two main boards are stacked, the tubes bundled together, and a small hardware packet sits on top of the panels. Items are mostly ready to use straight out of the box and the instruction sheet is visible as the topmost paper.
- Instruction sheet and parts diagram
- Two finished panels with protective film
- Support tubes bundled together
- Small hardware packet (screws, caps, and any plastic washers)
- Protective foam/corrugated inserts and a few adhesive feet
| Item | Count (typical) | Notes |
|---|---|---|
| Top and bottom panels | 2 | Pre-drilled, with protective film |
| Support tubes | 4 | Bundled together, color contrasts with panels |
| Hardware packet | 1 | Screws, caps, small fittings; labelled or in clear bag |
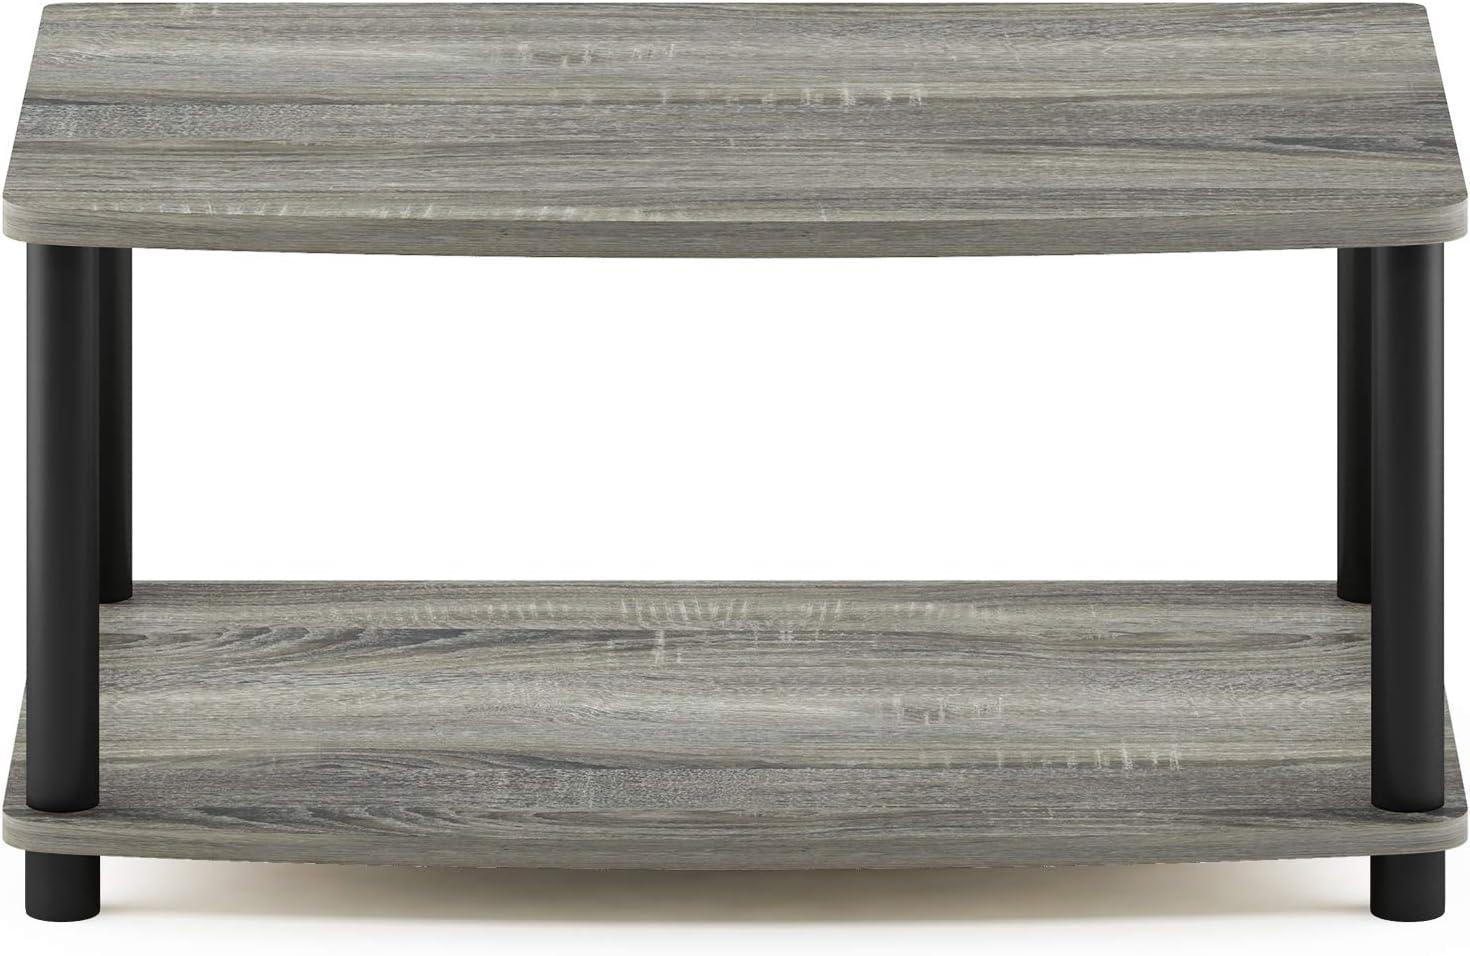
The French Oak finish the particle board frame and how the parts slot together for your build
The French Oak finish on the particle board panels appears as a printed oak grain with a low satin sheen; when you handle the pieces during assembly the surfaces feel smooth and slightly warm to the touch compared with raw board. The laminate is applied over predrilled edges, so most faces are uniform in colour and pattern; at some cutouts or hole rims the lighter core can be visible where the covering doesn’t fully wrap around. As you bring two panels together the finish tends to mask small mismatches, and the printed grain helps seams look continuous from a short distance, though you may notice tiny factory marks or faint abrasion if you press hard at joints. the surface shows dust or light scuffs under certain lighting, but there’s no raised texture to catch on fabric or papers while you’re fitting parts together.
Parts slot together using a simple peg-and-tube approach: the shelves have round, predrilled openings and the PVC tubes fit into those holes with a snug, friction-fit seating that holds each tier in place without tools.When you line up a shelf over the tubes you’ll usually push straight down until the shelf rests on the tube collars; occasional wiggling or a firm press helps seat stubborn tubes and slightly misaligned holes. A few quick observations as you build:
- Panels are stamped or labeled so you can match holes without guessing.
- Some tube joints require a firmer push; they don’t rotate, they simply press-fit.
- Tube end caps press into place last and tidy the visible ends.
| Part | How it slots together |
|---|---|
| Top/Lower Shelves | Drop onto tube collars and rest flush in predrilled holes |
| PVC Tubes | Insert into shelf holes with a friction fit; may need a firm push |
| Plastic end Caps | Press into exposed tube ends for a finished look |
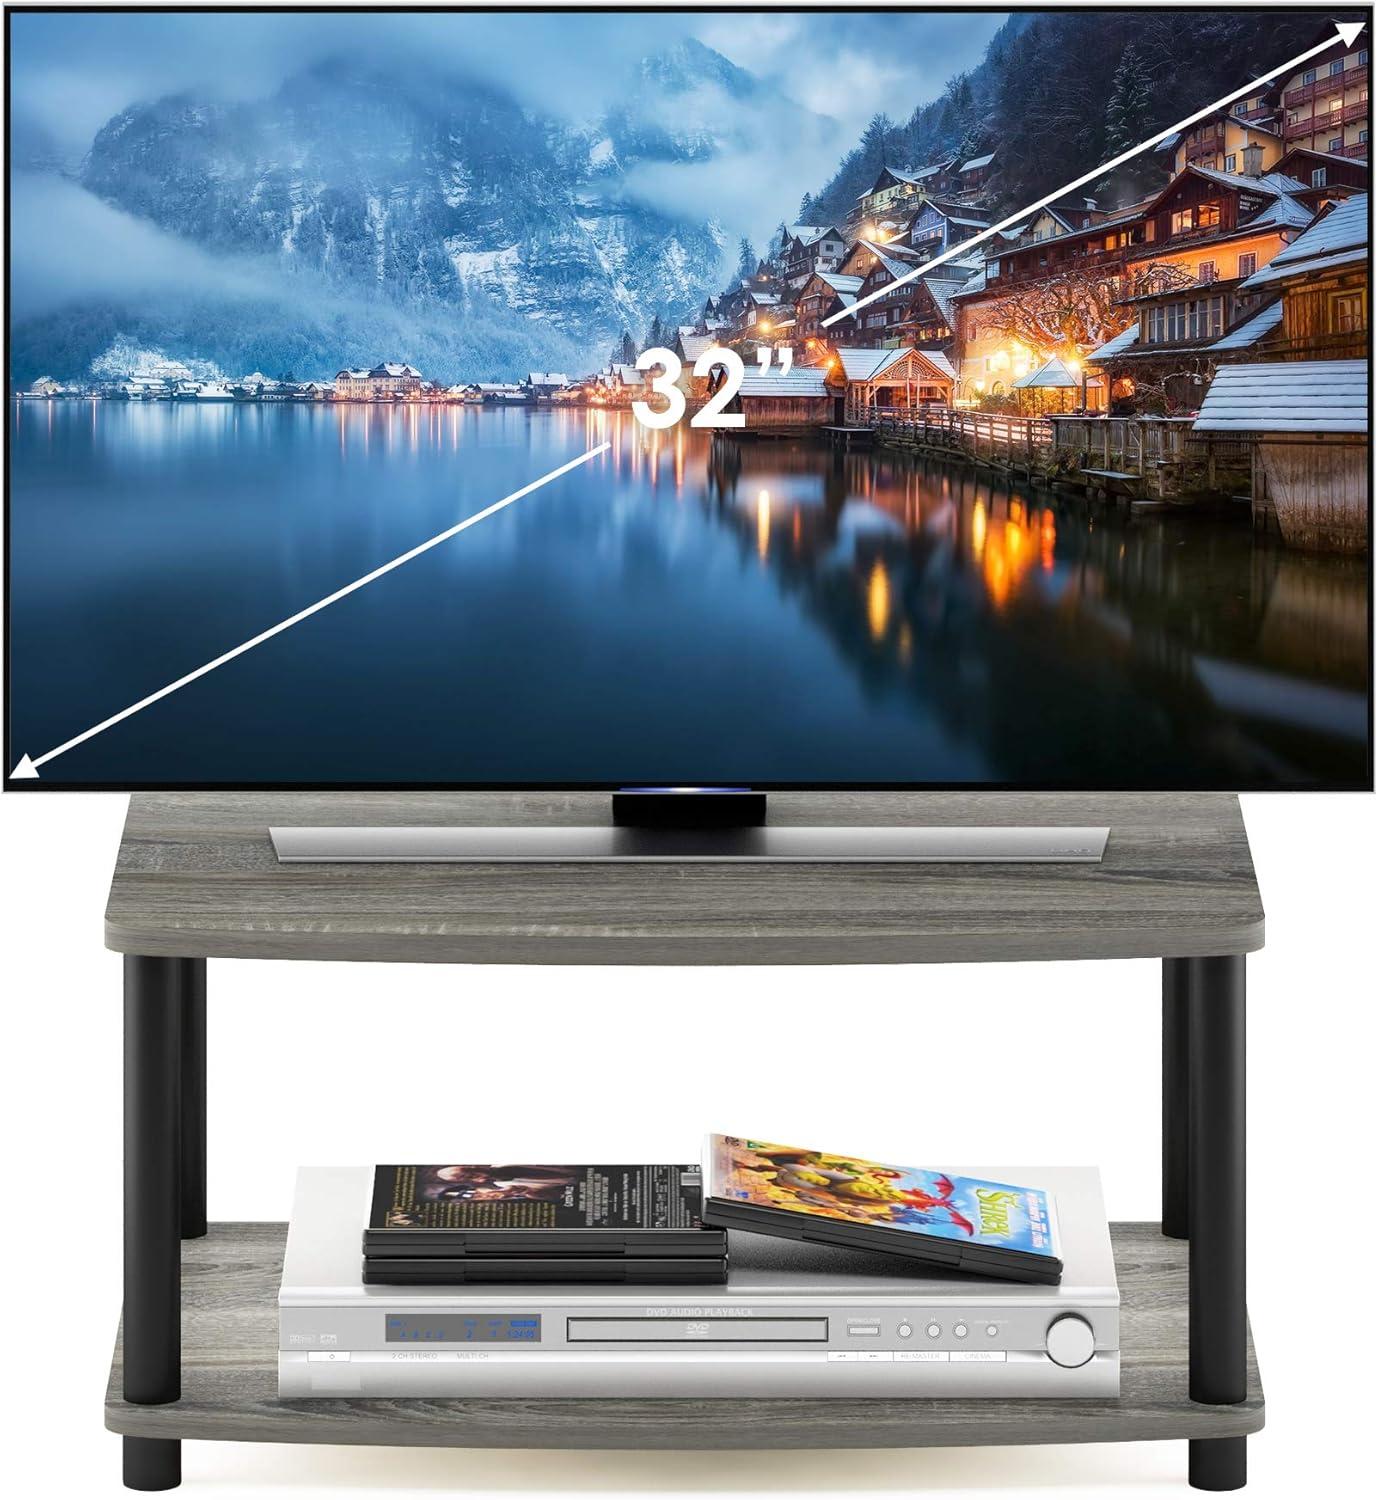
What the measurements mean for your printer your CPU and the space beneath your desk
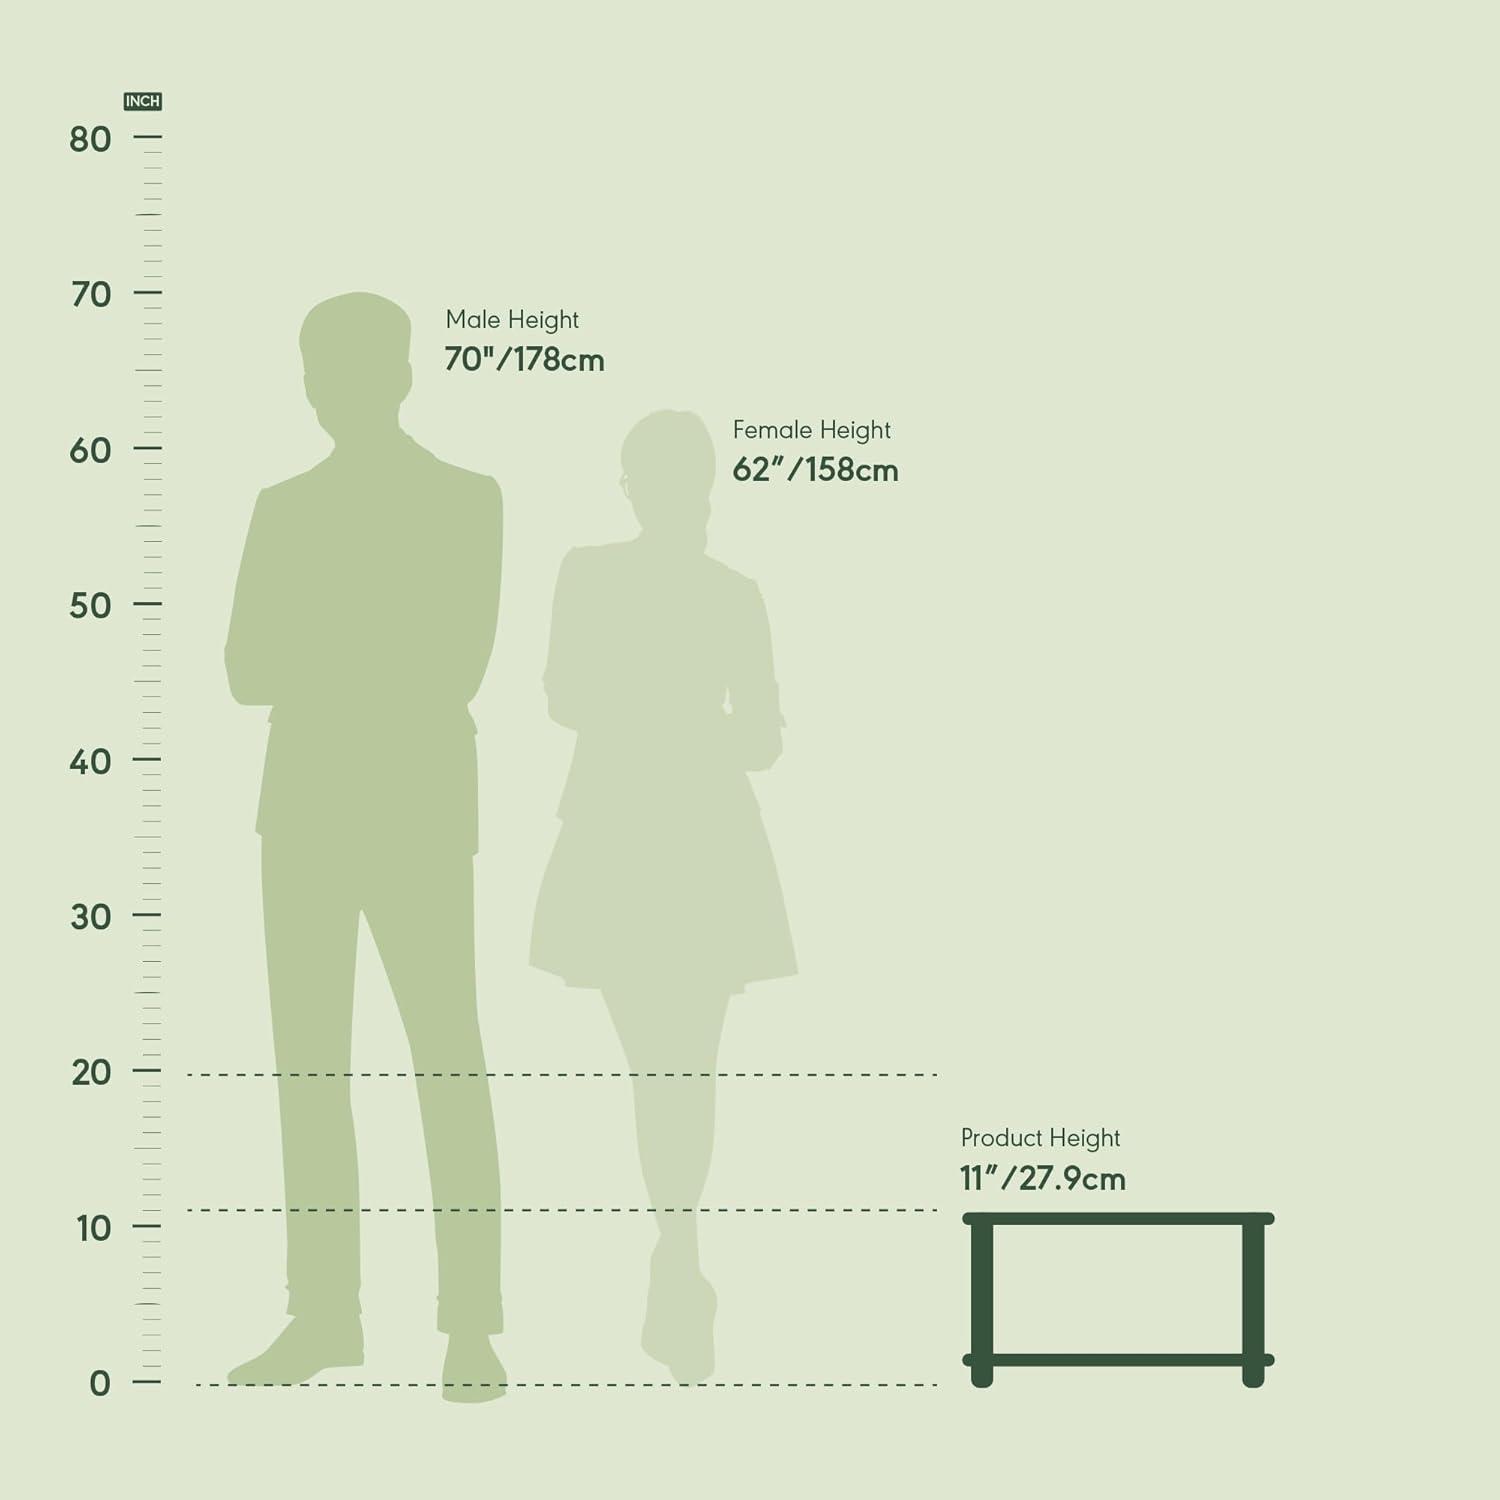
The listed footprint and load numbers translate into concrete limits for typical office devices. The overall footprint (about 23.8″ wide by 15.8″ deep with an 11″ overall height) and a top-shelf capacity of 20 lb mean that compact inkjet printers and many small laser/all‑in‑one units usually sit fully on the top surface without overhang, while larger office lasers and heavier multifunction units approach the depth or weight limits. The lower shelf, at roughly 20.5″ of usable width and a 15 lb capacity, commonly accommodates paper reams, small routers or a mini‑PC; full‑size CPU towers and larger printers often exceed either the depth or height envelope and will not sit neatly beneath the top platform. The weight distribution note — 35 lb total when evenly spread — is relevant in everyday use: stacking heavier items on the lower shelf reduces stress on the top, and uneven placement can make the layout feel less stable over time.
- Top shelf: footprint and 20 lb limit tend to favor compact printers; larger, heavier units may overhang or approach the weight ceiling.
- Lower shelf: its width is enough for paper and slim mini‑PCs, but multiple heavy reams quickly use up the 15 lb allowance.
- Under‑desk clearance & access: the 11″ height and modest depth mean devices sit close to the desk underside, which can restrict airflow and make cable access a bit fiddly, prompting occasional sliding or angling during use.
| Device | Typical footprint / weight | How the measurements translate |
|---|---|---|
| Compact inkjet | ≈14–16″ W × 12–15″ D / 6–10 lb | Generally sits on the top shelf with clearance around edges |
| Small laser / all‑in‑one | ≈17–20″ W × 14–18″ D / 12–25 lb | May occupy most of the top shelf; heavier models approach the load limit |
| Mini‑ITX / SFF CPU | ≈6–12″ W × 8–14″ D × 8–12″ H / 8–25 lb | Often fits on the lower shelf; deeper or taller mini‑towers can protrude |
View full specifications and configuration details
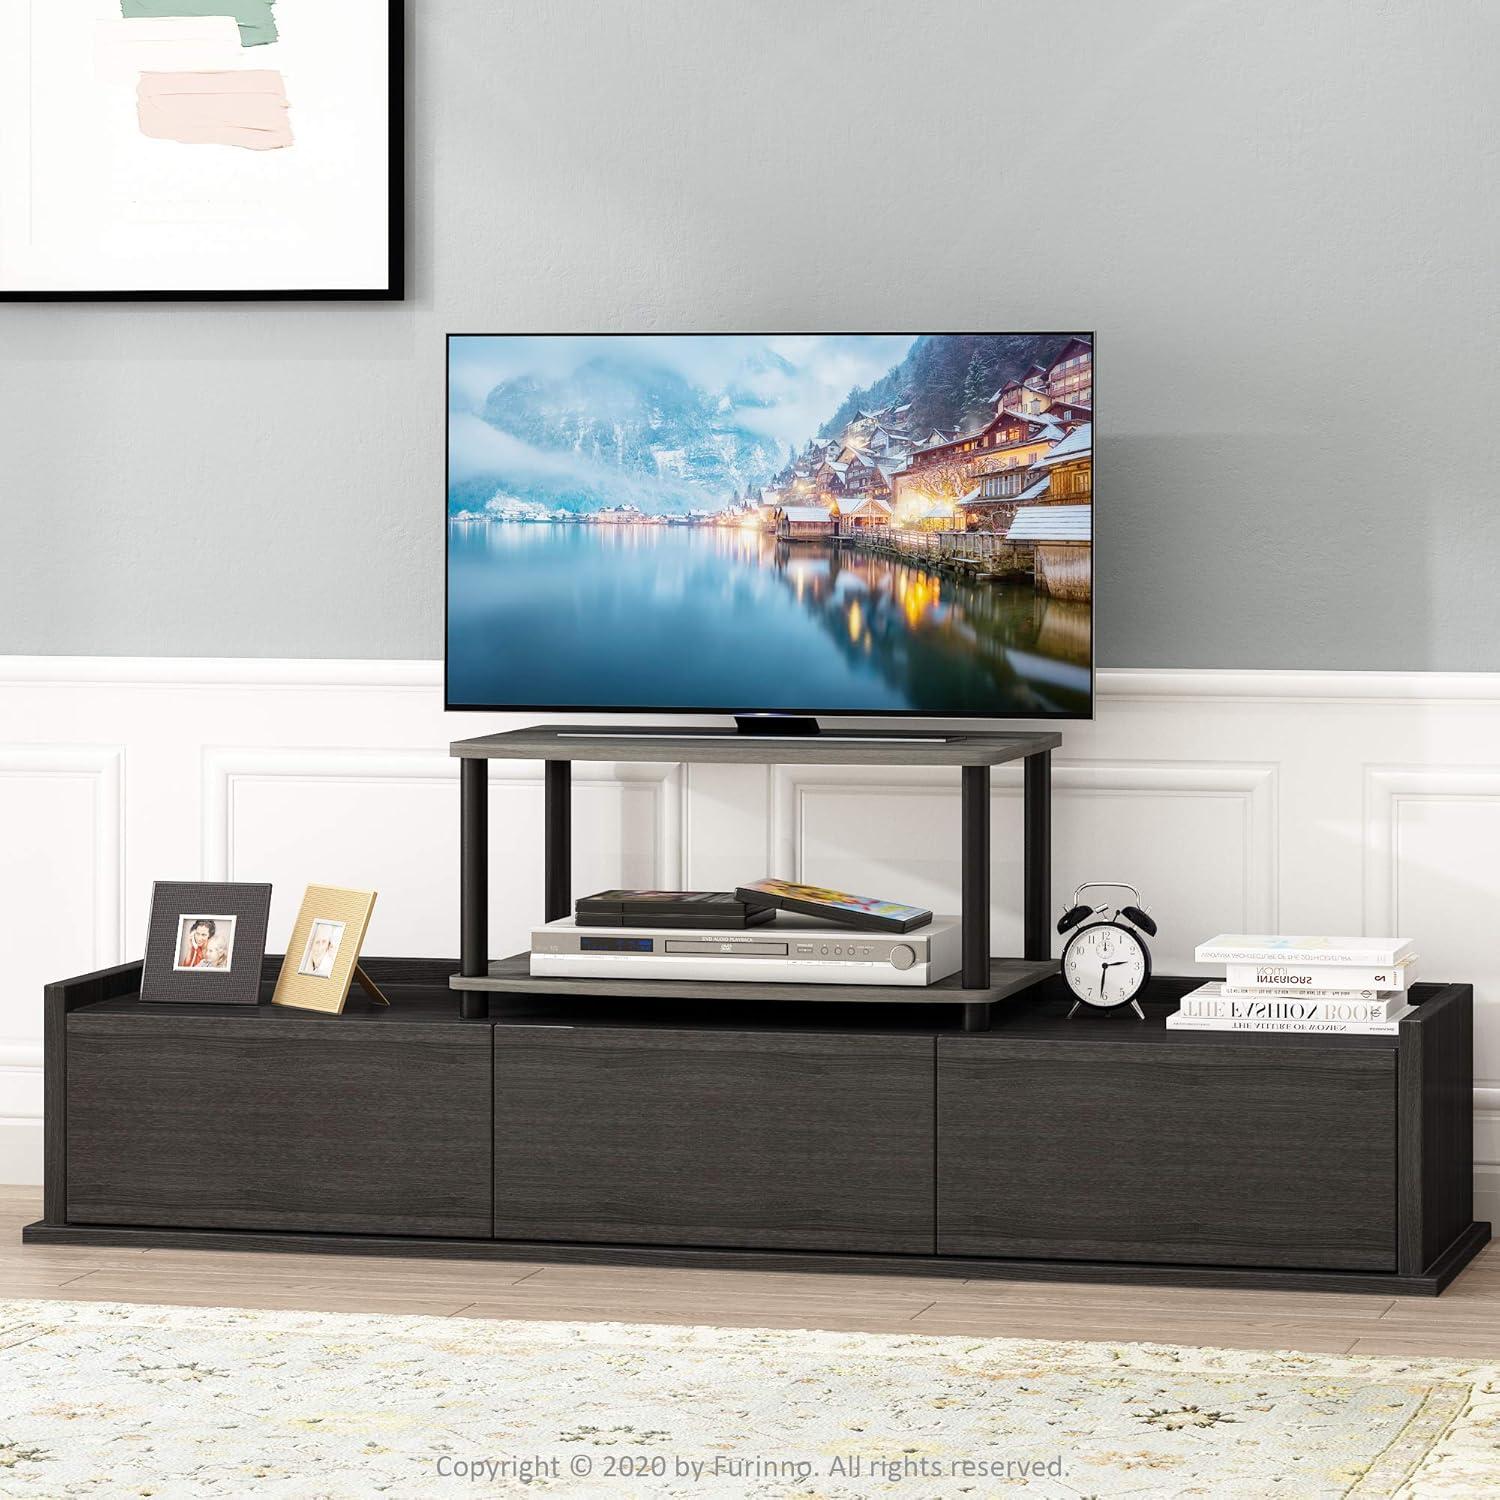
Where your printer and office supplies sit and how the storage is arranged
The printer sits on the upper platform with the front edge close enough that you can reach paper trays and the control panel without leaning over the desk. When the unit is in use, printed pages tend to collect just in front of the machine or slide to the edge of the platform, so you’ll find yourself nudging stacks back into place now and than. Cables drop down behind the stand and usually follow the gap between the two tiers, creating a narrow path for power and data leads; depending on how you route them, this can leave a small loop visible under the desk or tucked neatly against the wall.
The lower tier acts like a catch-all for supplies and small devices, and items are frequently enough arranged in layers rather than lined up side-by-side. Common patterns you’ll notice include keeping paper reams flat toward the back, a compact router or mini-PC off to one side, and smaller items—staplers, ink boxes, a pencil cup—grouped toward the front so they’re easy to grab.
- Top shelf: printer and immediate printwork
- Lower shelf: paper, small electronics, and loose office supplies
Heavier or bulkier things usually sit at the back while things you reach for every day stay within arm’s length; when the lower shelf gets crowded the whole arrangement can feel a bit fussy, prompting you to shuffle things around during busy work sessions.
How it fits into your typical desk layout and everyday movement around your workspace
The stand usually lives as a low-profile element in the desk footprint,sitting either tucked under the work surface or beside a monitor riser. Placed there, it changes how people circulate around the workspace: printed pages are often picked up from a seated position, chairs are nudged slightly to one side when reaching, and the habit of swiveling to access a printer becomes part of the routine. Observations that tend to recur include:
- Access: Controls and paper trays are reachable without standing, which encourages quick, frequent use.
- Movement: The presence of the stand shifts how feet and chair casters move under the desk, producing small, repeated adjustments.
- visibility: The printer and any status lights sit at a glanceable height from the chair, so users often notice jams or low-ink alerts during normal tasks.
On a day-to-day level the stand influences minor routines: sliding the printer forward to swap paper, routing a power cord along the desk leg, and occasionally pivoting around it when reaching for a router or small CPU nearby. A simple layout chart captures common placement effects:
| Typical position | Common effect on movement |
|---|---|
| Under the desktop, centered | Reduces bending but can narrow knee space |
| Beside a monitor stand | Encourages sideways reach and chair adjustment |
| Against a side panel | Makes cable access easier but limits lateral movement |
These patterns can make daily interactions feel more streamlined while introducing small trade-offs in legroom or the need to reroute a chair path on occasion. View full specifications and listing details
How it measures up to your expectations and the practical limits you might encounter
When put into everyday use, the stand generally performs within the bounds that its basic specs suggest, though a few practical caveats become apparent. The combination of lightweight construction and simple tube connectors means it stays steady for routine printing tasks, but the assembly tightness and the flatness of the supporting surface noticeably affect how much wobble is felt during use. Cable routing and access to rear ports often require minor adjustments of the whole unit because there are no integrated grommets or dedicated pass-throughs, and moving the stand once loaded usually involves lifting rather than rolling since casters are not part of the design. In tighter under-desk situations, the reduced height profile saves visual space but can make reaching paper trays or clearing jams a little more fiddly than at full desk height.
| Observed limit | practical note |
|---|---|
| Top shelf load | Works well for light to moderate inkjet units; heavier, full-size laser printers can approach the shelf’s capacity |
| Lower shelf use | Helpful for paper and small peripherals, but stacking very dense items reduces overall stability |
Over weeks of use the trade-offs become clear: compactness and simplicity favor everyday convenience, while heavier or frequently moved setups reveal the stand’s limits. Minor shimming or re-torquing of the connectors is a common, quick adjustment after the first few days of use, and occasional redistribution of stored items helps keep the unit steady rather than overloaded on one side. For full specifications and current configuration details, see the product listing here.

When you open the box you’ll find the primary panels and the tubular supports laid out, a sealed bag of small hardware, and a one-sheet illustrated instruction guide. The hardware packet generally contains the fasteners you need, a few plastic caps and spacers, and a small hand tool for tightening; common items are listed in the table below so you can confirm everything is present before you start. The parts arrive with protective film on the surfaces in most cases, and there are often one or two spare fasteners tucked into the bag.
| Included item | Typical quantity |
|---|---|
| top and bottom shelves | 2 |
| PVC tube supports | 4 |
| Connector pieces and caps | 4–8 |
| Hardware packet (screws, spacers) | 1 bag |
| Small tightening tool | 1 |
| Instruction sheet | 1 |
The assembly sequence you will follow is straightforward and mostly repetitive: lay out the pieces, attach the first shelf to the lower sections of tube, stack the upper tubes and align the second shelf, then secure the connectors and caps. In practical terms you usually start by matching predrilled holes and sliding the tubes into place, then using the included tool to snug the fastenings—many people tighten by hand first and then finish with the small tool to avoid over‑torque. A few quick checks along the way—making sure edges line up and the caps are seated—save you from minor adjustments later; small nudges or re-seatings are common as you balance the parts together. Here are the core actions, noted without step-by-step detail:
- unpack and verify parts
- assemble base tubes to lower shelf
- stack and align upper supports and top shelf
- insert and tighten fasteners, fit caps
How the Set Settles Into the Room
Having the Furinno Turn-N-Tube Printer Stand with Storage, 2-Tier printer Table, Under desk Printer Stand, for CPU, Office Supplies, Home Office, French Oak tucked into a side of your workspace, you find it recedes into the background over time rather than insisting on attention. In daily routines it quietly shapes how the space is used — a low spot to set a stack of envelopes,a place the printer always returns to,the small reach that fits the rhythm of moving papers and coffee. The surface picks up faint scuffs and the corners soften as the room is used, so its presence feels familiar more than new.In regular household rhythms, you notice it stays.