decordip Garden and patio decoration inspiration
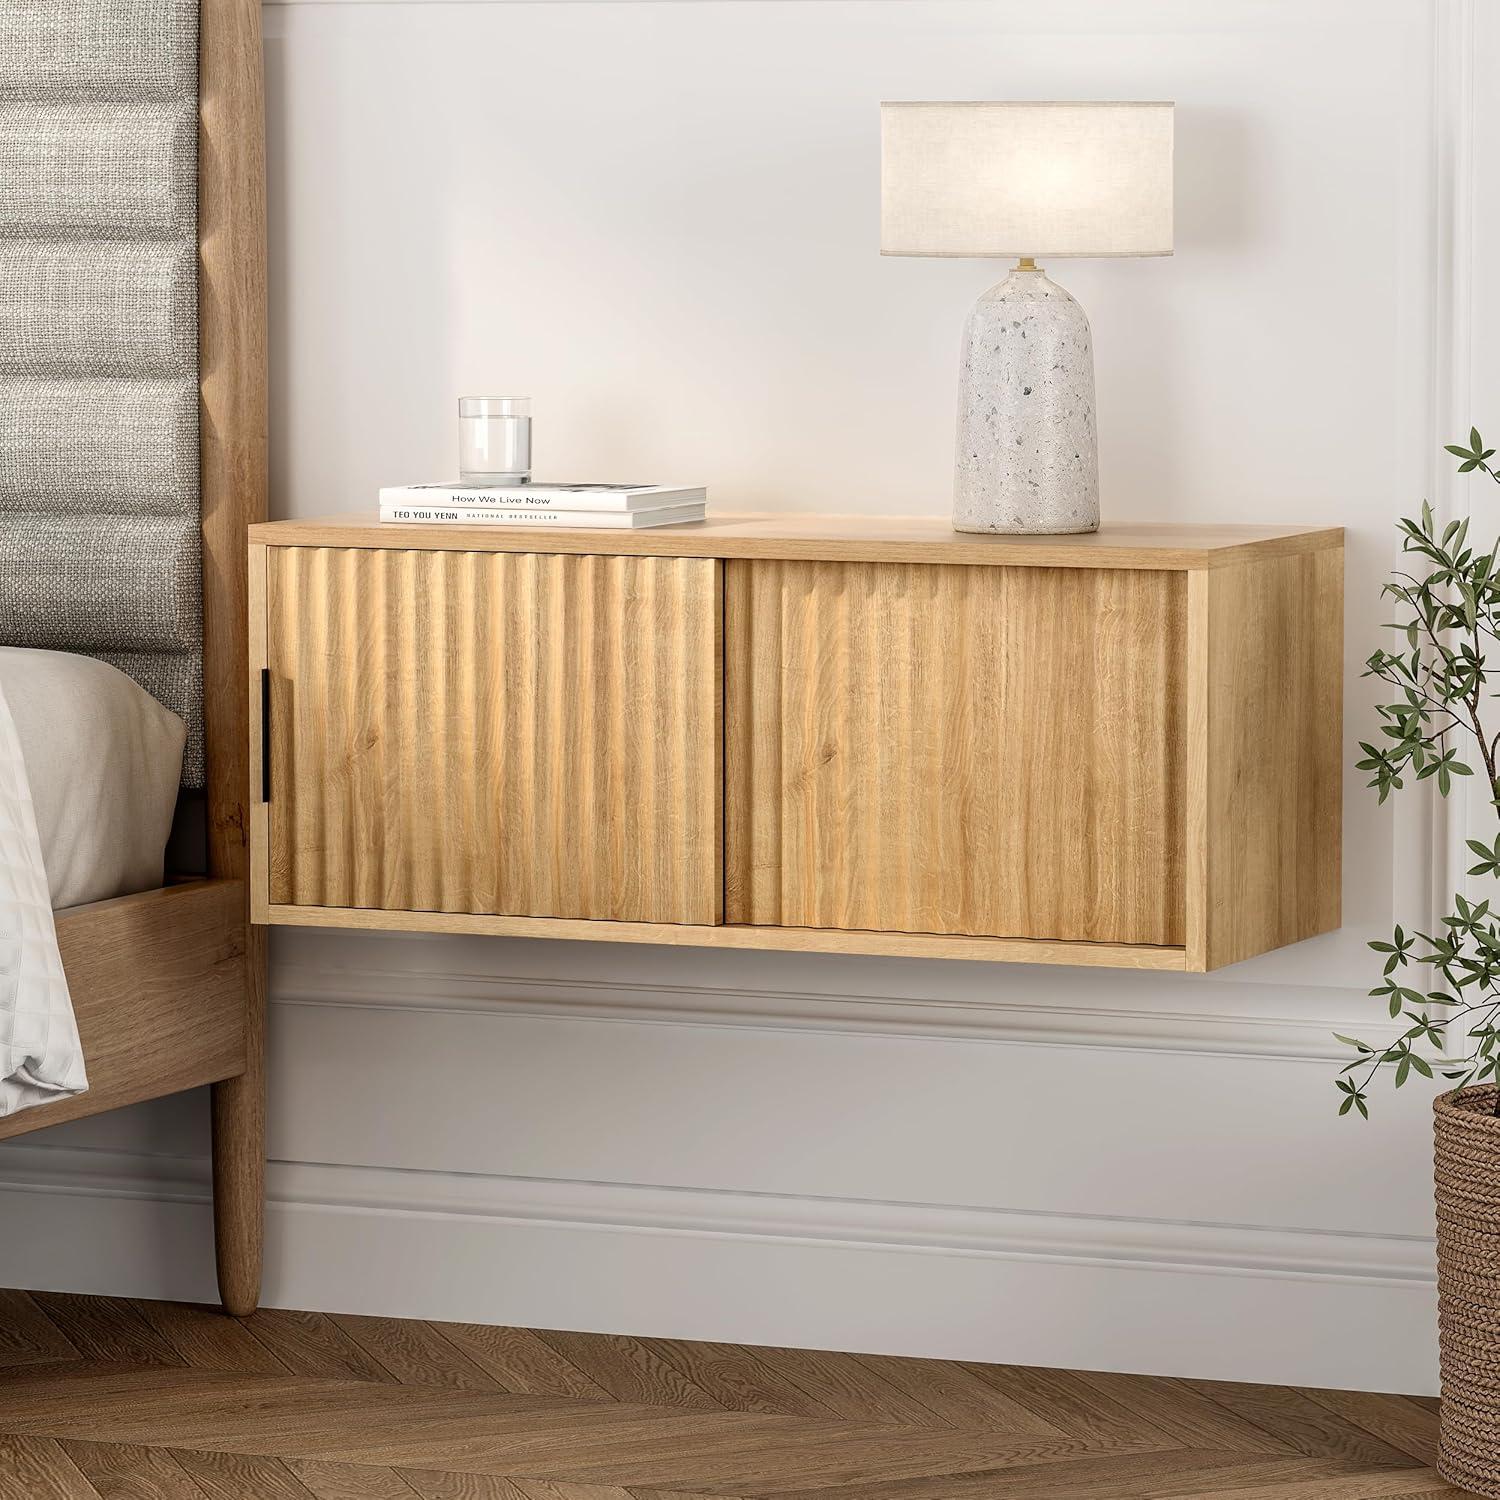
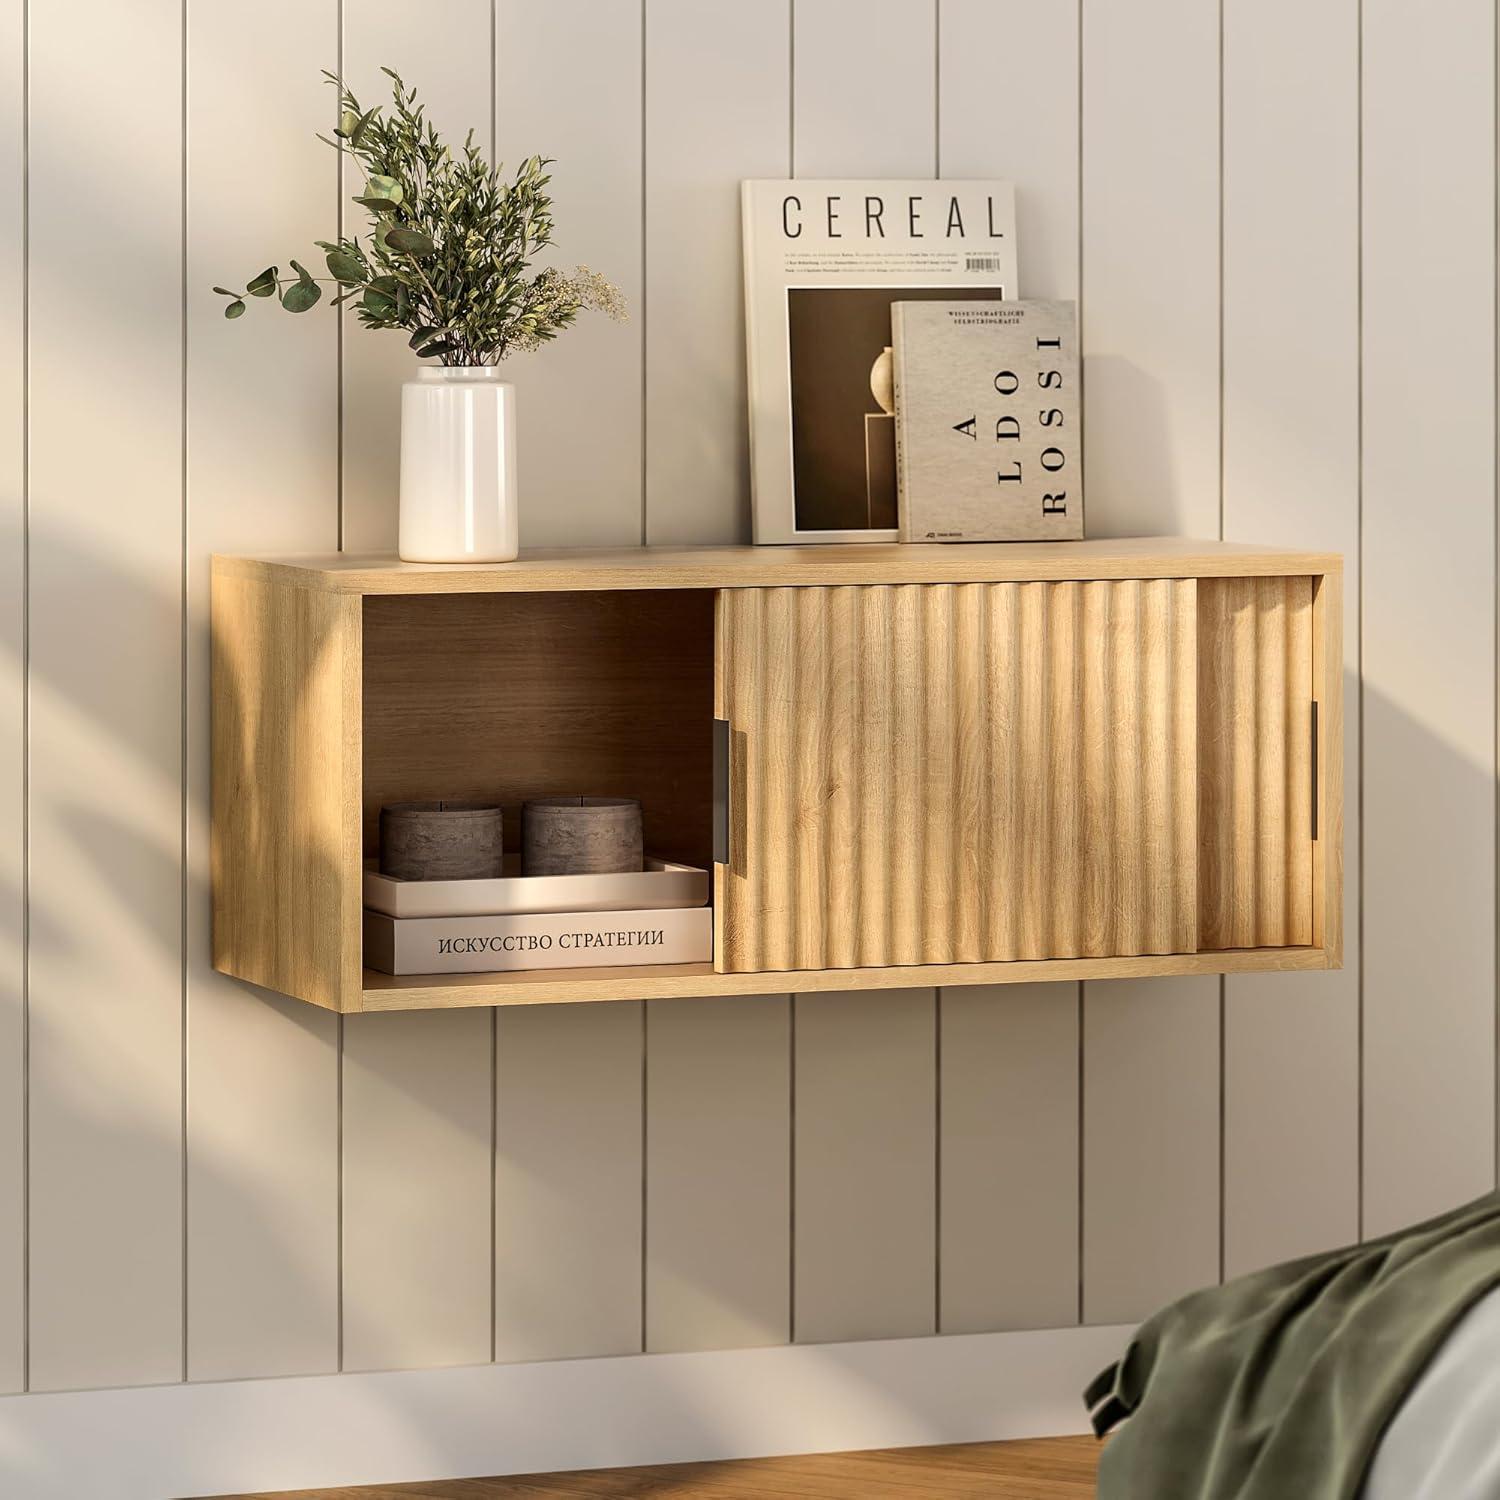
Sunlight catches the rippled face first — the fluted doors throw thin shadows that make the unit feel lighter than its footprint suggests. it’s the unbranded “Floating TV Stands Set of 2” — or, more simply, a fluted floating nightstand in Natural Oak — and at bedside height it reads as a broad cubby rather than a bulky cabinet. When you rest your hand on the top the laminate is smooth with just enough tooth to feel reassuring, and the sliding doors glide with a soft, mechanical hush to reveal a shallow tucked-away interior.Mounted on the wall, it shifts the room’s balance: the visual weight sits higher, the floor looks clearer, and the corner takes on a quietly curated, lived-in feel.
What you see first when you unbox the natural oak floating bedside cabinets
When you cut thru the tape and peel back the top layer of packaging, the first thing you notice is the neat, almost clinical arrangement: two cabinets nestle side by side, each wrapped in protective foam and a thin plastic skin. The oak-like faces are visible through the film, and the wood grain tends to catch the light a little differently between the two pieces, so you may pause to compare tones.Tucked into a corner is a small clear bag with fasteners and a folded instruction sheet; a flat metal bracket or rail is usually visible against one inner panel, and most of the visible surfaces carry a removable protective sticker. There’s a faint factory smell at first, and you’ll likely brush off a few foam crumbs from the edges as you lift a cabinet out of the box.
Before you move everything to the mounting spot you’ll take a rapid inventory: the cabinets themselves, the hardware pack, the mounting plate, and the paper instructions. The sliding doors sit closed in the box and can shift slightly if you tilt a cabinet; the top faces have a thin film you can peel away, and some corner edges show the cut lines of the protective foam.Below is a simple list and quick table summarizing what typically appears right away.
- Inside the box: two wrapped cabinets, hardware bag, mounting plate/rails, instruction manual, protective film/stickers
| Item | Observed quantity |
|---|---|
| Cabinets (wrapped) | 2 |
| Hardware bag (screws, anchors, small parts) | 1 |
| Mounting plate / bracket | 1–2 pieces |
| Instruction manual | 1 |
How you can inspect the fluted fronts, sliding doors, and oak grain up close
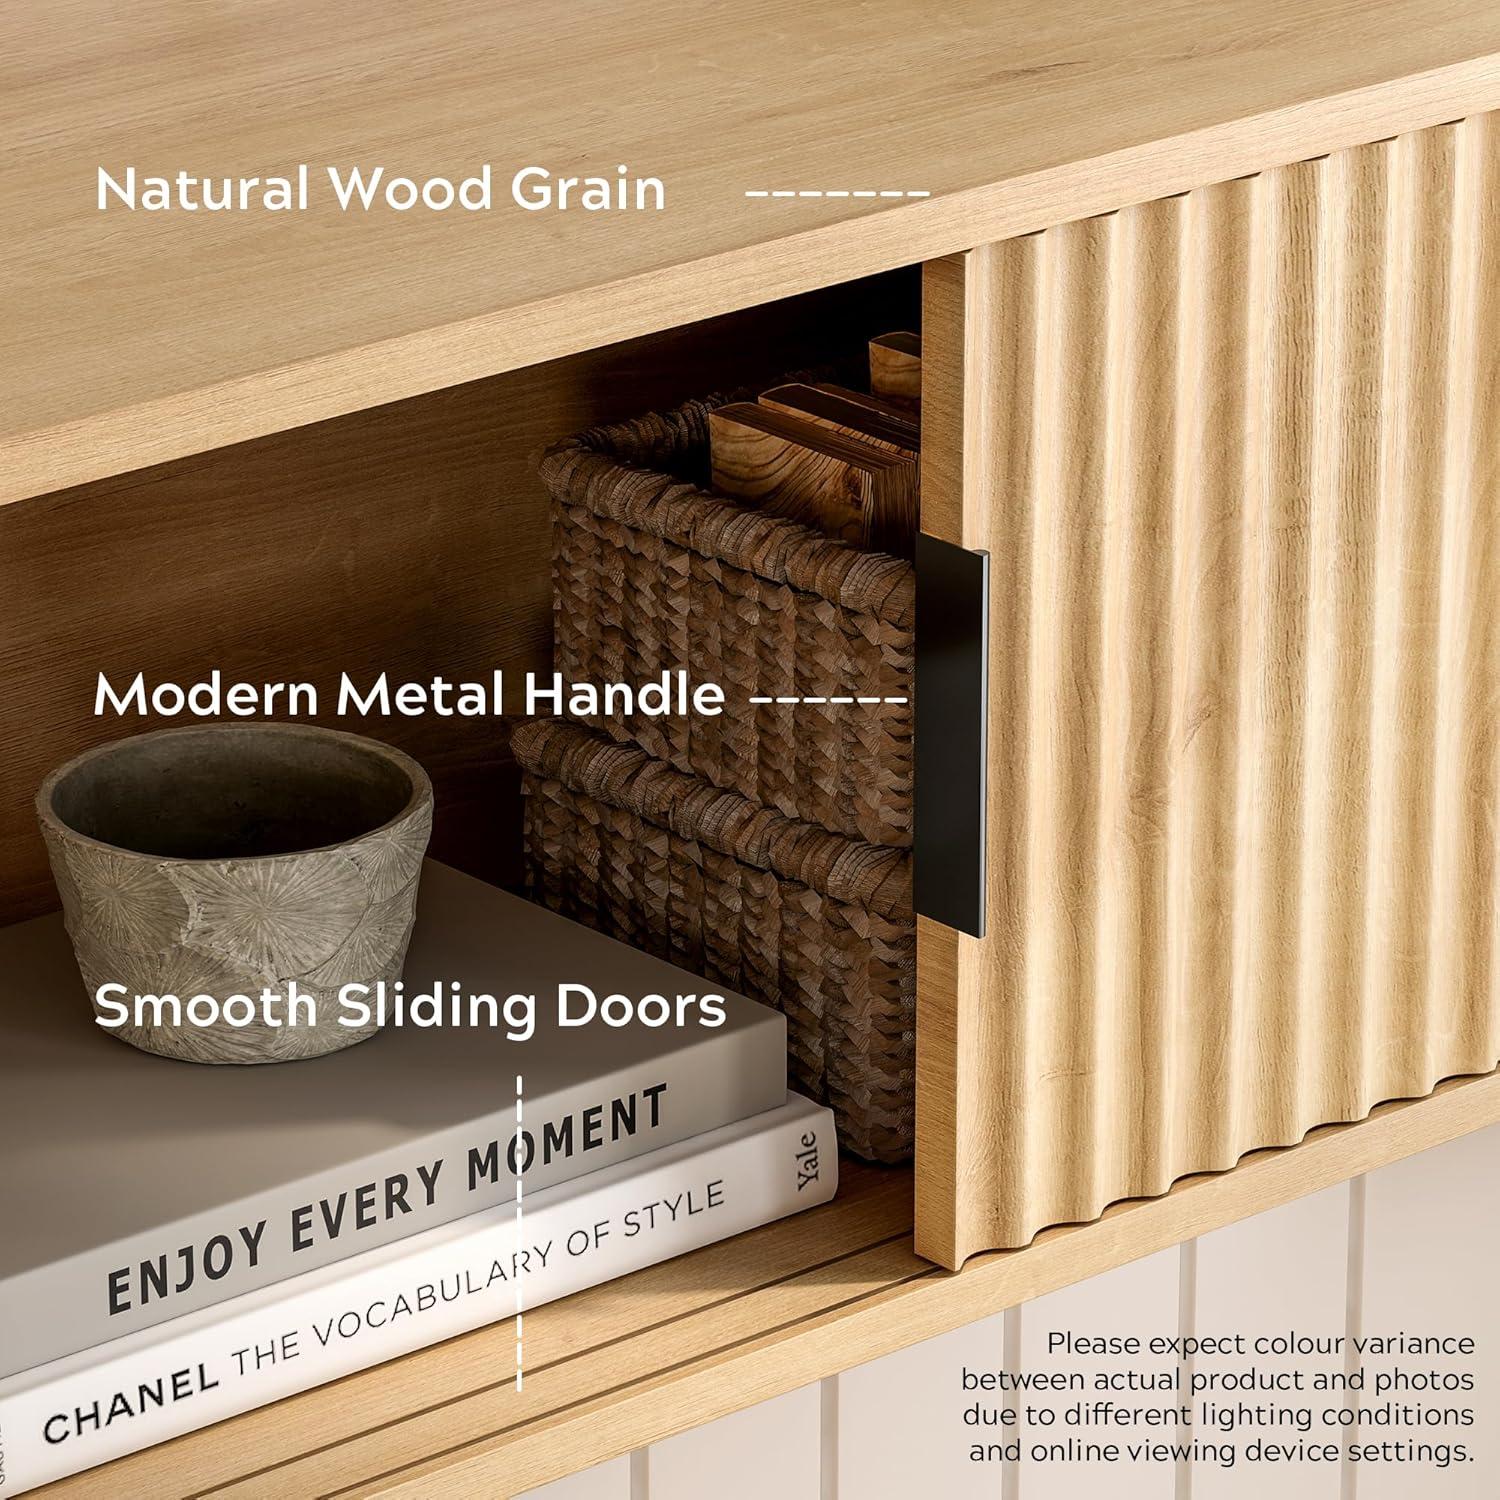
You can start by letting your eyes travel along the fluted fronts at different angles. Hold a soft, diffuse light—your phone flashlight works—to skim across the grooves and watch how the shadows change; that reveals the flute depth and any minor inconsistencies in the routing. bring your fingertips gently across the ribs to sense whether the finish fills the grooves or leaves a slight texture,and note any places where dust or lint tends to settle. for the oak grain, lean in close and follow the pattern across panel joins and around edges to see how continuous the veneer is; look for small knots, streaks or color shifts that run with the grain rather than against it, and use an oblique view to judge sheen and how reflections trace the wood pattern.
When you inspect the sliding doors, move them slowly through their full travel and observe both motion and fit. Pay attention to these quick checks:
- Visual — watch for even gaps and whether the doors remain parallel when closed or sit slightly offset.
- Tactile — feel for smoothness along the track and whether a light push keeps the panel in place or it drifts.
- Sound — listen for scraping, light rattles, or a near-silent glide as the door moves.
| Feature | What to look for up close |
|---|---|
| Fluted fronts | Consistent groove spacing, shadow variation under angled light, and any trapped dust along grooves |
| sliding doors | Even gaps, smooth start/stop motion, visible track cleanliness |
| Oak grain | Pattern continuity at seams, subtle color shifts, and finish sheen over the grain |
Make small, incidental adjustments as you work—changing hand position, reopening a door from the other side, or wiping a groove with your thumb—to catch behaviors that only show up in repeated use.
Where these cabinets sit on your wall and the dimensions you will measure
Where these cabinets end up on your wall depends on the room and the furniture they sit beside. in a bedroom you’ll likely align the bottom edge roughly with the top of the mattress or a few inches below the bedside lamp, while in a living room they often sit under a mounted screen or beside a sofa arm. Pay attention to nearby features that will affect placement: baseboards, window sills, door swings, outlet and switch locations, and any moulding that interrupts a flush fit. You’ll also want to note whether you’re mounting one or both pieces and how far apart they should sit horizontally—sometimes a few inches of extra gap looks intentional, sometimes it’s constrained by studs or a TV bracket. As you mark positions, check for level and plumb and make a quick visual pass for any pipes or conduits if the wall has unusual access panels or older wiring.
- Floor to bottom edge — records the vertical position so the cabinet lines up with beds, chairs, or media equipment.
- Bottom to top clearance — measures headroom for lamps, decor, or wall-mounted screens above the cabinet.
- Stud locations and spacing — notes where anchors or screws will sit relative to the cabinet’s mounting points.
- Distance to nearest obstruction — capture offsets from doors, windows, switches, and outlets.
- depth and walk-by clearance — ensures the cabinet won’t protrude into a pathway.
- Horizontal separation (for the pair) — records the gap between two units and alignment relative to a central feature like a bed or TV.
Below is a simple table you can use to record those on-wall measurements; keep one copy while you mark the wall so you don’t have to re-measure. Measurements can be rough at first (an inch or two of leeway is normal) and then refined once you confirm stud positions and any obstructions.
| Measurement | Why it matters | How to measure |
|---|---|---|
| Floor to bottom edge | Aligns cabinet to furniture and sets reach height | Measure from floor to where the bottom of the cabinet will sit; note any baseboard height separately |
| Bottom to top clearance | Ensures space for lamps, decor, or a TV above | Measure from proposed bottom height up to obstructions or to the ceiling |
| Stud centers & wall material | Determines anchor placement and hardware type | Use a stud finder and measure center-to-center spacing; note drywall/plaster thickness if known |
| Distance to outlets/doors/windows | Prevents covering switches or blocking openings | Measure horizontal offset from the cabinet edges to nearest fixtures |
| Pair spacing / horizontal alignment | Sets visual balance when mounting two units | Measure from a central reference (bed/TV) to each cabinet center, or measure the gap you want between them |
A day in the life with these wall mounted bedside cabinets and how you use the storage

When you wake up, the first interaction is usually simple and a little automatic: you reach for your phone, bump the lamp, maybe slide the door open to grab reading glasses or a paperback you didn’t finish. The top surface becomes a short-term staging area—coffee, glasses, that one book—while the enclosed compartment swallows the small, loose stuff that would otherwise live on bedside surfaces. You’ll notice small habits forming: a charger tucked behind the unit where the cable drops neatly down the wall,a notepad slid under the lamp base,the sliding door nudged open with a fingertip instead of fully pulled back. Typical day-to-day contents tend to fall into a few repeatable groups:
- Top surface: lamp,alarm clock,drink,current read
- Enclosed compartment: glasses,chargers,medication,paperback stacks
- Quick-grab zone: remote,earbuds,a pen or two
Later,when evening arrives,the routine shifts a bit: you clear the tabletop of cups,slide items into the enclosed space,close the door and the room looks tidier without a lot of effort. Small, incidental behaviors show up here—half-open doors when you’re distracted, a bookmark left sticking out, the occasional knock that makes you re-center a mug—none of it dramatic, just the texture of everyday use. The cabinets also play a role beyond bedtime: you might use one for bathroom overflow or as a compact media spot in a living corner, adapting what goes where as the week unfolds. The table below summarizes how different items tend to be used across the two storage areas.
| Item type | Typical placement | Notes |
|---|---|---|
| reading material | Top surface or stacked inside | Often alternates depending on how close to finishing |
| Electronics/chargers | Enclosed compartment with cable routed down | Left tucked away overnight; sometimes brought out for daytime use |
| Small daily items | Enclosed compartment | Keeps visual clutter low while still within easy reach |
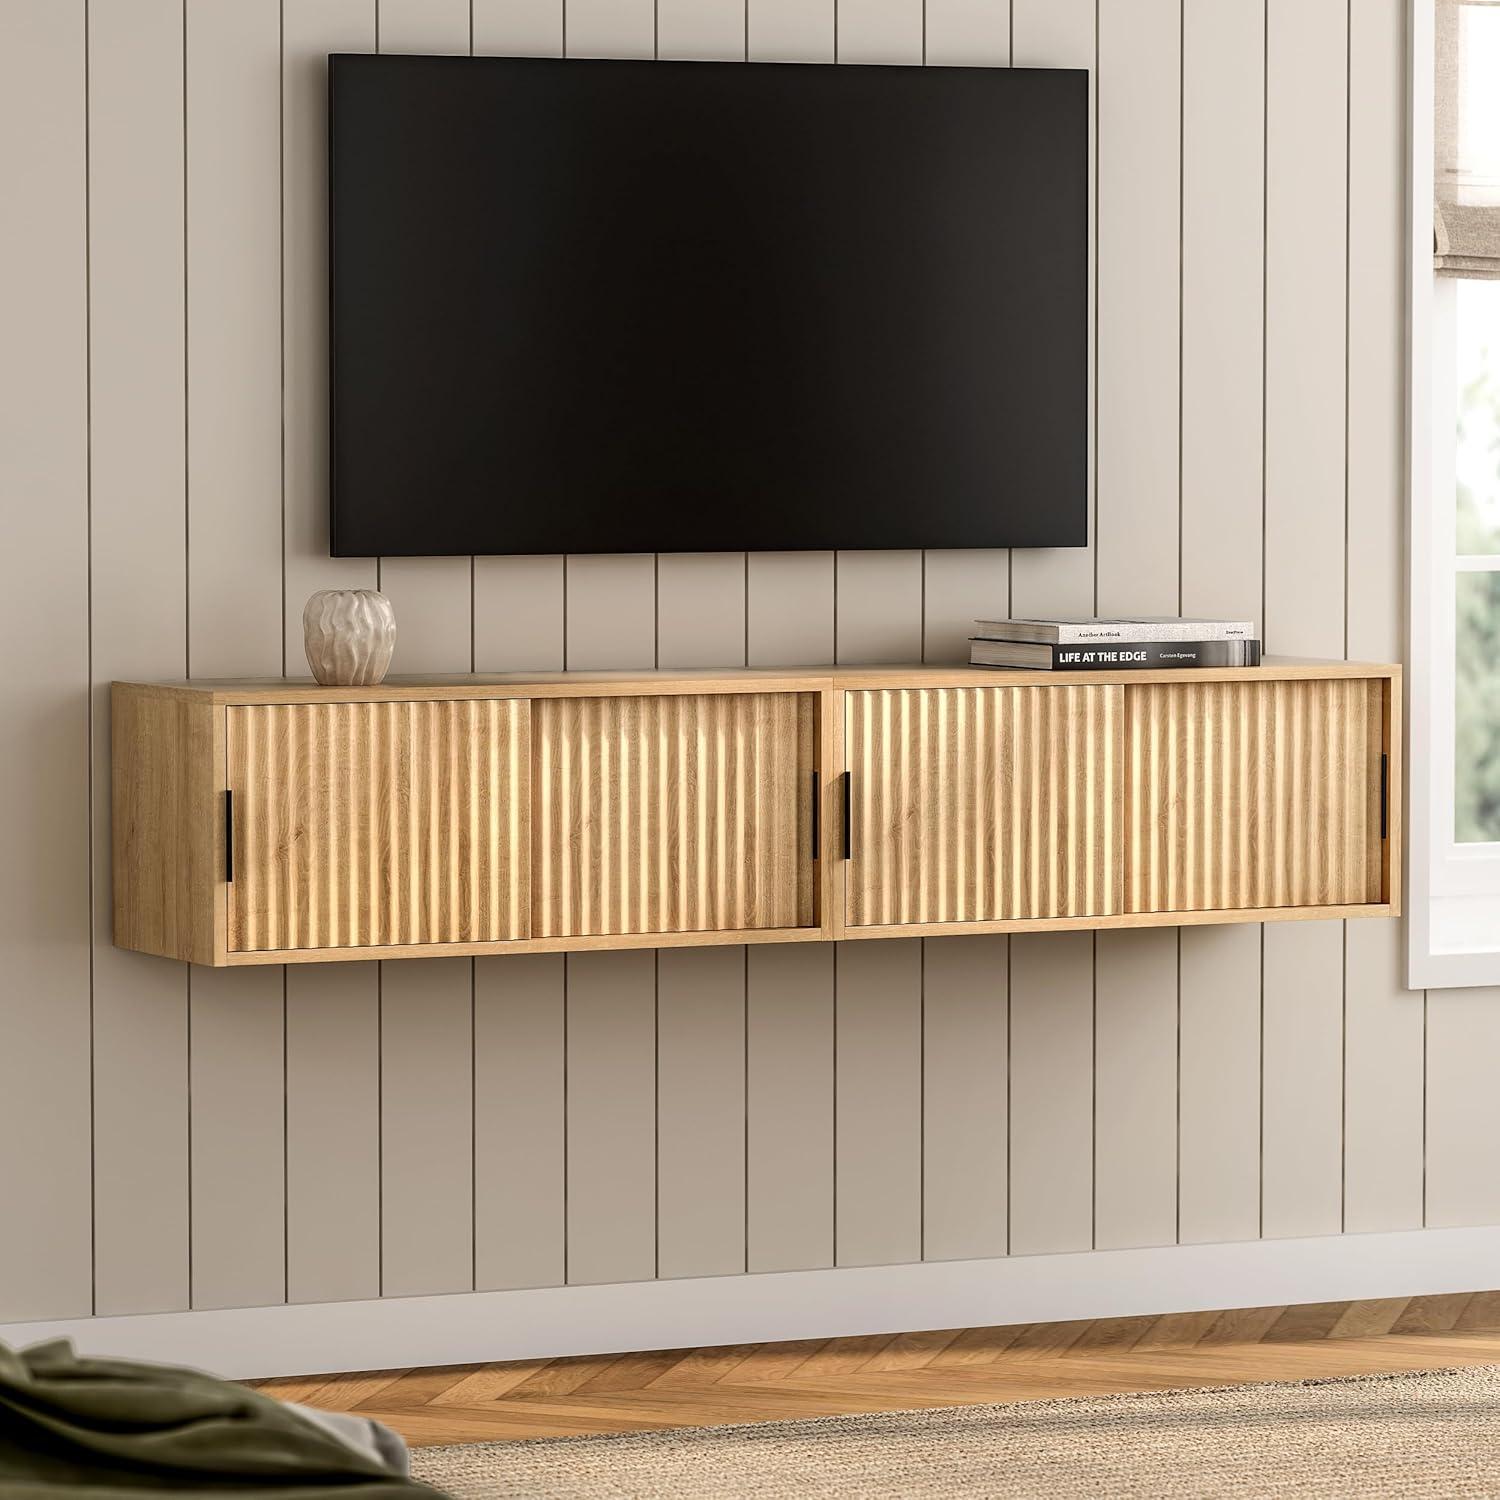
How they match your space and where they limit what you can do

These wall-mounted cabinets tend to read as visually light in a room: the raised profile keeps floor sightlines uninterrupted and can make narrow spaces feel less crowded. The low,horizontal silhouette often lines up neatly with other wall-mounted elements,while the sliding doors keep faces of stored items out of sight — which in turn changes how often stored things are accessed. Everyday habits shift slightly; people often leave frequently used items on the open top or nearby surfaces instead of stowing them behind the doors, and cords from lamps or media devices end up routed along the wall rather than hidden under a freestanding base. A few situational notes help clarify how they slot into different rooms:
- Bedroom: works with floating headboards and nightstand-level sightlines, though care is required so bedside lighting and alarm access remain convenient.
- Living areas: clears floor space under sofas or against narrower walls, but the fixed mounting can create awkward gaps if furniture is rearranged.
- Bathrooms or entryways: offers wall storage without taking floor footprint, but limited depth changes what can be placed behind sliding doors.
Mounting is the main practical constraint: fastening to a solid wall or suitable anchors is necessary, which affects where the piece can go and how easily it can be moved later.The fixed position also means access angles matter — sliding doors and shallow interiors make reaching tall or bulky items awkward once the unit is hanging. Cable routing and ventilation for any electronics placed on or inside the cabinet tend to require planning ahead,and routine cleaning frequently enough involves working around the mounted edge rather than lifting the whole unit. The table below summarizes a few common constraints and their immediate effects on placement and daily use.
| Constraint | How it affects placement or use |
|---|---|
| Fixed wall mounting | Limits relocation and requires planning for studs or anchors |
| Shallow interior depth | Restricts tall/bulky items and favors flat or stacked storage |
| Sliding-door access | Reduces quick retrieval; items are frequently enough kept on the open top rather |
For full specifications and current configuration details,see the product listing here.
What arrives in the box and the hardware you handle during installation
Inside the box you’ll find the main panels and the smaller parts separated into labeled bags. The larger pieces arrive either fully assembled or with the sliding-door panel detached—either way they’re wrapped in foam and cardboard to protect the finish.Alongside the panels you can expect a printed instruction sheet and several plastic bags containing fasteners and fittings.Typical loose items you’ll see include:
- Mounting cleat or metal bracket (usually pre-drilled to match the cabinet back)
- Assorted screws and washers in separate,numbered bags
- Wall anchors (plastic and sometimes short metal anchors)
- Small parts for the sliding doors: rollers,guides,and rubber bumpers
- A small hex key or Allen wrench and a set of decorative caps
Hardware you handle during installation centers on the metal cleat and the variety of fasteners. When you lift the cabinet to the wall you’ll be aligning the pre-drilled cleat or slot and threading the larger lag screws or bolts through washers into the anchors; the smaller screws are mainly for door runners and bumper stops. The parts are usually numbered to match steps in the instructions, which reduces hunting through tiny bags while you work. The table below lists the most commonly included items and rough counts as they appear in the kit:
| Item | typical quantity |
|---|---|
| Mounting bracket/cleat | 1 |
| Lag screws / bolts | 2–4 |
| Wall anchors (plastic) | 4–6 |
| Rollers/guides for sliding door | 2–4 |
| Small screws, washers, decorative caps | several labeled bags |
Note: parts may vary slightly by batch; check the included inventory against the parts list before you begin.

How the Set Settles Into the Room
After living with the Floating TV Stands Set of 2, Modern Fluted Large Floating Nightstand Wall Mounted bedside Cabinet with Sliding Doors for Bathroom, Living Room, Bedroom, Natural Oak for a few weeks, you notice it doesn’t demand attention so much as slot into routines. In daily use the tops pick up soft scratches and the occasional mug ring, the sliding doors are eased open in passing, and the cabinets quietly hold the things you reach for in the morning and at night. It alters how the room is used — a place for a phone, a landing for a hand — and those small accommodations fold into habit. Over time it stays, simply part of the room.