decordip Garden and patio decoration inspiration
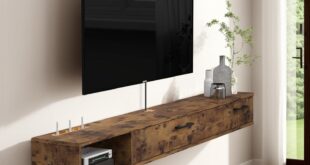
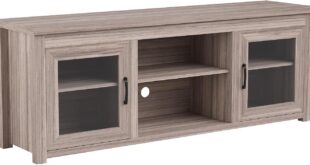
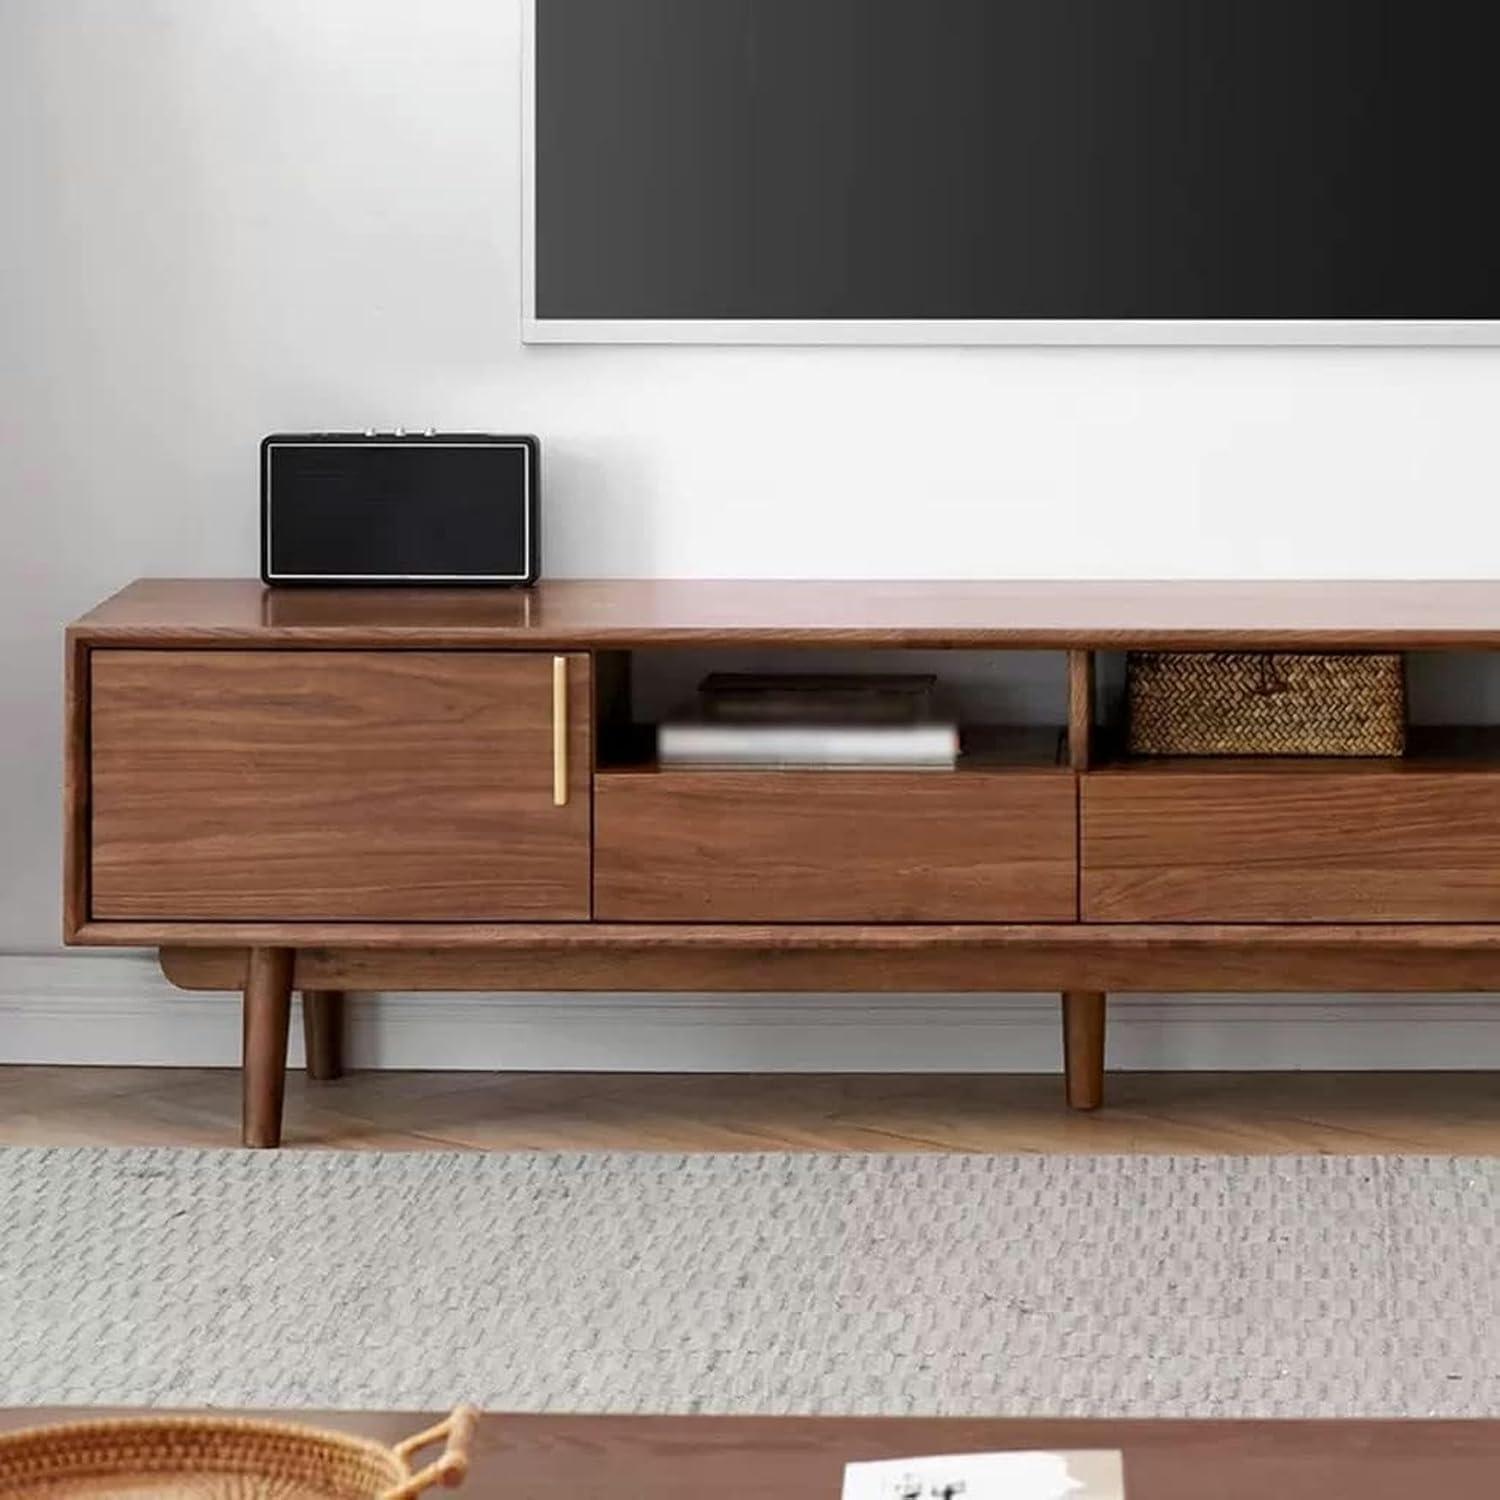
Late afternoon light pools along the top of the unbranded Entertainment Center TV Stand (200 × 40 × 46 cm), bringing out warm notes in the black-walnut finish. From your sofa its low, horizontal silhouette reads significant rather than bulky — long enough to sit beneath the TV yet shallow enough not to intrude into the room. When you glide a hand across the surface the veneer has a gentle tooth, and the drawers close with a soft, muffled thud. Four drawers line the front,their seams and subtle handles breaking the face into calm,practical planes. It feels like something that’s already been lived with: visually grounded, quietly textured, and easy to ignore until you need it.
A first look at your Entertainment Center TV stand measuring 200 by 40 by 46 centimeters out of the box

When you open the outer box, the first thing you notice is how the larger panels are wrapped and stacked to occupy the space — protective foam tucked into the corners and plastic sheeting over the surfaces. As you pull pieces out you tend to set them on the floor and make a quick visual sweep: edges, visible joins and any obvious scuffs. A folded instruction sheet and a small clear bag of hardware usually sit near the top, and there can be a mild cardboard or factory scent that fades after a few minutes of airing. It’s common to pause and rearrange parts into a clearer work area before you reach for tools.
- What’s immediately visible: the main panel(s) wrapped in plastic
- One instruction manual folded on top
- A sealed installation kit with labeled fasteners
Before you start fastening anything you’ll probably sort the smaller items into groups so nothing gets lost — screws, dowels and the odd extra fastener are easy to misplace if they’re dumped in a pocket.The printed diagrams sit face-up in the manual and most of the bags are labeled, which makes matching parts to steps quicker; at this stage you can also test-fit a couple of pieces to confirm alignment without fully tightening bolts. If you like a simple breakdown to glance at, the table below lists the items you’ll most likely find immediately upon unpacking.
| Item | Quantity |
|---|---|
| Main cabinet panels | 1 set |
| Instruction manual | 1 |
| Installation kit (fasteners, small tools) | 1 bag |
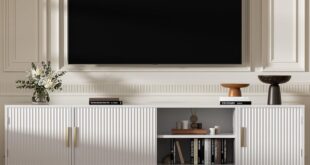
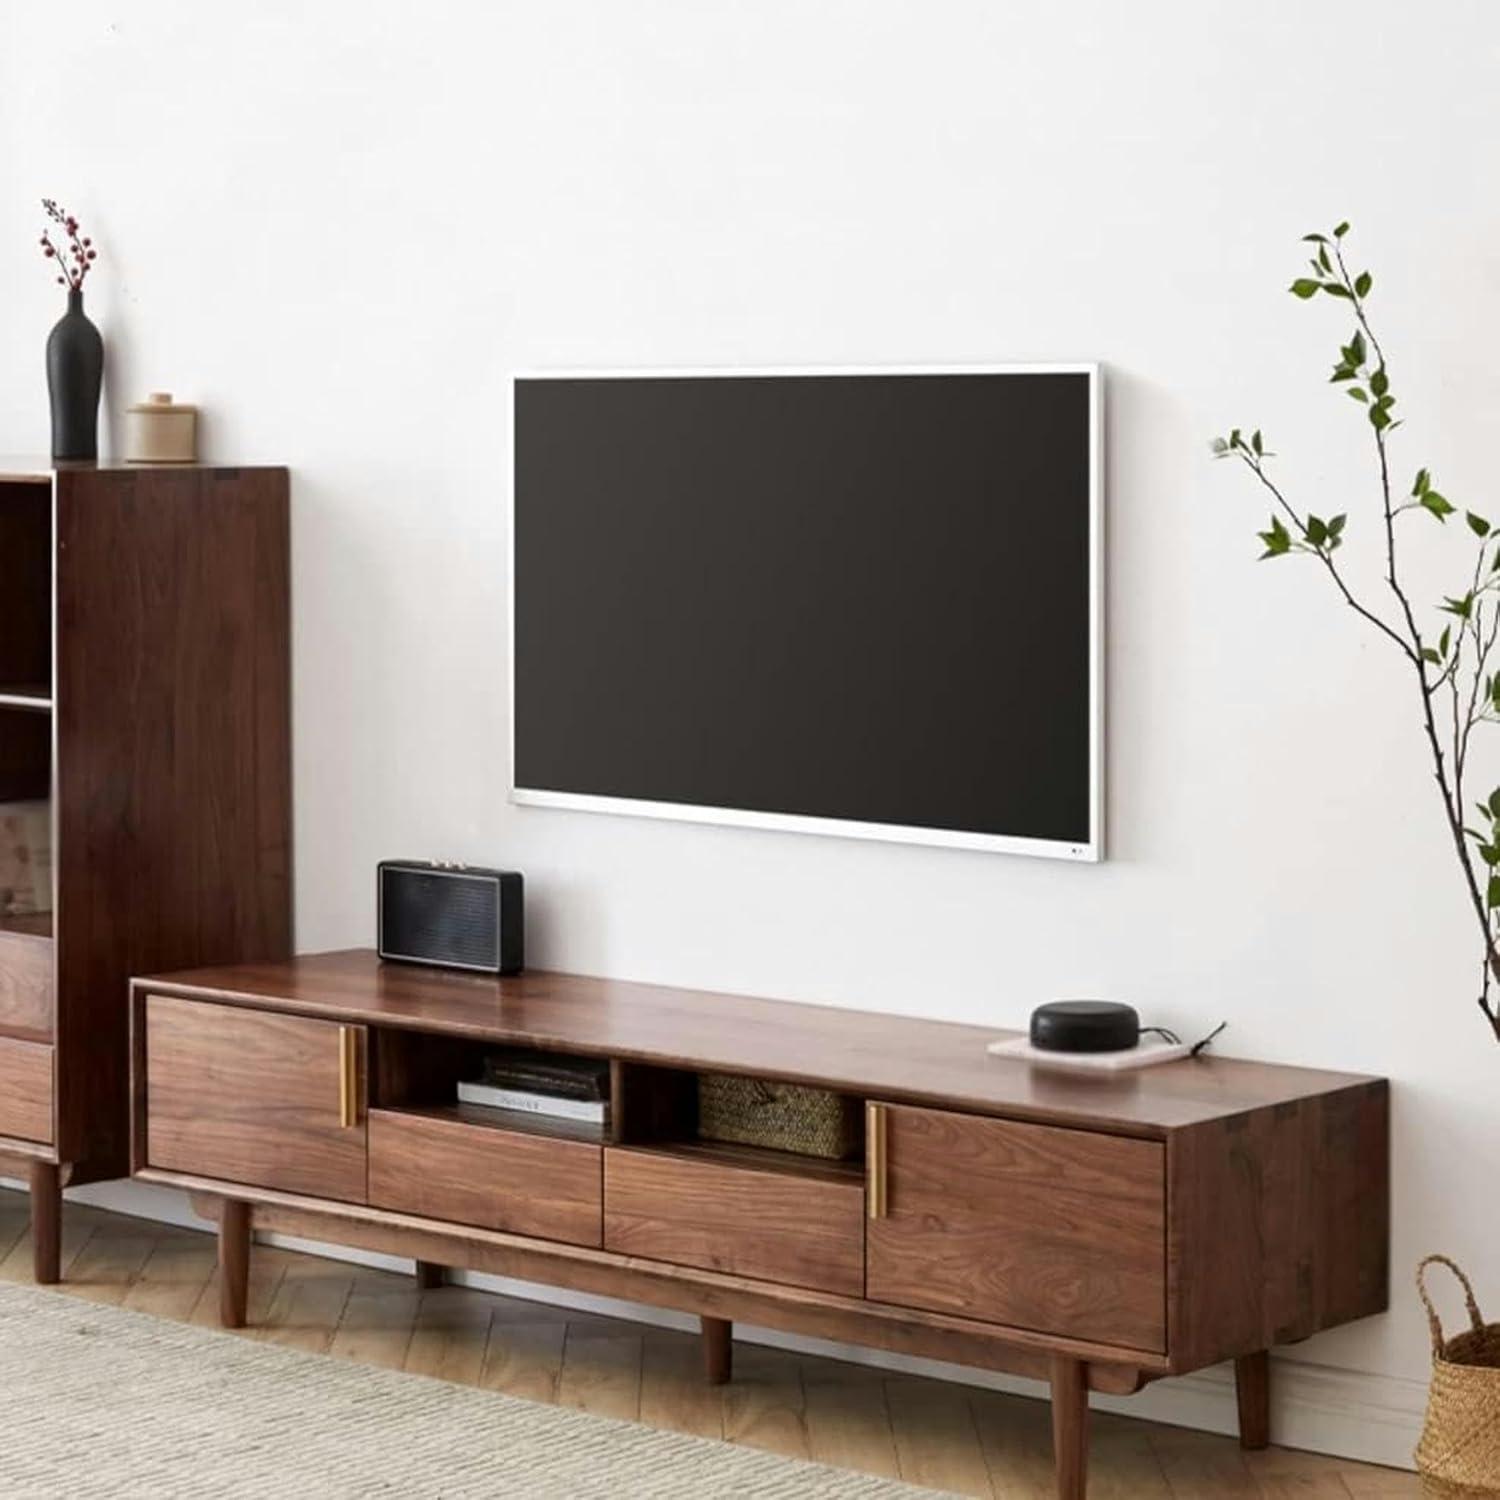
How the stand’s proportions sit against your living room wall and define a focal area
You’ll quickly notice the way the stand’s low, elongated profile creates a clear horizontal anchor along your wall, pulling the eye across the room rather than up. In everyday use that manifests as a defined strip of focus: the TV and objects on the surface read as a single composition against the wall,and the drawer fronts add a steady rhythm that helps the arrangement feel intentional. Small, incidental actions—nudging the unit a few inches to better align with the sofa, or shifting a lamp until the shadow looks right in the evening—are part of how this horizontal emphasis settles into the room.
- Horizontal anchor: the line created by the top surface and drawer seams
- Visual breathing room: the space left above and to the sides that frames the focal band
Against a wider wall the stand tends to establish a broad focal band that invites grouping—art,speakers,and decor items read together; on a narrower wall it can dominate more of the eye-level plane and make the television area feel more compact. The interaction with surrounding furniture matters too: a low coffee table or a long sofa emphasizes the stand’s lateral sweep, while taller chairs or shelving nearby shift attention vertically and break that band. The table below summarizes common visual outcomes you might observe when the stand is placed along different wall proportions.
| Wall proportion (relative width) | Typical focal effect observed |
|---|---|
| Much wider than the stand | Creates a centered focal band; surrounding empty wall becomes part of the composition |
| Close to the stand’s visual span | Reads as a cohesive, room-defining element with balanced edges |
| Narrower than the stand’s perceived sweep | compresses the focal area; the stand appears more dominant and room feels tighter |
What the materials and finishes reveal when you inspect surfaces and joinery up close
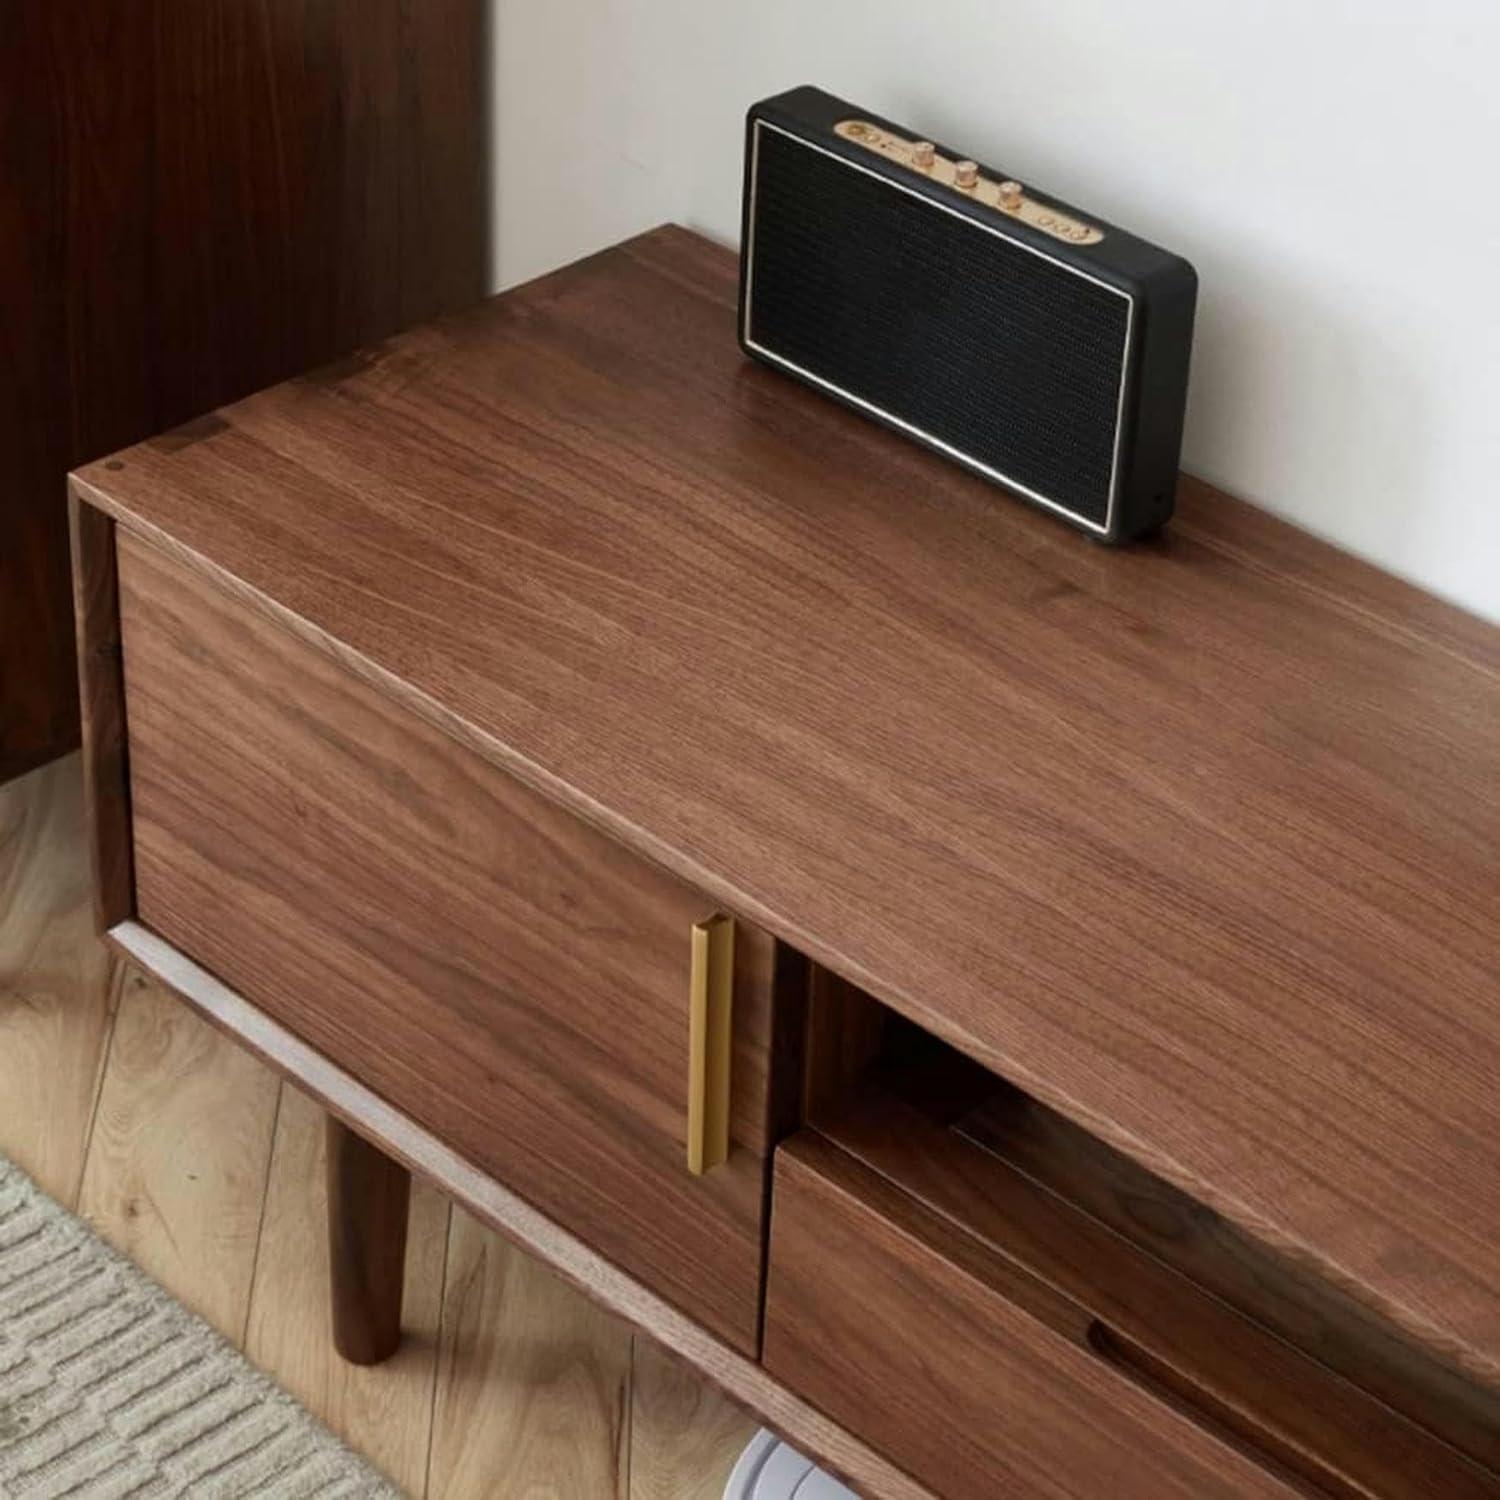
When you run a hand across the top and faces, the first things that register are the finish and how the veneer sits on the substrate. The surface typically shows a consistent stain and a low- to mid-sheen that softens reflections; finish sheen helps hide small dust and fingerprints but also slightly mutes the walnut grain. In close-up you’ll notice thin seam lines where veneer sheets meet at corners and along long edges, and those seams can be more visible under bright light. The texture alternates: some panels feel almost glassy where the lacquer is thicker,while other areas retain a faint “tooth” from the underlying wood pattern. Tiny milling or sanding marks can appear on routed edges and drawer fronts; they’re not always obvious until you change your viewing angle or brush your fingers along the edge. Small glue squeeze-out or touch-up fills may be present inside cabinet cavities or behind drawers — the kind of incidental traces that tend to show on manufactured pieces after assembly and handling.
Up close, the joinery language is more about fit and the assembly system than about heavy, exposed carpentry. You’ll see evidence of cam-locks, dowels, and confirmation holes where shelf pins sit, and drawer gaps reveal how consistently the faces were aligned during final adjustment.Hardware finishes — the metal of knobs, slides and screws — frequently enough carry a slightly different sheen than the cabinet surfaces and may show machining marks or fine tool abrasions. A quick visual checklist you can use when inspecting includes:
- Drawer gap: consistent spacing along the front edge indicates a repeatable assembly process.
- Edge finish: thin veneer edges can expose the particleboard core at extreme close range.
- Hinges & slides: visible mounting plates or screw heads reveal how components were installed.
For reference, the table below summarizes a few typical close-up clues and what they reveal about surface and joint treatment:
| Feature | Close-up clue |
|---|---|
| Top surface | Even sheen, occasional micro-scratches that show at grazing light |
| Veneer edges | Thin seam lines; substrate visible where edge banding is minimal |
| Drawer hardware | Mounting screws and slide housings indicate factory pre-drilling |
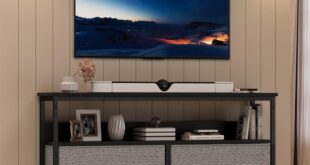
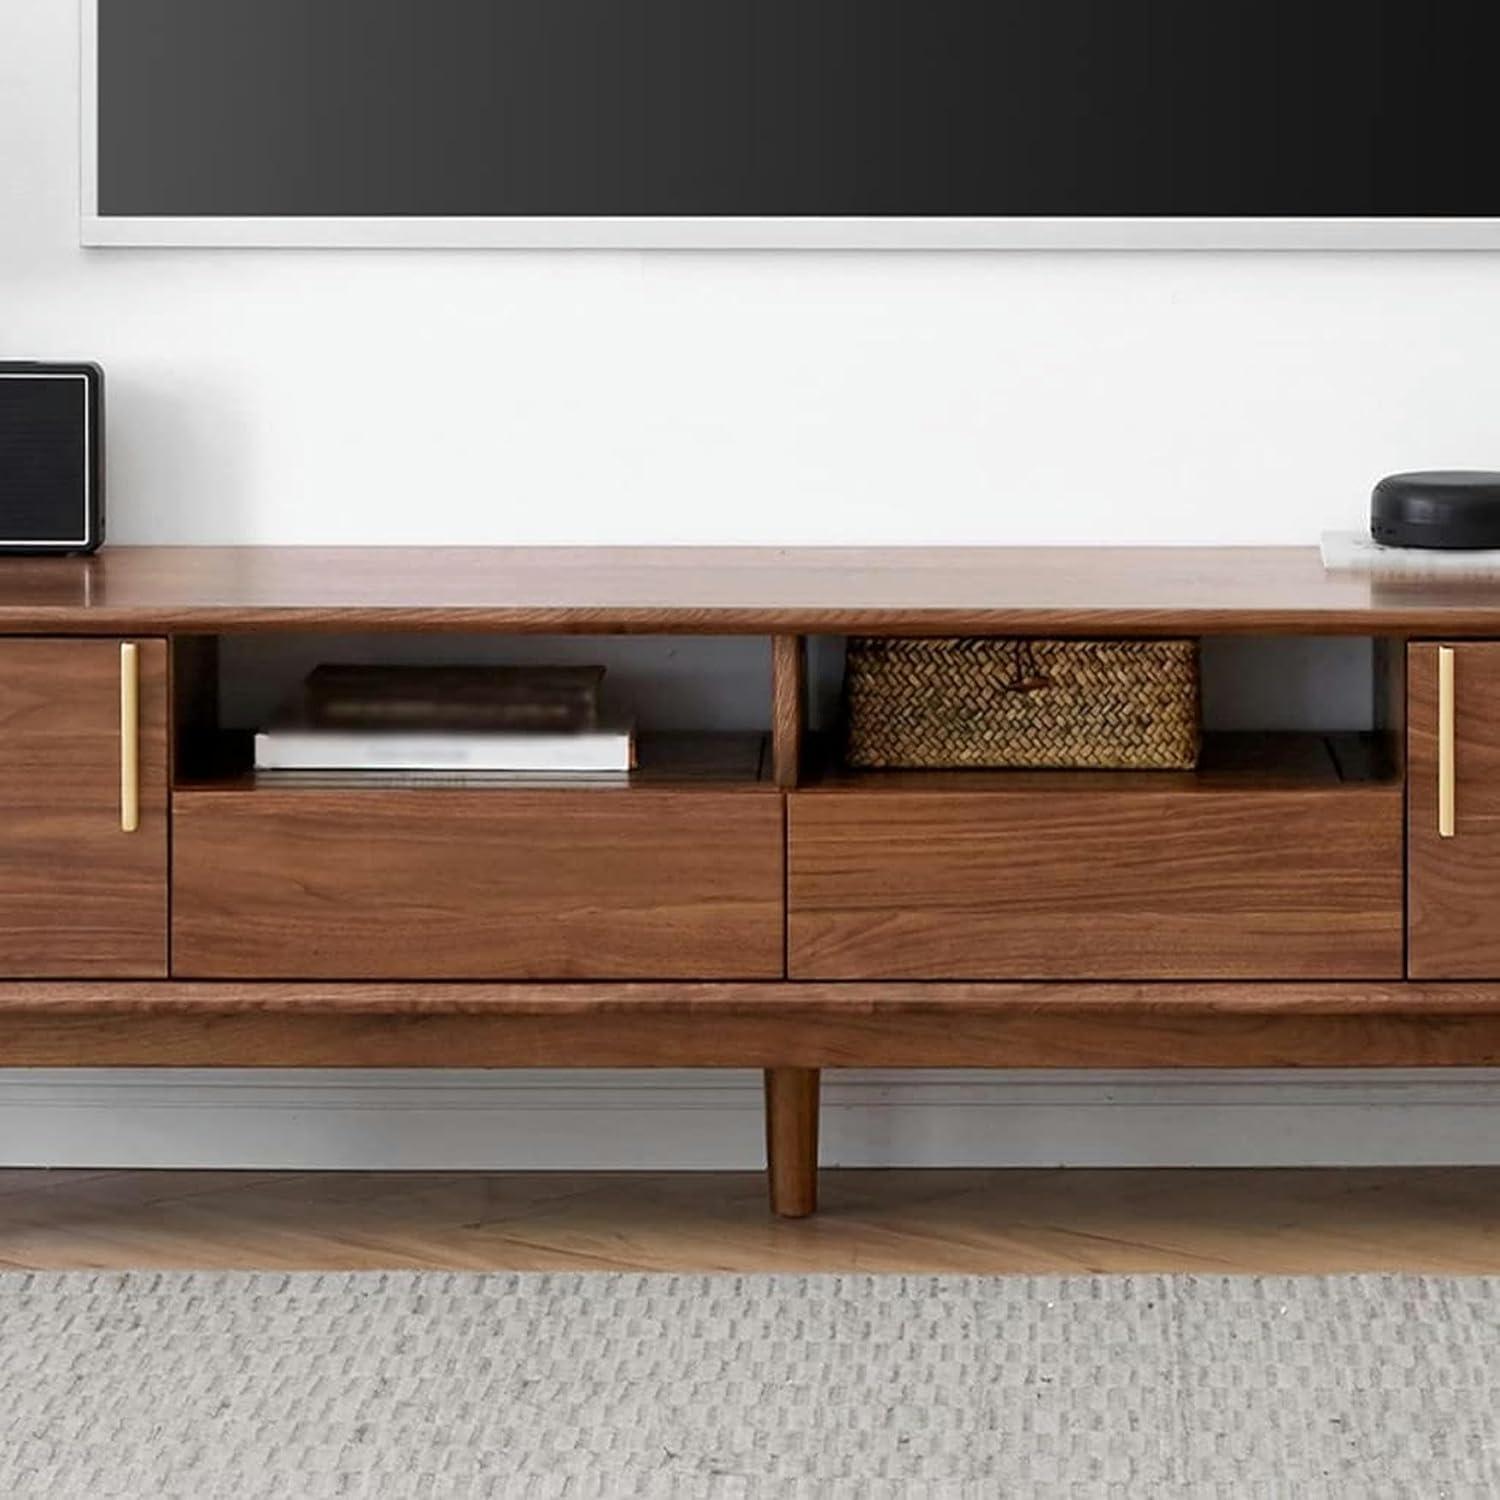
The top surface naturally becomes the anchor for your screen and a couple of accent pieces; you’ll frequently enough balance the television slightly off-center to leave room for a lamp, plant or framed photo. The open shelf space below (or behind any central openings) tends to hold devices you reach for most—streaming boxes, a soundbar, or a game console—laid flat or with a slight forward tilt so remote signals find them easily.Drawers become the quieter workhorses: small accessories, extra cables, remote controls and instruction manuals disappear into a drawer so the visible surfaces stay calm, while deeper drawers can hold stacks of discs, controllers or seasonal decor that you rotate in and out.
- Top surface: TV plus one to three decorative items or practical pieces like a speaker.
- Open shelves/compartments: Everyday electronics with room for airflow and a cable run.
- Drawers: Smaller miscellany,media collections and items you want out of sight.
In everyday use you’ll notice habits develop: consoles sometimes get nudged to the edge for better ventilation, remotes end up on top of a drawer when in the middle of a binge, and decorative objects migrate with the seasons. Visible shelves invite styling but also occasional dusting; enclosed drawers hide clutter but make quick access slightly more purposeful. The layout naturally encourages a mix of display and concealment rather than everything being visible at once, so items that benefit from quick reach sit higher and those kept tidy or protected go behind a drawer front.
| Compartment | Common contents |
|---|---|
| Top surface | TV, decorative accents, compact speakers |
| Open shelf(s) | Streaming box, console, router/modem (with cable access) |
| Drawers | Remotes, cables, media discs, controllers, manuals |
the footprint often requires a moment of negotiation at thresholds and around turns. In practice, movers tend to angle the piece, sliding one end through first and then pivoting the body rather than attempting a straight pass; this is especially noticeable in short halls or where a door frame opens into a tighter corridor. Small on-the-fly adjustments — tilting the cabinet a few degrees, removing packaging, or briefly taking a drawer out to reduce catch points — are common when moving it from entryway to placement spot. Observations that commonly come up during transport include:
- edge-first entry helps when a flat approach would bind against a jamb.
- Pivot space at the end of a hallway often determines whether one or two people are needed to guide it.
- Stairs and elevators can change handling entirely; stair turns may require short, careful lifts rather than sliding.
These are incidental behaviors rather than fixed requirements and tend to vary by doorway style and the number of hands on deck.
Once in place, the footprint establishes a clear horizontal plane and subtly shifts circulation and sightlines in the room. Placed against a wall it creates a low visual anchor and typically leaves a narrow maintenance gap along the rear for cords; when set slightly off center it can alter walking paths and the perceived width of a passage. The table below summarizes common doorway-width conditions and the typical maneuvering tendency observed with similar pieces, presented as broad categories rather than strict rules.
| Doorway width (approx.) | Maneuvering tendency |
|---|---|
| Narrow (under ~80 cm) | Often requires angled entry or temporary disassembly of removable parts |
| Standard (~80–90 cm) | Usually passes with an edge-first pivot and one person guiding at the rear |
| wide (over ~90 cm) | Can be carried straight through with a little lateral clearance |
For full specifications and configuration details, see the product listing: Product details on Amazon.
In everyday use the stand settles into routines more than dramatic moments: electronics and a few decorative items are placed on top and reached for several times a day, drawers are opened for quick stashing and then nudged closed, and small adjustments—shifting a speaker an inch, re-routing a charging cable—happen without much planning. The surface and drawer fronts tend to reveal fingerprints and dust between weekly cleanings, so light maintenance becomes part of the cadence of using the piece. Over time fasteners occasionally need a quick retighten after moving components around, and the fit of the drawers can feel snug when items are packed to the back; those little habits (propping a drawer open briefly, using a coaster under a lamp) become common rather than remarkable.
Practical limitations show up in ordinary contexts:
- access in tight layouts: Moving the unit through narrow doorways or positioning it in compact rooms can require partial disassembly or an extra pair of hands.
- Cable routing and ventilation: Cable bundles often need creative routing to keep the back tidy, and stacked electronics call for attention to airflow when used for long viewing sessions.
- Drawer operation: The glides operate smoothly when lightly loaded but can feel stiff if drawers are packed full or unevenly weighted.
- Surface care: the finish shows everyday wear more quickly than hidden surfaces, so placement of frequently handled items influences how frequently enough the stand gets cleaned.
| Feature | Typical expectation | Observed behavior |
|---|---|---|
| Assembly time | Quick setup | Moderate time with two people for alignment and tightening |
| Cable management | Neat, out-of-sight routing | Requires external guides or clips for a tidy back profile |
| Daily upkeep | Occasional dusting | More frequent surface cleaning if used for high-touch items |
View full specifications and current configuration details on the product listing.
What you handle after installation assembly care and routine upkeep
right after you finish putting the pieces together, take a few routine steps to settle things in and keep surprises to a minimum. Walk around the unit and check for loose fasteners, misaligned drawers or doors, and any small transport nicks you might want to note; those minor fixes often show up in the first days. A quick run-through typically includes a few simple actions:
- Inspect: check screws, cam locks and visible joins for snugness
- Level: make sure the stand sits flat and adjust floor protectors if one corner tilts
- Secure: confirm wall‑anchoring hardware (if used) is seated and not under tension
- Route cables: tuck cords to avoid pinching or strain on plugs
- Protect floors: place pads or felt under feet if there’s any risk of scuffing
It’s normal to tighten a few fittings or realign a drawer after a day or two as parts settle, so you’ll probably handle a couple of tiny adjustments without much fuss.
Over the longer term, upkeep tends to be low‑effort but periodic. Light dusting every week reduces surface abrasion from grit, while wiping spills promptly keeps finishes even; you’ll often reach for a soft cloth and mild cleaner rather than anything abrasive. Every few months glance over hardware and slides and re‑tighten anything that’s loosened; lubricate runners sparingly if a drawer develops roughness. Avoid dragging the piece across floors when you rearrange a room, and try to keep very heavy items spread out instead of concentrated in one drawer. For a quick reference, this table outlines common intervals and what you’ll typically do:
| Task | Suggested cadence |
|---|---|
| Surface dusting and light wipe | Weekly |
| Check and tighten hardware | Every 2–3 months |
| Lubricate drawer slides / hinges | As needed (frequently enough yearly) |
| Inspect floor protectors and anchors | Seasonal or after moving |
Small habits—like testing a cleaner in an inconspicuous spot or shifting items occasionally to avoid permanent indentations—will keep maintenance simple. For some households, humidity or pets can change the rhythm of care a bit, so expect to adapt those checks over time.
Its Place in Everyday Living
After living with the Entertainment Center TV Stand with 4 Drawers floor cabinet for a while, you notice it doesn’t demand attention so much as it finds its corners in the room. Over time its proportions quietly shape how space is used, the drawers gathering the small rituals of daily life — remotes, chargers, a wandering stack of magazines — and the top softening with the faint wear of regular touch. in daily routines it moves between usefulness and background: a spot for a mug, a place where evening light pools, a stable presence as the room is used.With those steady, ordinary rhythms, it simply stays.