decordip Garden and patio decoration inspiration
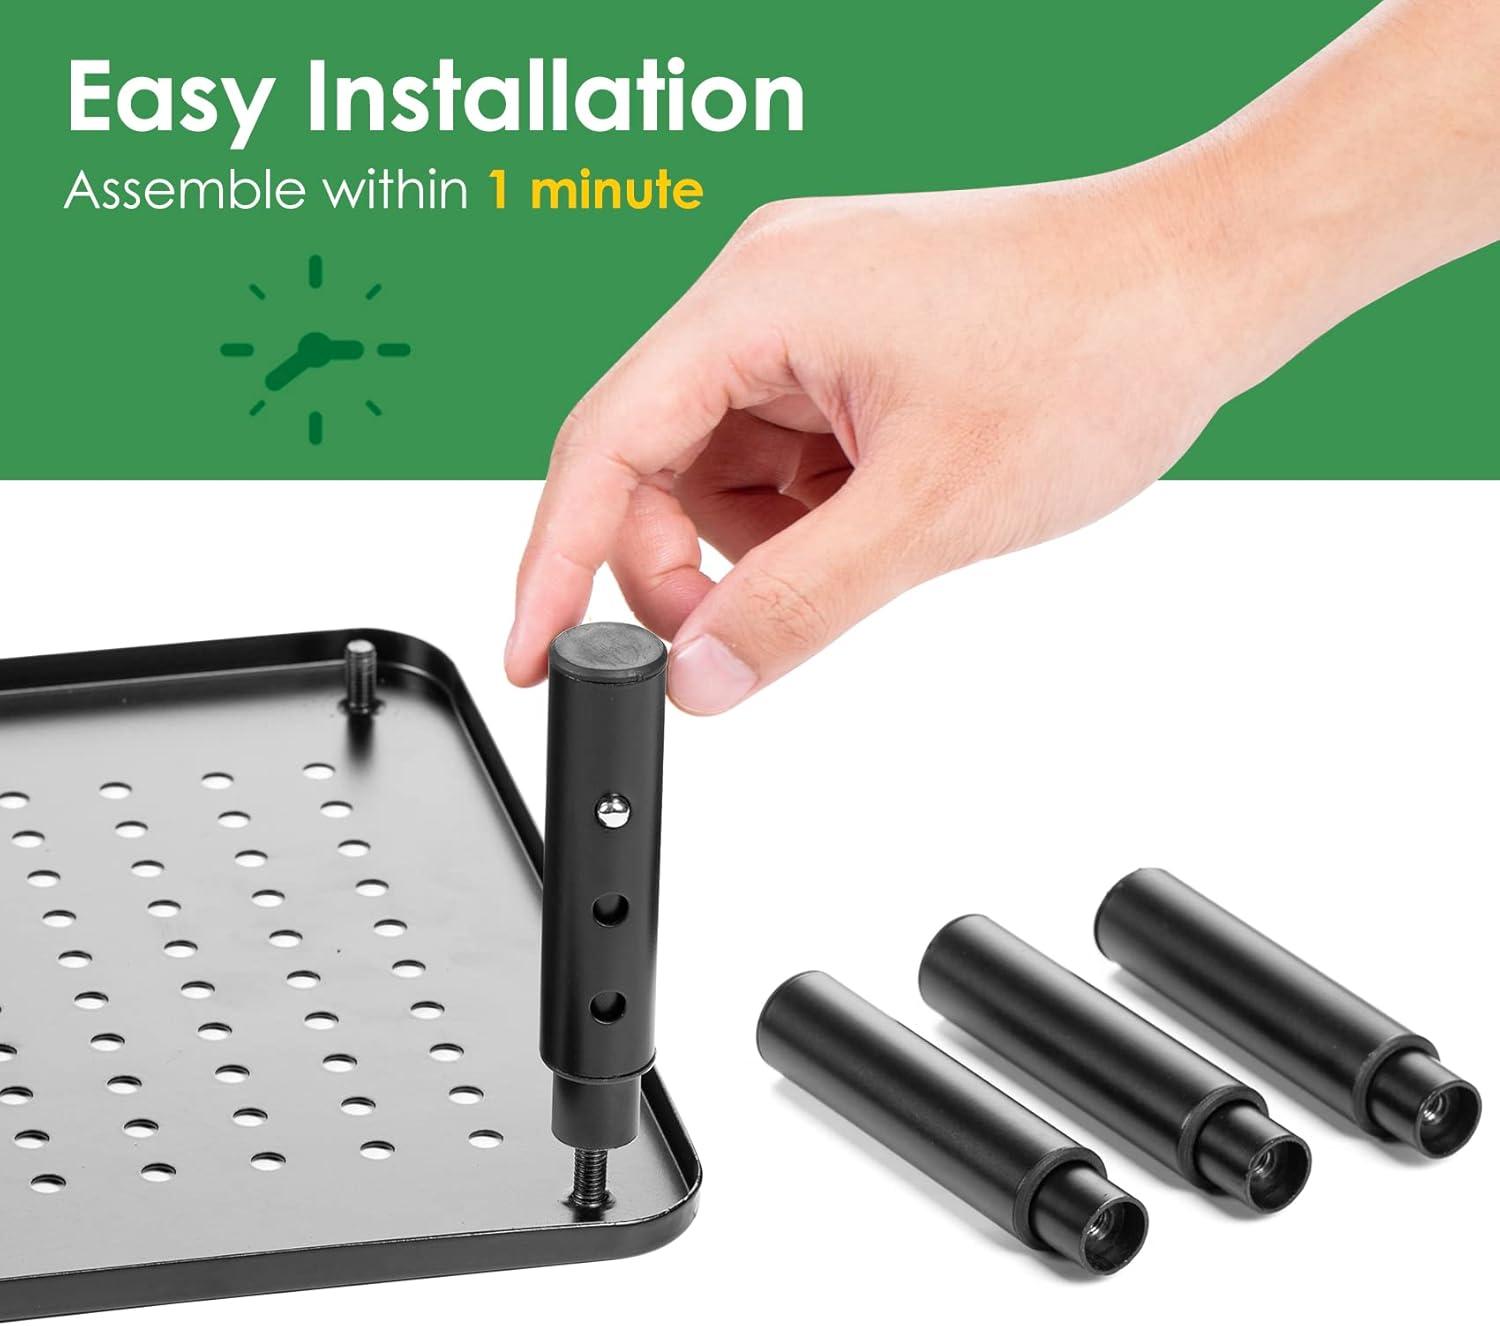
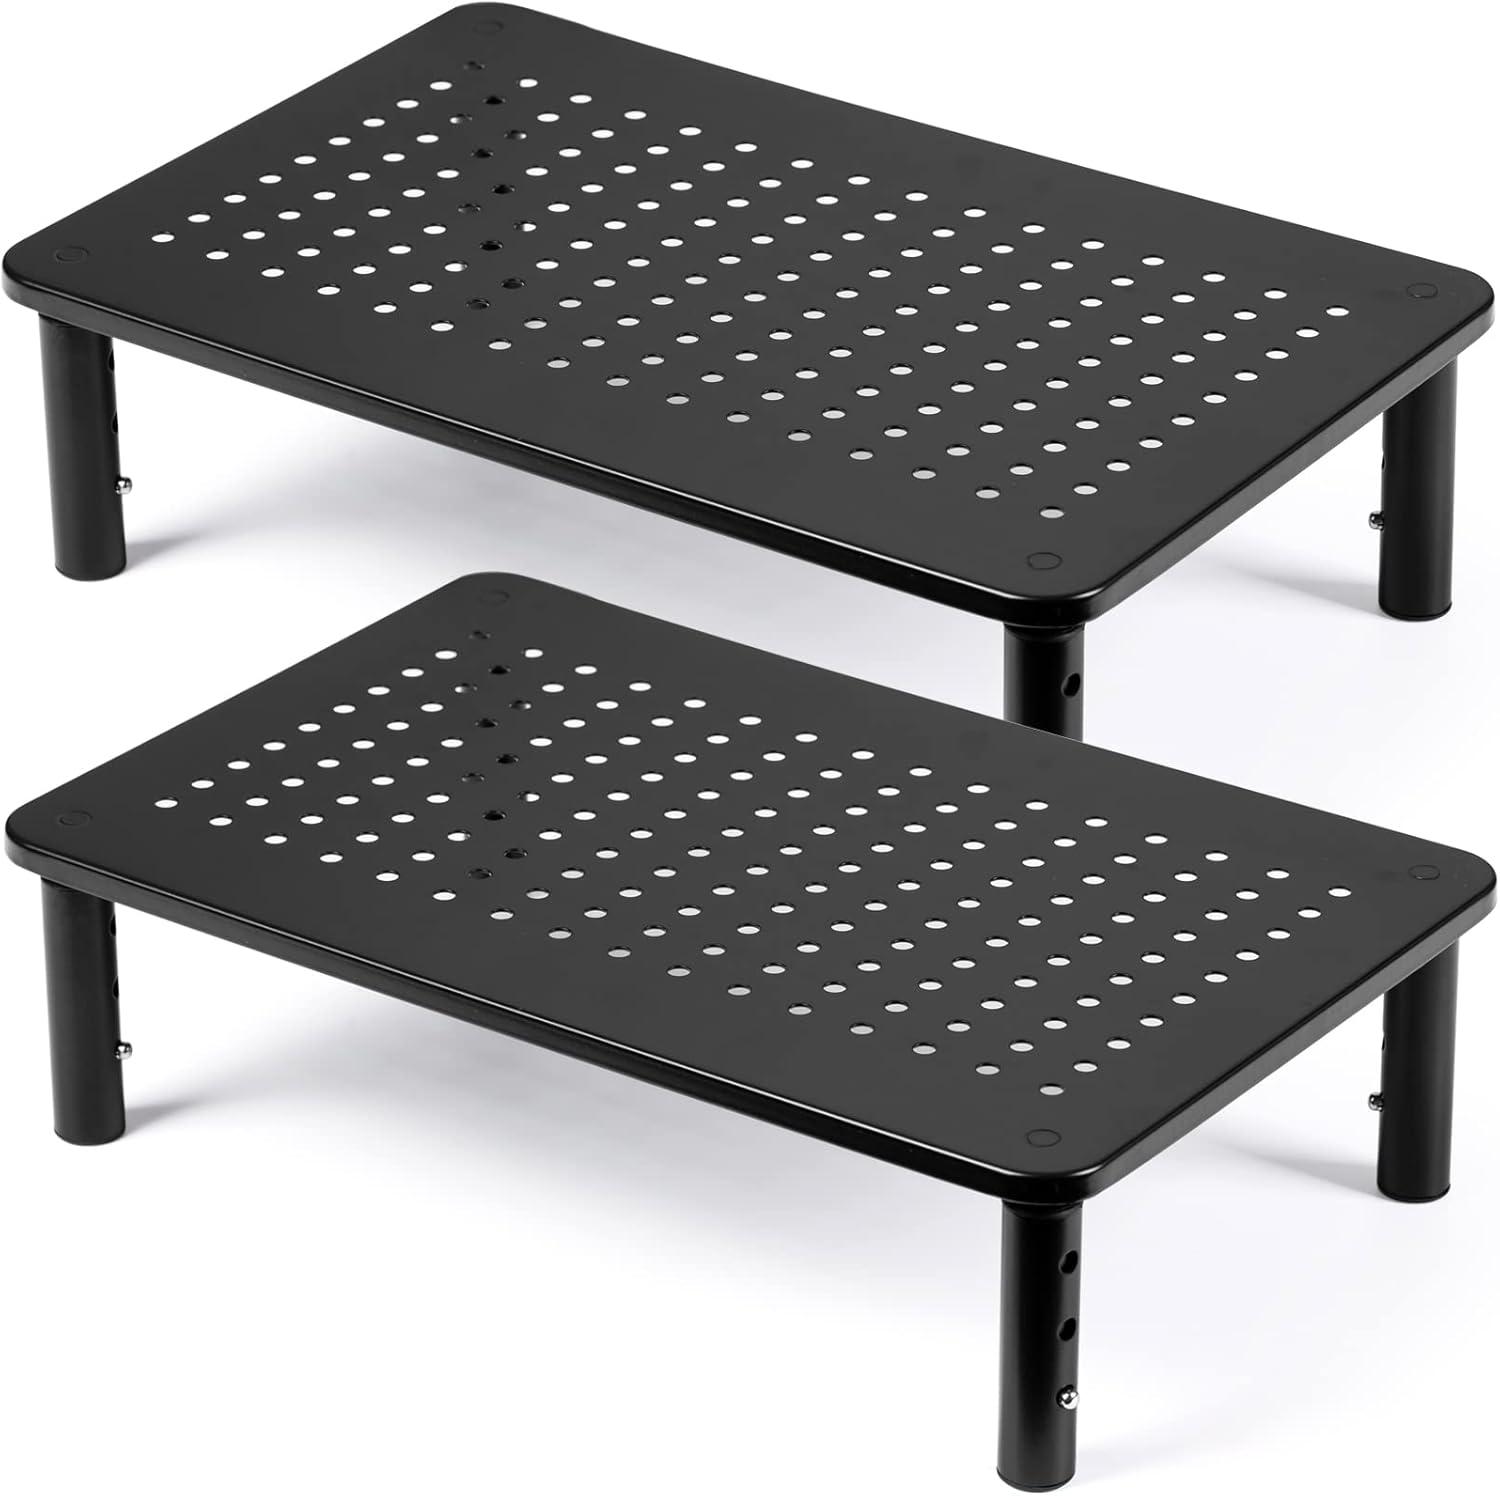
You slide one out of the box and it’s matte, perforated top catches the afternoon light; the little grid of holes makes it look lighter than it is. The DOLALIKE 2 Pack Desktop Riser — call them the risers — sits as two low, rectangular platforms roughly the length of your keyboard, modest in visual weight but solid under your palm. The steel tray feels cool and smooth, the legs click into place with a firm push and rubber feet keep everything from slipping, and suddenly ther’s a shallow shelf where cables and a notepad can quietly live.
What this dual riser looks like on your desk and what arrives in the box
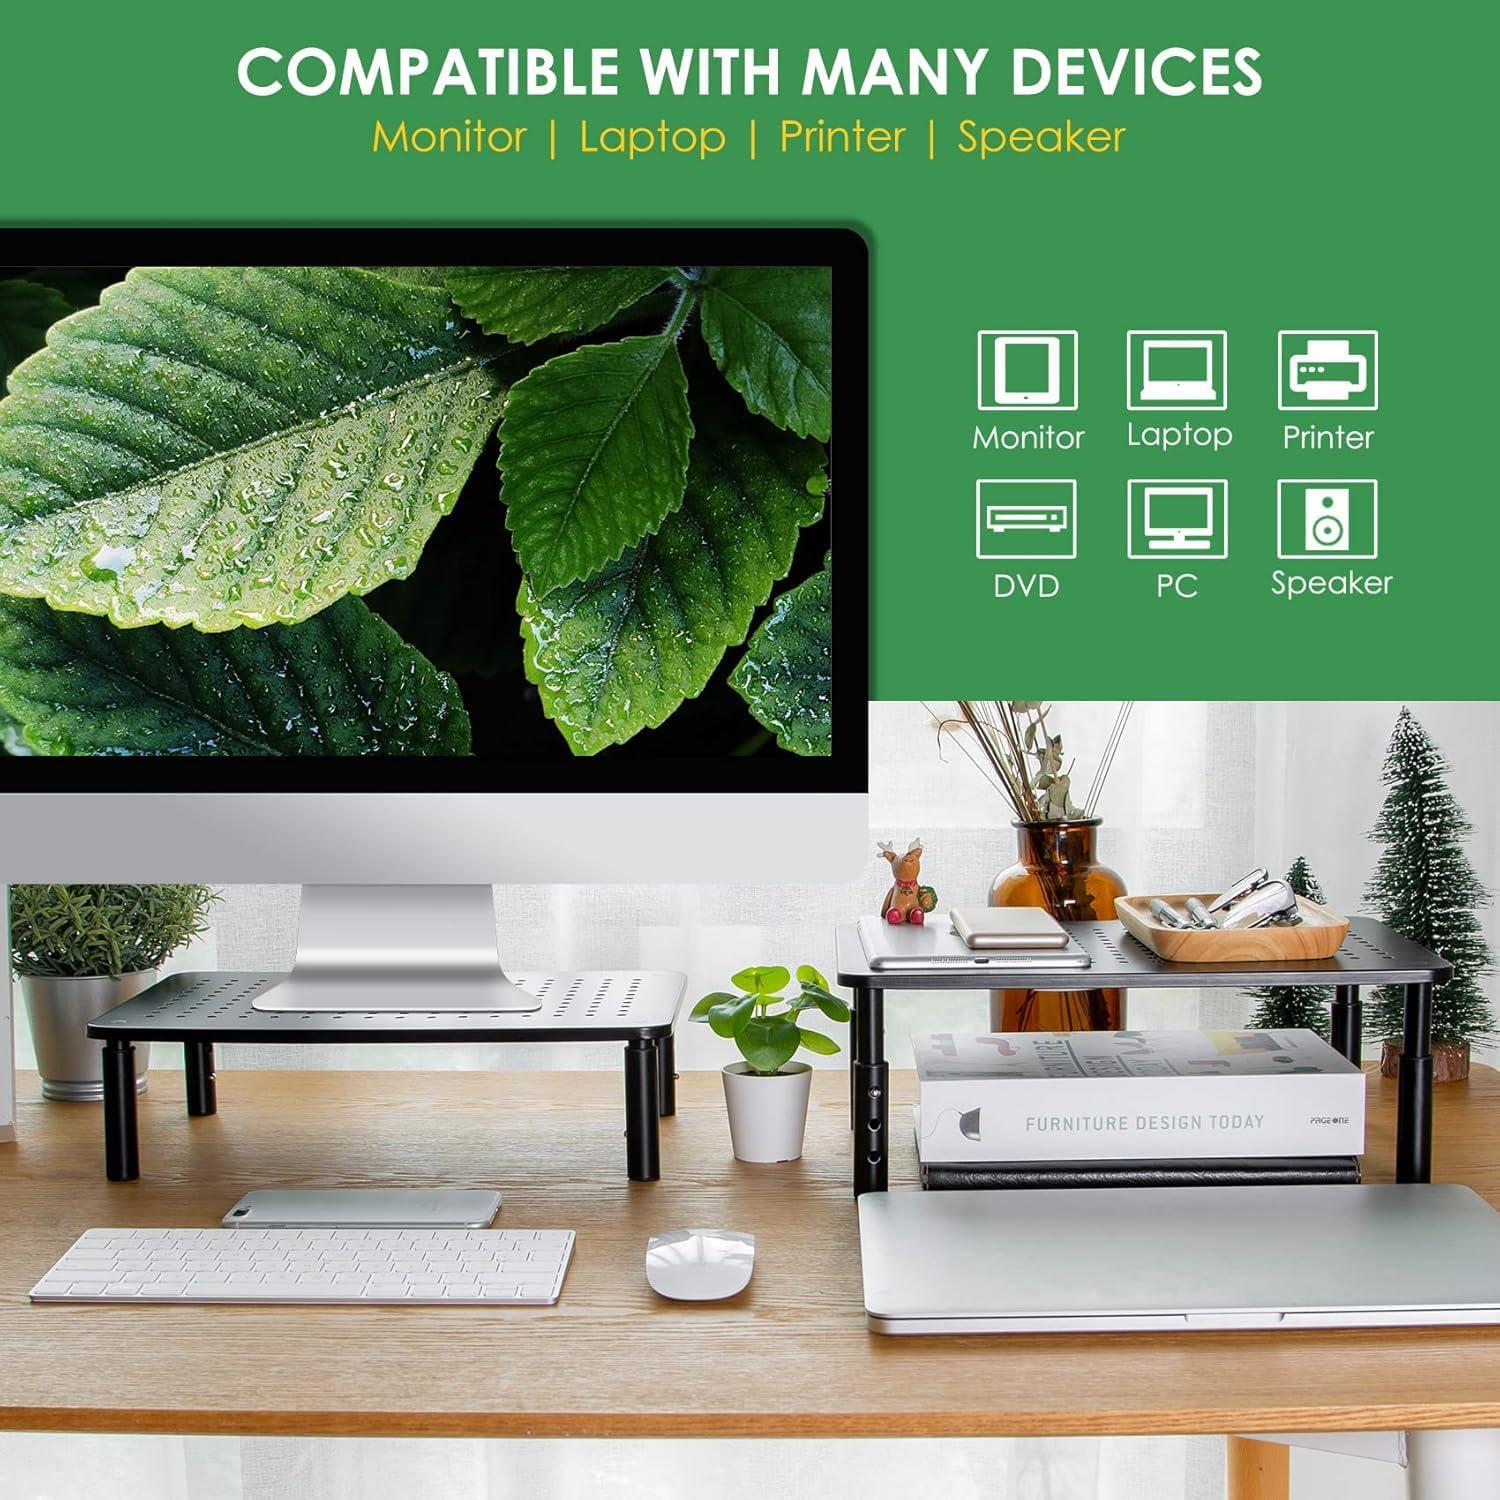
On your desk the two risers read as compact podiums — low enough to sit in front of a monitor base but high enough to create a clear horizontal plane for a screen and a few peripherals.The perforated tops throw a subtle dot pattern of shadow depending on your light, and the vertical legs break the visual line of the desktop so the set looks like a deliberately placed pair rather than random clutter. When positioned side‑by‑side they form a balanced, stepped arrangement that leaves a shallow gap beneath each platform for storing a keyboard, a notebook, or a slim accessory; cables tend to gather at the rear and you’ll find yourself nudging a leg or two when you slide a monitor sideways.
In the box you get the components needed to put the risers directly into service and the packaging around them. The platforms and legs come wrapped or nested in cardboard inserts; a single folded instruction sheet is included and there are a few loose rubber pads for the feet. Typical unpacking reveals:
- Platforms: two flat riser tops
- Legs: eight adjustable legs (four per platform)
- Feet: rubber pads for grip
- Documentation & packing: one instruction sheet and protective cardboard/foam
| Item | Quantity |
|---|---|
| Platform panels | 2 |
| Adjustable legs | 8 |
| Rubber feet | 8 |
| Instruction sheet | 1 |
Your first unpacking and the steps you take to position the pair on your surface
When you open the box the first things you notice are two identical platforms wrapped in a thin protective film and a small packet holding the legs and any rubber feet or screws. The film peels away with a quick tug and the platforms reveal the perforated tops; you might tilt one toward the light to see the mesh pattern and confirm which side should face up. Rather of immediately assembling both, many people (yourself included) will spread the pieces on the desk: platform, four legs for the first unit, then repeat for the second. there’s usually a tiny instruction sheet folded in the corner — you glance at it to check the basic assembly sequence and then set it aside. Small, incidental habits show up here: you move your drink, slide the keyboard over, and stack the removed packing materials to one side so they don’t get in the way while you work through the next steps.
Positioning the pair on your surface starts with clearing the footprint you want them to occupy and thinking about how the cables will run behind them. Place both platforms where you plan to keep the monitors and check alignment visually from your usual seated spot: are the edges level, do the risers line up with the monitor bases, and is there enough clearance to push your keyboard underneath if you want storage beneath? A few simple checks tend to save time later:
- Alignment: sight across the fronts to make sure the two platforms look even from your chair
- Cable access: leave an inch or two at the back for cords to exit without pinching
- Under-platform space: confirm there’s usable room beneath for any items you plan to store
You might experiment briefly with a staggered arrangement — one riser slightly farther forward — or swap their positions to match monitor sizes; small nudges and a quick sit-back to check the view are part of the normal setup routine before you finally lock them into place.
Visible construction, finish, and the ventilated top you can inspect up close
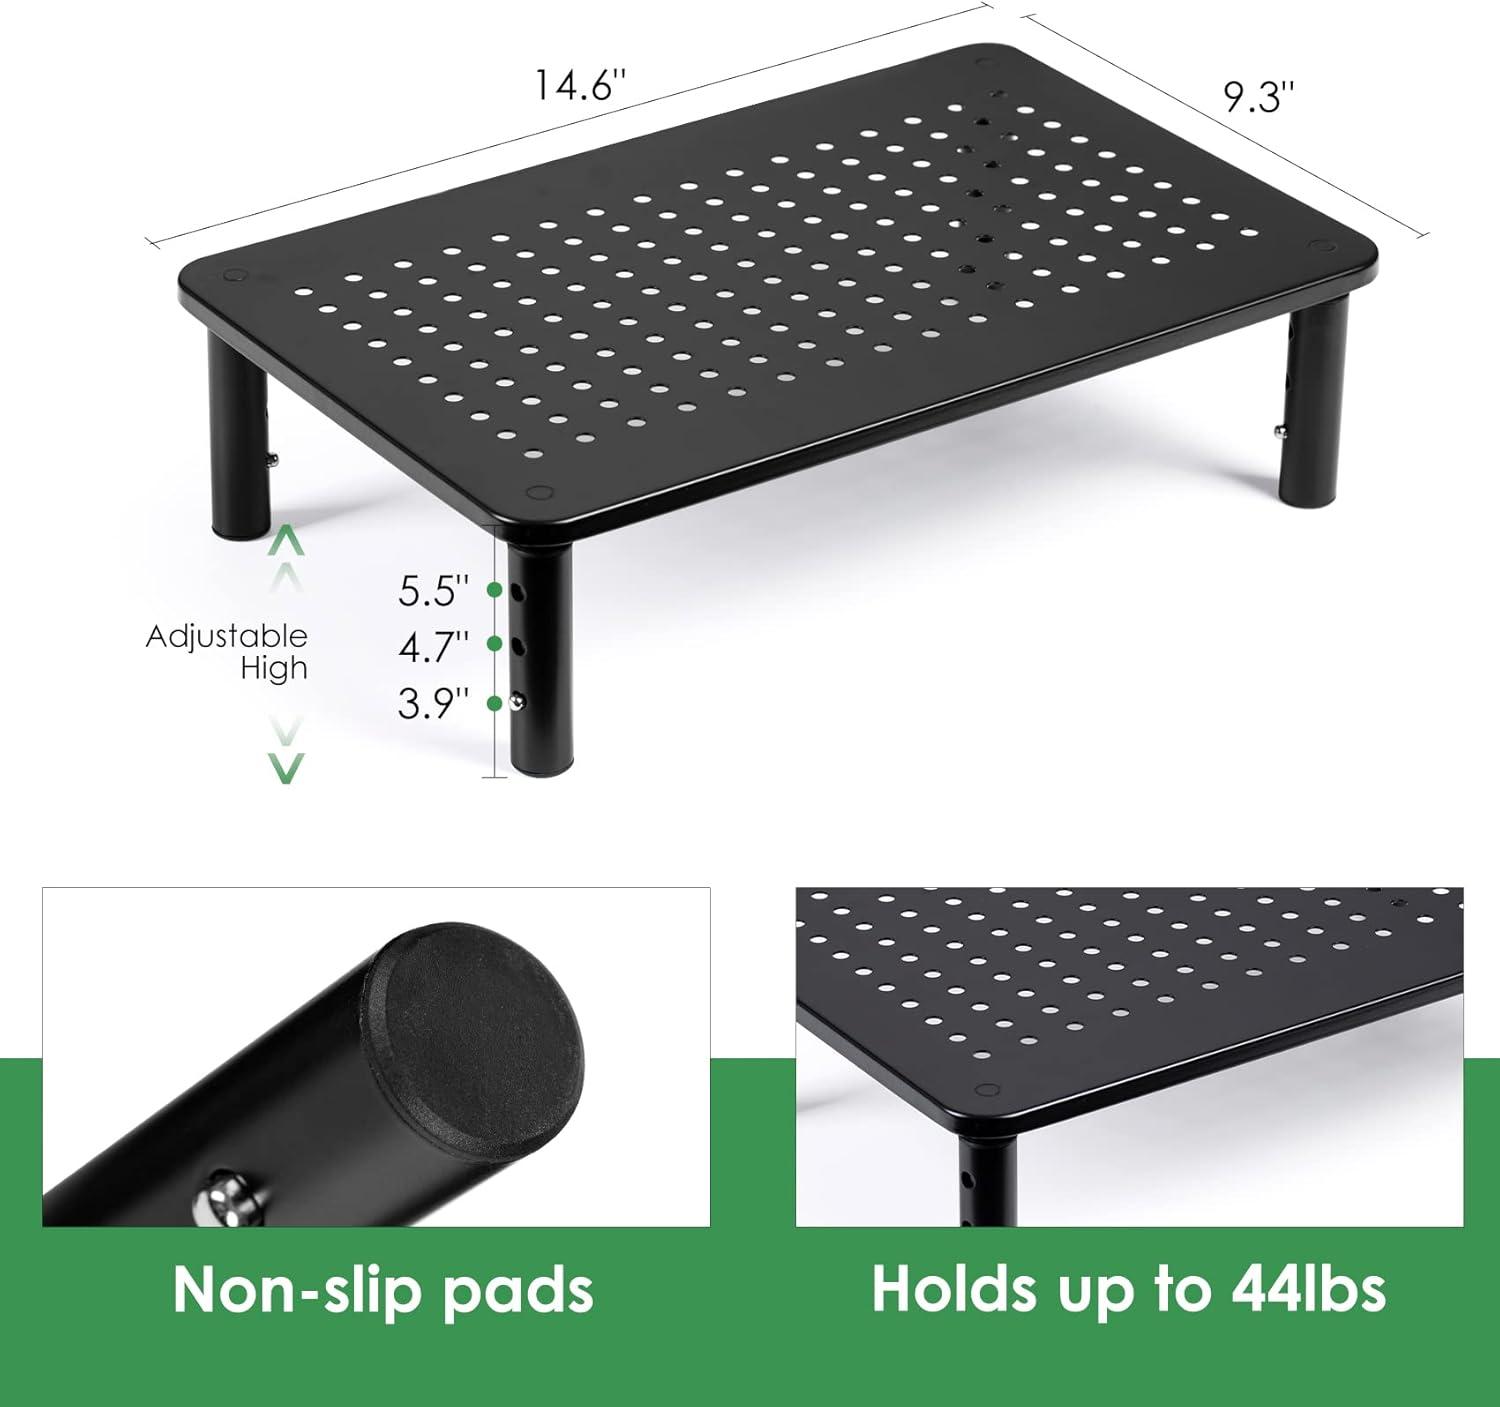
When you bring the riser within arm’s reach the first things that stand out are the surface texture and the assembly details. The platform wears a muted, mostly matte finish that catches light at a shallow angle; under close inspection you can see tiny tooling marks and a very light mottling in the coating where the finish pooled during production. Corners and edges are neatly folded rather than sharply cut,and the sockets where the legs screw in show the faint circular impression from the mold. If you run a fingertip along the underside you’ll also notice the non‑slip pads set into shallow recesses and the small push‑button holes on each leg — little visual cues that explain how the height adjustments engage without needing to read the instructions.
- Platform finish: matte with subtle texture and minor tooling marks
- Edge treatment: folded edges and shallow seams
- Leg sockets: visible impressions and alignment notches
- Non‑slip pads: recessed, slightly rubbery to the touch
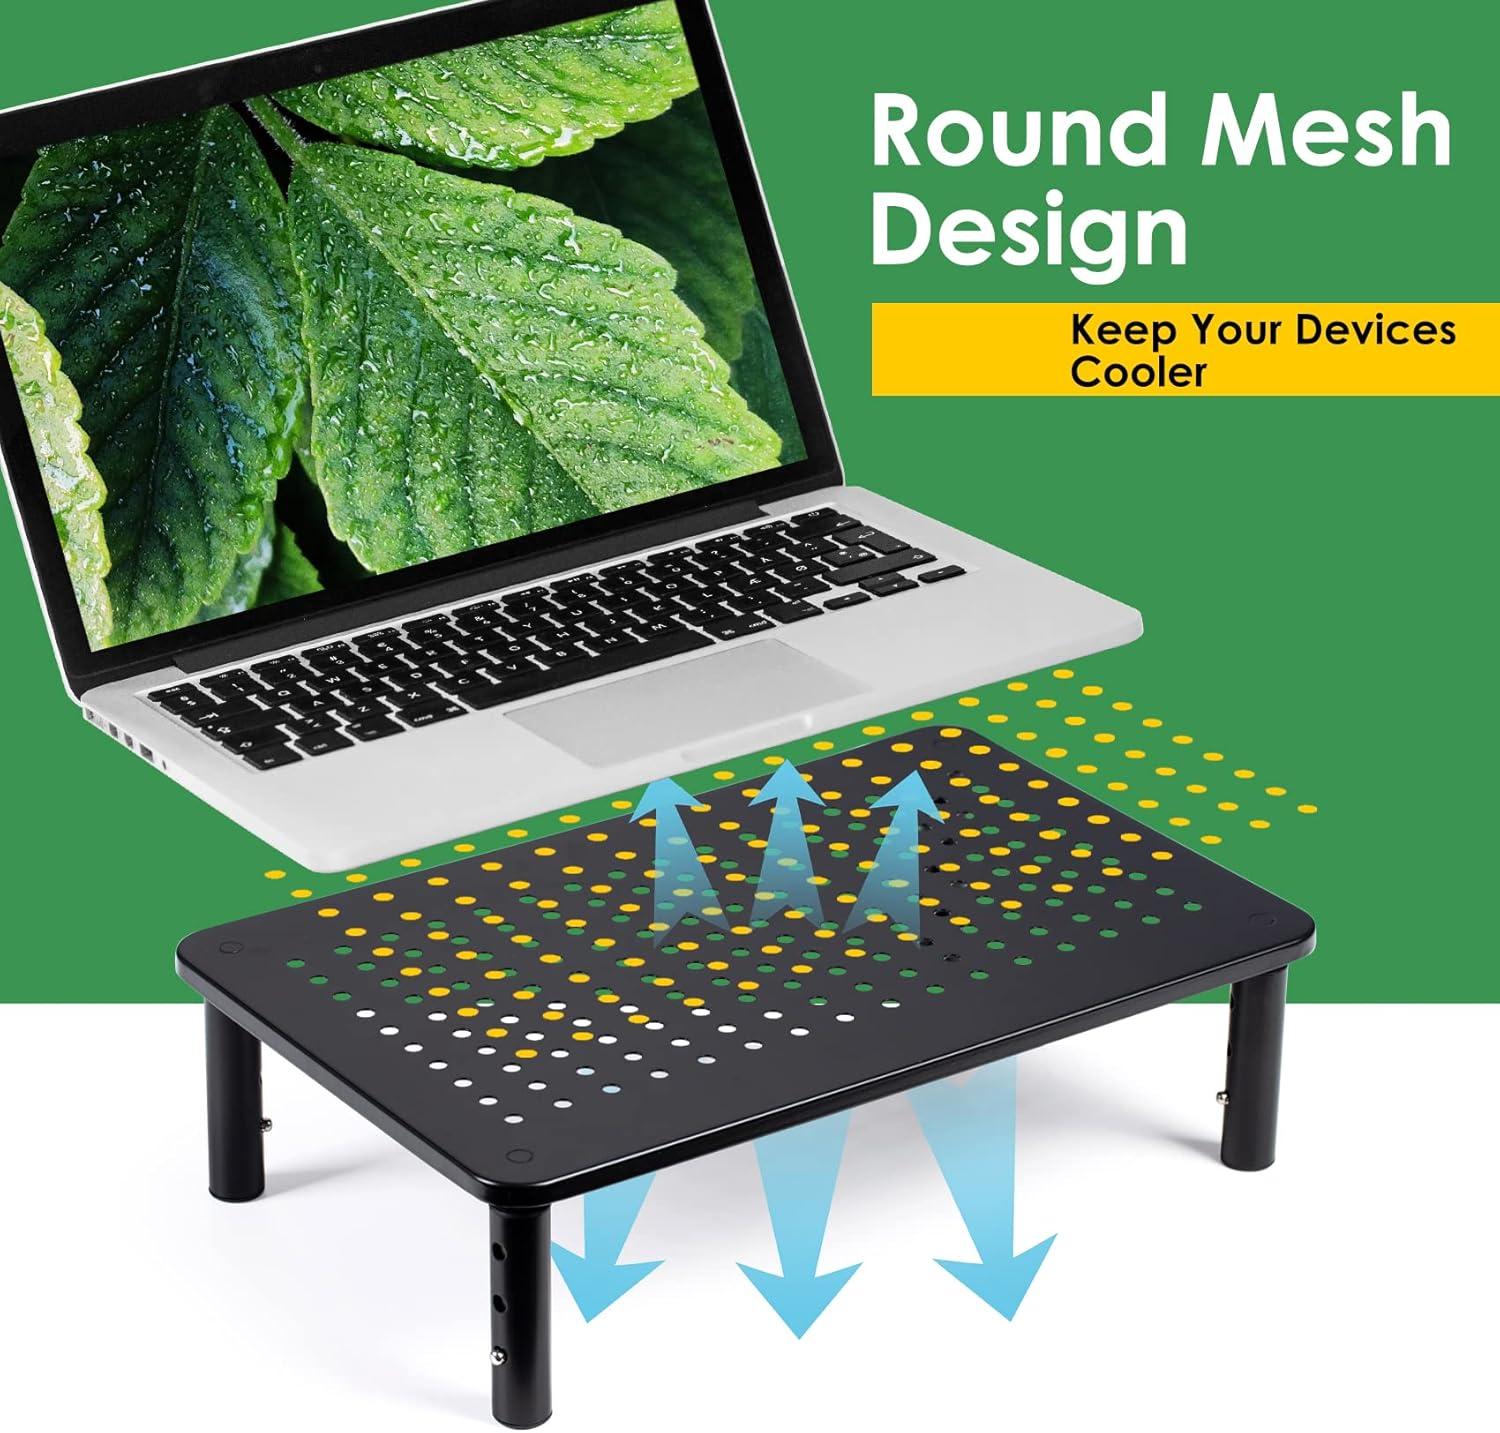
The ventilated top is easy to inspect because the perforations are large enough to study individually yet close enough together to form a consistent pattern across the surface. up close each hole shows a slightly rolled lip where the metal was punched,and dust can collect in those tiny rims if you don’t wipe it regularly; you can also see faint concentric marks inside some holes from the stamping process.Tilt the riser and you’ll notice how the pattern makes the platform semi‑see‑through from certain angles, revealing cables or device feet beneath it.
| Feature | What you see up close |
|---|---|
| Perforation pattern | Uniform, closely spaced holes with rolled edges |
| Surface around holes | Minor stamping marks and occasional dust caught in rims |
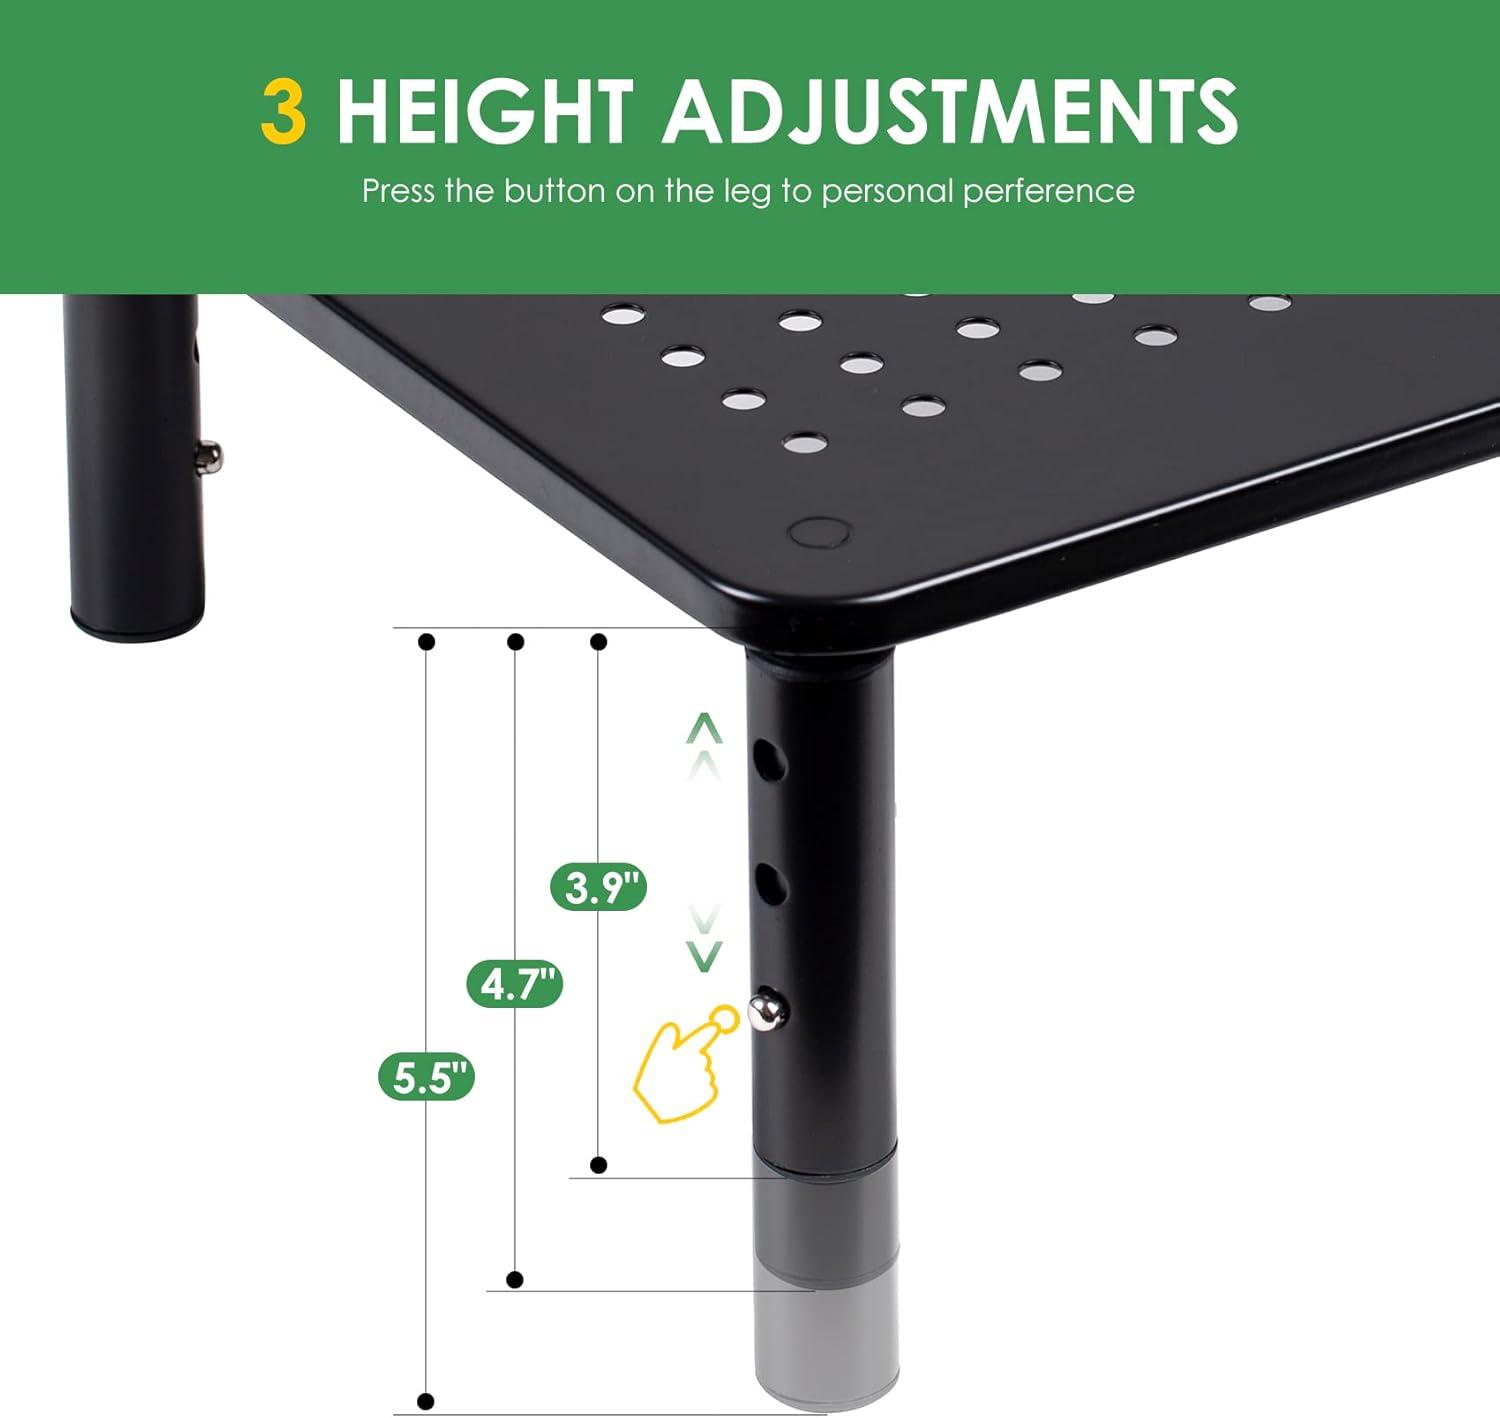
When you switch among the three height positions, the most immediately noticeable change is in the amount of room under the screen. At the lowest setting the monitor sits close to the tabletop and there’s only room for slim items or a row of sticky notes; at the middle setting you’ll usually find enough clearance for a compact keyboard to slide partially under, while the tallest position opens up enough vertical space to tuck a full-size keyboard or a small notebook fully beneath the platform.These shifts affect how you arrange things in day-to-day use — you may find yourself nudging the keyboard forward when you need to type, or habitually stashing it under the riser ultimately.Quick takeaway observations:
- Lowest: minimal under-screen storage, easier reach to desk surface
- Middle: partial keyboard tuck, balance of reach and storage
- Highest: clear under-shelf storage, keyboard can sit fully out of the way
The actual platform takes up the same tabletop footprint regardless of leg height, but the way that footprint functions changes with each setting. Raising the monitor increases the unit’s vertical profile and often makes the area beneath feel like usable storage rather than dead space, so visually and practically the same patch of desk can handle more items — or encourage you to move things there.Higher positions can also shift cable runs and push peripherals slightly forward as you reach for them, which in most setups leads to small, repeated adjustments over time. The trade-off is situational: more under-riser space can mean one extra step whenever you pull the keyboard back into typing position.The table below summarizes these practical differences in everyday terms.
| Setting | Screen clearance | Keyboard space | Footprint effect |
|---|---|---|---|
| Lowest | Limited; view sits close to desk surface | Keyboard stays exposed; little tuck space | Footprint feels immediate and uncluttered |
| Middle | Moderate; room for small items beneath | Partial tuck possible for compact keyboards | Footprint becomes semi-usable storage |
| Highest | Ample; clear space underneath | Full tuck for most keyboards; stashed when idle | same footprint but greater perceived usable area |
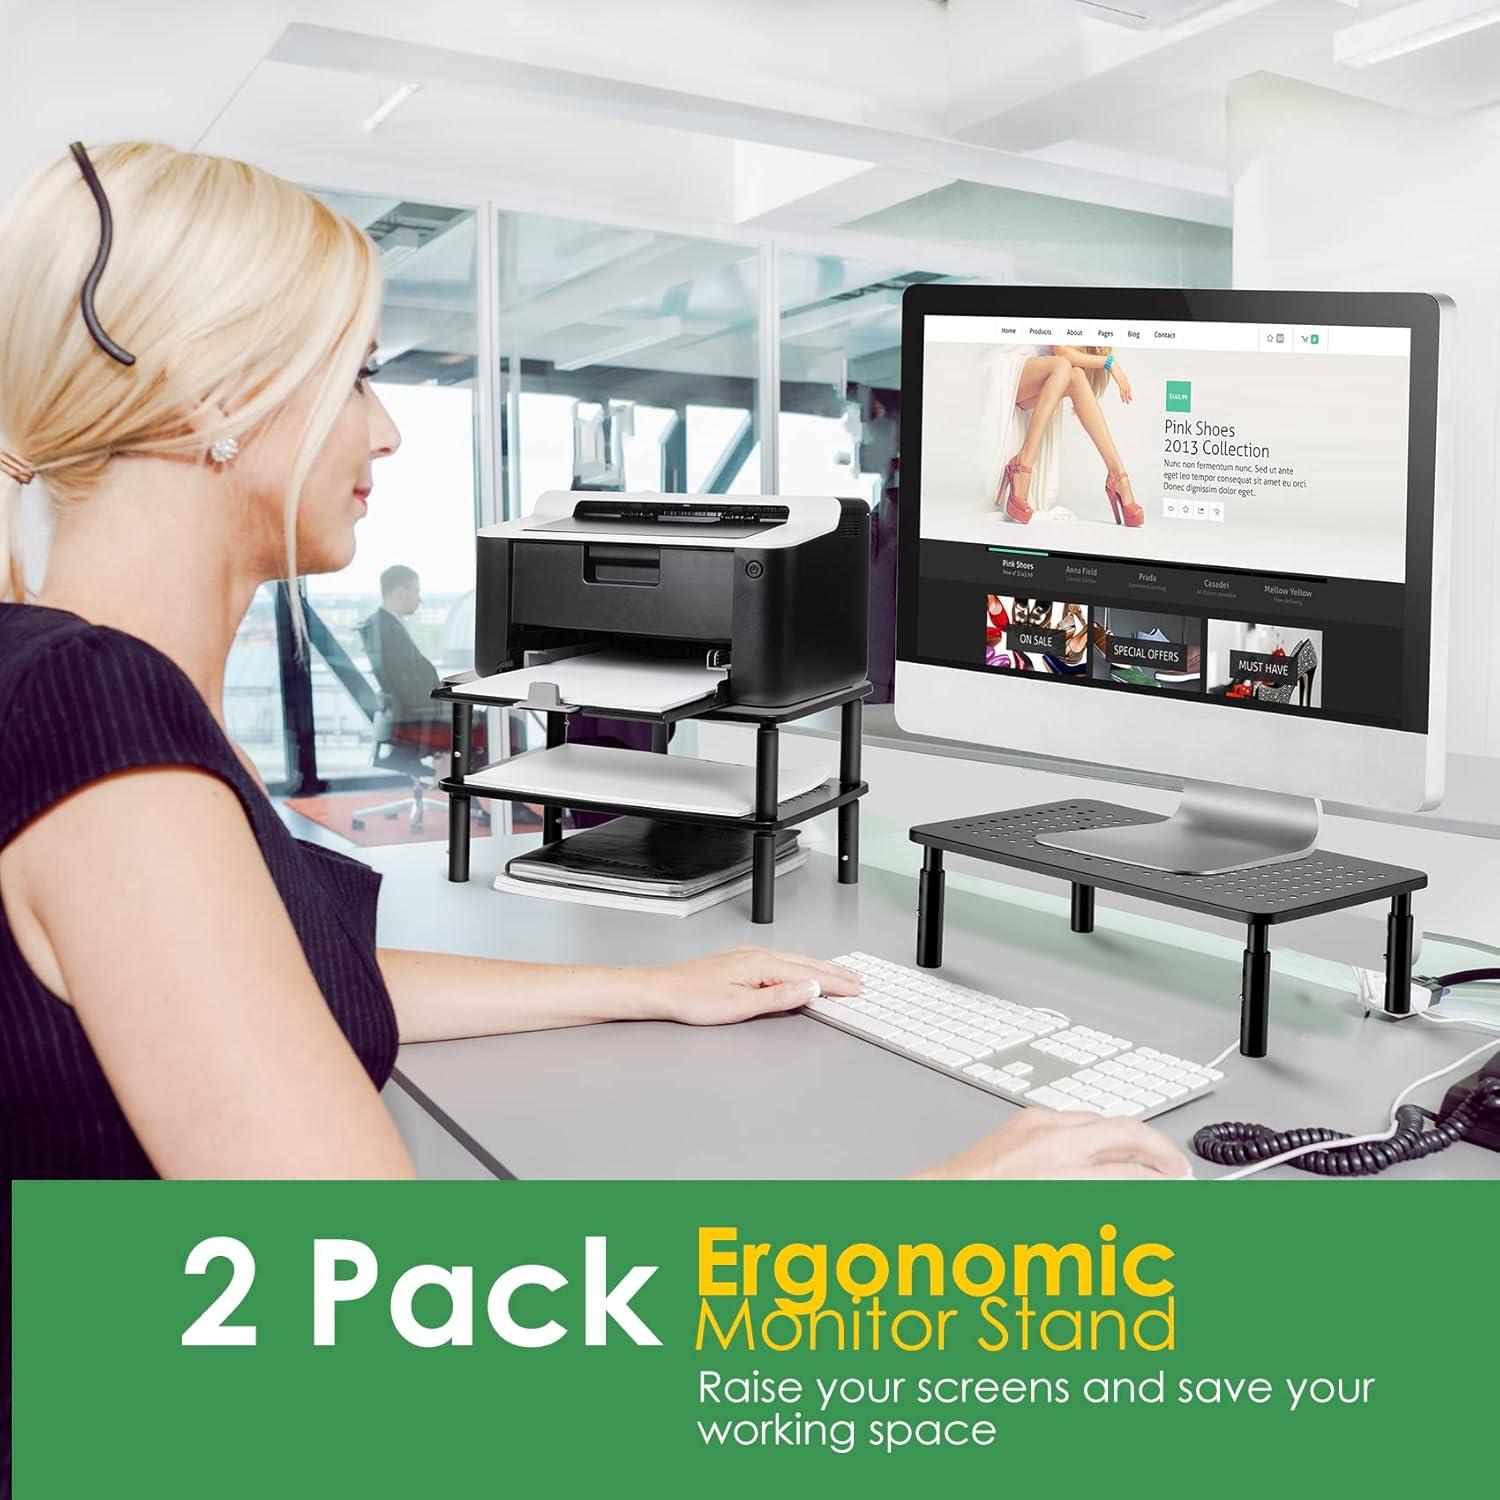
A day at your desk with a pair of monitors, peripherals, and a printer
You start the day by nudging your chair into the same spot and booting both screens; the raised displays put your main windows at eye level so you reach forward mostly for the keyboard and mouse rather than the monitors. Around the monitors you arrange the usual peripherals—USB hub, external drive, a small desk lamp—and habitually tuck spare cables behind the platforms where they’re out of sight but still within reach. The printer sits to one side; grabbing a freshly printed page sometimes has you leaning slightly to the right,and there are a few moments when you slide paperwork or a notepad under a platform to clear the surface. Small, routine adjustments happen without much thought: you shift a webcam a bit higher, angle a monitor to reduce a glare, or pull a stapler forward so it’s not under the riser when you need it.
Through the afternoon the setup evolves as tasks change. You drag windows between screens, set a tablet next to the keyboard for reference, and occasionally lift one platform a notch to line up two different monitor heights—those little tweaks are part of the rhythm. A short list of things you commonly stash or move illustrates how the desk lives with you:
- under the platform: notebooks, a slim portable hard drive, occasionally a charging phone.
- Beside the printer: a stack of paper, a spare toner cartridge, and a few printed pages waiting to be filed.
- On the far edge: a pair of headphones or a drawing tablet you pull in when needed.
Below is a small snapshot of typical interactions you’ll notice during a workday.
| When you… | What moves or shifts |
|---|---|
| Need to grab a printout | Reach toward the printer, sometimes nudging a cable or a corner of a platform |
| Switch from typing to sketching | Slide the keyboard back a few inches and pull the tablet into the central work zone |
| Level two mismatched screens | lift one platform slightly and fine-tune both monitor angles |
Suitability for your workspace, expectation versus reality in everyday use, and real life limitations or constraints you may notice
In everyday setups the risers tend to settle into predictable roles: as short monitor boosters on mid-sized desks, as stacked platforms for extra under-desk storage, or as temporary surfaces for peripherals.Observations from actual use show the adjustment mechanism is quick to operate and often nudged during routine desk reconfigurations, but the apparent height can be slightly higher than some anticipate when combined with monitor stands or adjustable arms. People also notice small, habitual behaviors — nudging a leg back into alignment after sliding a laptop into place, or rotating the platform to better center a webcam — that don’t break the product but add a few seconds to daily tweaks. Two practical points that repeatedly appear in real-life use are height clearance (how the raised profile interacts with existing monitor stands and camera placement) and stability (how the setup responds to nudges or the occasional reach across the desk).
There are trade-offs that become visible only after a week or two of regular use. some users find the ventilated platform helps air circulation when device intakes line up with the perforations, while others report the cooling benefit is modest unless the device sits squarely on the mesh. Cable routing remains an incidental chore; the open underside creates storage but doesn’t solve cord management,so power bricks or bulky adapters may still protrude. Commonly observed constraints include:
- slight play in the adjustment pins that can require re-seating when changing heights;
- limited surface depth for wide speaker stands or specialized webcams;
- a modest footprint that frees up desk space but limits placement of larger peripherals beneath the platform.
| expected behaviour | Typical real-life observation |
|---|---|
| Height adjustments align monitors evenly | Often true, though extra small tweaks are needed with mixed-height monitor bases |
| Under-platform storage frees desk area | Works for low-profile items; larger power adapters may still extend beyond the riser |
| Ventilation noticeably reduces heat | Helps when device vents align; less impact for devices with side or rear-only intakes |
View full specifications and available configuration details on the product listing
Its Place in Everyday Living
Over time you notice how it settles into the room: the way it nudges the edge of your desk and how your glance and posture shift in daily routines. The DOLALIKE 2 Pack Desktop Riser, 3 Height Adjustable Monitor stands for 2 Monitors, PC, Computer, Printer, iMac, Desktop Monitor Stand with ventilated Platform for Airflow sits quietly among the clutter, taking on the small scuffs and the faint polish where hands rest. In regular household rhythms comfort reveals itself in tiny, repeated gestures—moving a mug, adjusting a notebook, the way your wrists find a new habit—so that its presence becomes part of the room. After a while it simply stays.