decordip Garden and patio decoration inspiration
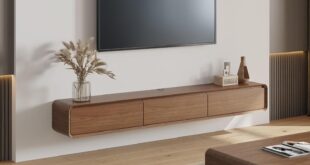
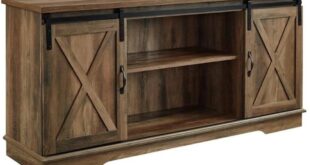
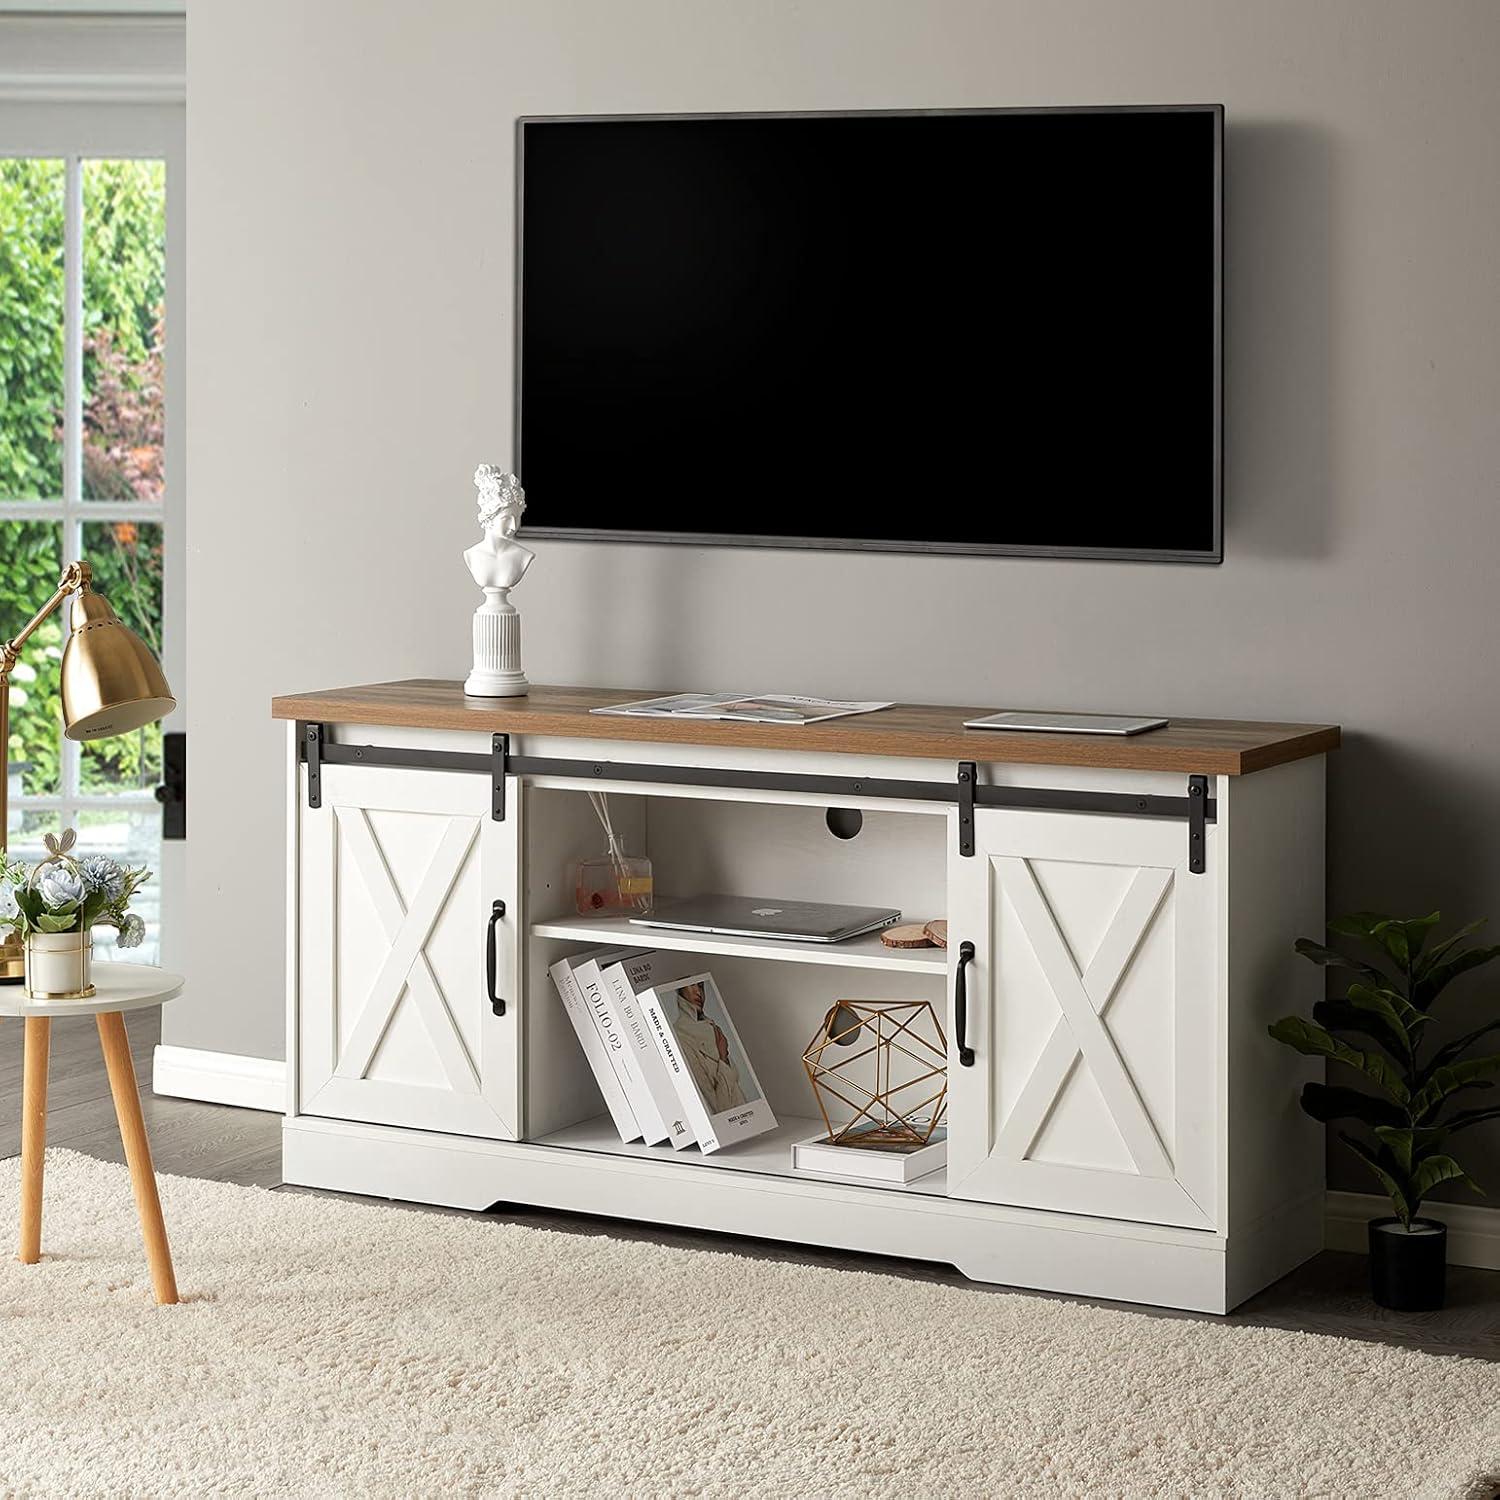
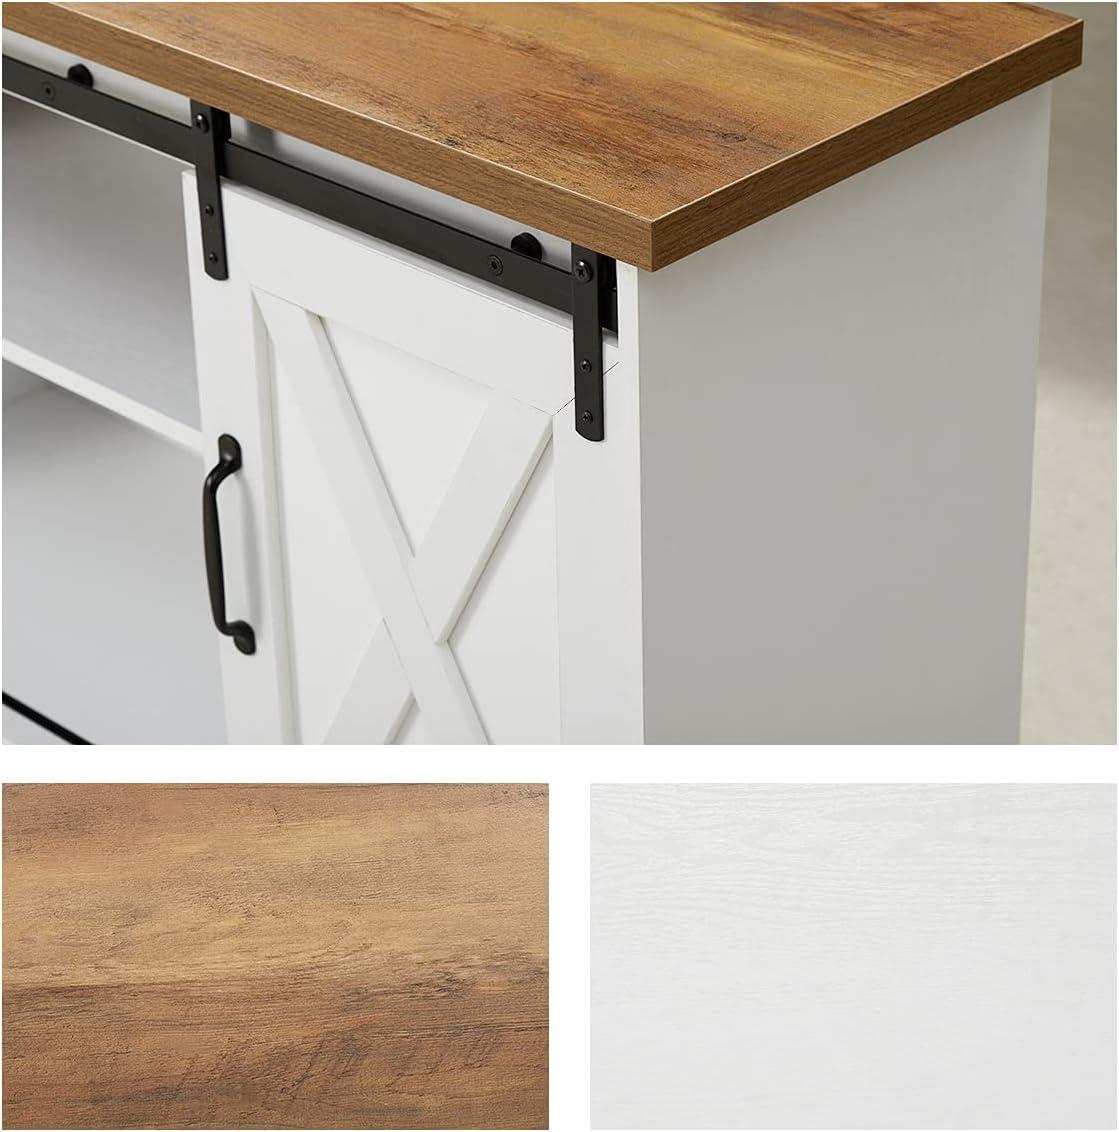
Light lands along the distressed white top and catches the reclaimed-wood grain, a faint roughness under your palm that reads as worn rather than manufactured. You notice the BonVie Entertainment Stand Sliding Barn Door TV Stand (the BonVie barn‑door stand) filling the wall with a confident, horizontal presence that frames the screen without shouting. The black metal track feels solid to the touch as the barn doors glide smoothly, the hardware adding a little industrial rasp when you nudge them aside. Open a door and the interior reveals deep,rearrangeable shelves and a neat cable opening at the back—practical details that show up in everyday use rather than in a spec sheet. From a few paces back the mix of white paint and reclaimed‑wood tones gives the whole piece a lived‑in, farmhouse note that quietly sets the room’s mood.
A first look at the bonvie sliding barn door TV stand and what you get in the box
When you open the shipping box you’ll notice the pieces are packed flat and wrapped in foam and protective corners, so parts arrive with finish protection still in place. The largest panels sit on the bottom with smaller components and a clearly marked hardware bag on top.Inside you’ll find a printed assembly guide and a single screw pack; the guide lays out step-by-step diagrams rather than long paragraphs, so you’ll be flipping between pages and parts as you go. Below is a speedy snapshot of the basic items you’ll pull from the box.
- Main panel set (flat-packed components that form the cabinet)
- Screw pack with labeled smaller bags for fasteners
- Installation guide with parts illustrations
| Item | Typical count |
|---|---|
| Main cabinet panels | Several pieces (top, sides, back panels, shelves) |
| Hardware bag | One multi-bag pack (screws, dowels, small fittings) |
| Manual | One illustrated guide |
As you start sorting parts you’ll likely take a moment to match the labels on each panel to the diagrams; many holes are predrilled and the hardware bags are grouped, which tends to speed the process. Some small adjustments—lining up doors on their track or nudging a shelf into place—are part of the first assembly rythm,and you’ll find the manual flags key orientation steps so you don’t end up reinstalling components. The overall unboxing is straightforward: clear labeling, protective packaging, and a single hardware kit are the main items you’ll encounter before the actual assembly begins.
how the white finish and rustic accents read in your living room or bedroom
In your living room or bedroom the combination of a white finish with rustic accents tends to read as a layered backdrop rather than a single, loud statement. The distressed white surface breaks up light — it can make a corner feel brighter in daytime and pick up the warmth of lamps at night — while the weathered, barnwood-like tones add visual depth and a sense of texture against smoother surfaces.Small details, like the dark sliding track, create a horizontal line that anchors the piece; against patterned rugs or plush throws the contrast can feel intentional, and against plain walls the stand often becomes a subtle focal point. You’ll notice occasional little adjustments — nudging a plant, swapping a frame — as you react to how the finish reflects different light and items around it.
- Daylight contrasts — surfaces feel airier,grain and distress show more.
- Evening warmth — white takes on lamp tones and looks softer.
- Textile interplay — fabrics and cushions alter perceived warmth of the rustic tones.
| Lighting or Context | How it reads | Notes |
|---|---|---|
| Natural daylight | brighter, more detailed texture | Distressing appears more pronounced |
| Warm indoor light | Softer, warmer white | Rustic tones blend with ambient hues |
| High-contrast decor | White acts as neutral field | Dark track and accents create deliberate lines |
In practical use, the pale finish can show dust or light scuffs more readily, but the distressed pattern tends to mask small marks in most cases; the rustic accents break up the surface so you rarely see one flat plane of color.the way it reads will shift with the rest of your room — sometiems receding, sometimes asserting a quite texture — and you might find yourself shifting small decorative elements until the balance feels right.
What the components and hardware reveal as you unpack and assemble the unit

When you first open the boxes the packing strategy becomes obvious: most of the larger boards are wrapped and stacked, while the small hardware arrives in a handful of clearly sealed bags and a folded instruction sheet. Panels often carry small stickers or punched tabs that match steps in the manual, and several holes are pre-drilled or have partially inserted dowels so pieces roughly align before you start fastening. The metal sliding components and track hardware are packaged together so they don’t rattle into the wood parts, and the door rollers, stoppers and short length screws for the track arrive in their own small pack. In practice you tend to spread everything out on the floor, sort the bags by label, and check off the parts list; along the way you notice that several screw types look very similar, so pacing through the checklist matters more than rushing.
- Bag A: assorted long screws and bolts
- Bag B: small screws, washers and plastic spacers for door rollers
- Bag C: shelf pins and miscellaneous fasteners
As assembly begins the hardware reveals a bit about how the stand was engineered: cam locks and dowels do much of the alignment work, while the larger bolts and the metal track carry the structural joins. You’ll notice some fasteners thread into metal inserts rather than raw particle board, and a few components come partly preassembled — an indication of were tolerances are tighter. Sliding the doors onto the track during fitting highlights the need for precise placement of the track screws and small plastic spacers (those spacers sit between roller and wood more frequently enough than you expect). The row of shelf-pin holes along the interior walls makes the adjustability obvious when you hold a shelf up to test positions, and the routed cable openings reveal where wiring will naturally travel once the unit is standing. Below is a concise breakdown of commonly found hardware and where it shows up during build:
| Hardware | Typical Location on Assembly | What it reveals |
|---|---|---|
| Long bolts & washers | Top rail and major joins | Points designed for structural support |
| Short screws & spacers | Door rollers and track | Fine alignment and smooth sliding |
| Shelf pins | Interior shelves | Modularity of shelf placement |
where it sits in your space and the measurements to check for a sixty five inch television
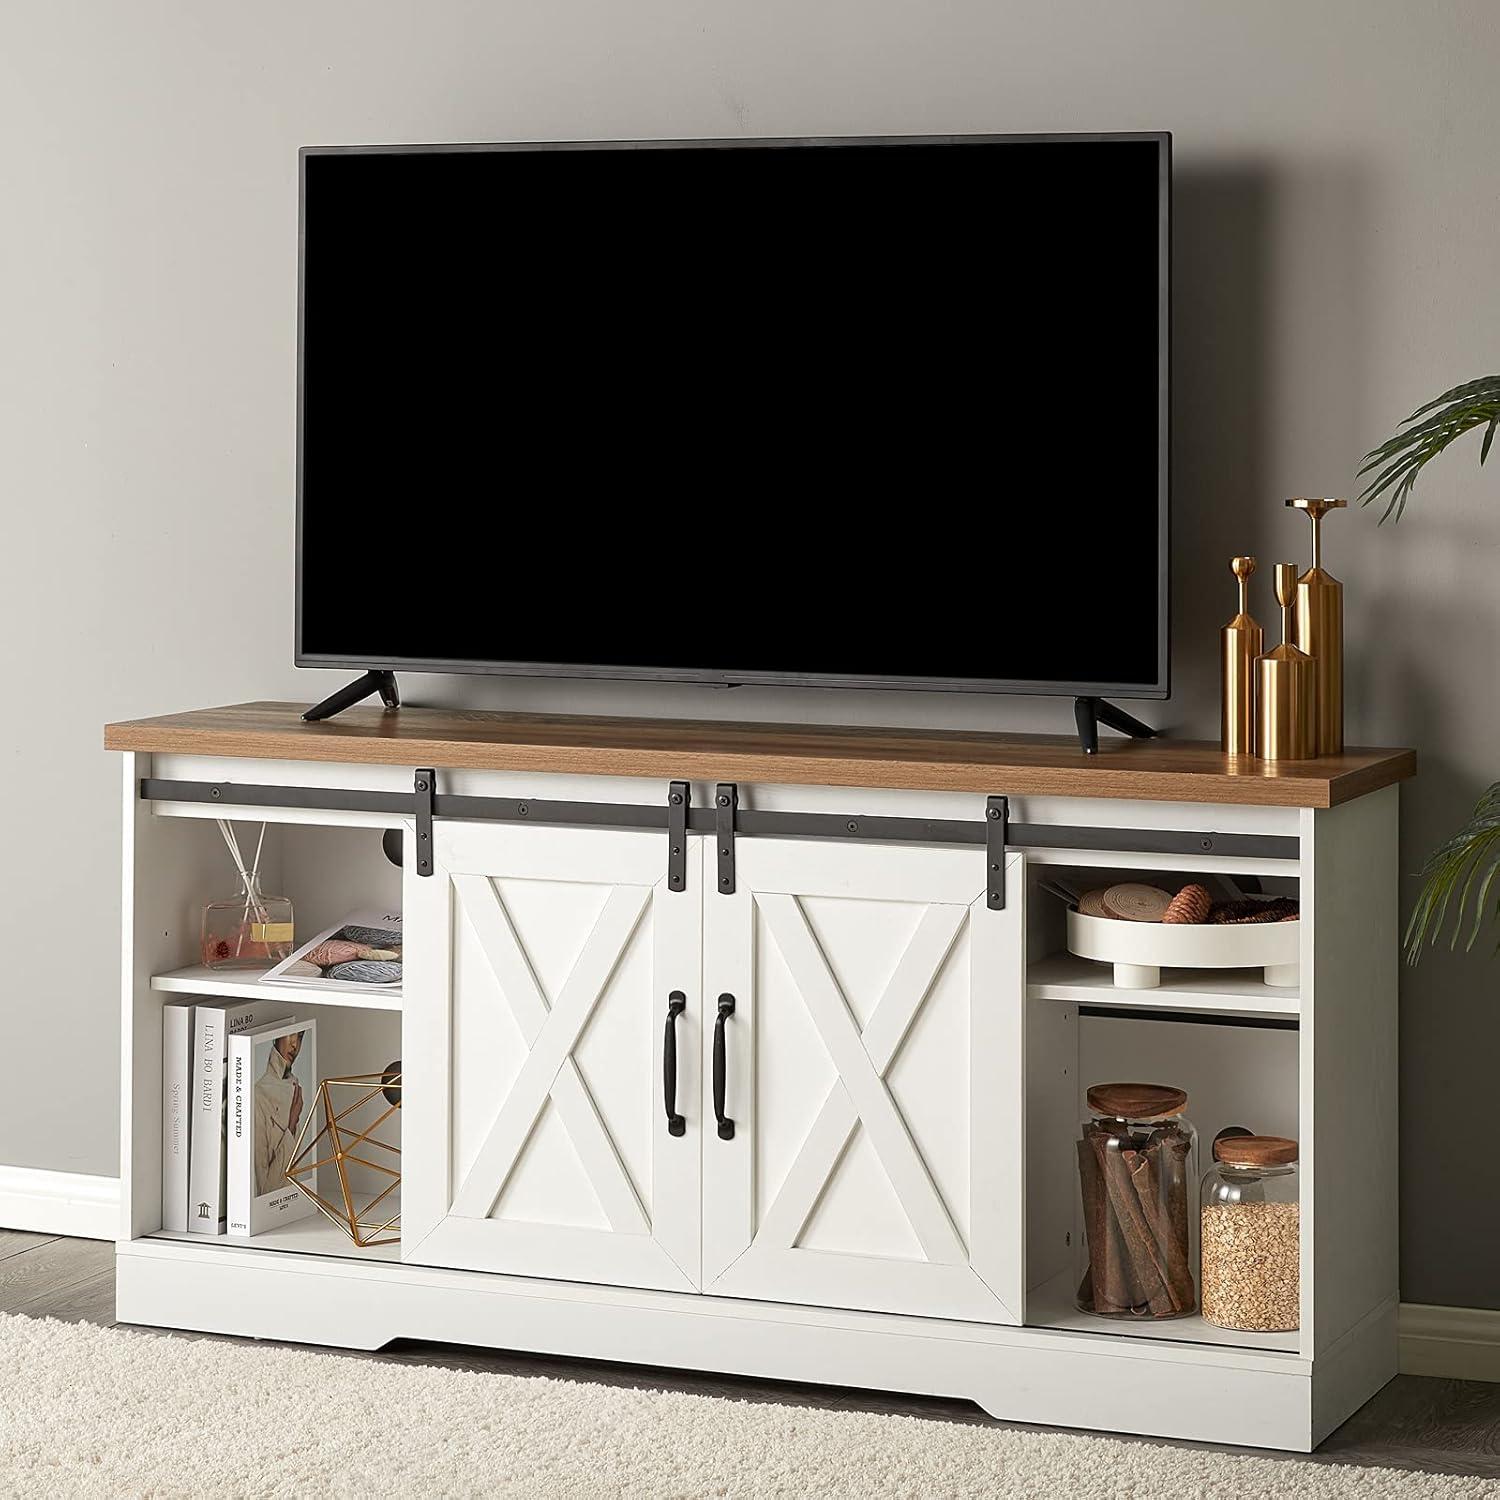
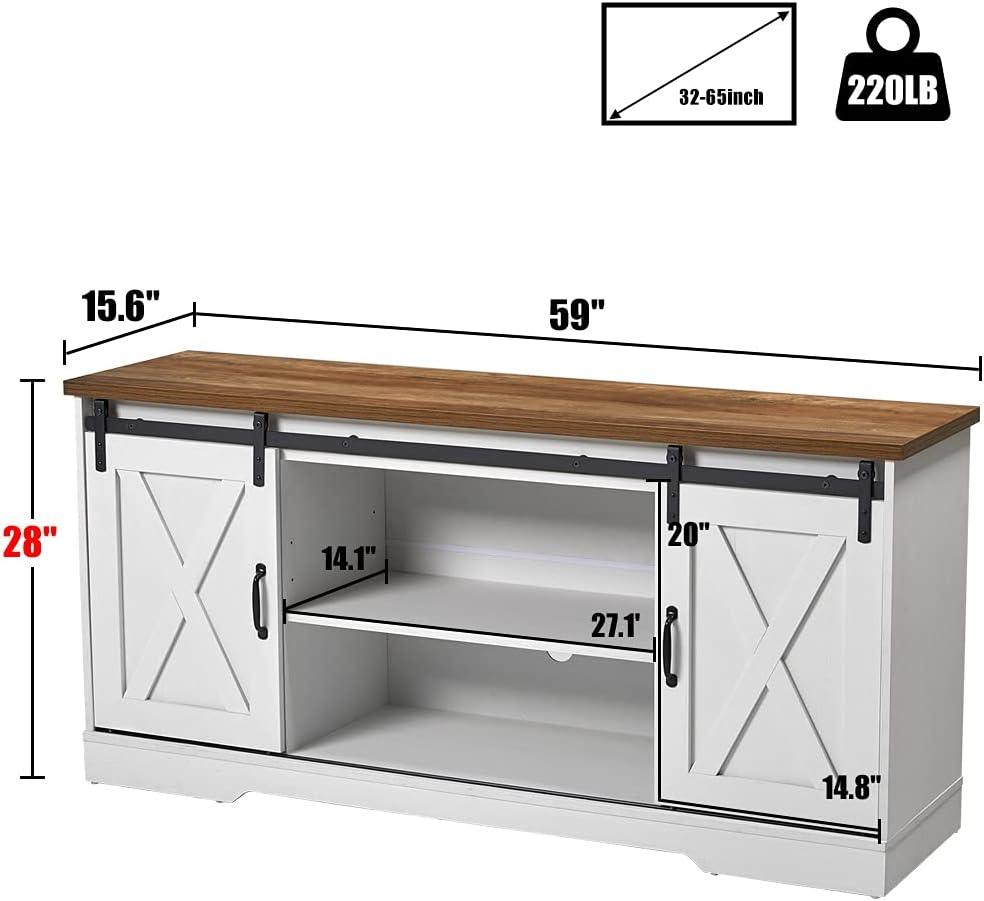
The stand typically sits flush against a wall and centers a large-screen set at a low, furniture-top height; with a 65‑inch diagonal screen the balance between screen width and cabinet top becomes the main spatial consideration. Measured observations to make before placing a 65‑inch television include the following:
- TV width: measure the screen from bezel edge to bezel edge (65″ diagonal usually translates to roughly 56–58″ wide, depending on bezel).
- Leg/base spread: the lateral distance between the TV’s feet or pedestal—this can exceed the cabinet top even when the display width fits.
- Depth (front-to-back): include any pedestal or stand platform and clearance for ventilation and cables behind the screen.
- Vertical placement: the height of the cabinet top relative to typical seating eye level and the clearance to the bottom edge of the TV.
Not all tvs of the same diagonal share the same footprint, so measuring the actual panel and its stand frequently enough changes the placement plan more than the diagonal number alone. Sliding front doors and the shallow top surface mean there may be limited side surface for speakers or décor once a wide set is in place, and small adjustments to centering or the distance to the wall are a common, quick fix when the fit feels tight.
A quick reference for diagonal-to-width gives a practical sense of how a 65‑inch screen compares to the cabinet surface; the table below lists approximate panel widths and a brief note about fit. The numbers are approximate and intended as observational guides rather than absolute specifications.
| diagonal (in) | Approx. Width (in) | Fit note |
|---|---|---|
| 65 | ~56–58 | Leaves only a couple of inches of top surface margin on a 59″ cabinet; check leg spread. |
| 55 | ~48–49 | Plenty of side surface remains for small speakers or décor. |
For full specifications and exact measurements, see the product listing: See full specifications and configuration details
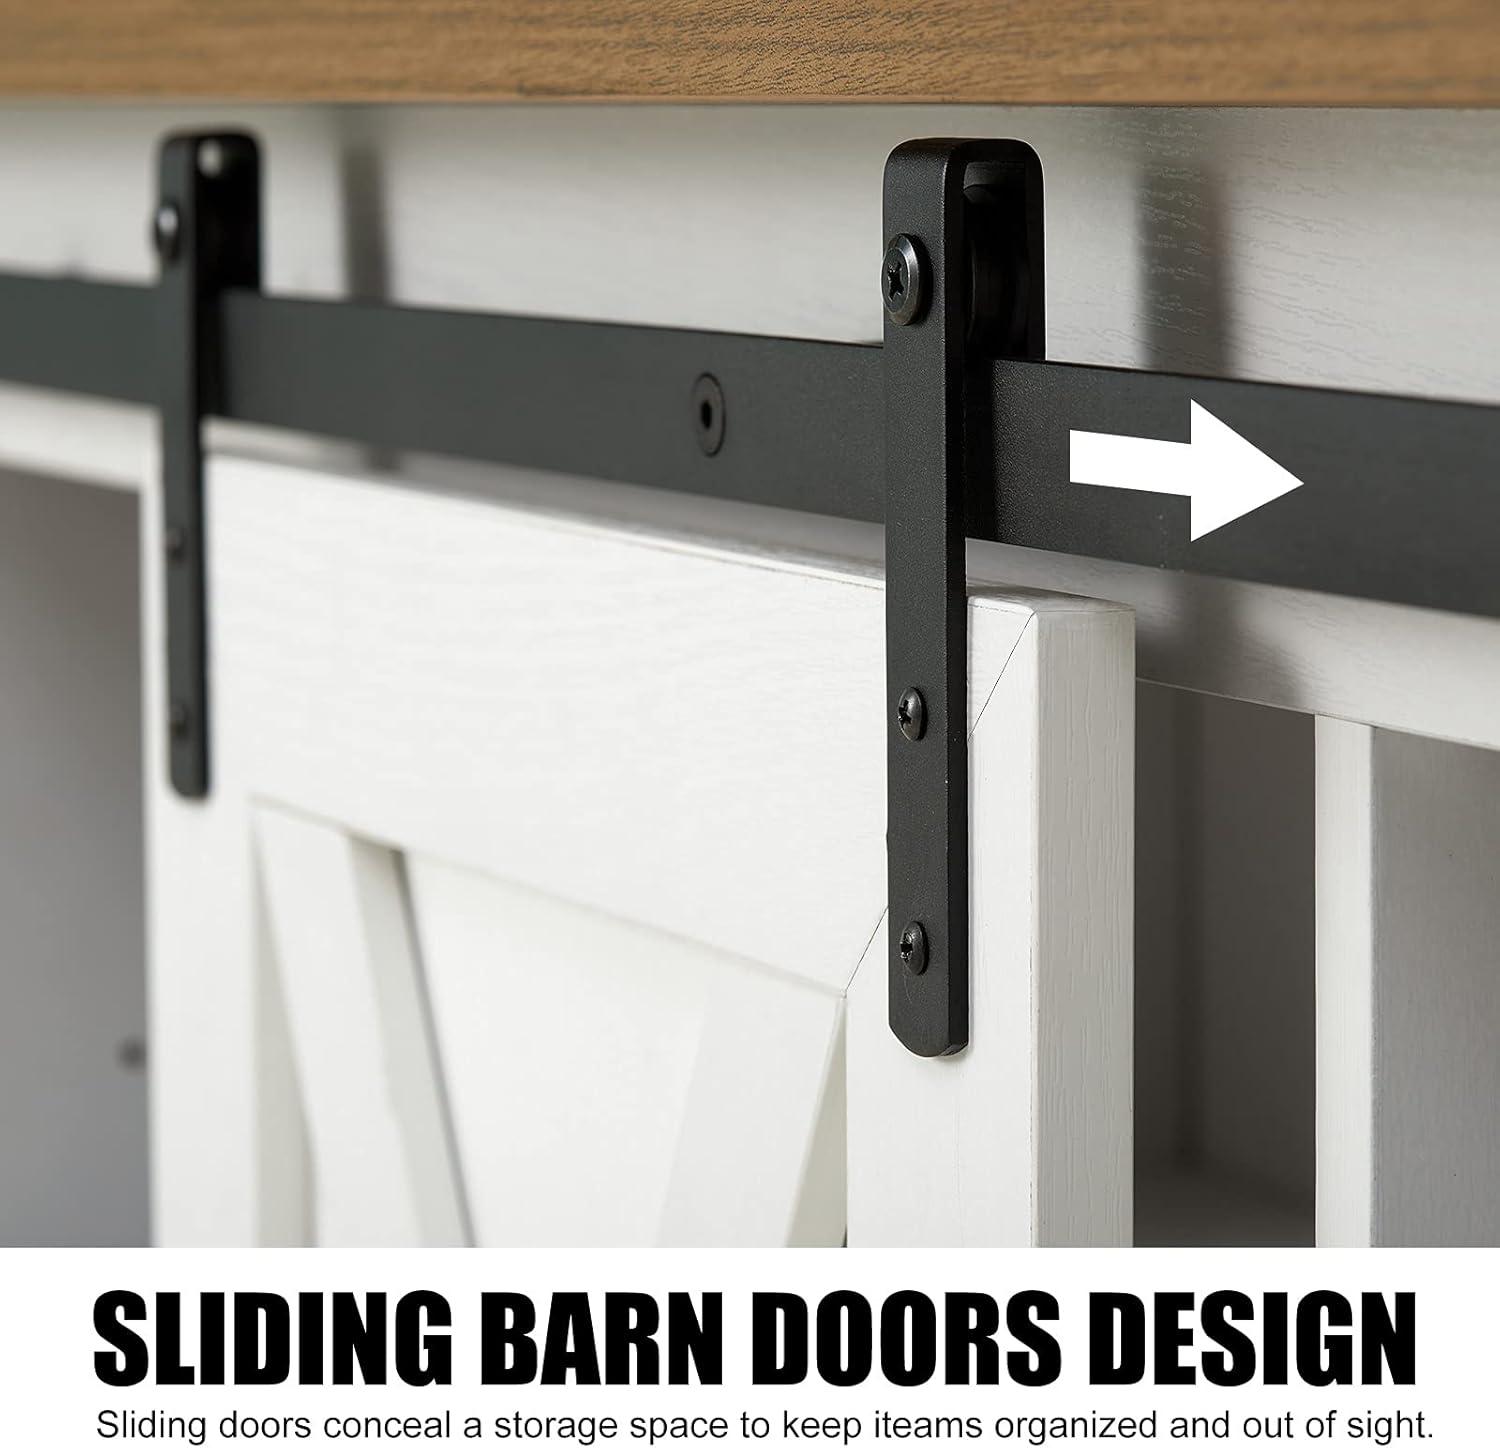
The pair of sliding barn doors changes what is visible in the room without you having to move anything else: slide one door across and a stacked cluster of devices or a tidy display comes into view, slide both and the storage recesses are concealed so the front of the stand reads more like a table. You’ll notice this encourages small habits — doors left slightly ajar to show a favorite book or plant, a single door kept open for frequent access to a game console, or both closed when the room is being used for entertaining. As the doors move along the rail, you can also create asymmetry in the room’s sightlines (one exposed cubby beside one hidden one), which affects how lighting and decorative objects play off the surface and what catches the eye from different seating angles.
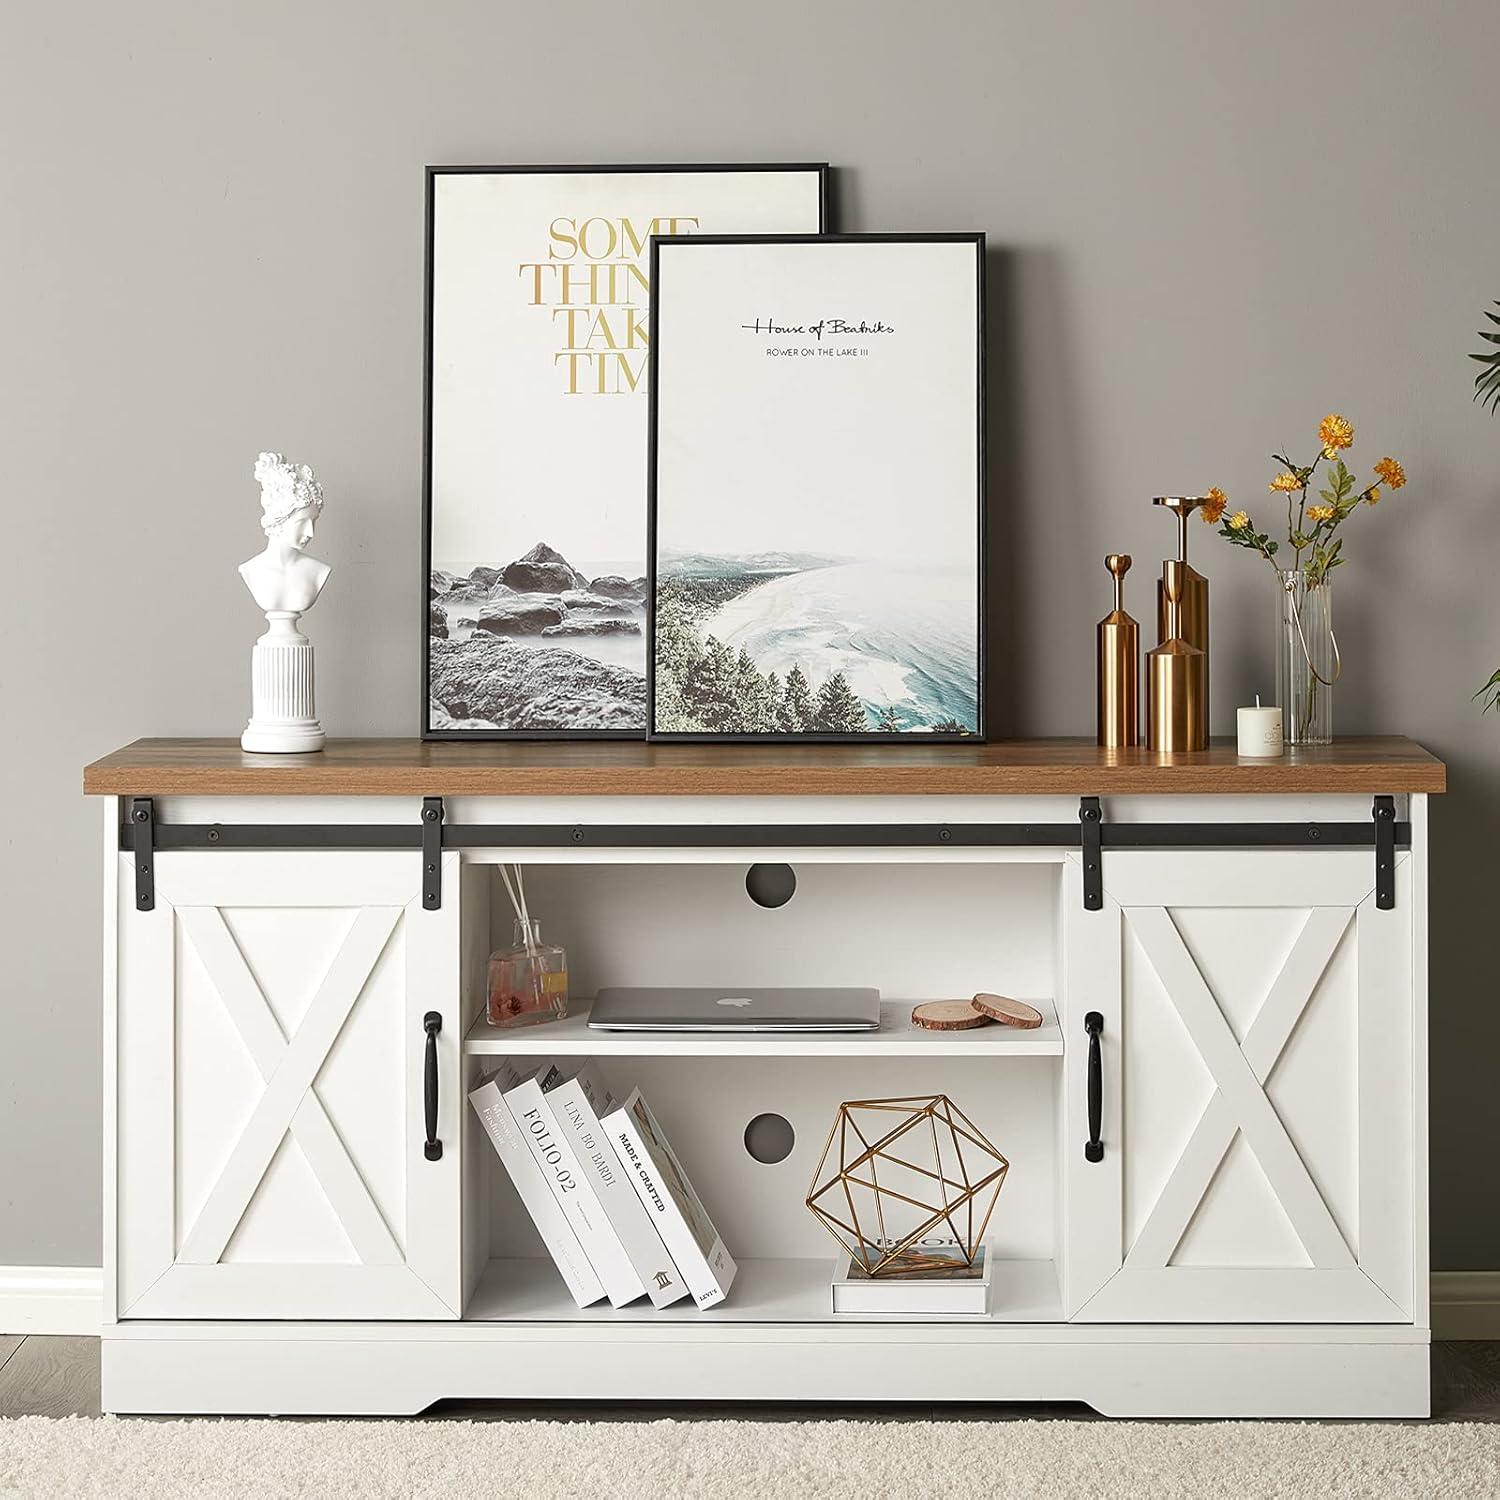
The adjustable and removable shelving lets you arrange media and visible storage with a fair bit of versatility.in everyday use you might fit slimmer components on the higher positions and reserve the taller, cleared bays for a subwoofer or stacked board games after removing a shelf; cable routing through the cabinet’s openings tends to keep fronts cleaner even when multiple devices live inside. typical arrangements people fall into include the following patterns:
- Display + conceal: decorative items on the top half with hidden electronics below.
- Frequent-access layout: one open cubby for controllers and a console, the other closed to hide routers or less-used boxes.
- Single tall bay: removable shelf used to create space for tall gear or storage baskets.
| Shelf position | Typical use |
|---|---|
| Upper positions | Decor, soundbar base, slim streaming boxes |
| Middle positions | Game consoles, cable/satellite boxes, chargers |
| Lower / shelf removed | Subwoofer, larger media storage, stacked board games |
These combinations tend to be shifted seasonally or when new gear arrives, so the shelving arrangement feels more like a small ongoing project than a one-time decision.
How the stand measures up to your expectations and where you may encounter limits
In everyday use the stand tends to behave as a straightforward, familiar piece of furniture: the sliding doors operate on their track with a predictable motion but often require a brief period of adjustment during and after assembly to run without catching. Assembly time can feel longer than expected for a two-person task, partly because aligning moving parts and tightening the track hardware usually takes a little extra fiddling. Cable-routing features generally keep wires out of sight, though getting bulky power bricks or a tangle of cords neatly arranged behind electronics can demand temporary reconfiguration of shelves or components. The unit sits steadily on flat floors but will show a slight give on uneven surfaces, and repeated door movement can reveal minor squeaks until the hardware beds in.
- operation: The doors glide smoothly once aligned but will exaggerate any imbalance in the load if shelves are arranged asymmetrically.
- Wear and handling: The distressed finish camouflages small scuffs, although edges and corners can show more wear when heavy items are moved on and off the top.
There are a few practical limits that surface with regular use: deeper or unusually shaped AV components may need the middle shelf removed or a different arrangement to fit comfortably, and some larger controllers can protrude when the doors are closed. The sliding hardware does free up front access, yet it also means that accessing the far corners of the interior occasionally requires shifting doors fully aside, which can be inconvenient in tighter spaces. Moving the assembled unit across finished floors can leave marks if not lifted, and the metal track and hardware pick up fingerprints more readily than the wooden surfaces, which affects upkeep more than functionality. Small adjustments — loosening and re-tightening bolts, nudging the track slightly, or re-centering heavier items — are common during the first few weeks of use.
| Feature | Typical observation / limit |
|---|---|
| Sliding doors | Require alignment; smooth after initial adjustment but can squeak until hardware settles |
| Shelves and component fit | Adjustable in practice, though very deep or irregularly shaped devices may need to be reconfigured |
| finish and handling | Distressed surfaces hide light marks; edges show wear with heavy handling |
View the full listing for complete specifications and configuration details
what daily care and signs of wear look like as you live with it
Living with it tends to fold into the small routines you already have for the room. You’ll find the top collects dust and the distressed white finish shows fingerprints and smudges more readily than darker pieces,so a quick wipe becomes habitual after guests or movie nights. The sliding doors attract the most attention: dust and pet hair gather in the track and the doors can leave faint scuff marks where they meet the cabinet edges, so you notice yourself nudging them back into alignment now and then. Shelves get moved around as you swap game consoles,soundbars or decorative objects,and the cable-management holes turn into little catch-alls for stray cords and crumbs — things you clear out intermittently rather than on a strict schedule.
Over months of everyday use, a few predictable signs of wear appear without dramatic failure. Small chips and abraded spots show up on corners and the top edge where items are placed or shifted frequently; the metal track may pick up tiny scrapes near the rollers; and shelf pegs sometimes sit a touch looser after repeated repositioning.Observationally,these patterns fall into a loose timeline you can see developing in typical households:
- Early weeks: more visible dust and fingerprints,settling noises as components bed in.
- 3–6 months: light scuffs on finishes and mild loosening of fasteners around high-use areas.
- Year plus: small chips at contact points and slight sag or indentation on shelves that regularly carry heavier loads.
| Timeframe | Common observations |
|---|---|
| First month | Surface dust, visible fingerprints, track needs occasional clearing |
| 3–6 months | Minor scuffs on edges, slight hardware loosening, more frequent shelf adjustments |
| 12+ months | Small chips, faint wear on door contact points, possible shelf indentation under heavy items |
How the Set Settles Into the Room
Living with the BonVie Entertainment Stand Sliding Barn Door TV Stand White & Rustic Farmhouse Entertainment Center Adjustable Shelves, Storage Media console for TV Up to 65″ for Living Room, Bedroom, you notice it loosens into the background over time, fitting around the ways the room is used. In daily routines it quietly claims spots for the things that get used most, its surfaces picking up faint marks and the occasional cup ring that come with everyday life. It nudges space usage and comfort behavior into small habits — where to reach for the remote, which shelf becomes the catch-all — and those rhythms make it feel familiar rather than new. After months of moving with your days, it simply stays.