decordip Garden and patio decoration inspiration
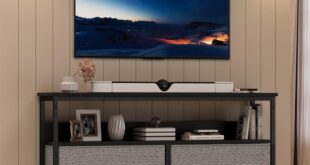
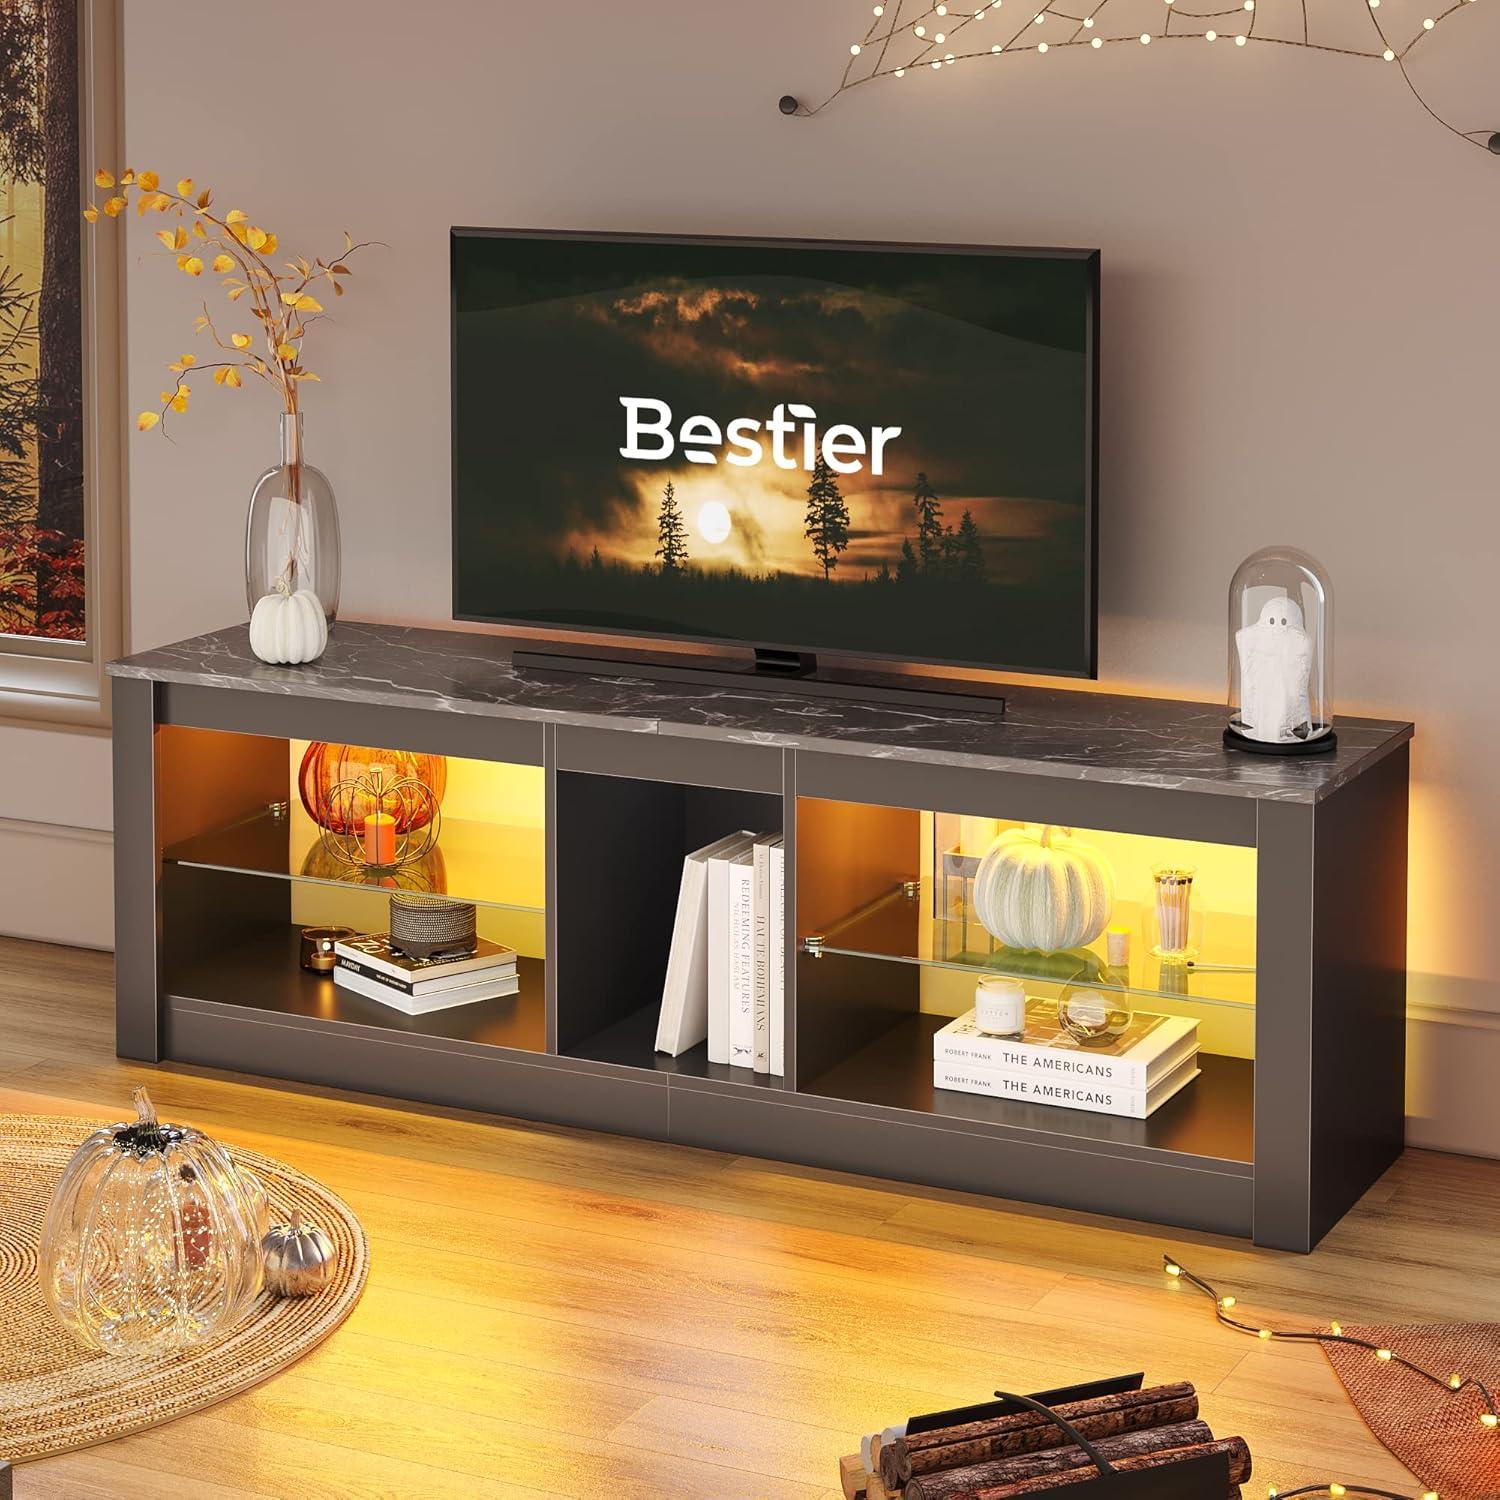
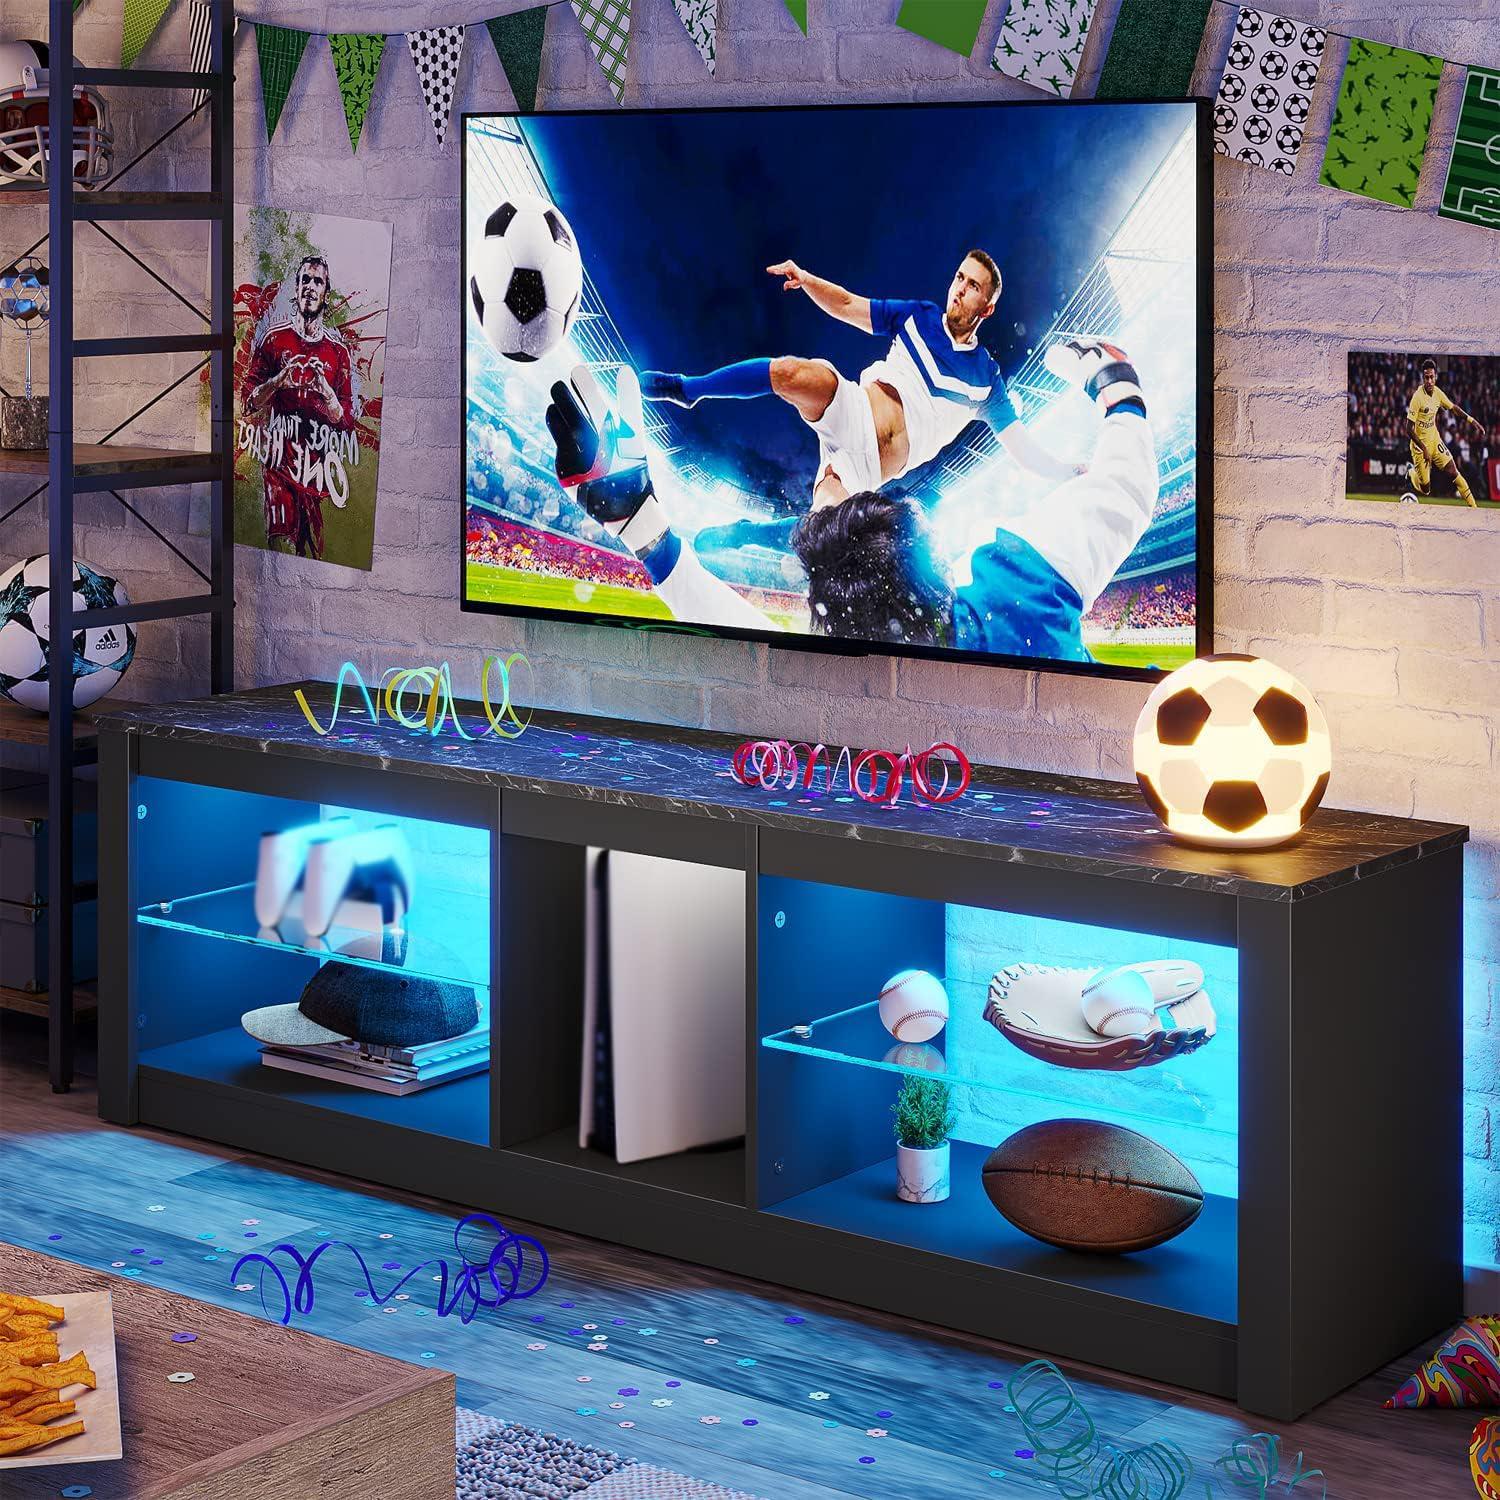
A low ribbon of color washes the floor when you flip it on, and at a glance the whole piece reads like deliberate theater rather than a spare storage unit.In your living room the Bestier Entertainment Center LED Gaming TV Stand sits broad and grounded—the black-marble finish catching fingerprints, the tempered glass shelf cool under your hand. It stretches out beneath a 55‑inch screen without feeling top-heavy; the open compartments and glass tiers create layered planes that change the room’s visual weight. Up close the particleboard frame has a quieter, denser feel than the LEDs suggest, and the lights themselves shift the mood from muted daylight to something distinctly more cinematic.
A first look at the Bestier Entertainment Center LED Gaming TV Stand and how it sits in your room
When you wheel the unit into place and step back,the first thing you notice is how the LED glow changes the room’s visual balance. The lighting can make the media area feel like a deliberate focal point, especially in lower light, and you may find yourself angling the stand a few degrees to get the reflection and glow where it looks best from your usual seat. Cables and power access become visible quickly if they’re not routed, so you’ll probably pause to tuck or clip wires behind the back panel; minor nudges to level the feet are also a common, quick fix once it’s where you want it. In practice, the stand’s surfaces pick up ambient light and colors from nearby furnishings, wich affects how prominent the display appears at different times of day.
On closer inspection, the middle shelves reflect the LEDs and any nearby lamps, which makes displayed items show up more vividly but also means fingerprints or dust become more noticeable over time. Placing the unit in an open living area tends to let the lighting play across the floor and walls; in a tighter alcove the effect is more contained and can feel concentrated. A few everyday adjustments you might make include:
- Leveling — small tweaks to keep doors and shelves even.
- cable routing — slight shifts back from the wall to hide cords.
- Light tuning — choosing a mode that matches nearby light sources.
| Room condition | How it sits |
|---|---|
| Dim living room | LEDs become the visual anchor, casting soft ambient light |
| Compact media nook | Light is more contained; reflections are more noticeable |
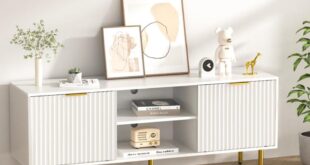
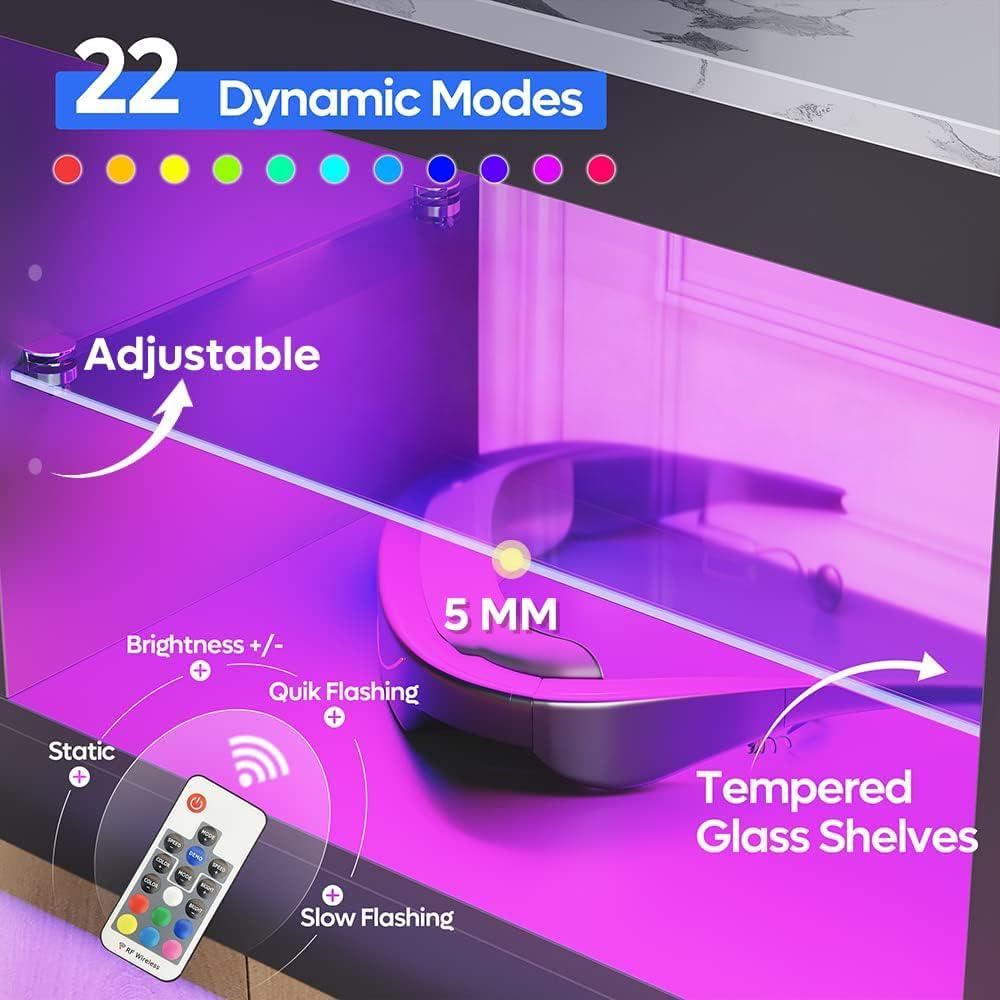
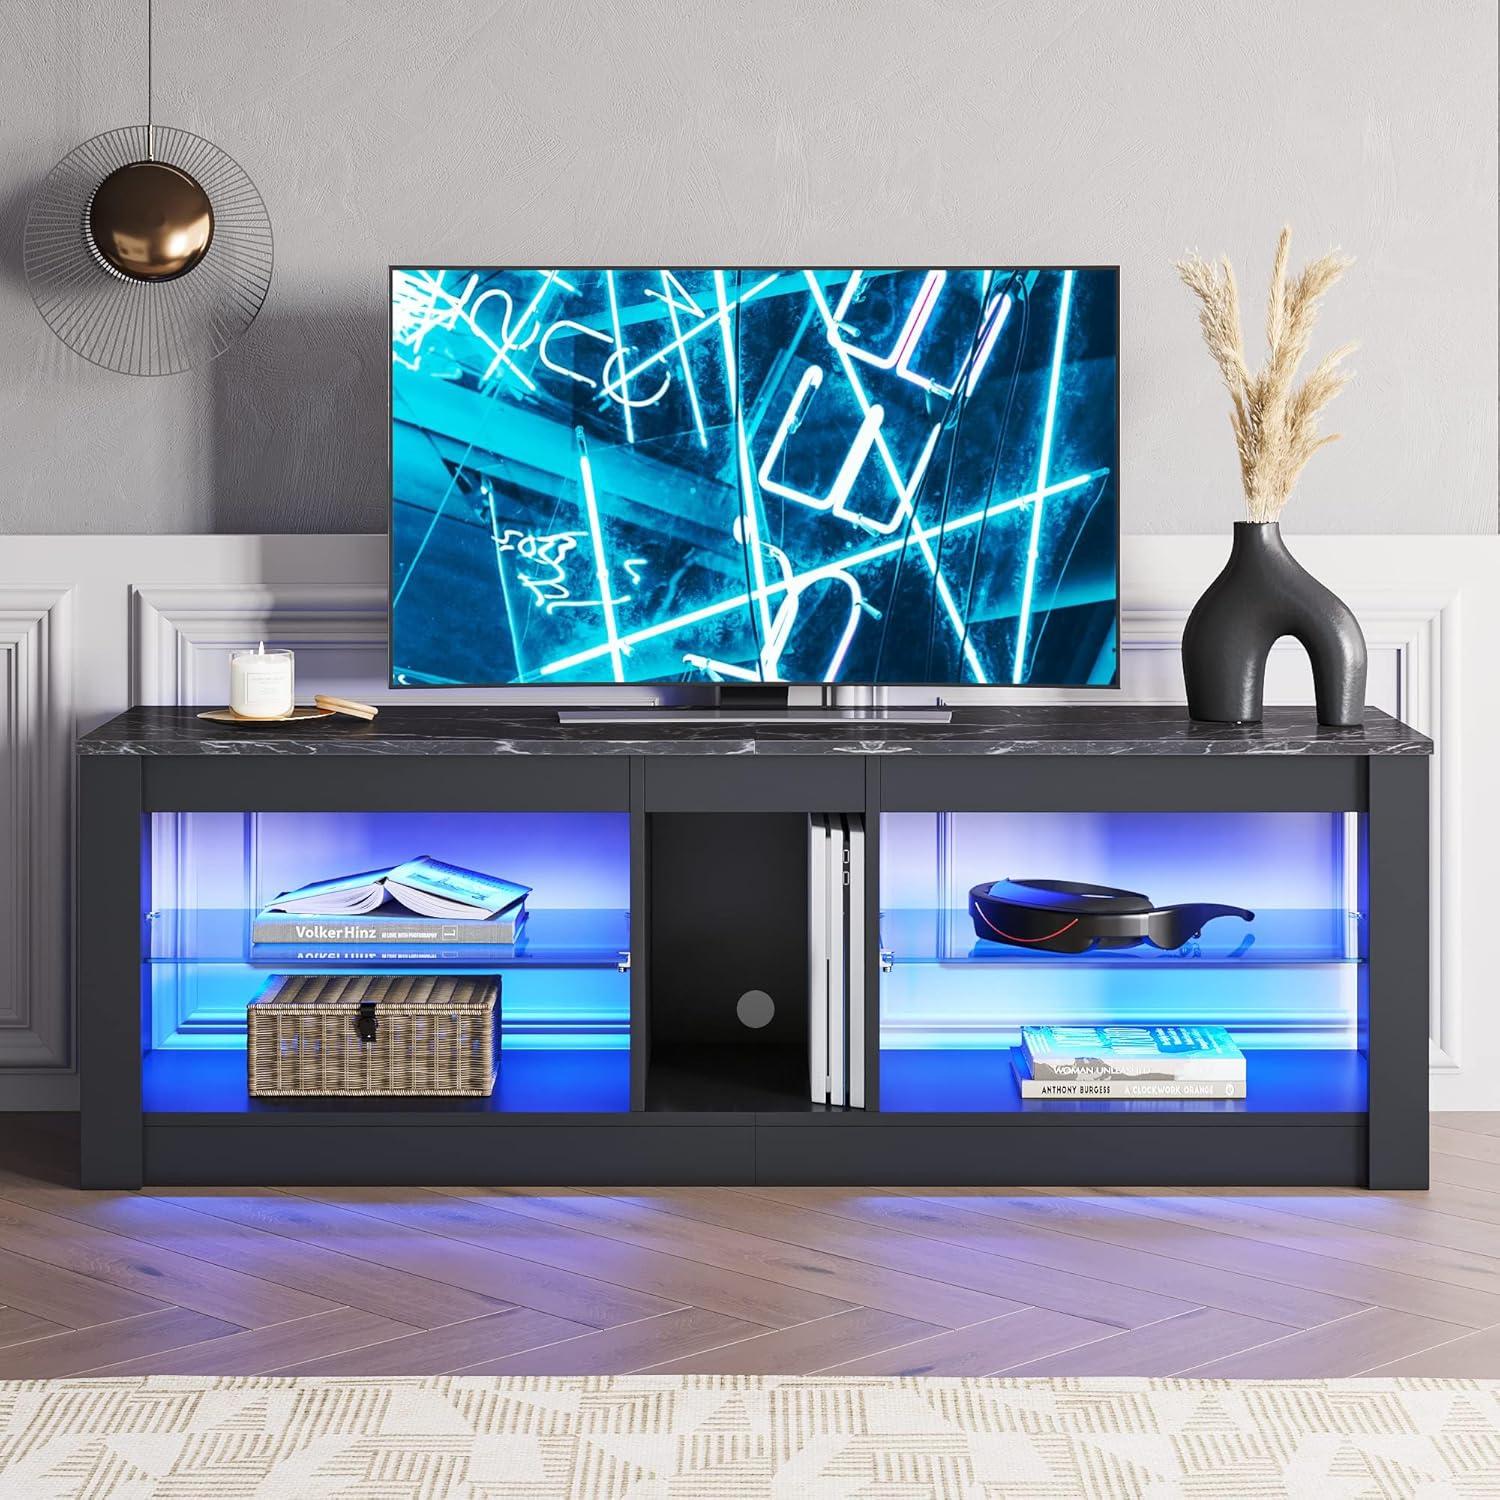
Up close, the black marble surface reads as a printed stone veneer rather than raw rock: the white and grey veining appears fine and slightly diffused, and the topcoat has a smooth, almost satiny feel when you run a hand across it. The finish catches light unevenly — from some angles the veins pop, from others the black background deepens into a soft, low-gloss field. The tempered glass shelves feel cool and solid under your fingers; tapping them gives a clean, slightly higher‑pitched ring compared with the surrounding panels, and the edges are polished enough that you notice the thickness without any sharpness. Small, everyday details become apparent in close quarters:
- Finish: printed veining with a satin surface that shows smudges in certain light
- glass shelves: cool to the touch, reflective, and prone to showing fingerprints and dust
- Surface interaction: objects cast crisp reflections on the glass and softer, streaked reflections on the marble
The LED trim reads differently depending on ambient light and proximity. In a well-lit room the strip is an understated halo, but when the lights dim it becomes the dominant visual element — colors deepen and edges of lit objects pick up a thin rim of light. You can see individual diodes if you peer very closely, though the plastic diffuser generally smooths the transitions; when the glass shelves sit above or below the trim they act like mirrors, multiplying the glow and creating layered color reflections beneath displayed items. The following gives a quick sense of how the trim behaves in typical lighting:
| Ambient lighting | Observed effect |
|---|---|
| Radiant daytime | Subtle accenting; colors are muted and act as soft highlights |
| Dim evening | Colors become vivid; edges of objects pick up visible color halos |
| Dark room | Highly saturated tones with clearer diode banding at very close range |
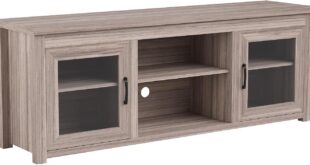
Assembling and arranging it in your space: how you adjust shelves, route cables, and work with the build
When you unpack the cabinet, spread the parts out and keep the hardware bags grouped so you don’t have to stop mid-build to hunt for a screw. The assembly process moves in a few predictable stages: frame together, shelves in place, and then the backing and anti‑tip bracket.You’ll find that the middle glass shelf sits on removable pegs, so you can lift it free and test different heights before tightening anything; it’s common to slide a shelf in and out a couple of times as you judge the spacing for a console or a soundbar. A few tools typically make the job smoother —
- Phillips screwdriver or drill driver
- small level for shelf alignment
- masking tape to mark peg positions
- pair of gloves for handling glass
—and you may find yourself standing back to see how the LED strip sits under the glass before committing to a final arrangement. The anti-tip strap attaches near the back; plan where the cabinet will sit against the wall so you can fasten it without shifting the whole assembly later.
routing cables becomes part of the arranging process: position devices, note where each cord exits, then move things only after you’ve threaded longer runs thru the rear gap or tucked them along shelf edges. In practice you’ll route power leads down one side and video or aux cables across the back, using clips or zip ties to keep bundles from snagging when you slide a console back in.It’s normal to leave a little slack so you can pull a console forward for a disc swap without disturbing the whole setup, and you may adjust shelf height once or twice after seeing how long the HDMI and power cords actually are. A quick reference table shows common cable types and straightforward places they tend to run on this kind of stand:
| Cable type | Typical route / note |
|---|---|
| Power | Down rear gap to nearest outlet; secure with clips along side or back |
| HDMI / video | Behind devices, across shelf back; avoid tight bends near connectors |
| Audio / optical | Along shelf seams or taped under shelf to reduce visible slack |
You’ll probably make small adjustments over a few sessions as cables settle and you notice where clutter shows through, rather than finishing perfectly on the first try.
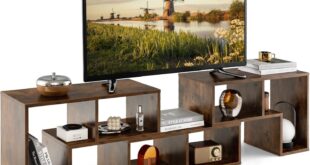
How your TV, consoles, controllers, and accessories occupy the shelves and where they fit for you
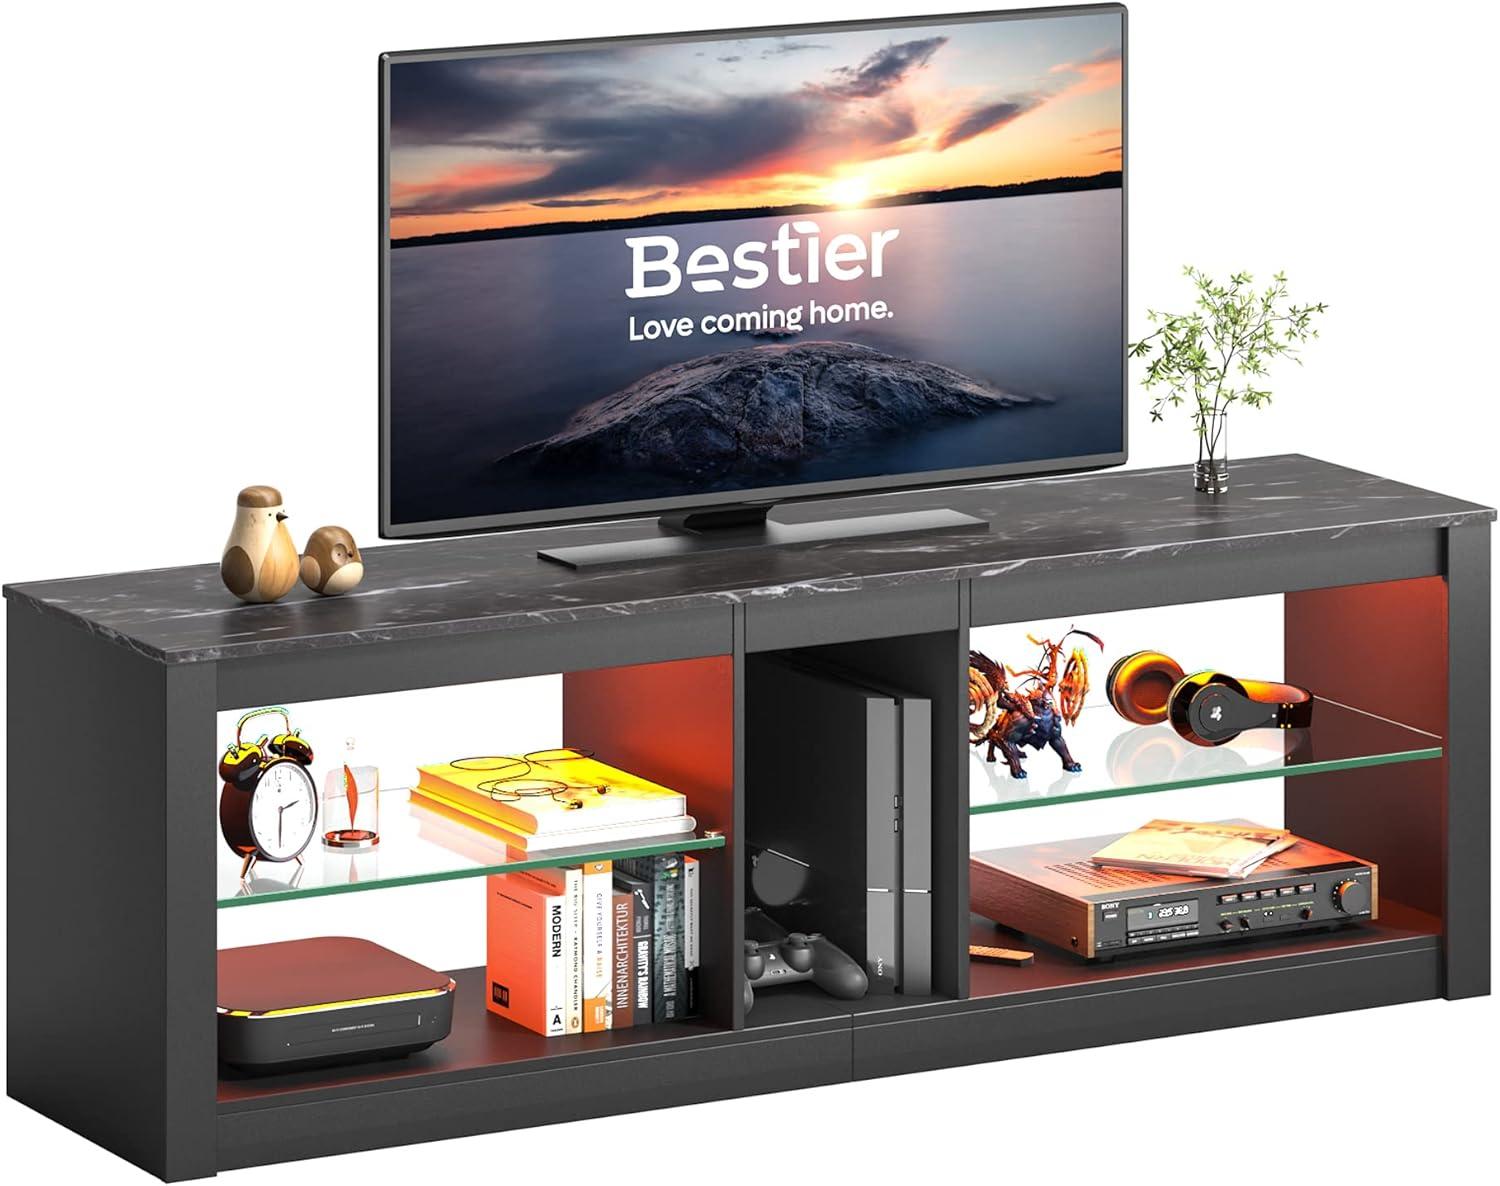
When you set the TV on the top surface, the arrangement below quickly becomes a mix of display and everyday access. The open compartments tend to host the larger, frequently used gear — consoles usually sit in the wider bays where you can slide a controller forward and reach disc trays without kneeling. the glass middle shelf often ends up as a dual-purpose plane: sometimes raised to give a tall console breathing room, sometimes lowered to showcase a few figures or a headset with the LEDs behind them catching the edges. Cables typically route out the back openings and collect near a power strip; you’ll find yourself nudging a power brick or repositioning a router once in a while to keep airflow clear.Small items — handfuls of thumb grips, spare batteries, a charging dock — gravitate toward the front edge of a lower shelf or into a shallow tray you place there, and controllers are frequently left on top of a console between sessions rather than in a drawer.
- Top surface: TV plus infrared/streaming dongles and the permanent cable cluster.
- Middle compartments: Consoles, a media player, or a display of collectibles on the glass shelf.
- Lower bays: Controllers, game cases, a small surge protector or networking gear.
In daily use you’ll often make small adjustments rather than plan an ideal layout: moving the glass shelf a notch if a new console is slightly taller, sliding a controller forward when you sit down, or rotating a game case so its spine faces outward. Heat-producing devices are usually given a little extra clearance by habit; that empty inch behind a console gets used to encourage airflow. Lighting changes how you treat display items — the LED backlight tends to shift a figurine from “stored” to “on show,” which affects where you place it — and the open-front design means routers and charging stands are both easy to reach and visible, so they don’t stay hidden for long.
| Item | Typical placement | Notes |
|---|---|---|
| Television | Top surface | Center of the unit with cables routed rearward |
| Game consoles | Middle open compartments | One per bay or stacked with adjusted shelf height |
| Controllers & remotes | Front of lower bays or atop consoles | Frequently enough left within arm’s reach during play |
| Accessories (headsets, chargers) | Glass shelf or lower shelf | Displayed or stowed depending on daily use |
Where the stand aligns with your needs, where it falls short, and the real life limits you may encounter
In everyday use the stand often reads as a functional centerpiece rather than a neutral piece of furniture: the lighting noticeably changes evening atmosphere and the open shelving keeps devices visible and easy to swap, while the glass surfaces make displayed items prominent but also show dust and fingerprints more readily. Assembly tends to involve intermittent fiddling—aligning panels, tightening fasteners and adjusting shelf positions—and a second set of hands turns up in manny casual accounts. Practical limits appear around cable runs and component fit; rear access and short power leads can force temporary rerouting or the placement of extension cords in visible spots, and the adjustable shelf positions sometimes leave little room for taller gaming peripherals unless reconfigured.
The following patterns show how typical household use interacts with the stand’s features:
- Lighting in use: creates a distinct ambient layer that can draw attention away from on-screen content in dim settings or feel subdued in bright rooms.
- Glass shelving: highlights collectibles but requires more frequent cleaning and careful placement of heavier items.
- Cable access: rear openings are serviceable but not generous, so power strip placement and device plugging often need planning.
- assembly and stability: once secured to a wall and leveled, stability improves, though surface unevenness or overloaded shelves can reintroduce wobble.
| Real-life constraint | Typical manifestation |
|---|---|
| Short power/cable lengths | Visible cables or use of extension cords; limits placement adaptability |
| Shelf vertical spacing | Some taller devices require reshuffling or removal of a shelf |
| Glass surfaces | Shows dust/fingerprints quickly, increasing upkeep |
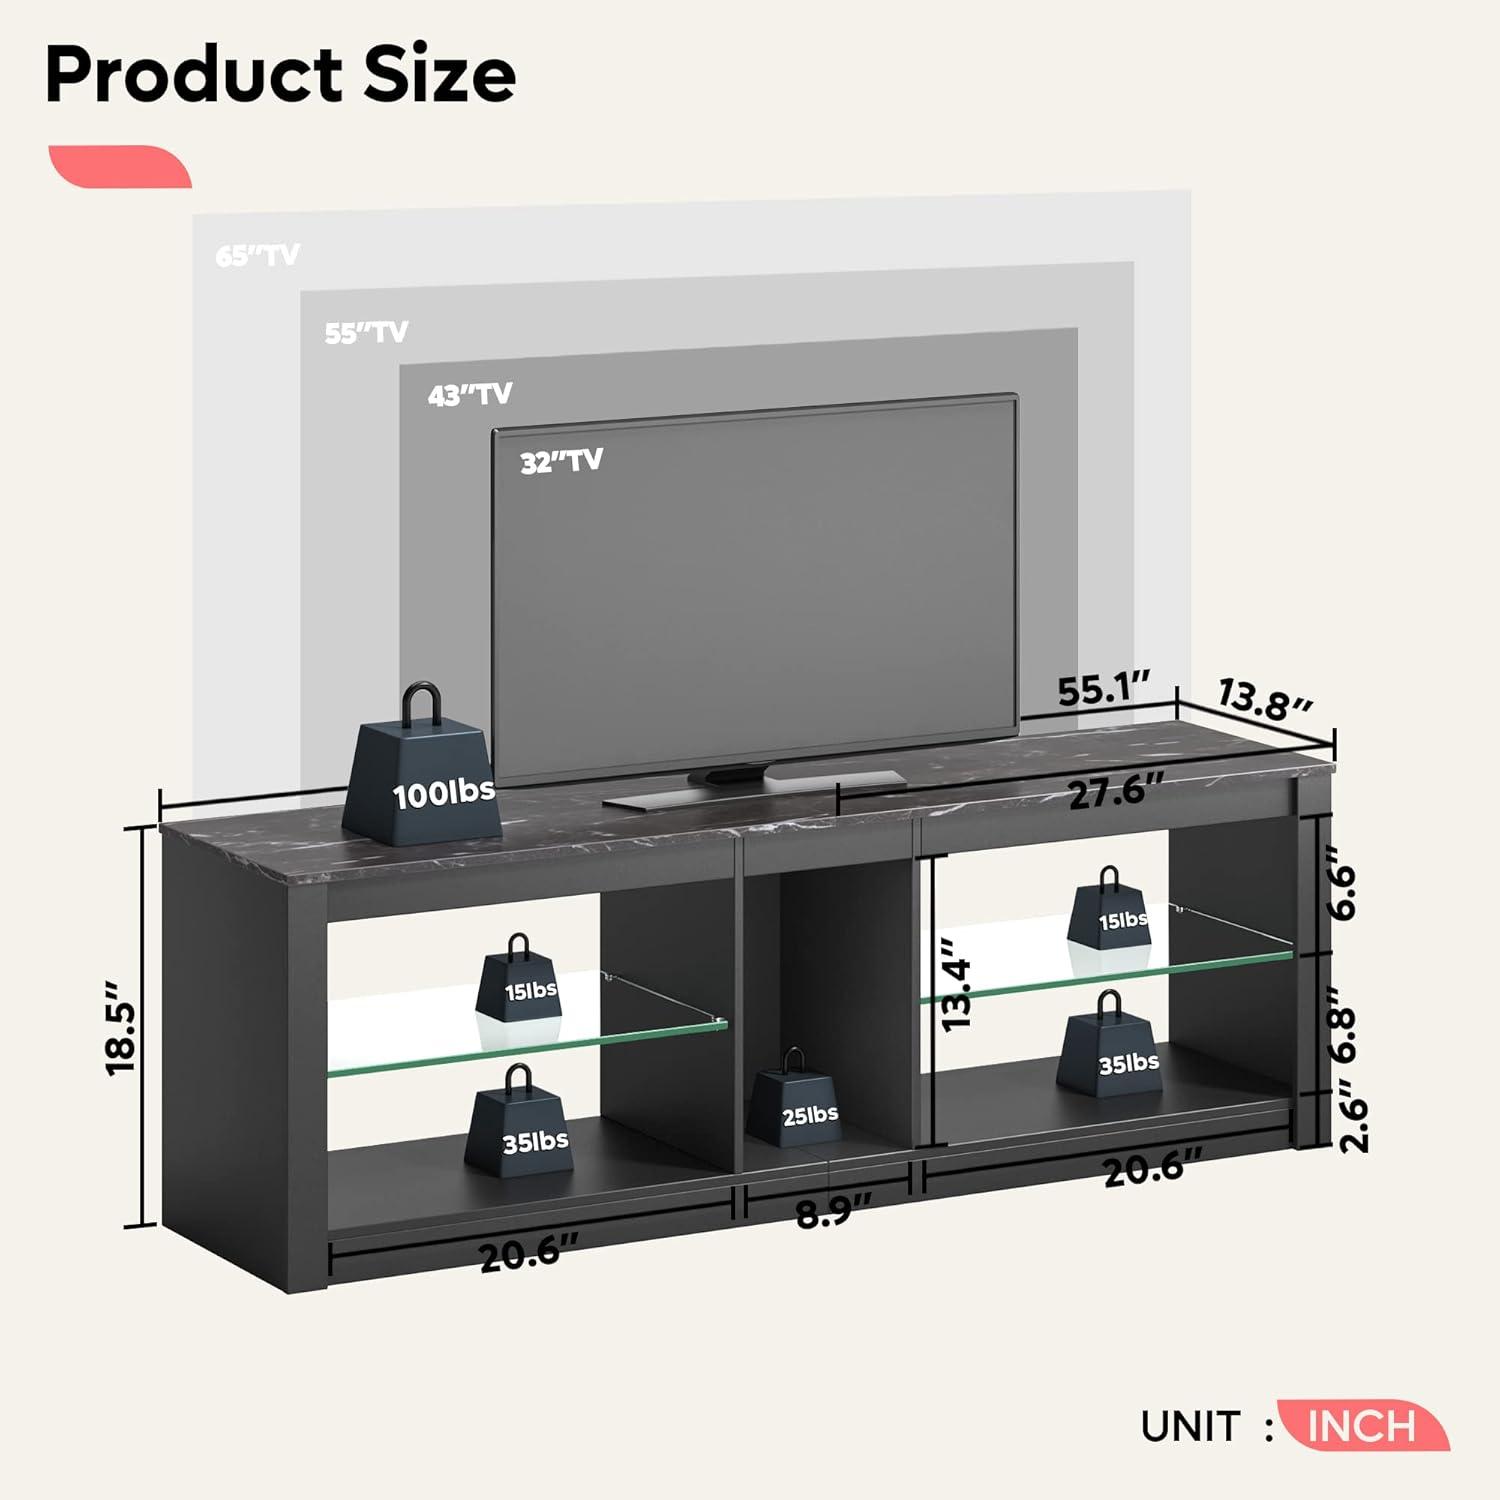
Full specifications and current configuration details are available for review at this listing.
Living with the lights and glass day to day: how you clean it, handle accidental knocks, and see the RGB in different rooms
Living with glass surfaces and built-in lighting means you develop small habits fast. Fingerprints and dust show up more when the LEDs are on, so you’ll find yourself doing quick wipes after movie nights and a more thorough clean once a week. A practical routine that works in most rooms is: light dusting with a dry microfiber cloth to lift surface dust, followed by a slightly damp microfiber wipe for smudges, and a final dry buff to remove streaks; avoid spraying cleaner directly onto seams or electronics.For the LED elements, don’t use ammonia-based cleaners or heavy liquids near the strip—wipe any nearby glass with a cloth that’s damp rather than wet and unplug or switch off the lights if you’re cleaning close to the cable runs. Small habits, like keeping a fresh cloth on the media cabinet or using compressed air briefly in corners, tend to keep the surface looking good without much fuss.
Accidental bumps happen; the usual response is practical and immediate rather than dramatic. After a knock you’ll probably check that nothing shifted into the TV footprint, reposition fragile items, and tighten any loose fasteners or brackets if a shelf feels off-center. A few quick fixes you might use after a light impact include:
- Re-center and restack collectibles or consoles to rebalance weight.
- Add or replace pads — small rubber or felt bumpers under objects reduce future sliding.
- Inspect edges for chips and smooth any raised glass fragments with care; cover sharp spots until a proper repair can be made.
How the RGB reads depends a lot on the room: in bright daytime settings the colors look muted and the glass reflects more,in evening ambient light the LEDs appear livelier and more saturated, and in a dark room the modes pop and cast clearer color onto nearby walls. The short table below gives a simple sense of those differences.
| Room lighting | How the RGB appears |
|---|---|
| Bright daylight | Washed-out, reflections more noticeable |
| Evening with lamps | Balanced color, moderate glow on surroundings |
| Dark room | High contrast and vivid hues |

How the Set Settles Into the room
Over time, the bestier Entertainment Center LED Gaming TV Stand for 55+ Inch TV Adjustable Glass Shelves 22 Dynamic RGB modes TV Cabinet Game Console PS4, Black Marble stops feeling like a staged object and more like a lived spot in the corner, quietly shaping how the space is used and where cushions and controllers end up. Its surfaces collect the soft patina of daily life—small marks, a forgotten coaster, the faint path of a hand—and those traces make it behave more comfortably in the room than it did on day one. In regular household rhythms it takes on a steady,everyday presence around evening screens and weekend clearing-ups,folding into familiar habits rather than demanding attention. It stays.