Henn&Hart TV Stand for TVs up to 75 — Your Space, Organized
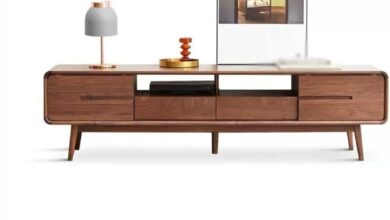
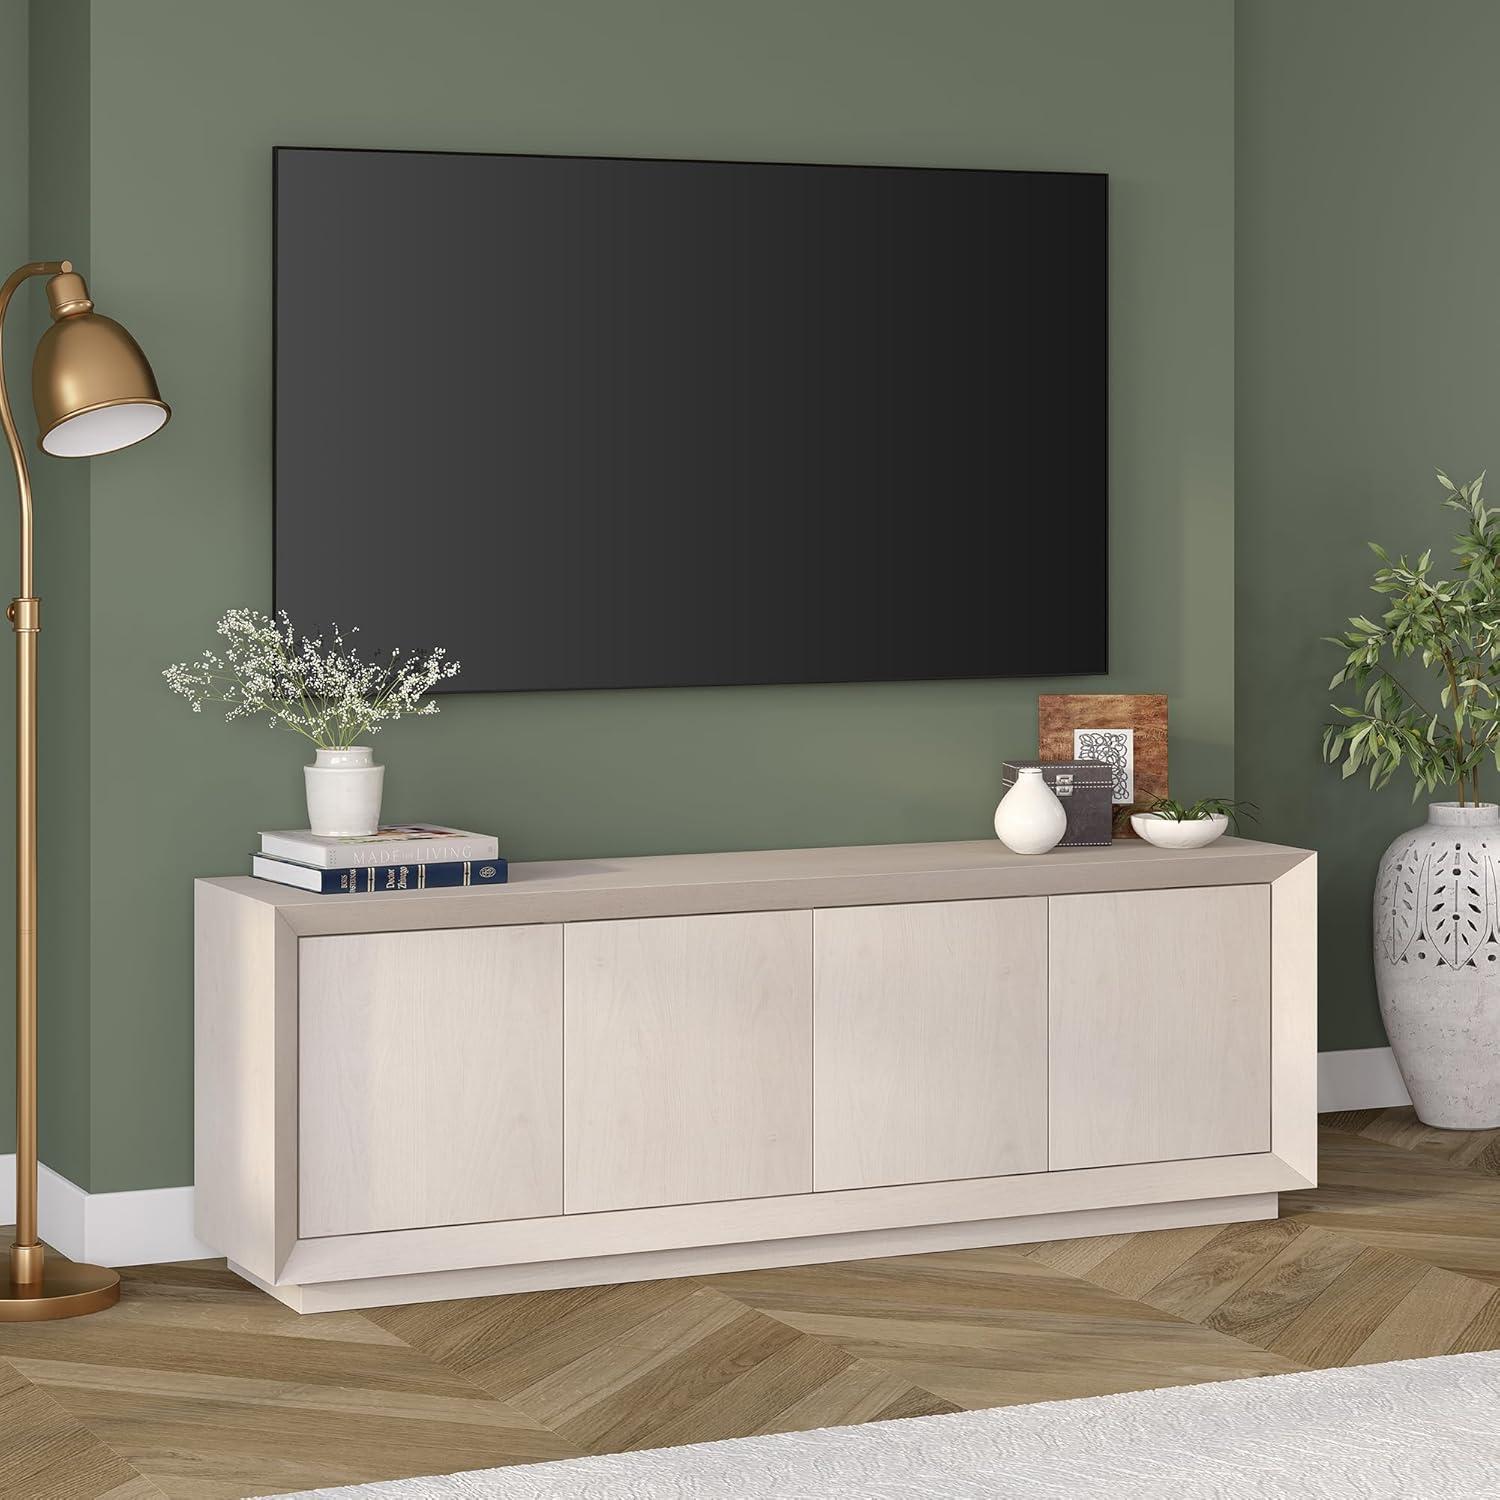
Light from the window catches the alder-white finish and you immediately sense the piece’s scale: wide enough to hold a substantial screen yet low and unassuming in profile. The Henn&Hart TV Stand in alder white quietly organizes the visual weight of the wall, its smooth top showing a faint grain under your palm. Open a door and the interior feels practical—adjustable shelves that click into place,a soft hush as the doors close,and a broad center shelf that breathes room around a soundbar or a row of books. It settles into the living room as a calmly useful presence rather than a showpiece.
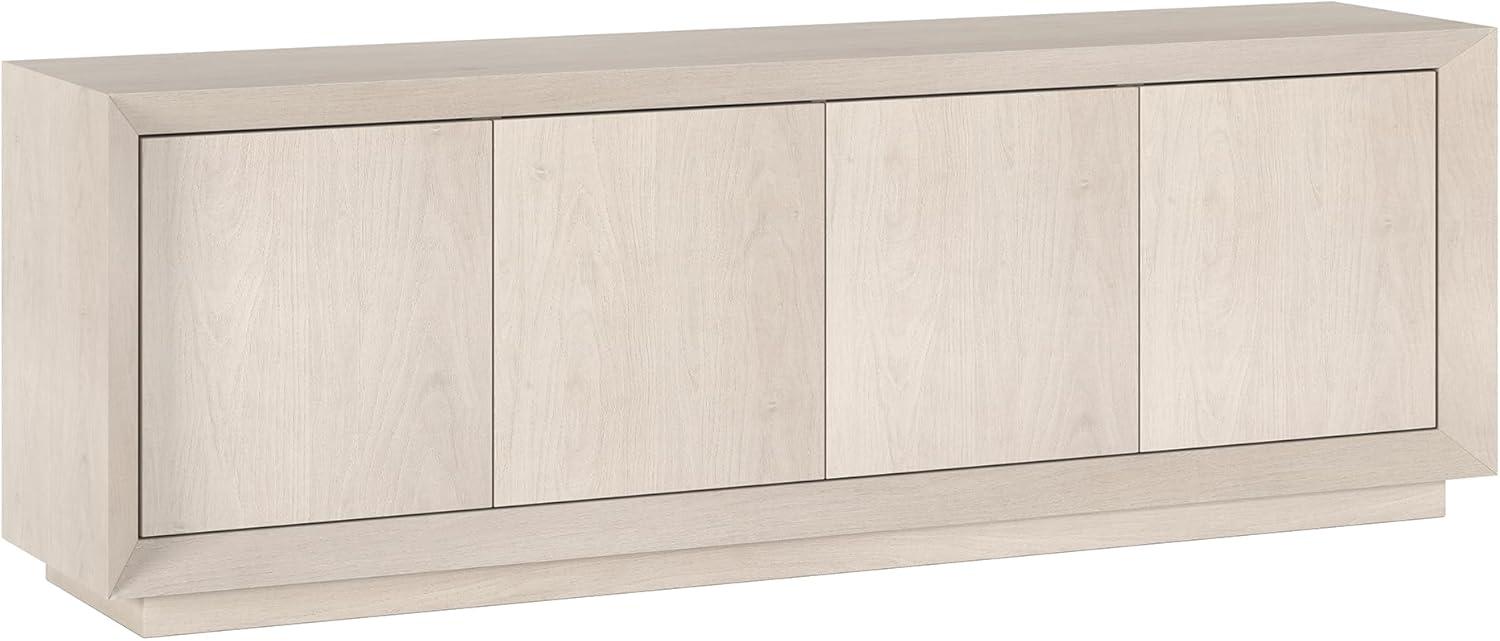
Your first look at the Henn and Hart TV stand for televisions up to seventy five inches

You notice it before you set the screen down: a low, orderly silhouette that nudges attention toward the television without shouting. From where you stand the pale finish reads calm and a little contemporary, letting lamps and frames nearby take on more personality; the top surface looks broad enough to hold a soundbar or a row of framed photos, and the doors and panels create a tidy, balanced foreground beneath the screen. In everyday light the finish can pick up fingerprints and dust a bit more readily than darker woods, so you find yourself wiping the surface now and then as part of your usual living-room tidy-up.
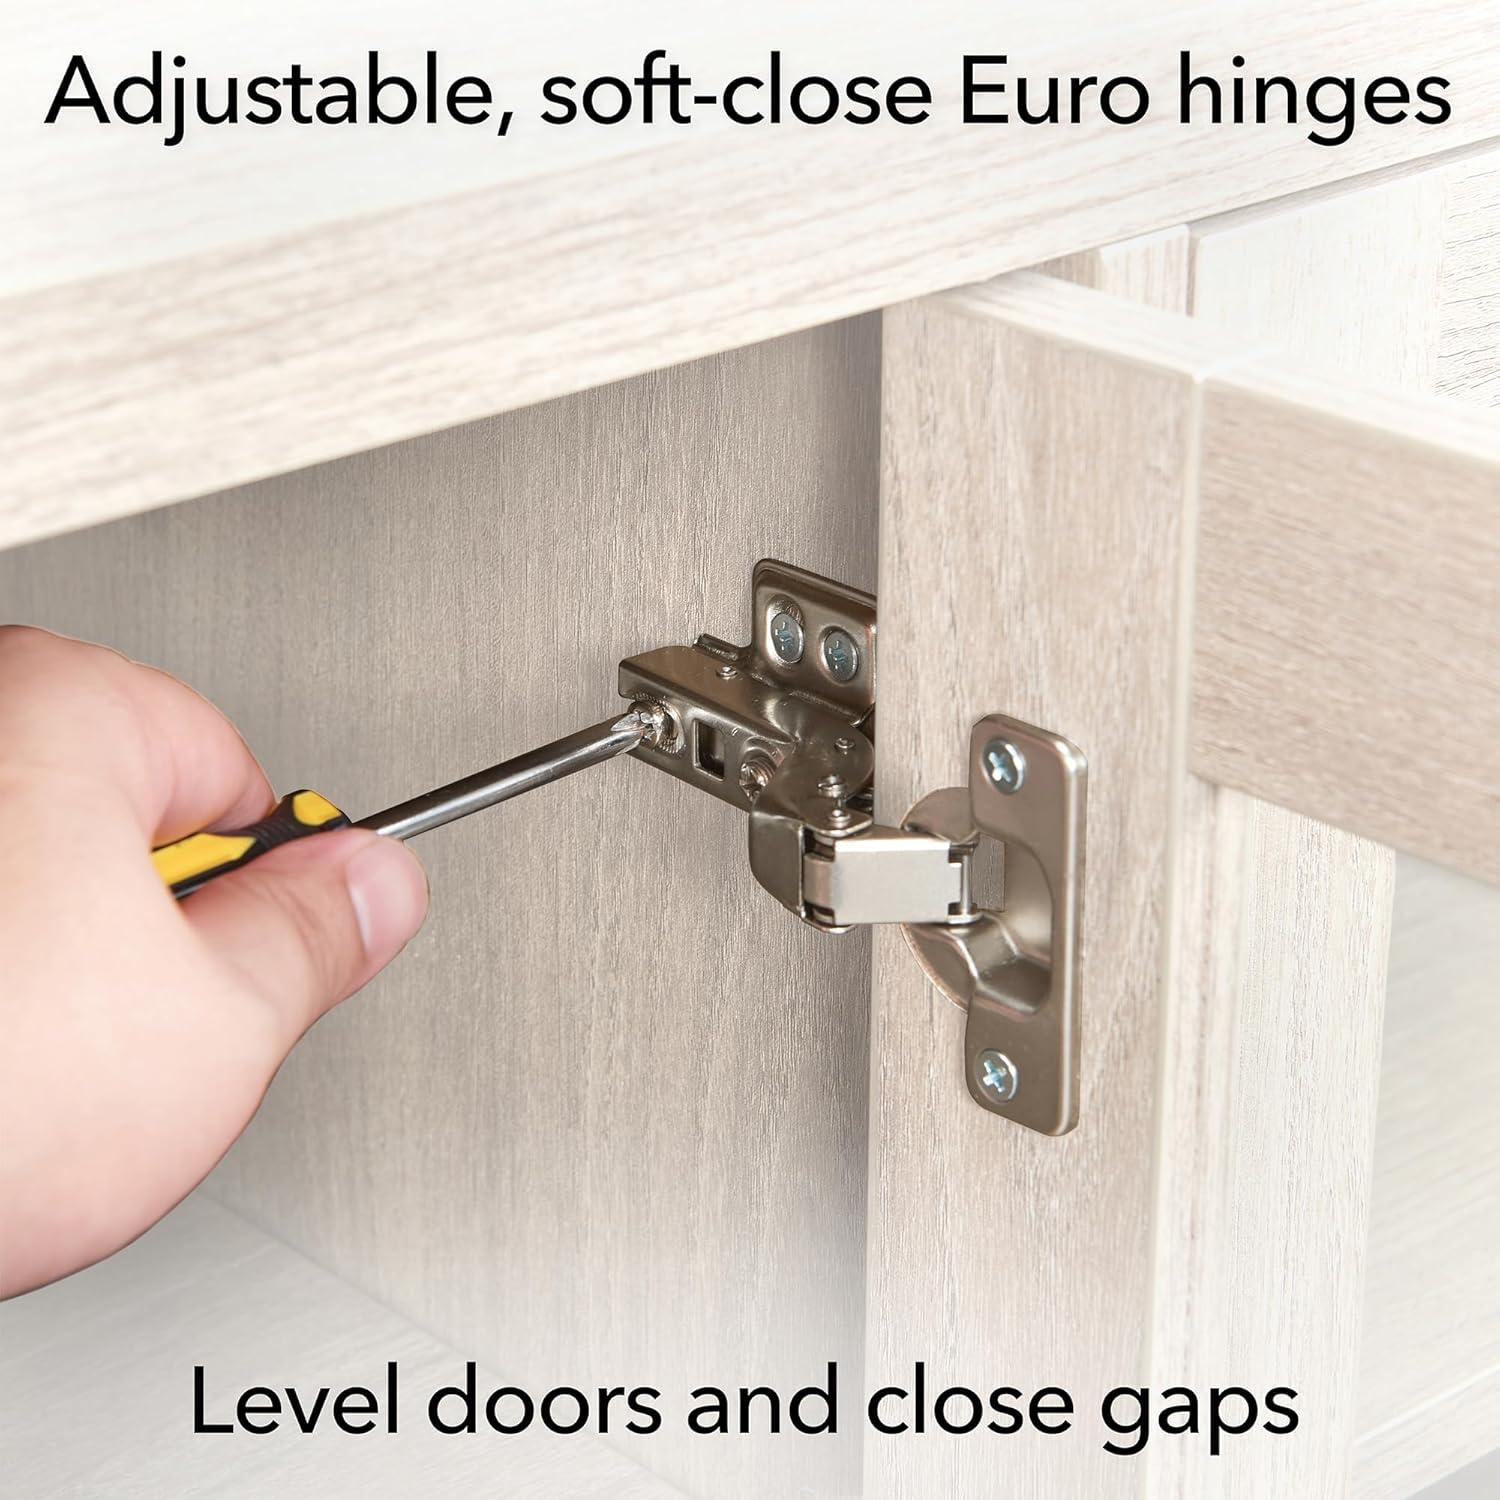
When you move closer, the details you interact with first are revealing: door action, the ease of slipping a console in and out, and how cables fall behind the unit.The cabinet doors operate with a quiet, controlled motion — the soft-close action is noticeable the first few times you shut them — and the rear openings make the cords disappear from sight as you hook things up. As you tend to shuffle devices around while gaming or swapping streaming boxes, the interior feels like it adapts with a few small nudges rather than a full rearrange, though bulkier components may need a bit more finessing to sit flush.
the alder white finish and construction details you can see and touch in your room
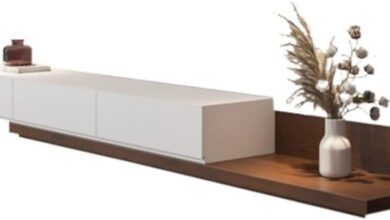
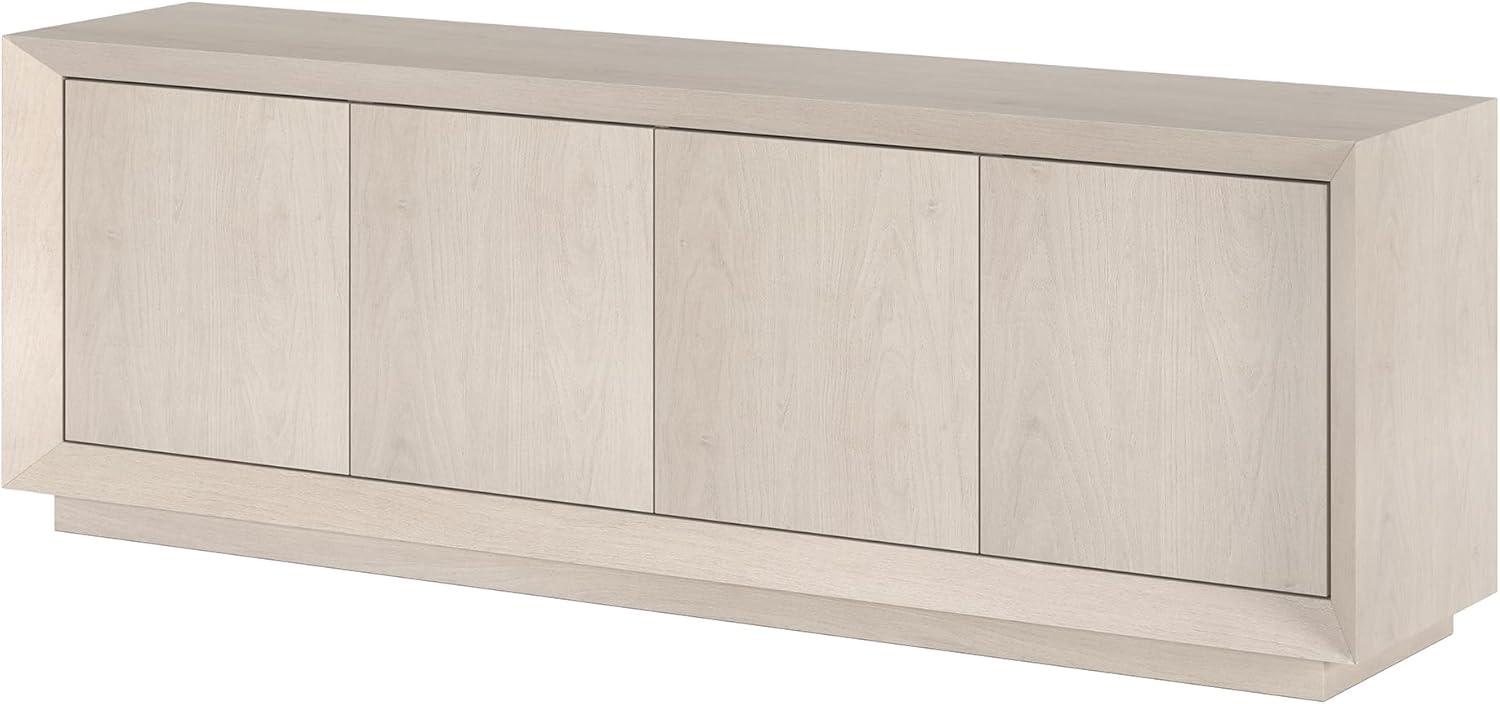
When the piece sits in your room the alder-white finish reads as a soft, slightly warm white rather than a clinical shining. Under different light it can look chalky in the morning and a touch creamier in the evening; you’ll notice a subtle wood grain showing through the paint when you kneel down and look along the surface. Run a hand across the top and the paint feels mostly smooth with a faint texture where the grain peaks — not glossy, more of a low satin or matte skin that doesn’t show fingerprints easily. Edges are gently rounded rather than razor-sharp, and the visible seams where panels meet are narrow; in some assemblies a tiny shadow line appears along joins, especially where two pieces were mated during setup.
Beyond the finish itself, there are a few tactile construction cues you can check without tools: the top panel has a reassuring stiffness when you press near the middle, the backing is thinner and gives slightly if pushed, and the underside shows standard assembly hardware and covered fasteners rather than hidden, seamless joinery. A short list of swift, hands-on observations:
- Surface feel: low-sheen paint with slight grain texture.
- Edge treatment: rounded profiles and narrow joint lines.
- Assembly evidence: visible fastener caps and predrilled joins at internal seams.
Below is a simple snapshot of those tactile points for reference.
| Feature | What you’ll notice |
|---|---|
| top surface | Stiff under load, matte finish, faint grain texture to the touch |
| Panel joins | Narrow shadow lines where pieces meet; small gaps possible after assembly |
| Backing & underside | Thinner back panel with visible fasteners and access points |
Measured proportions and the viewing height and sightlines your television will provide

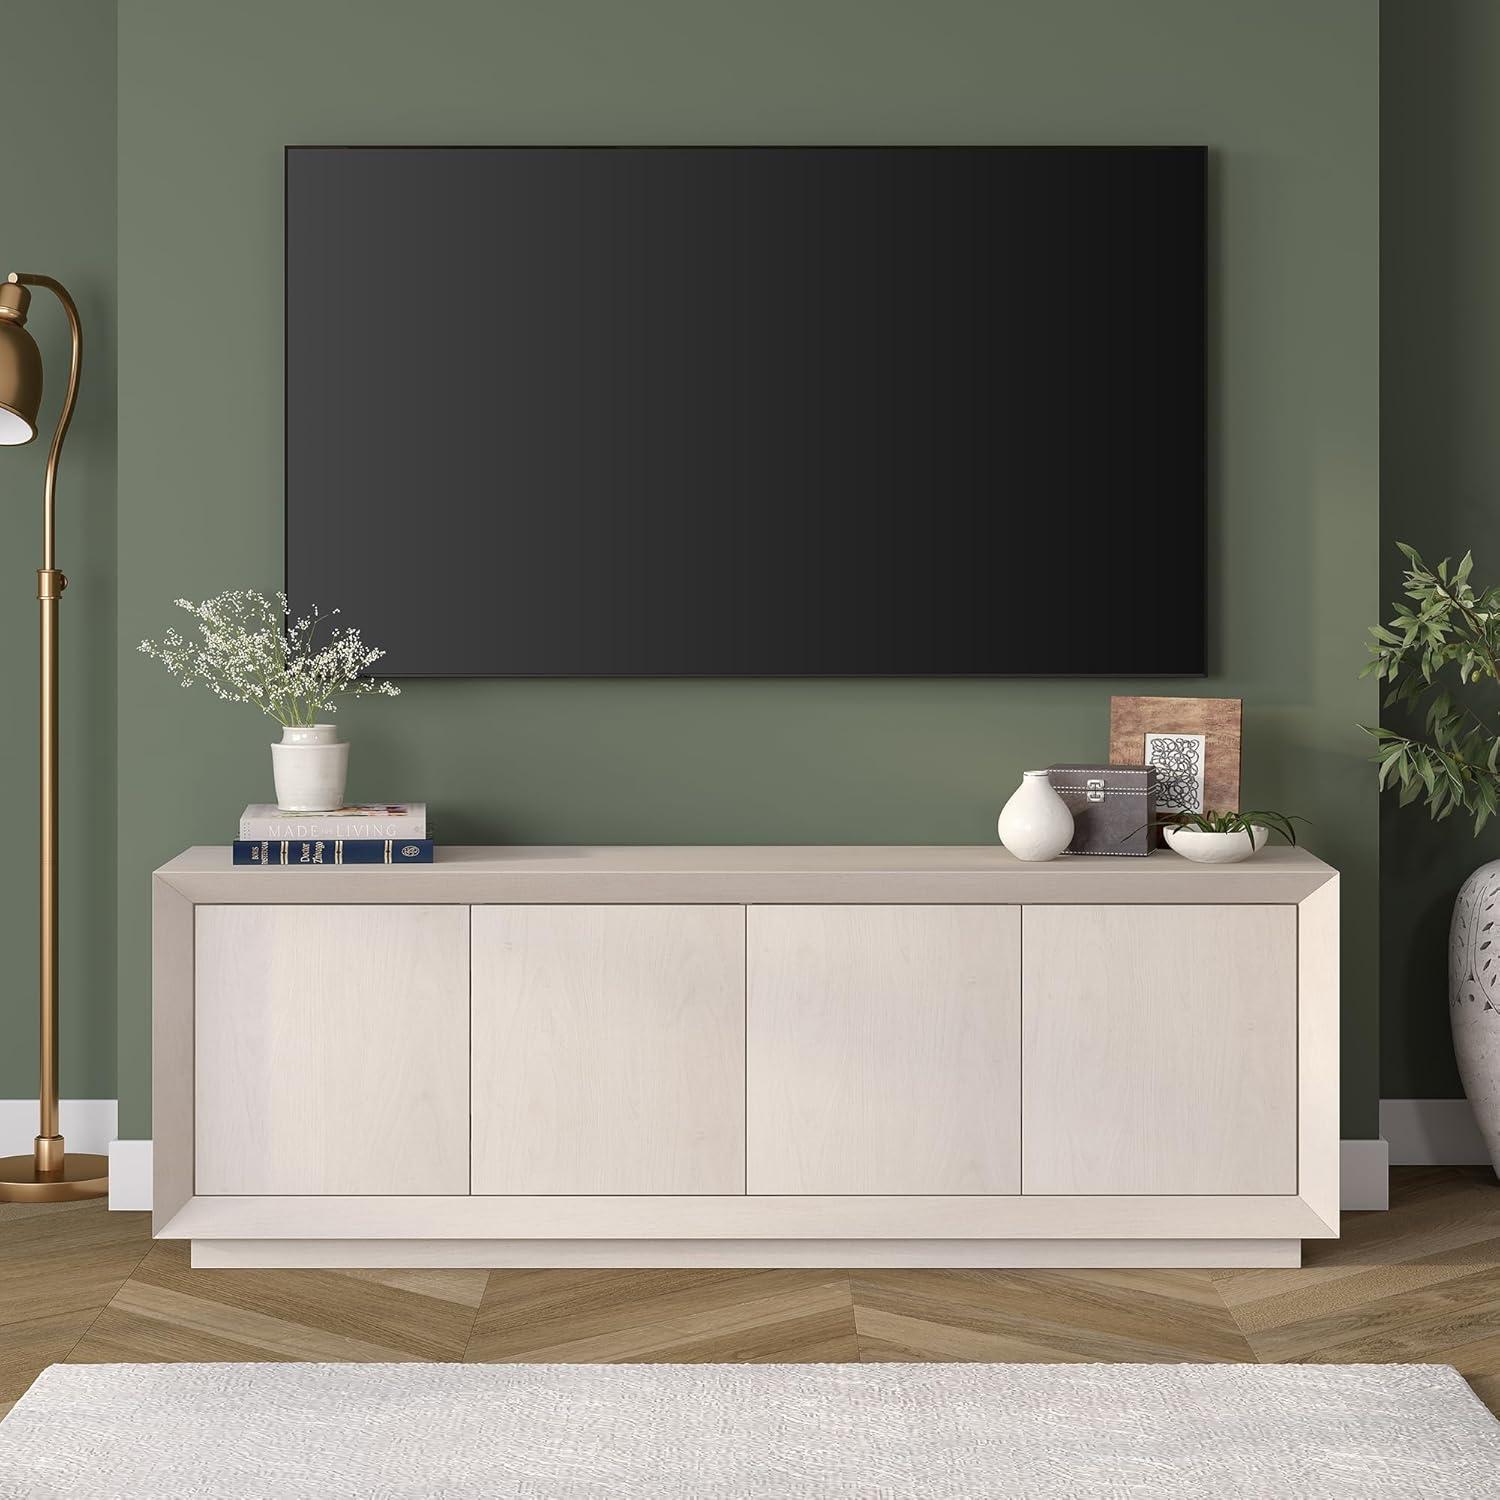
Measured on a living-room setup, a full‑size flat screen sitting on this stand tends to place the screen’s center roughly in the low‑40‑inch range from the floor. With a larger panel in place the eye line from a typical seated sofa (often around 38–42 inches) sits very near the middle of the screen, so viewing tends to feel level rather than noticeably tilted up or down. Small shifts — a soundbar on the shelf, a stack of books used as a riser, or a slightly taller TV base — will nudge that center point by an inch or two, and side seating or high stools routinely changes the apparent angle enough that viewers often lean or tilt their heads without thinking about it.
The measured relationship between screen size and centre height is useful when planning sightlines; the table below summarizes approximate center heights observed with common panel sizes placed directly on the stand top. Typical sightline behaviors noted in everyday use include occasional upward glances from counter seating, a tendency to bring gaming consoles closer for a more immersive view, and small posture adjustments when multiple peopel view from staggered heights.
- Seated eye alignment usually lines up within a couple of inches of the screen center for 65–75 inch TVs.
- High seating (bar stools, raised chairs) frequently enough places viewers slightly below the natural center, creating a mild upward sightline.
- Accessories such as soundbars or decorative objects on the center shelf can raise the perceived screen height.
| TV diagonal | Approx. screen‑center height above floor |
|---|---|
| 65 inches | ~40 inches |
| 75 inches | ~42 inches |
See full specifications and configuration details on the product listing
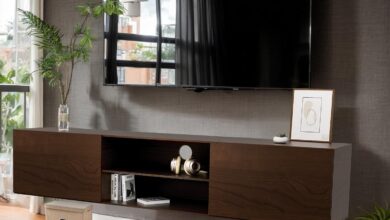
How your television and components sit on the top and inside the two concealed storage cabinets with adjustable shelves
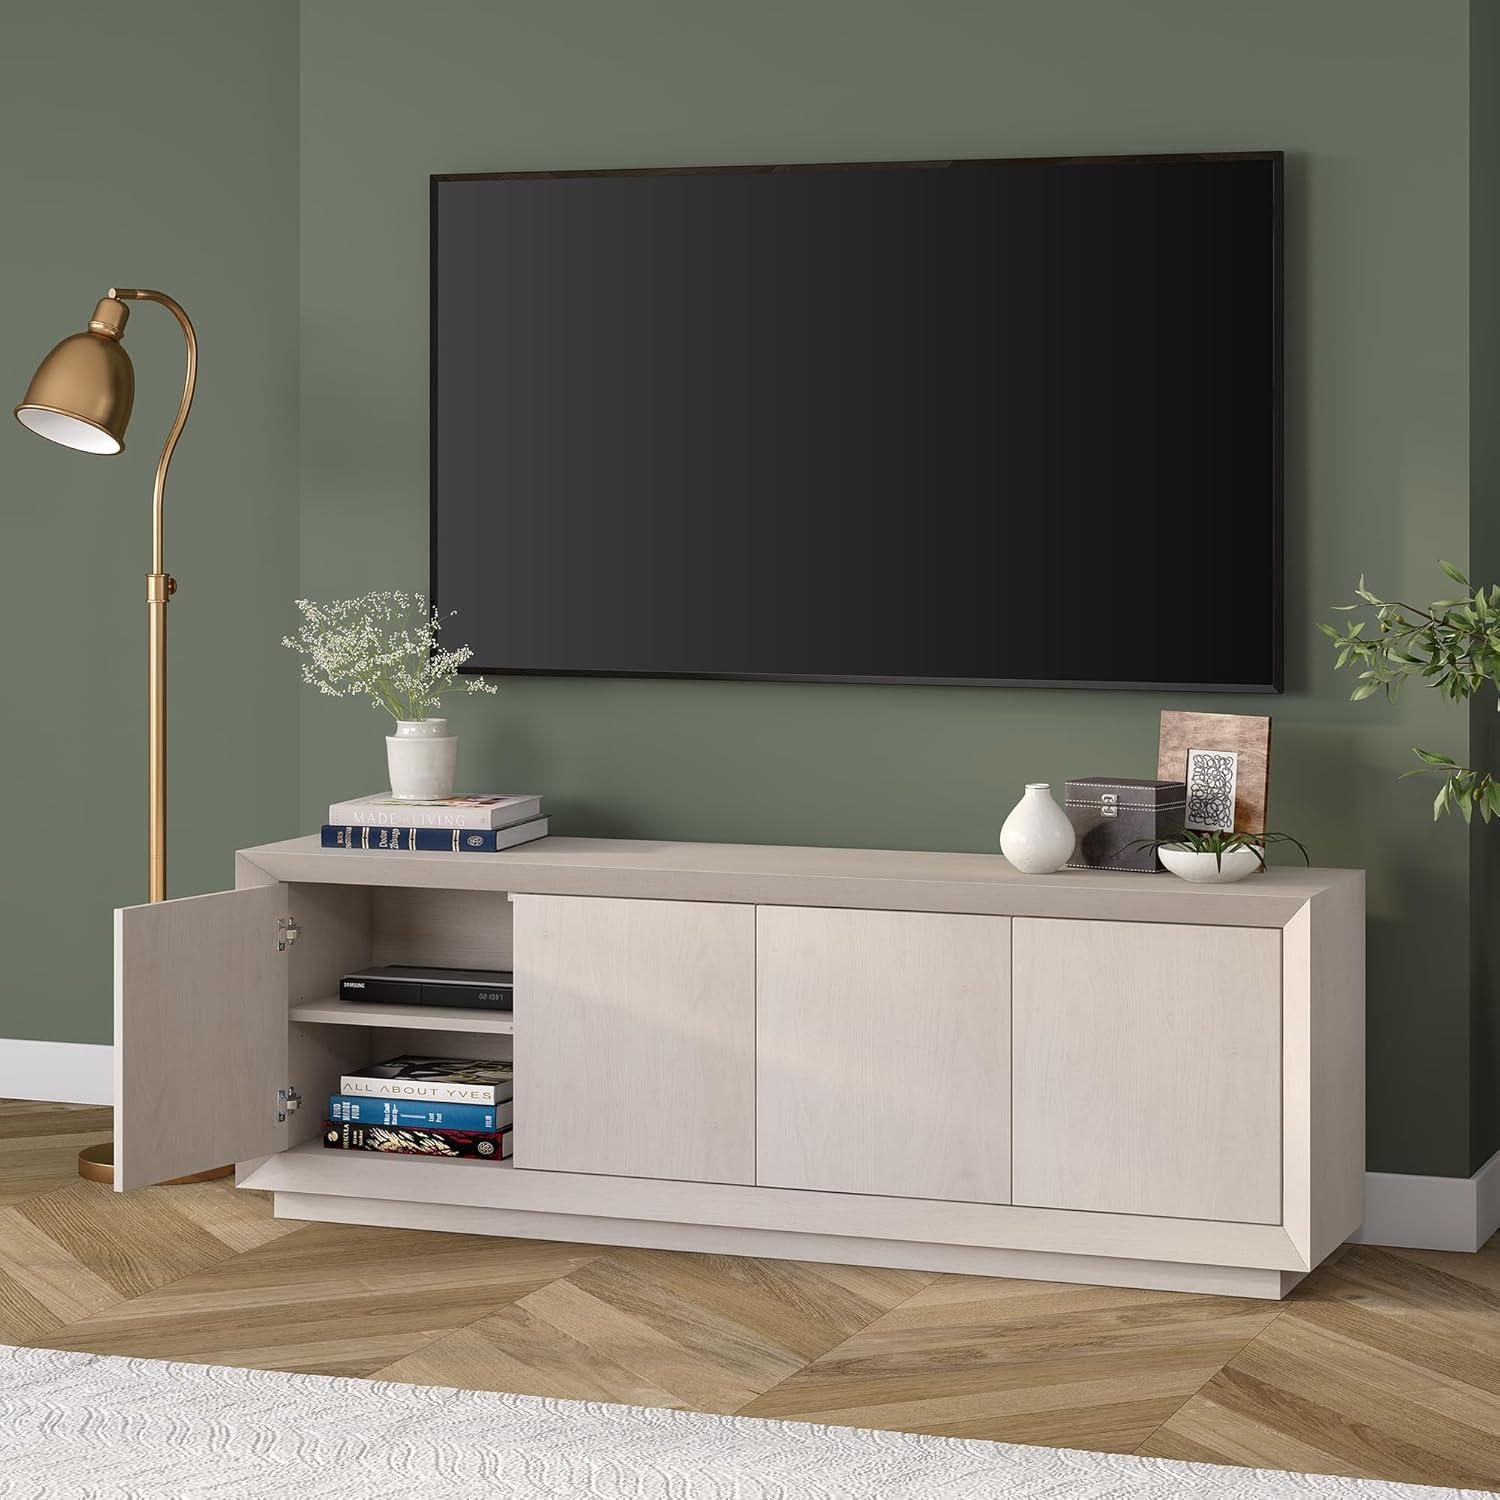
You place your television on the top board and it settles on a broad, level surface that gives you room to nudge it left or right for alignment. the center portion of that top area frequently becomes the spot for a soundbar or a low-profile display piece, leaving the flanking edges for remotes or decorative items. Behind the scene, the rear cable cutouts make it straightforward to run power and AV leads down into the cabinets, so cords tend to be routed through the same gaps rather than draping over the back of the stand; you’ll notice small adjustments from time to time as you swap devices or tidy cables after setup.
Open a concealed cabinet and the interior becomes a quiet staging area for media gear: consoles, streaming boxes, a small AVR, spare controllers or discs.The adjustable shelves let you change the vertical spacing so a taller console fits on one level while a slim streamer sits on another, and the doors close without slamming thanks to the hinges, leaving most equipment out of sight during everyday use. In practice, you might leave a router nearer a cutout for antenna clearance and arrange less-used items on higher shelves; enclosed storage can also slightly limit airflow around heat-generating components, so placements often reflect a balance between concealment and occasional breathing room. Typical arrangements many people settle into:
- Top center shelf: soundbar or display object
- Upper cabinet shelves: slim streaming devices, remotes
- Lower cabinet shelves: game consoles, disc players, larger AV boxes
| Device | typical placement inside/above the stand |
|---|---|
| Soundbar | Center shelf on the top surface |
| Game console | Lower cabinet shelf with easy front access |
| Streaming stick/box | Upper cabinet shelf near cable cutout |
| Router/modem | Upper shelf close to rear opening for signal and cords |
What your daily setup and cable routing look like in living room family room or office arrangements
In everyday use you’ll often set up a mix of streaming boxes, game consoles and a sound source so that everything feels reachable but visually low-key. Devices tend to sit on the open center shelf or inside the cabinets depending on whether you want them visible; a streaming puck or small console will usually live where the infrared receiver and HDMI runs are easiest to reach. You’ll notice small habits emerge — shifting a console slightly forward to cool it after a long session, leaving a door slightly ajar to reduce heat buildup, or rotating a power brick so its cord exits neatly through the back. Common items in regular rotation include:
- Streaming device — short HDMI run to the TV, often placed nearest the center shelf.
- Game console — sits where you can swap discs or controllers easily; cords drop behind into the cable channel.
- Soundbar or speakers — positioned centrally with a tidy audio run toward the TV or receiver.
When you look at cable routing day to day, the rear cutouts become the main organizing point: HDMI, power and network cables funnel there and then spread out toward your surge protector or wall outlet. Cables commonly collect in a small bundle behind the stand and are tucked along the inside back edge; for a while that bundle can be a loose, shifting thing as you add or swap devices. There’s a trade-off between a perfectly hidden run and leaving space for airflow — in most setups a single gap or slightly open door prevents heat from building around stacked power bricks.Below is a simple view of how different cable types usually route in a living-room or office arrangement:
| Cable type | Typical routing / placement |
|---|---|
| HDMI | Through rear cutout to TV input; short, direct path across the shelf back. |
| Power | Plugged into a surge protector inside the cabinet or directly behind the stand, cords run down the back. |
| Optical / RCA | Kept relatively short and tucked along the shelf rear to avoid kinks. |
| Ethernet / Speaker wires | Routed through back openings and bundled together; speaker runs sometimes loop behind the stand to stay out of sight. |
Where your expectations meet the standS practical limitations and real life constraints
During everyday use, the stand’s practical limits tend to show up in small but persistent ways. Assembly and alignment take a few extra minutes beyond a simple “place and go” — hinges frequently enough need fine-tuning to sit perfectly flush, and shelving adjustments reveal that available increments don’t always match the height of bulky electronics. cable routing works for a basic setup, but when multiple power bricks and network switches are involved the rear cutouts can become a single choke point, so ventilation and heat buildup around stacked components sometimes becomes a consideration rather than an abstract spec. In shorter sessions of rearranging or cleaning, doors that close quietly still require occasional nudging to settle straight after loading or shifting heavier items inside.
Daily living introduces constraints that aren’t obvious from the box: access patterns cause people to leave doors ajar for quicker reach, pets or children can nudge stored items into sightlines, and tight room layouts limit how far cabinet doors can swing without bumping other furniture. Common, recurring observations include:
- Cable crowding: multiple adapters tend to bunch behind a single cutout, making power strips and ventilation compete for the same space.
- Shelf increments: available positions often force compromises between a perfect fit and a practical arrangement.
- Door clearance: hinge travel and nearby traffic paths interact in ways that require small positional tweaks.
| Constraint | Typical outcome in use |
|---|---|
| Limited rear access | Frequent cable juggling and temporary extension cords |
| Shelf spacing increments | Stacking or repositioning devices to fit available heights |
| Floor unevenness | Occasional hinge readjustment to keep doors aligned |
See the full specifications and configuration details
Assembly steps and maintenance notes you will notice after purchase
When you unpack the unit you’ll notice the parts and hardware are grouped and labelled, which makes the first assembly pass feel straightforward. Lay everything out and follow the illustrated steps in order; the panels generally line up with the pre-drilled holes,though getting cam locks to seat can take a little finesse. In most cases you’ll work through the build by attaching the base and uprights, fitting the cabinet carcasses, mounting doors and hinges, and then installing the shelves and back panels. Some small, routine steps you’ll perform during assembly include:
- Inventory check: confirm all screws and fittings are present before you start
- Pre-assembly layout: position large panels on a soft surface to avoid scratches
- Door and hinge fit: soft-close hinges are already mounted but will need final alignment
- Back panel and cable cutouts: slide or screw the rear panel into place and remove protective backing from cutouts as needed
You’ll probably find the job goes faster with two people when it comes time to lift the wide top and align the doors; for a solo build expect some pauses to double-check orientation and hardware types. A Phillips screwdriver and a small wrench are the most commonly used tools, and a rubber mallet can definitely help seat panels without marking the finish.
After you start using the piece you’ll notice a few maintenance rhythms that tend to recur. surface cleaning is usually a quick wipe with a soft, damp cloth—abrasive cleaners or excess water can dull the finish over time, and light scuffs show more on lighter surfaces. Hinges and cam fittings can loosen after some handling; you may tighten small screws now and then, and the soft-close mechanism has adjustment screws that let you tweak door alignment if they shift. Shelf pegs and adjustable supports can compress slightly under heavy loads, so periodic checks are common in active media setups.Dust also accumulates behind the unit where cables pass through cutouts, so an occasional vacuum or compressed-air pass keeps vents and openings clear.
| Maintenance task | Typical frequency/notes |
|---|---|
| Quick surface wipe | Weekly to biweekly; use a soft, damp cloth |
| Check & tighten hardware | Every few months or after moving the unit |
| Hinge adjustment | As needed; small screws control alignment and soft-close tension |
| Dust behind unit | Monthly in dusty rooms; cable openings collect debris |

How the Set Settles Into the Room
You notice, over time, the Henn&Hart TV Stand for TVs up to 75-inch slipping quietly into the background of your days, less an object to look at than a surface that collects use. In daily routines it maps out space — a place for remotes, the occasional stack of mail, the small patina where hands rest — and the way it softens into the room says something about comfort and habit as the room is used. Surface wear appears as faint marks and slightly dulled edges, and those signs make it feel more familiar in regular household rhythms. After a while you hardly notice it except for how it becomes part of your room and stays.