decordip Garden and patio decoration inspiration
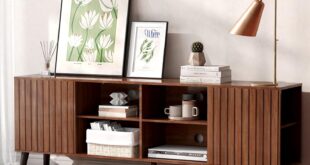
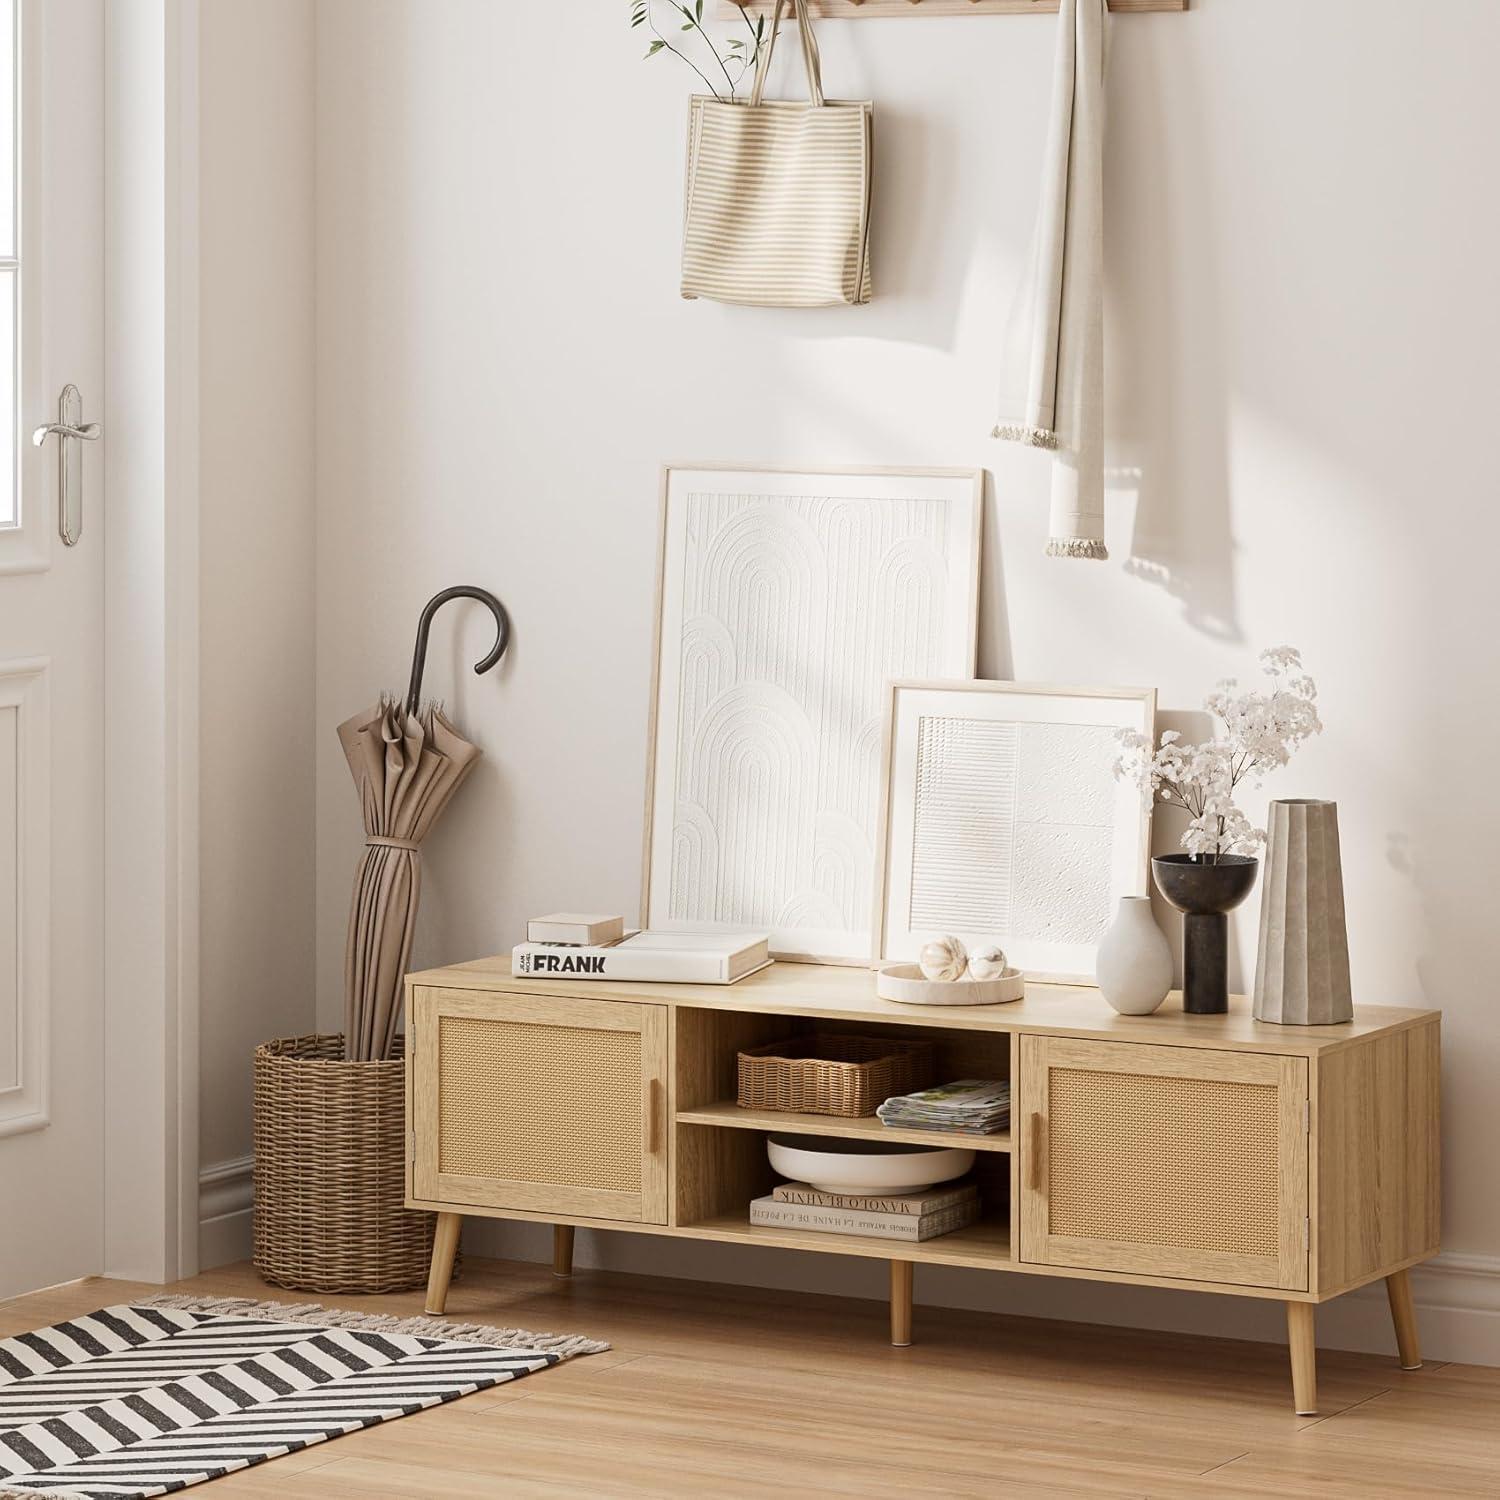
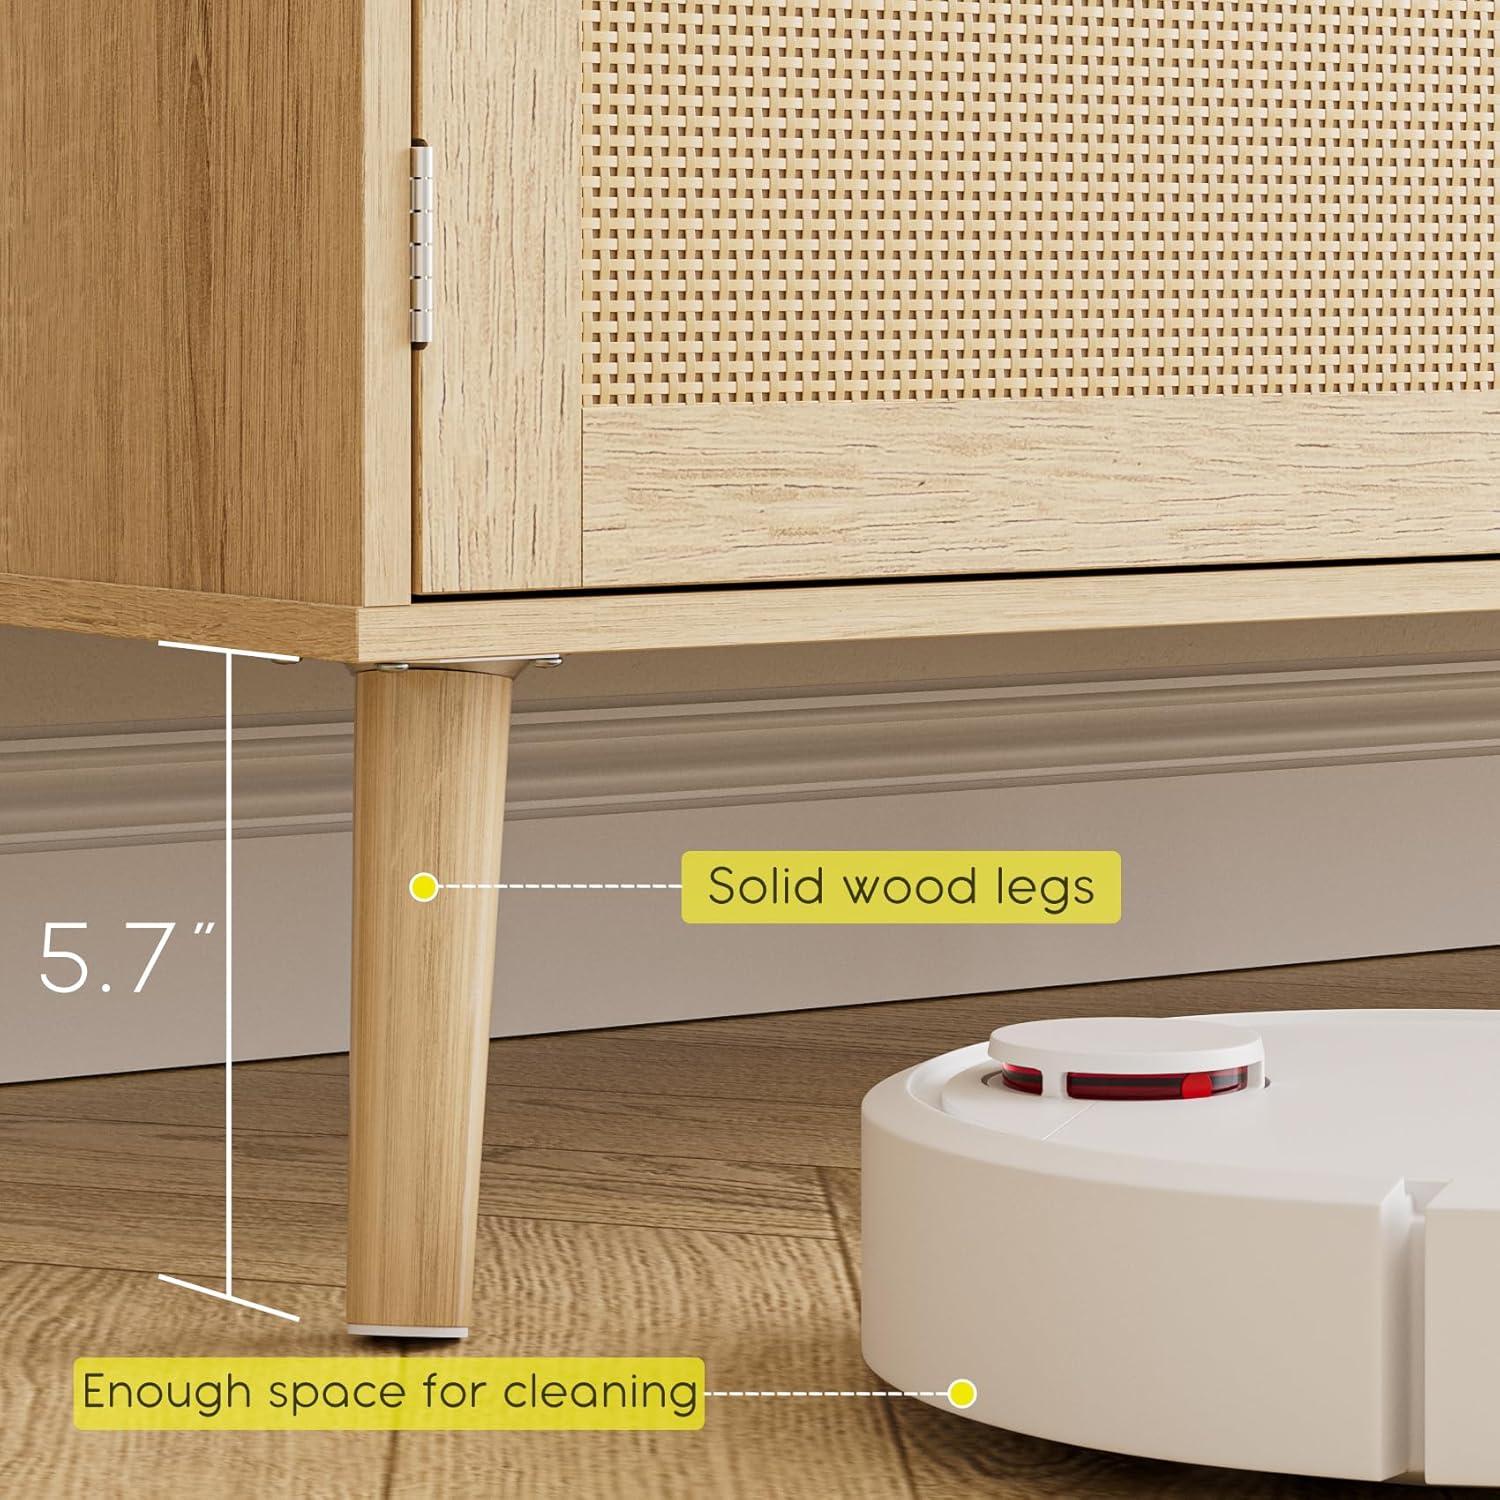
You notice the Acodaiuy Mid Century Modern Media console’s oak surface first — warm grain that feels smooth under your palm. Tapered legs and rattan-accented doors give it a mid-century silhouette that reads practical rather then precious, and its low, wide top fills the TV wall without overpowering the room. Up close the finish shows tiny assembly marks and the cabinet hinge clicks into place; once settled it feels solid on its four feet, with a bit of floor left showing underneath for easy sweeping. Light skims across the shelves and doors, and the piece simply lives in the space like furniture that’s already been used.
When the boxes arrive and you bring them into the room, the first impression is more about the choreography than the piece itself.You set the packaging down, clear a strip of floor by the TV, and open panels and hardware onto a blanket or the coffee table; the instruction sheet tends to get unfolded and refolded a couple of times while you sort screws and small fittings. There’s often a moment when someone else in the household wanders in — a child, a partner, a curious pet — and the scene briefly becomes communal: parts spread across the floor, a phone flashlight helping to read a diagram, a pause to move a lamp or shift a rug. In most cases you’ll notice how the effort of unpacking sets the tempo for the rest of the evening — slow at first, then a little more hands-on as pieces start to take shape.
Getting the console from unpacked pieces to its place against the wall involves a few practical nudges and adjustments that feel decisive in the room’s flow. You may angle larger sections through a doorway,tip a panel slightly to clear a stair or hallway,and make small corrections for uneven flooring once it’s resting where you want it. The process brings a handful of immediate, observable moments:
- doorway clearance: how the unit fits when turned on its side or moved at an angle.
- Staging space: the cleared strip in front of the TV where you assemble or attach legs and doors.
- Final position check: stepping back to judge sightlines, balance with other furniture, and weather there’s enough room behind for cables or airflow.
You’ll find yourself making tiny, habitual fixes — nudging it a few inches left or right, sliding a felt pad under a foot, or readjusting a lamp so the console’s profile sits comfortably in the room — and then pausing to see how the shape changes the living area’s silhouette in different light.
The wood grain finish and silhouette that make up its mid century profile for your space
When you stand a few feet away the finish reads as warm and even, the grain giving the surface a quiet rhythm that breaks up broad planes of color. Up close, the texture is slightly perceptible—enough that a fingertip follows fine ridges rather than slipping across a mirror-smooth veneer.Under daylight the surface deepens and the grain lines become more pronounced; under softer evening lamps those same lines soften and the piece can blend with both lighter and darker woods in the room. A few everyday details matter in use: the finish tends to catch light along its long grain,dust shows differently depending on angle,and small scuffs can be more visible where the tone is lighter.
- Color tone: leans warm, with subtle variation along the grain that hides minor smudges in most lighting
- Hand feel: a faint texture rather than gloss—so it feels more like wood than a polished surface
- Wear visibility: scuffs and scratches register more on flat stretches than along the patterned grain
The silhouette reads as a mid-century silhouette without shouting: low horizontal lines, gently rounded corners, and tapered legs that lift the body off the floor and create negative space beneath. In the context of a living area it helps the eye move across the room—when placed against a wall it anchors the TV visually, but pulled away from the wall the raised profile allows a fast sweep of the vacuum or a change in placement without much fuss. The lean proportions mean the piece doesn’t dominate sightlines the way a bulky cabinet would, though that same openness can make the legs feel less substantial if bumped.
| Silhouette element | How it appears in the room |
|---|---|
| Tapered legs | Create a feeling of lift and allow floor patterns to show beneath |
| Low, elongated top | Draws the eye horizontally, reinforcing a calm, grounded look |
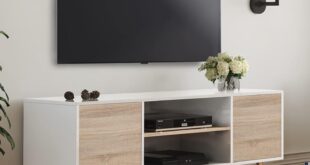
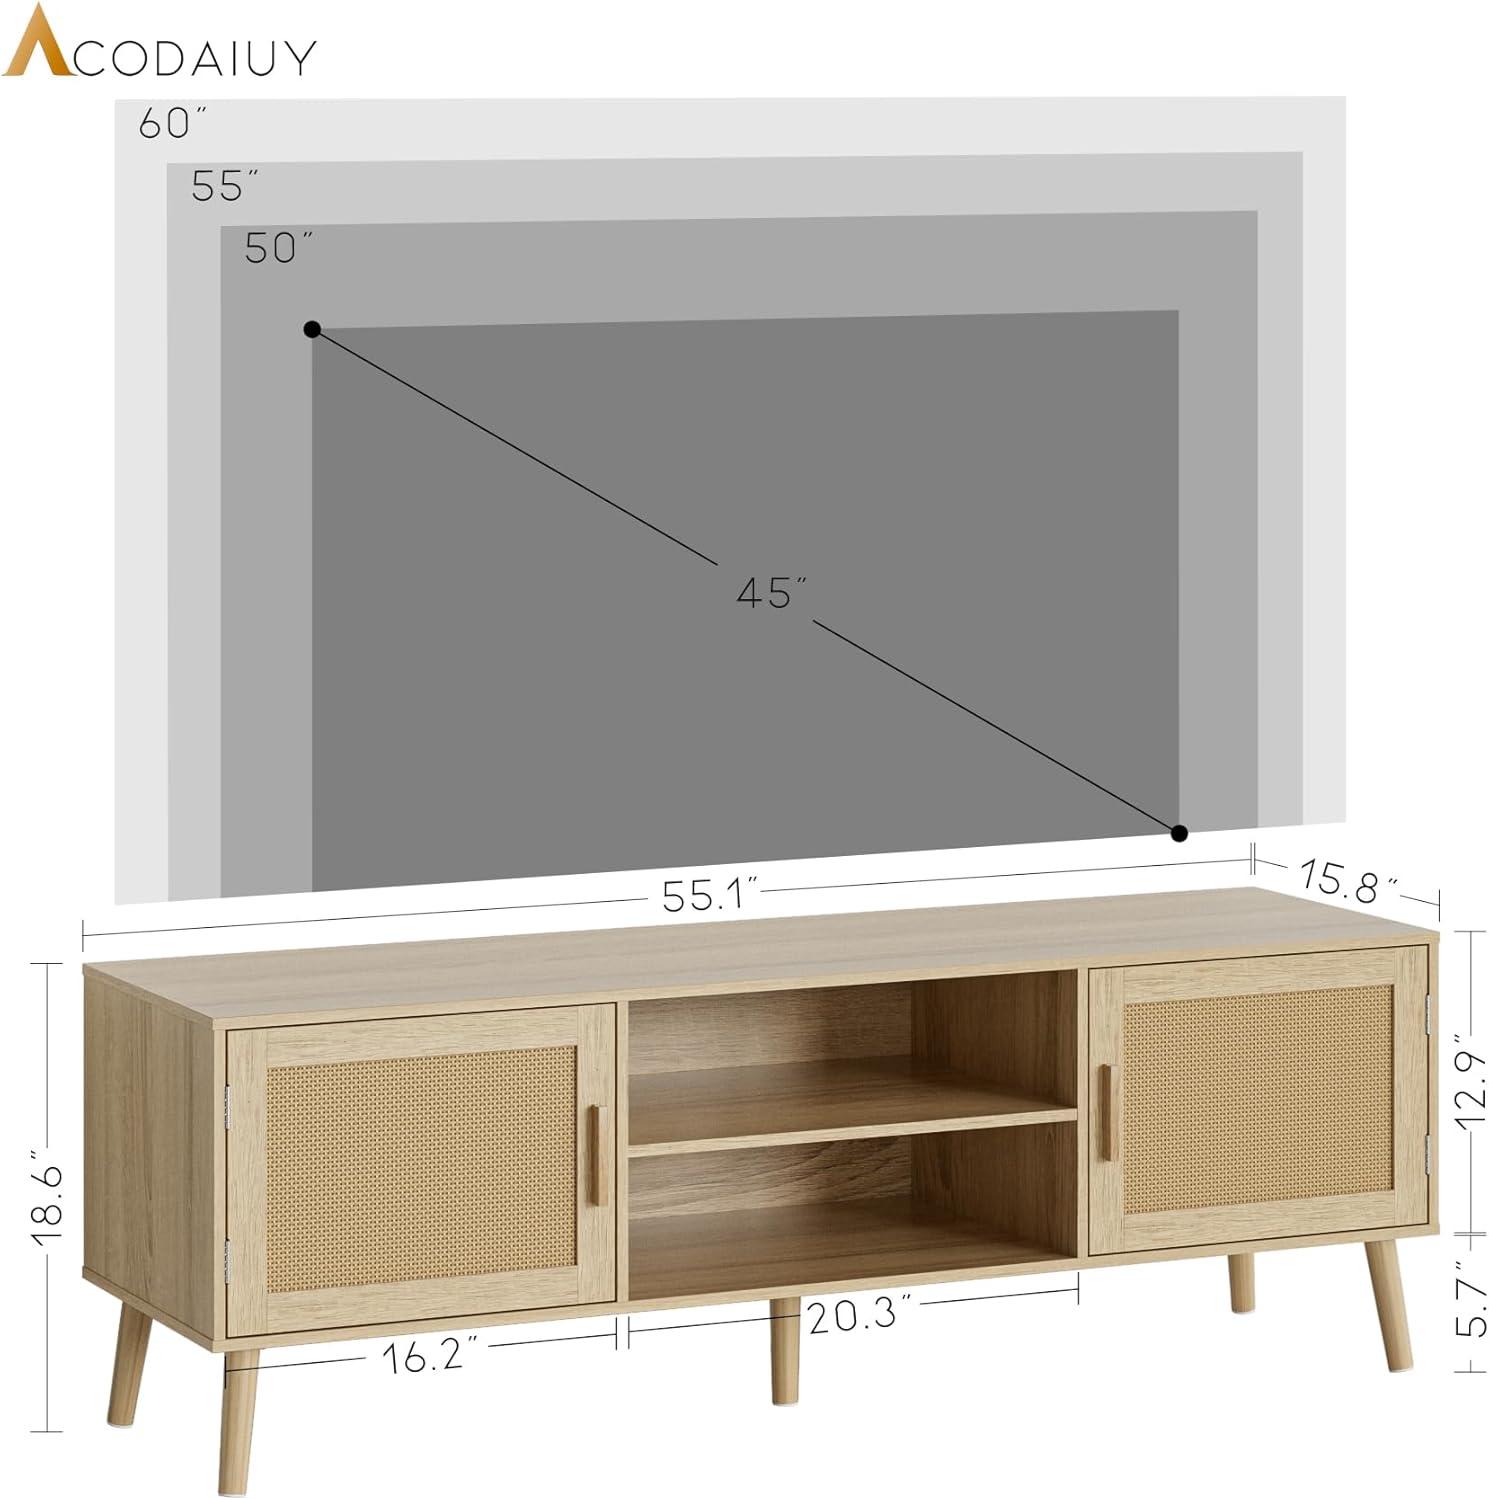
How the cabinet proportions and stated dimensions relate to common TV walls in your home
The relationship between the cabinet’s proportions and a typical TV wall shows up less as a technical fit and more as a visual balance in the room. On walls under about 10 feet, the piece tends to read as a central anchor—its horizontal span takes up a noticeable fraction of the wall, leaving modest negative space on either side; on longer, open-plan walls the same span looks more compact, often inviting additional shelving or a pair of lamps to widen the visual field. Vertical proportions matter too: the cabinet’s height places the screen and any decorative objects at a seated sightline in most living arrangements, while the depth determines how far the unit projects into a traffic path or how close seating can be arranged without feeling cramped. In most cases the stated desktop width and depth give a clear cue about how much breathing room will remain on a typical TV wall, and those cues tend to map predictably to common wall widths and furniture arrangements.
- Narrow TV walls (entryway alcoves, small apartments): the cabinet uses most of the horizontal span and leaves little lateral staging space.
- Standard living-room walls (about 10–12 ft): the piece usually centers with comfortable margins on each side for small plants or speakers.
- Wide or open-plan walls: the same proportions can appear modest,often prompting additional low furniture or art flanking the unit.
| Typical wall width | Cabinet width (stated) | Approx. side clearance each side |
|---|---|---|
| 8 ft (96″) | 55.1″ | ~20″ each side |
| 10 ft (120″) | 55.1″ | ~32″ each side |
| 12 ft (144″) | 55.1″ | ~44″ each side |
Full specifications and configuration details are available on the product listing: View full listing
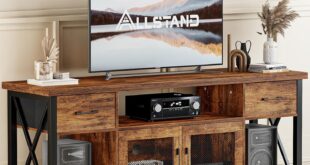
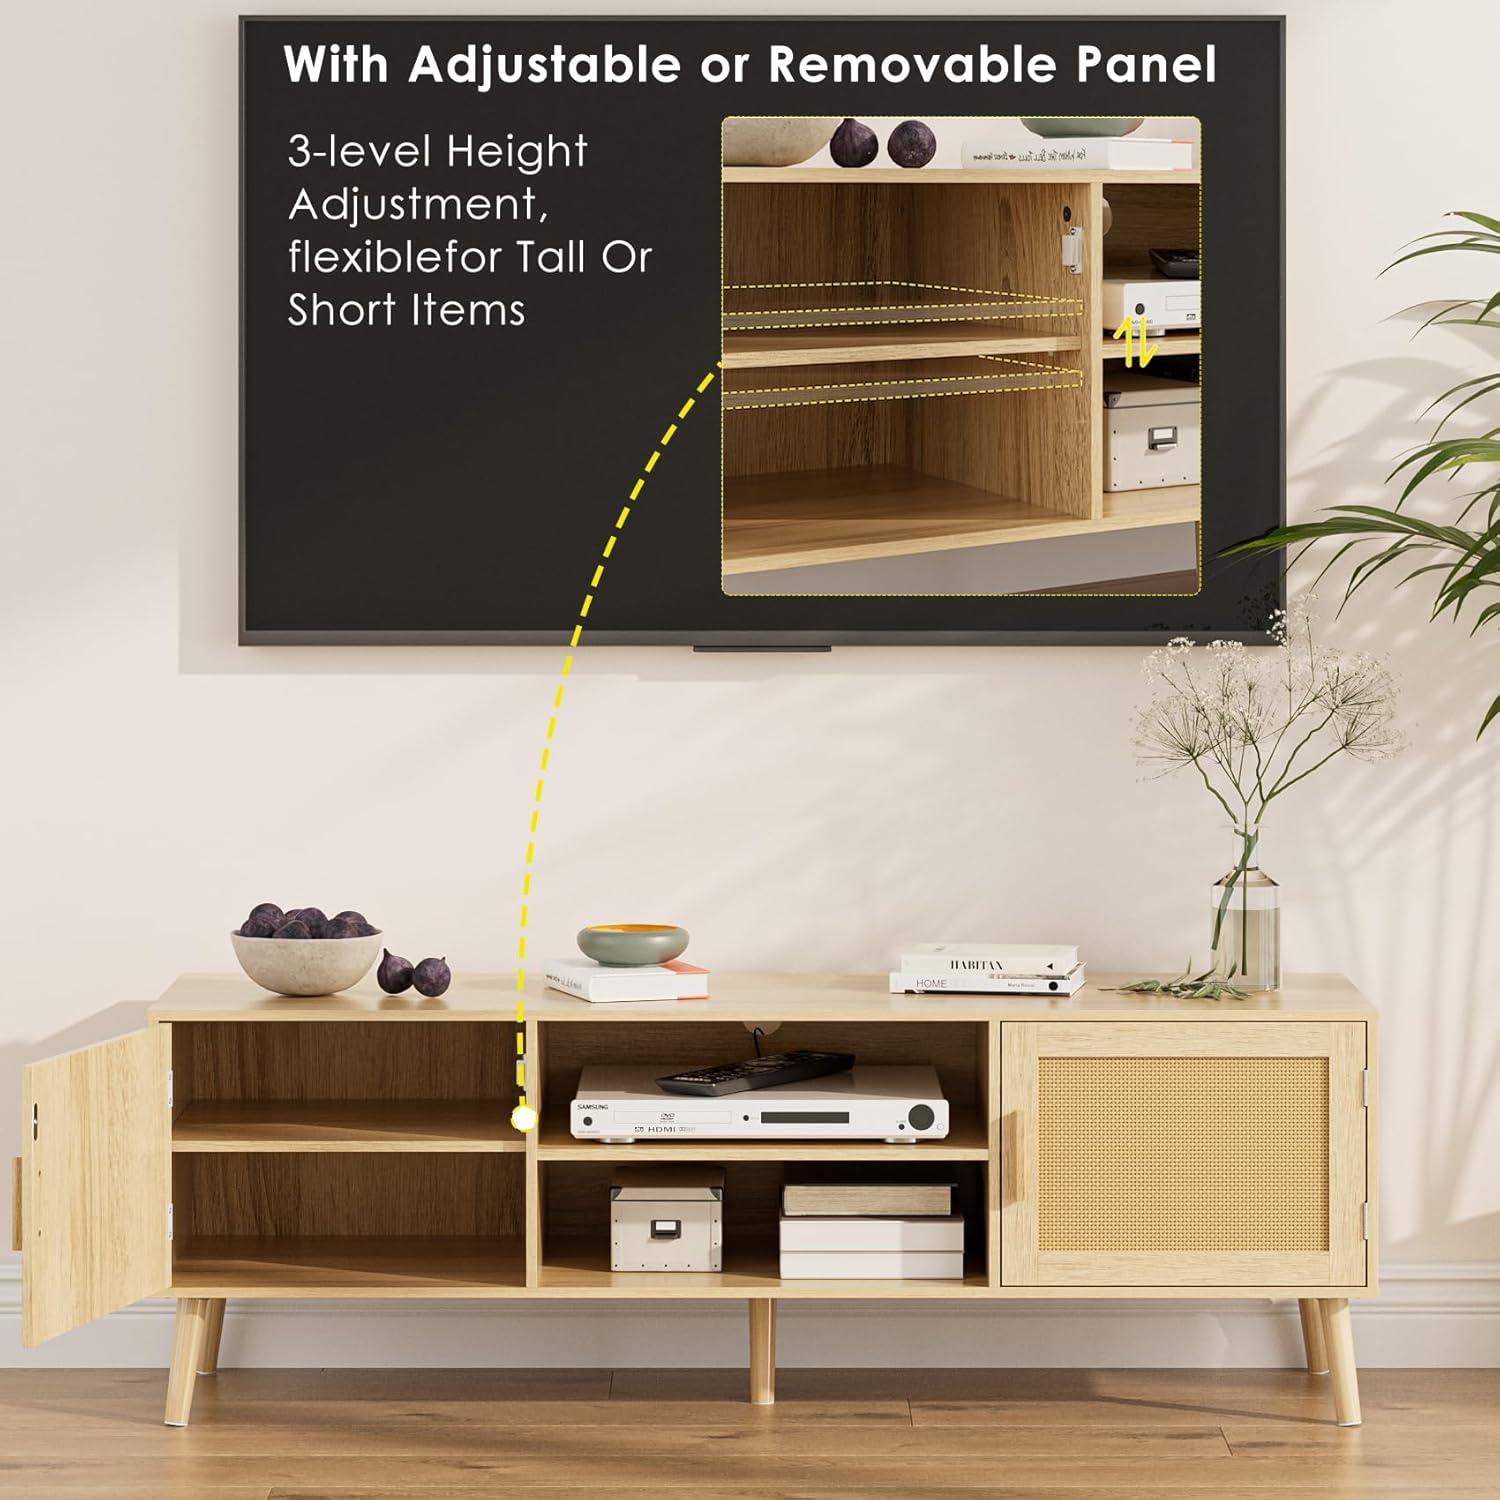
Where the adjustable hinge internal shelves and cable channels live and how you access them
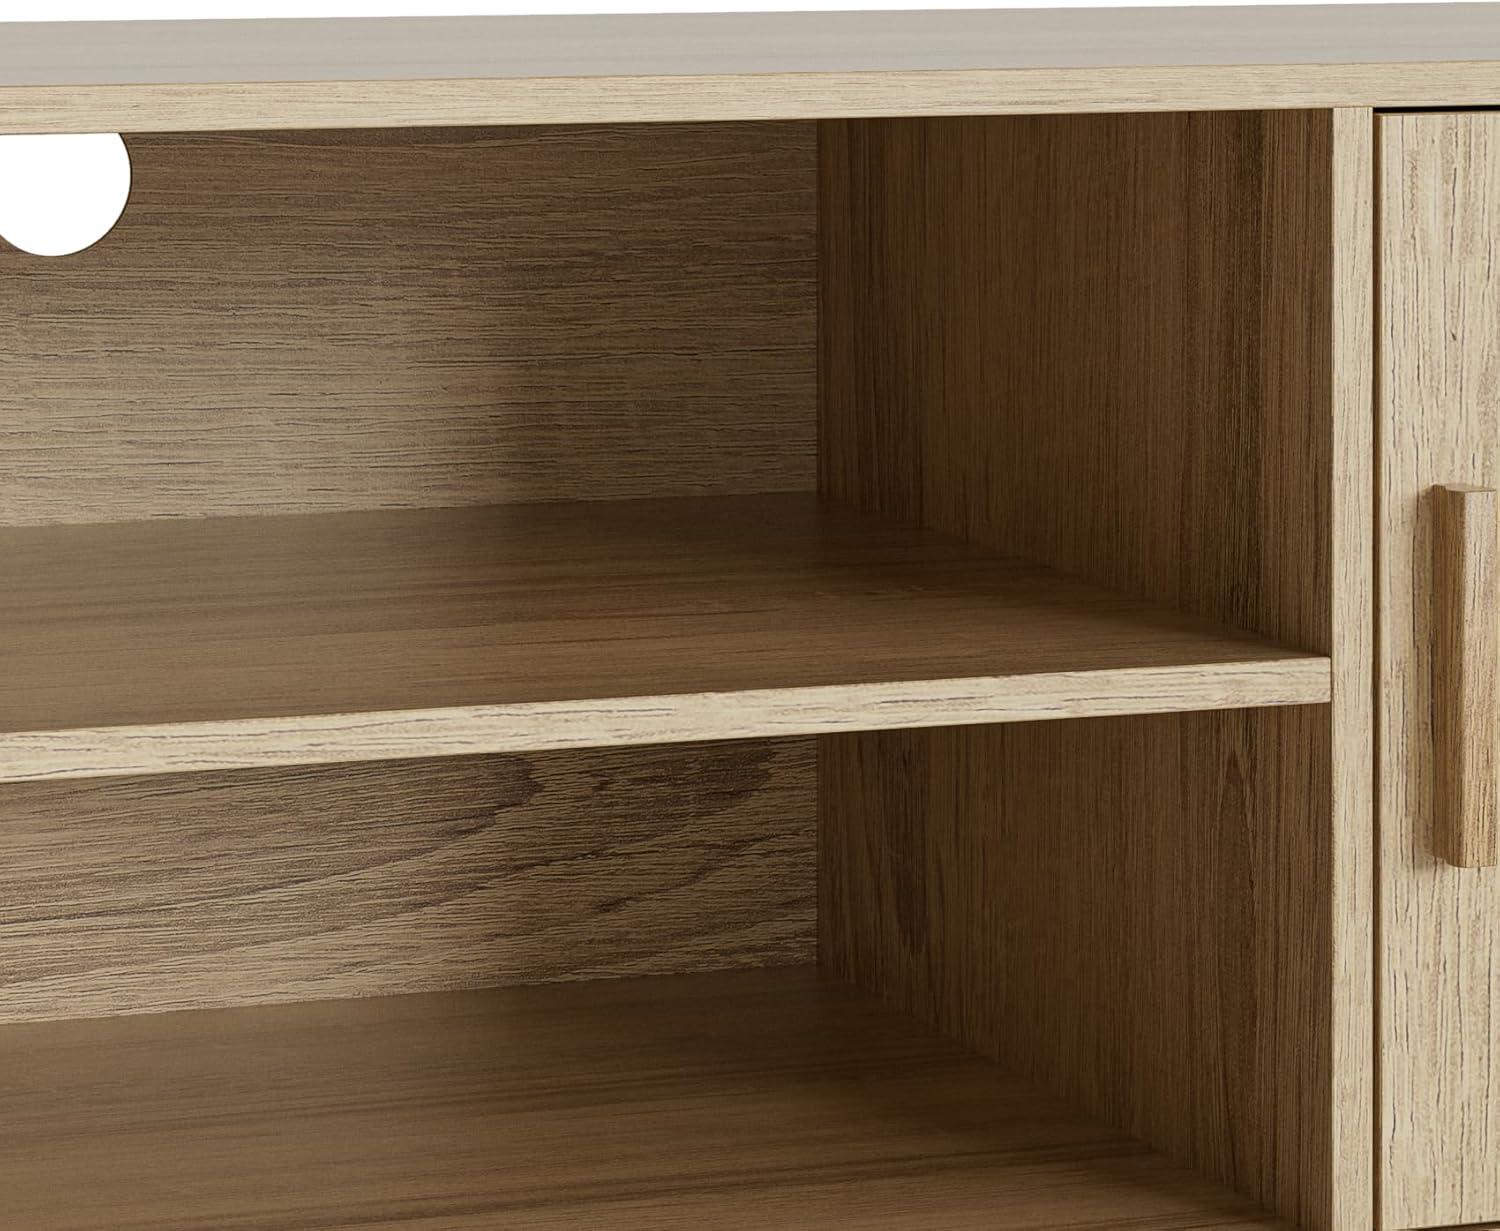
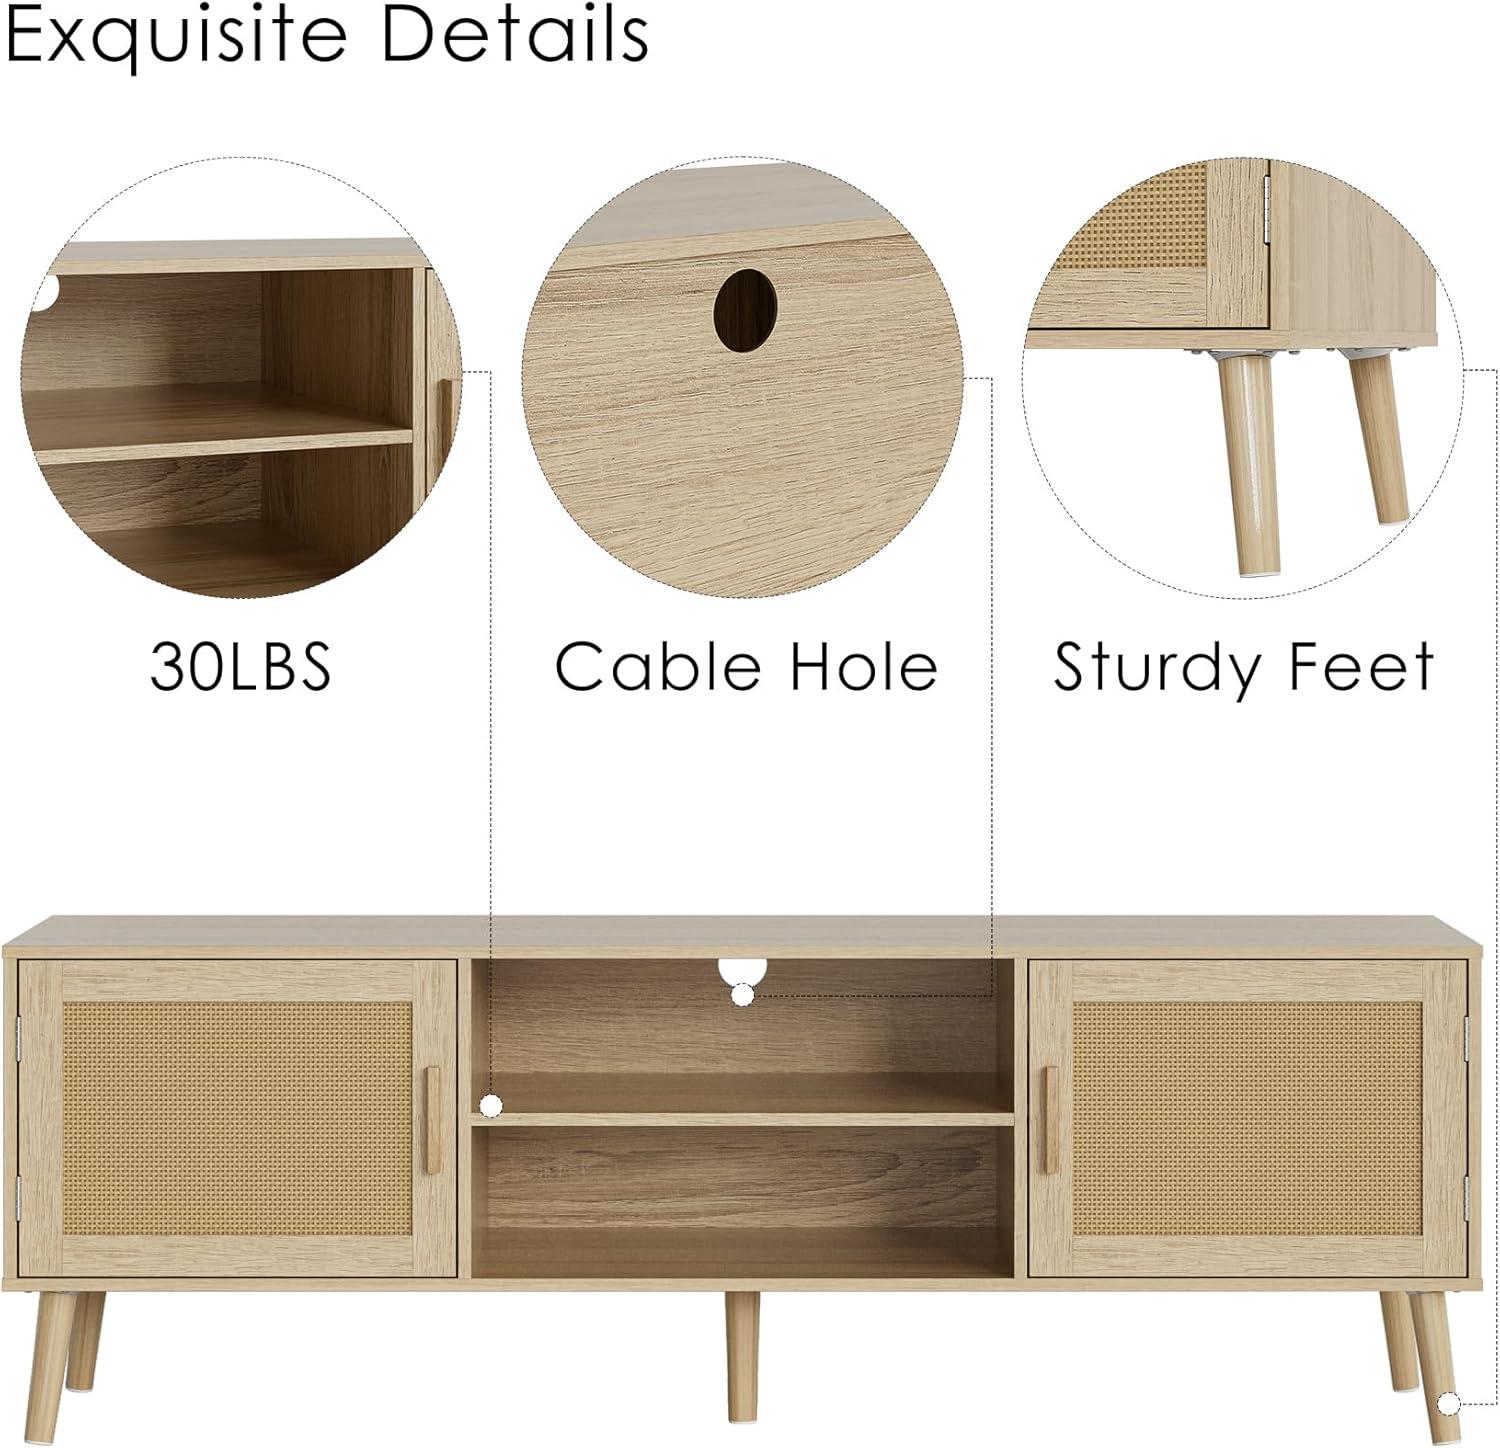
You’ll find the adjustable shelves tucked inside the enclosed side cabinets, each one sitting behind a hinged door that swings outward to give you direct access to the interior. The shelves rest on small support pegs that let you lift and reposition them a notch or two higher or lower; in day‑to‑day use you open the door, lift the shelf off its pegs and drop it into the next set of holes if you want a different spacing. The center section is an open bay rather than a deep enclosed cabinet, and its back panel includes a single circular cord hole so power and HDMI cables can pass through to the wall or power strip without needing to snake them out around the edges.
- Side cabinets: adjustable shelves behind hinged doors; access by opening the door and handling the shelf pegs.
- center bay: open shelf with one rear cable hole for through‑the‑wall routing.
| Compartment | Where it lives | How you access cables |
|---|---|---|
| Left/Right cabinets | Inside enclosed compartments behind hinged doors | No obvious factory rear cutouts; cables are usually routed via the center opening or run behind the unit |
| Center bay | Open middle shelf | Single circular cord hole in the back panel for passing wires |
There are small practical details that show up in use: the hinge and shelf peg arrangement generally allows you to remove or reposition a shelf without fully disassembling the door, and most setups end with devices placed in the center bay where cable access is straightforward while side compartments tend to keep wiring out of sight or routed around the back in most living‑room arrangements.
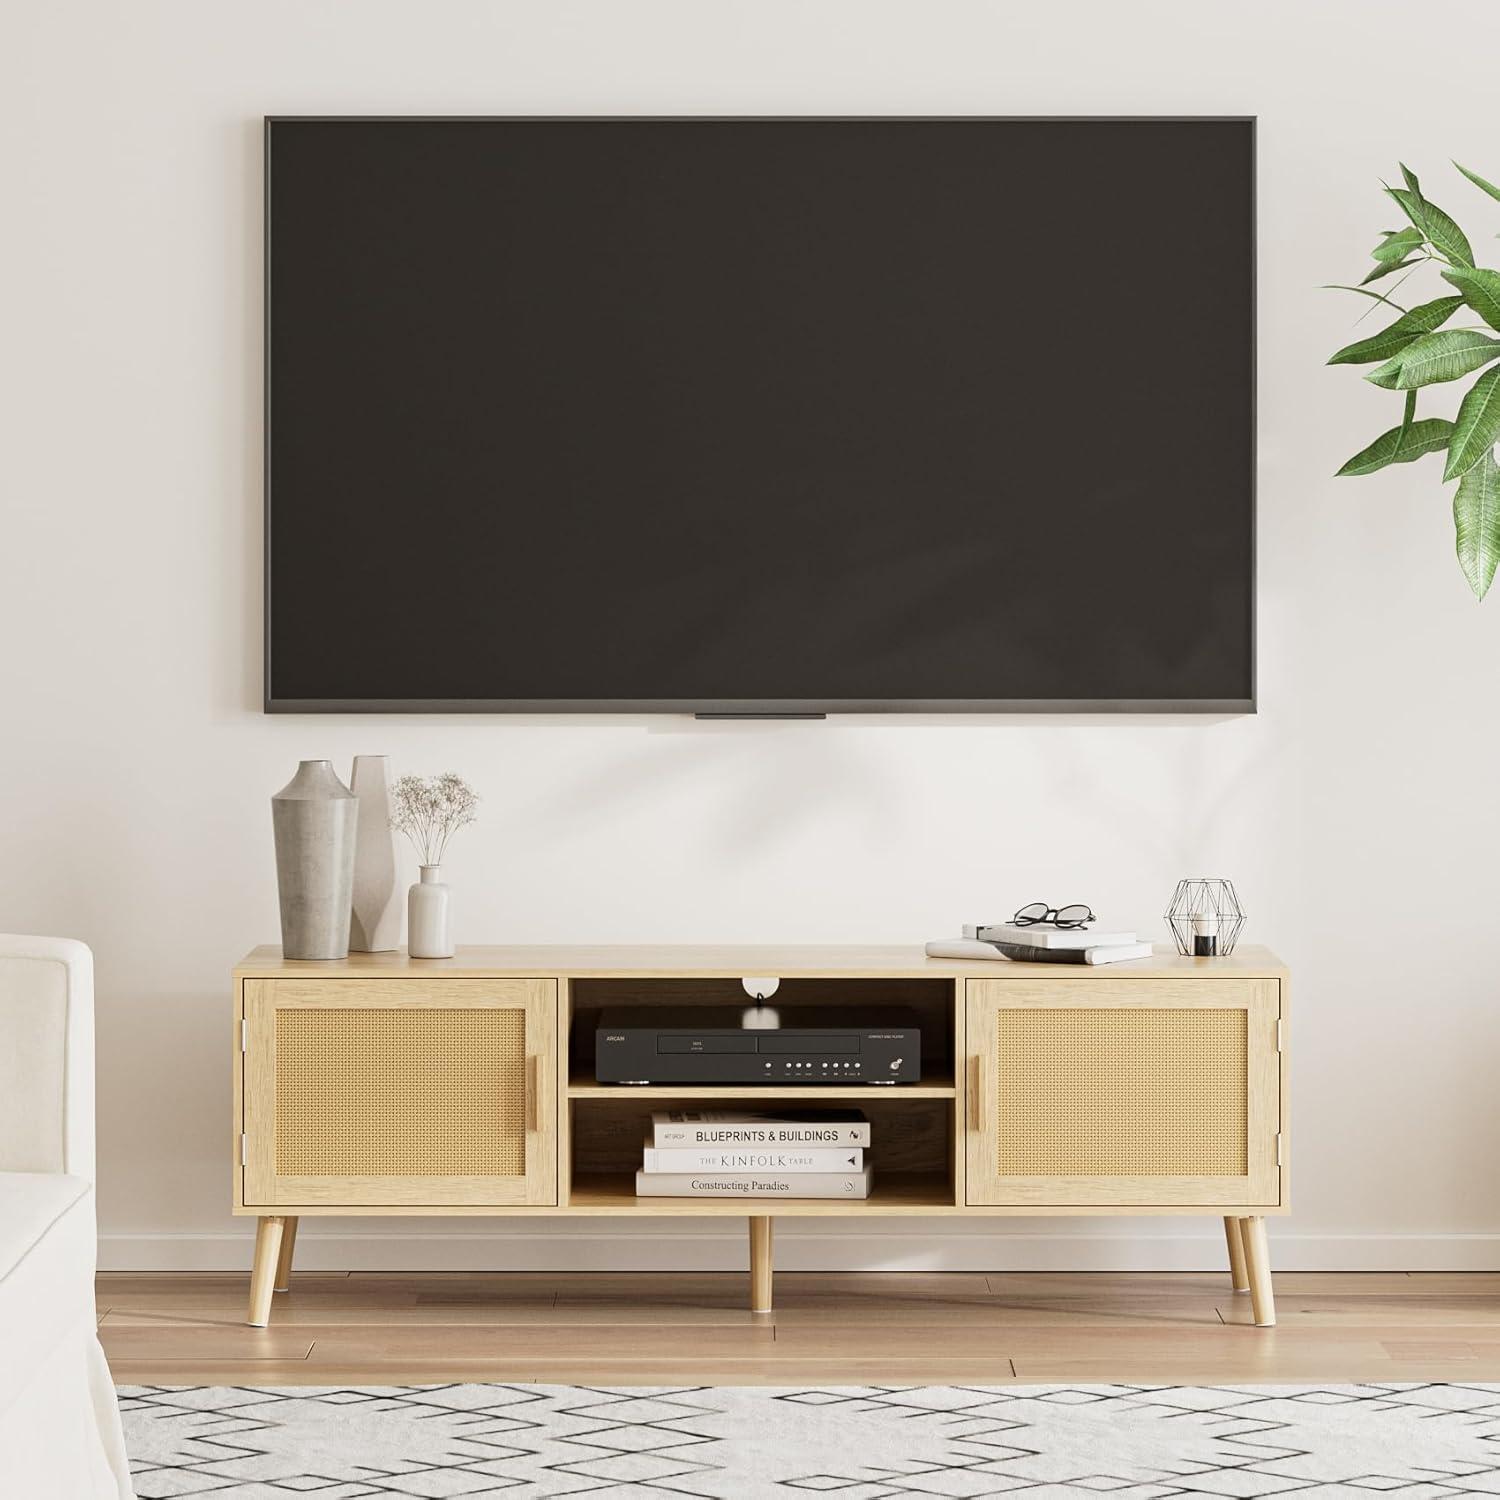
When placed against a wall or in front of a low sofa, the console tends to define the room’s frontal axis: screens sit at a moderate height, and small adjustments — angling the TV by a few degrees or nudging a lamp an inch — are common to tame glare from nearby windows. In everyday use the top surface often hosts a lamp or a slim soundbar alongside decorative items; speakers and remotes usually share that narrow real estate, so households often shuffle objects during movie time. Cable runs commonly come out the back and get tucked behind the stand or routed through a central cord hole; this creates the familiar habit of lifting the unit slightly to access cords or to reach a power strip, rather than reconfiguring the whole layout.
- Sightline: small angle tweaks are frequent to avoid reflections in late-afternoon light
- Seating relationship: low-profile sofas and floor seating often align comfortably with the cabinet’s visual center
- gear access: devices stored out of sight are often pulled forward for disc changes, game swaps, or quick reboots
| Layout | Lighting & staging notes | Media gear tendencies |
|---|---|---|
| Centered on a long wall | Side table lamps flank the console to soften backlight; overhead fixtures need minor dimming | Soundbar sits in front; remotes and small accessories kept on top for quick reach |
| Floating unit with sofa behind | Floor lamps or backlighting get tucked behind the sofa to reduce screen glare | Speakers often positioned on stands beside the console; cables routed under the rug or along baseboards |
| Corner placement | Light falls unevenly, so lamps are repositioned more often; staged decor leans toward smaller items | Smaller consoles may force compact components or external cooling to be used |
In most households the routine of staging involves small, repeated adjustments rather than wholesale moves: lamp shades are nudged, consoles are shifted slightly during deep-cleaning, and media boxes are rotated between visible and hidden positions depending on whether active cooling or quick access is needed. Full specifications and configuration details are listed on the product page: product page.
How it lines up with your expectations and the practical limits you may encounter

Common threads in real-world use show the piece generally matches the visual and functional expectations set by product images, while revealing a few practical frictions that tend to surface during ownership. Assembly frequently enough takes longer than the most optimistic estimates when the small included driver is used, and instructions can feel terse enough that a few holes or fasteners need a second look; once assembled, the unit typically sits level and feels secure, though the overall mass is lighter than some descriptions imply. Shipping and handling occasionally introduce cosmetic scuffs that are visible without close inspection, and enclosed compartments can limit airflow and cable routing unless aftermarket adjustments are made.
Practical limits to keep in mind:
- Assembly clarity and time can vary; some users spend extra minutes aligning panels or swapping tools.
- Surface finish may arrive with minor blemishes from transit, which tend to be noticeable in certain lighting.
- Enclosed storage has restricted ventilation and no pre-cut cable exits, so heat-producing electronics may require placement elsewhere.
- Small fit and tolerance issues — like slightly misaligned holes — can necessitate gentle adjustments during build.
| Area | Typical observation |
|---|---|
| Assembly | Time varies; clear but sometimes minimal instructions |
| Finish | Occasional transit scratches or dents reported |
| Enclosed compartments | Limited ventilation and no factory cable exits |
View full specifications and current listing details on amazon
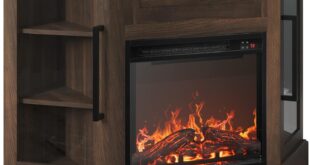
Assembly steps surface care and how the oak finish will age in your daily use
When the crate first arrives you’ll want to open it on a soft surface and lay out the parts so the oak faces don’t rub on cardboard or concrete — small habits like that prevent nicks before you even start. The build generally moves in predictable stages: unpack and match parts to the sheet,assemble the base and legs,then attach the top and doors while watching hinge alignment. During those steps take note of surface contact points and keep a cloth under areas where metal tools or fasteners meet the finish.If you use a power driver it cuts time, but work at a low torque and back off as pieces seat; over-tightening can leave small depressions in the veneer. You’ll probably find yourself pausing to adjust a hinge or door gap by a few millimetres rather than brute-forcing parts into place, and it’s common to go back with a gentle re-tighten after a few days once the structure has settled. A few tools that come up repeatedly during assembly:
- Power drill (low torque) — speeds up screws but can strip if not careful.
- Soft cloth or felt — to protect visible faces while aligning pieces.
- Rubber mallet — for gentle nudges without marking the finish.
In daily use the oak surface tends to develop a quiet, lived-in look rather than staying uniformly new; horizontal tops often mellow a touch where light and use meet, while edges and fronts keep a more consistent tone. Expect small surface abrasions to show as lighter lines at first and then blend into a subtle patina, especially in spots that get frequent contact. spills and heat leave visible rings or marks quickly if liquid sits or hot objects rest directly on the finish, and direct sunlight can slowly shift the tone over months; these are natural behaviors rather than sudden failures. The table below outlines a rough timeline of what often appears and the common actions people tend to take to manage appearance without heavy intervention.
| Time in home | Typical Finish Changes | Common Upkeep Observations |
|---|---|---|
| First few weeks | Minor settling marks, loose fasteners re-tightened | Small adjustments to hinges; wipe dust during assembly |
| 1–12 months | Beginning of patina; light surface scuffs on top | Regular dusting and occasional wipe-ups after spills |
| 1+ years | Evened-in color shifts, more blended wear patterns | Periodic light polishing or touch-up for blemishes |
How it Lives in the Space
The Tv Stand,Entertainment Center with Storage Cabinet,Mid Century Modern Media Console Table,Adjustable Hinge,Wooden Television Furniture for Living Room,Oak settles into a corner and slowly becomes part of the room rather than an accent you notice only once. Over time you find yourself arranging seating and small habits around it, and its proportions quietly shape simple comfort in daily routines. Its top gathers faint wear and the usual array of mugs, remotes and keys, marks that fold it into regular household rhythms. In everyday use it simply stays,resting and becoming part of the room.