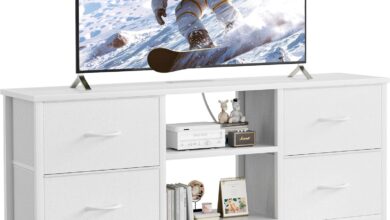
Lavish Home Farmhouse TV Stand: how it fits your space

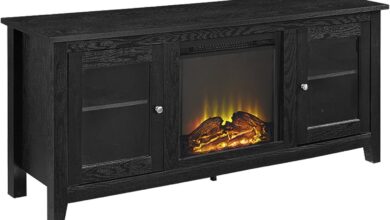
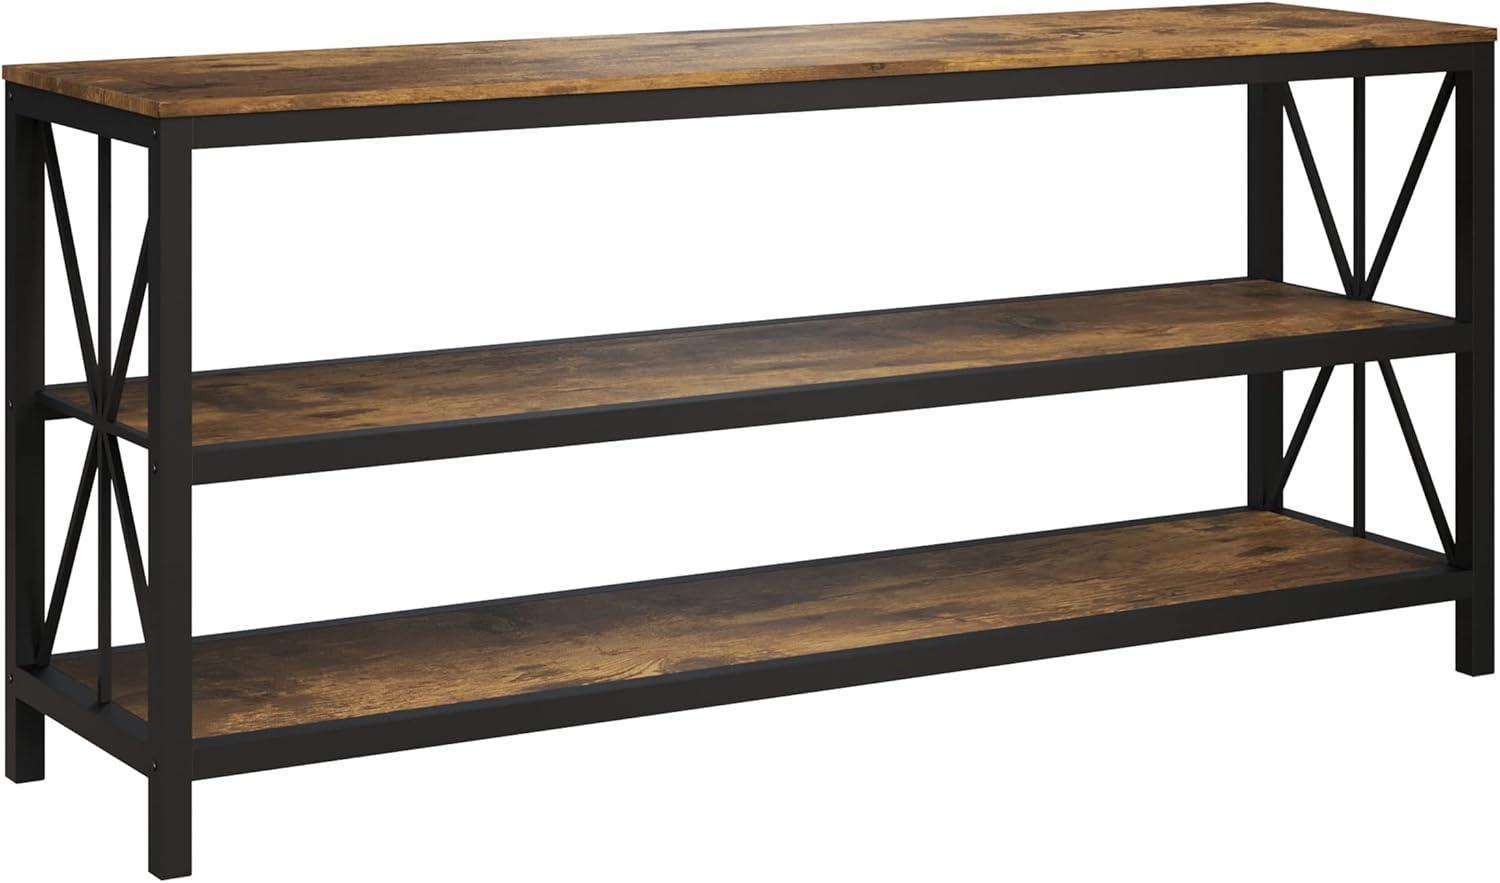
Light catches the faux barnwood grain and makes the top look gently worn before you even set anything down. It’s the Lavish home Farmhouse TV Stand — a three-tiered console that reads farmhouse in tone but keeps an industrial, metal-lined posture. Run your hand along the shelf and the PVC finish has a bit of tooth, while the metal frame feels cool and square under your palm; together they give the piece a measured visual weight. Open shelves reveal whatever you put on them,so cords and boxes become part of the room’s texture rather than hidden away. From across the living space it sits broad and unshowy, but up close those surfaces and the open back define how the whole wall feels.
A first look at the Lavish Home farmhouse television stand and what arrives in your box
When your box arrives you’ll first notice how the package is sized and taped for a large, flat item — it often arrives sitting on its side and feels heavier than it looks. Breaking the tape reveals layers of protection: corner foam, sheets of corrugated cardboard between surfaces, and plastic wrap around the longest pieces. Parts tend to be bundled together so you’ll instinctively clear a patch of floor and slide components out in stages; it’s common to find a small amount of dust or sawdust from shipping nestled in the foam, and protective stickers on the visible wood-grain faces that you’ll peel off as you go. The instruction booklet sits on top most of the time, and the hardware pack is usually the last thing you pull free from its nest of padding.
Inside the box you can expect a few distinct groups of items laid out in a compact arrangement. The contents are typically organized into a main assembly pack and a smaller hardware envelope,with at least one pre-assembled subframe in some shipments. Typical items you’ll handle include:
- Main shelves and side frames wrapped in foam or plastic
- Hardware pack with labeled small bags of screws, bolts, and washers
- Fastener tool (an Allen wrench or similar) tucked with the instructions
- Assembly manual containing exploded diagrams and a parts list
- Protective corner pieces and adhesive stickers
Below is a simple count of the typical components as presented in the manual and hardware pack:
| Component | Typical Quantity |
|---|---|
| Main shelves | 3 |
| side/metal frames | 2 |
| Hardware bags | 1–3 (grouped by type) |
| instruction booklet | 1 |
Occasionally you’ll find an extra screw or two included; at the same time, not every wood piece is individually labeled, so you’ll spend a few minutes matching parts to diagrams before starting assembly, which is a normal part of the unpacking rhythm.
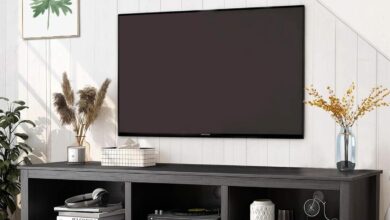
How it sits in your room: silhouette, barnwood finish and the visual weight of the open back
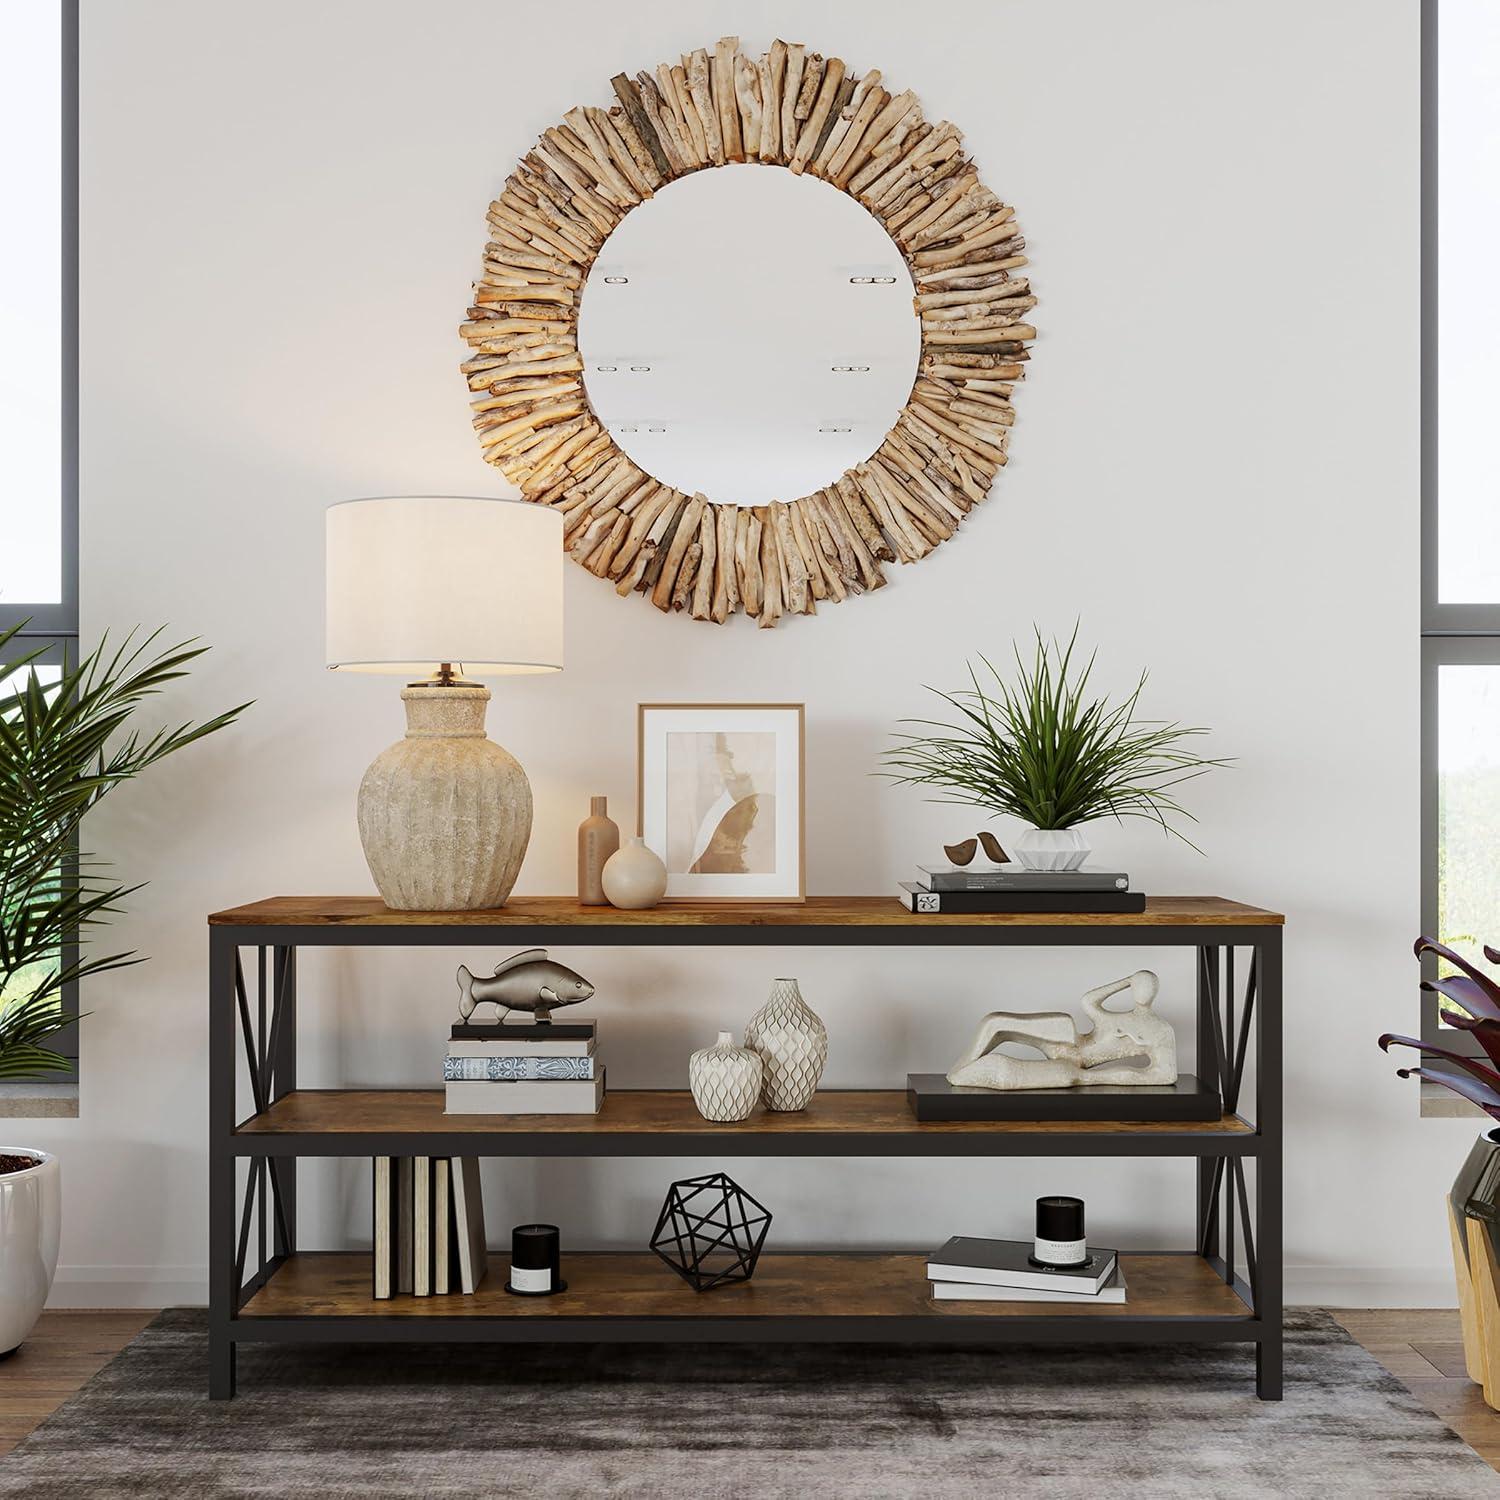
The long, rectangular silhouette reads as a horizontal anchor across a wall, so it tends to make the media wall feel wider rather than taller. The barnwood finish interrupts that straight line with grain and color variation, which softens the geometry and gives the surface something to catch the eye when light shifts through the room. Small everyday moves—sliding a lamp a few inches,centering a vase to hide a cable,angling the console a touch off the wall—change that presence more than it might on a plainer,flat-front piece. A few fast observations that often show up in a living space:
- Silhouette: the low, rectangular profile stretches the sightline across seating areas
- Finish: the barnwood tones add texture and break up reflective glare
- Contrast: wall color and nearby fabrics determine whether the piece retreats or becomes a visual focal point
The open back reduces the immediate blockiness of the unit and lets the wall behind become part of the composition,which can create a sense of depth or lightness depending on what sits on the shelves.When the shelves are sparsely populated the console tends to float visually; when filled with darker electronics and tangled cords the visual weight increases and the wall becomes a backdrop rather than a contributor. The trade-off is straightforward: the openness invites layering—books, frames, a runner—and also leaves more of the setup visible, so placement and styling choices change how heavy it feels in a room.
| Open-back condition | Perceived visual weight |
|---|---|
| Mostly empty shelves / light decor | Low — appears airy, integrates with wall |
| Filled with dark electronics and cables | Medium–High — becomes a focal, more massy |
| Decorated with layered accessories or a contrasting backdrop | Medium — textured, intentional presence |
Close up on materials and construction you can inspect: barnwood tones, metal frame details and joinery
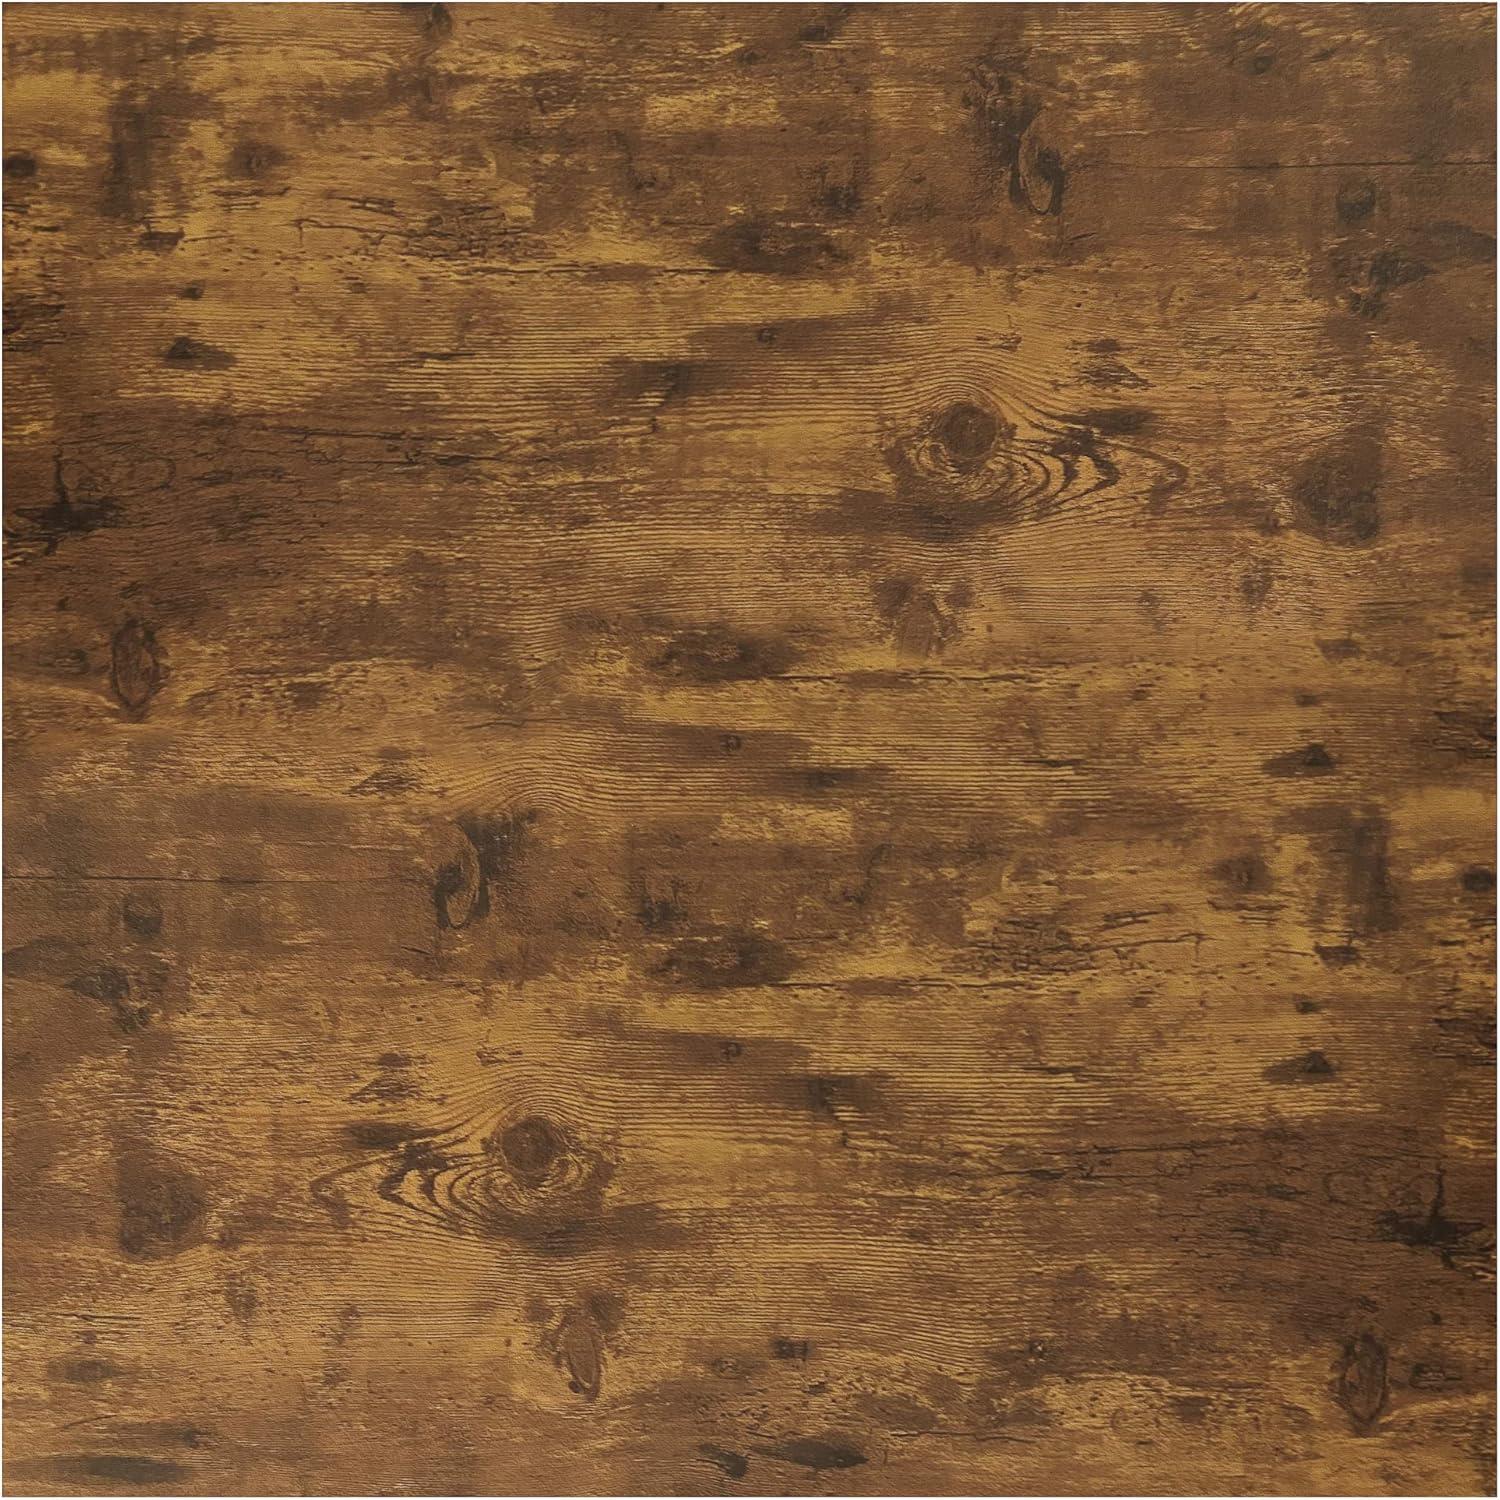
When you get close, the barnwood surface reads as a printed woodgrain rather than layered solid wood: mottled streaks of warm brown and paler highlights repeat across the panels, with faux knots and shadowing that catch the light differently depending on viewing angle. The PVC layer is smooth to the touch and has a low sheen that makes the grain look slightly glazed; edges where the veneer wraps around the shelf ends can show thin seams or slight misalignment if you feel along them. In everyday use you’ll notice small wipes or dust lines more quickly on the flatter, lighter streaks than on darker areas, and the pattern repeat becomes obvious on adjacent panels if you stand back and scan the shelves across their full length.
At the metal frame and attachment points, inspection rewards a short, practical checklist you can run through visually and by touch.
- Frame finish: look for an even powder-coat and any tiny chips near welds or corners.
- Welds and joins: many joins appear ground smooth but still show a faint seam where pieces meet.
- Shelf connections: shelves sit on metal ledges or rest on fasteners that are visible from under the unit.
A quick look underneath will reveal pilot holes, short screws, and the MDF core beneath the PVC veneer at cut edges rather than exposed solid wood. The X-brace joints and vertical posts are fastened with bolts or screws you can see; their alignment and how snugly the hardware sits in countersunk holes tells you how tightly the parts mate.
| Component | Inspection cues |
|---|---|
| Barnwood finish | pattern repeat, seam visibility at edges, surface sheen and wipe marks |
| Metal frame | uniformity of powder-coat, visible weld seams, bolt heads at cross braces |
| Joinery | presence of pilot holes/cam fittings, shelf bearing points, alignment of fasteners |
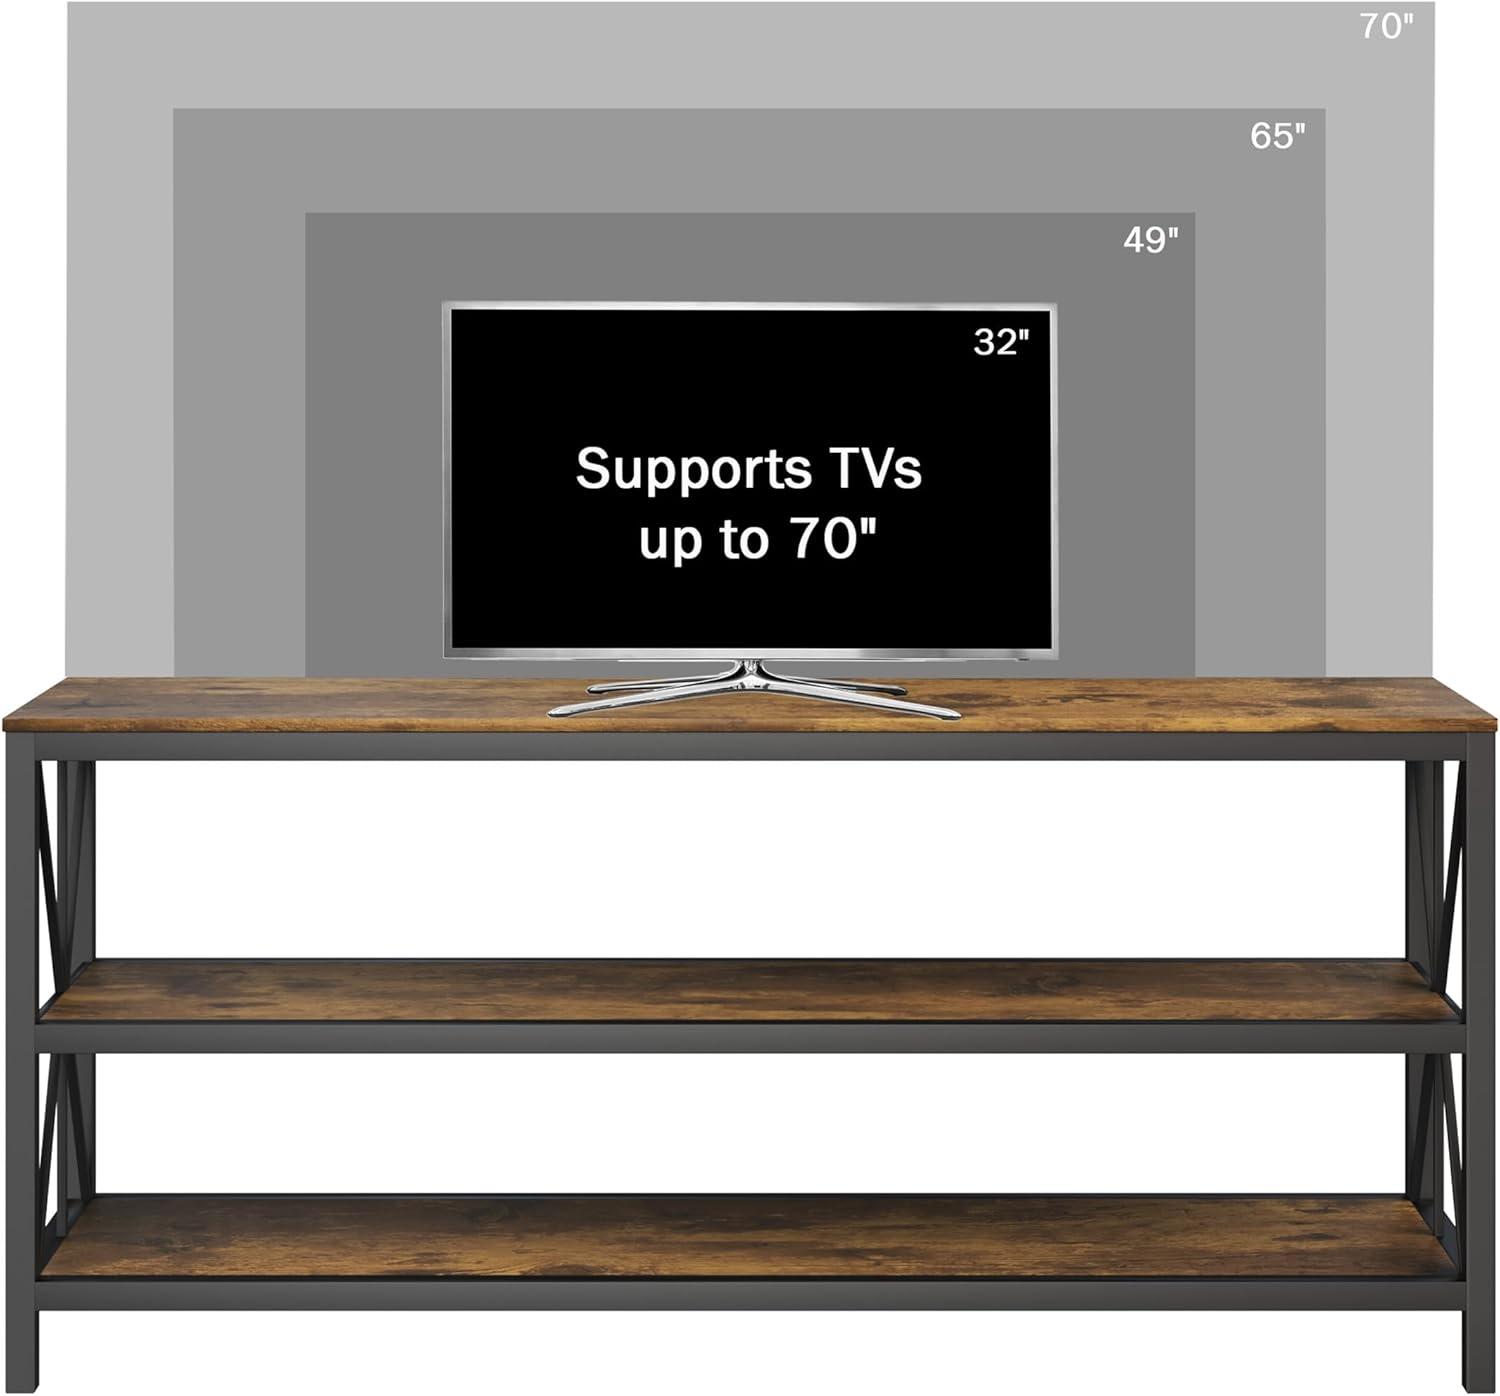
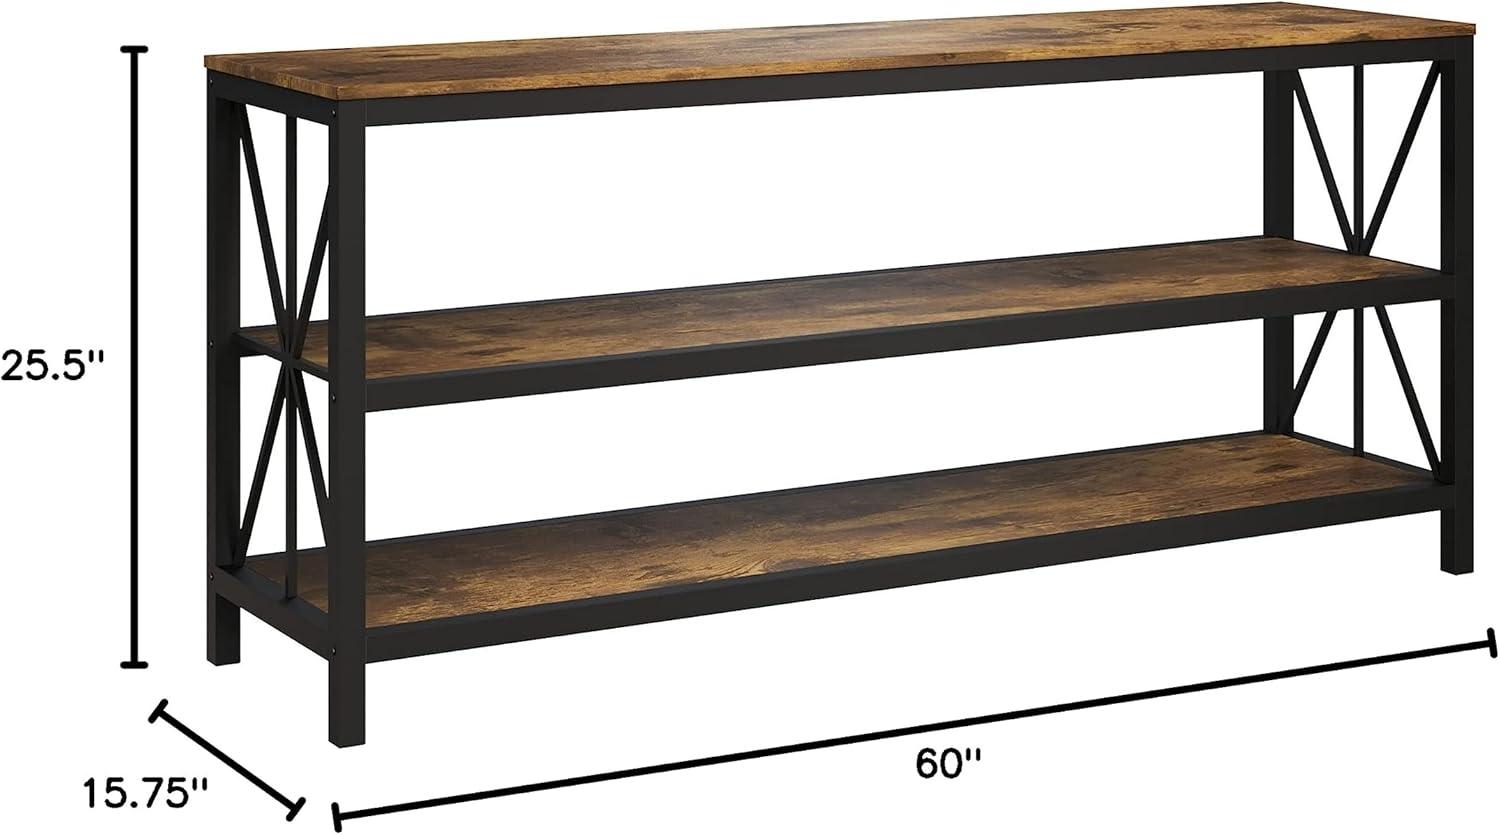
Measurements and clearances for your shelving layout, component placement and screen spacing
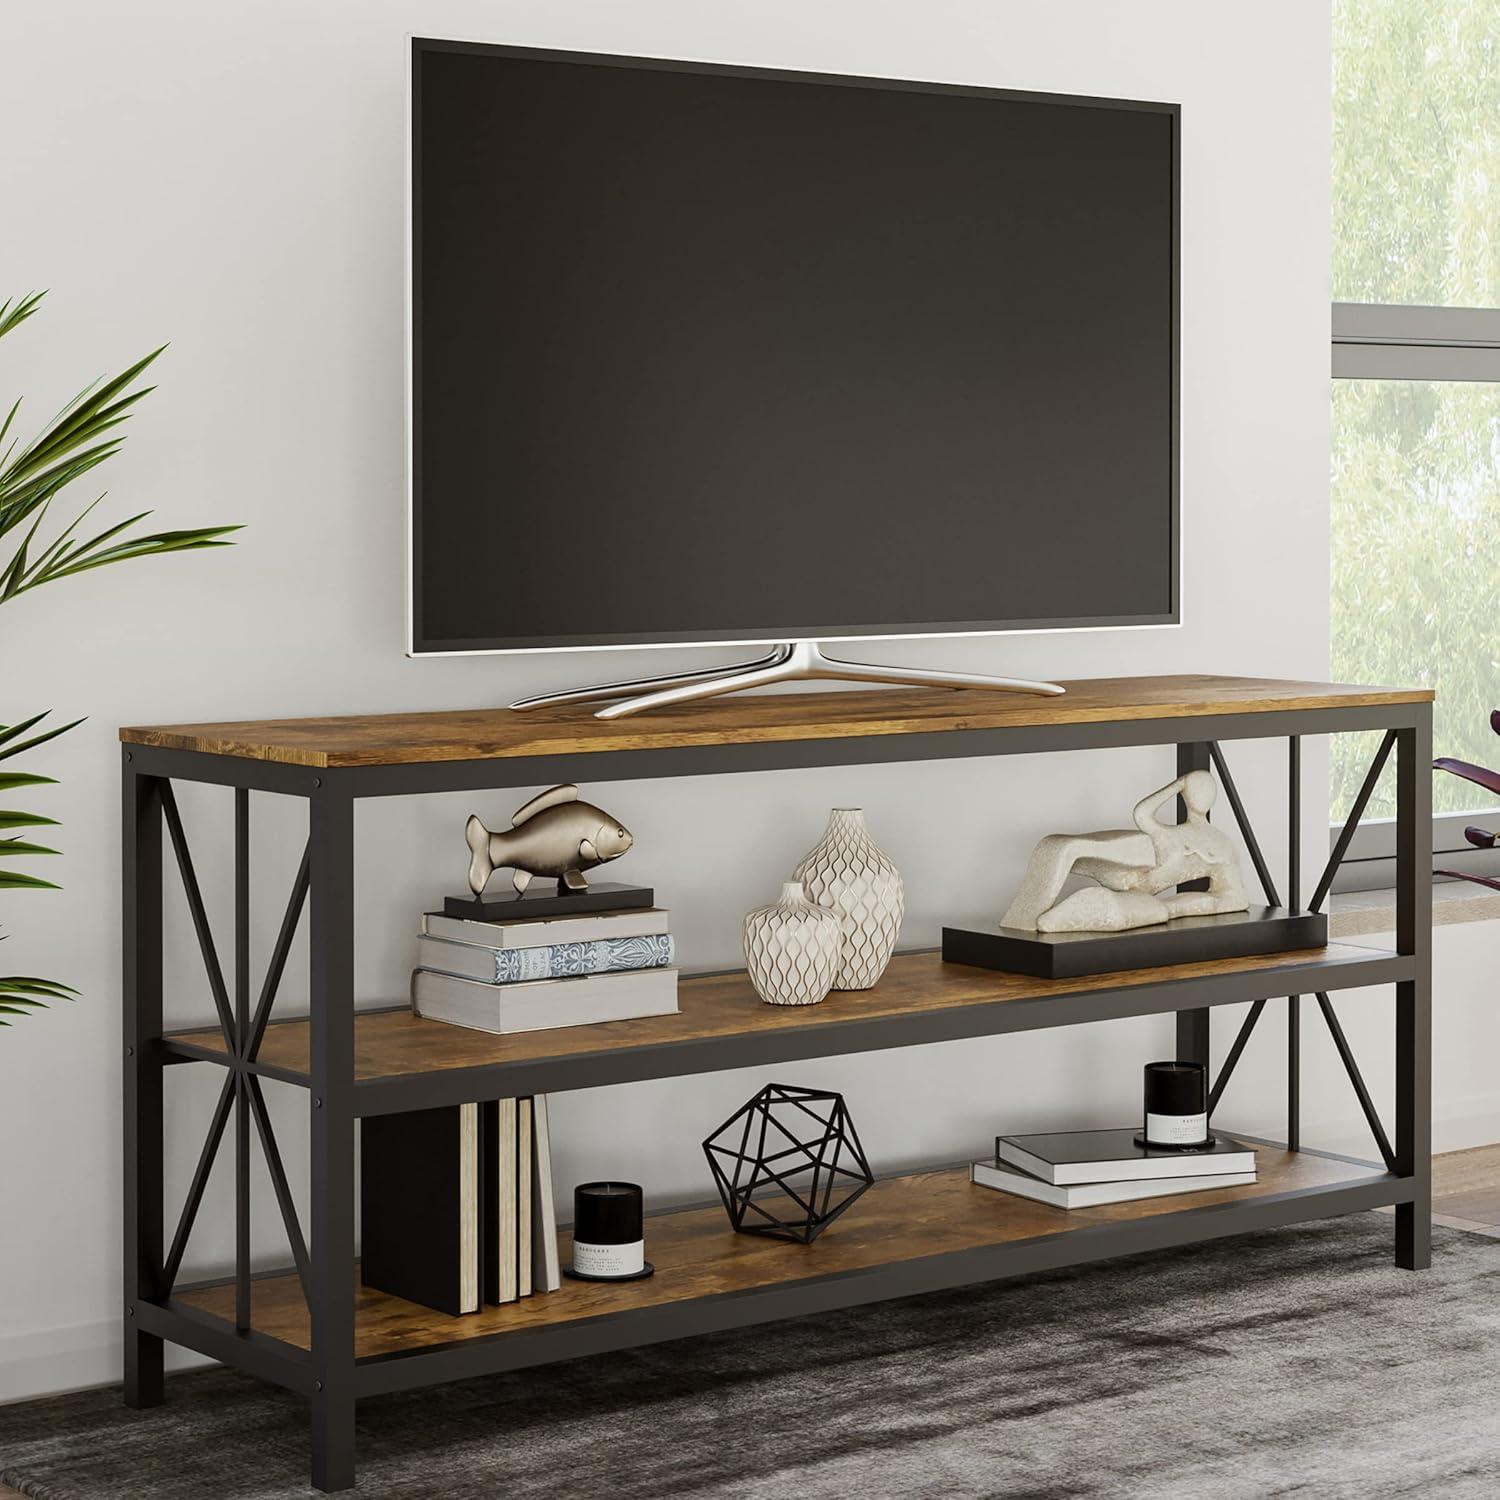
When you look at the shelving as a working surface rather than decoration, the basic numbers shape how you’ll place gear: the three tiers run the full 60 inches across, each shelf sits on a 15.75‑inch depth, and the two measured vertical gaps are roughly 10 inches and 9.75 inches from the top down. That horizontal run gives you room to lay out a cable box, a soundbar, and a couple of smaller components side by side with a little breathing space between them; the relatively shallow shelf depth means larger, deeper AV receivers will either protrude toward the front edge or need to be placed on the top shelf. Because the back is open you’ll be able to route cords without drilling through panels, but expect only a couple inches of rear clearance behind a screen’s mounting feet in most configurations, so plan for minor shifting of device positions when you need access to rear ports or extra ventilation around heat‑producing components.
| Measured area | Approximate size |
|---|---|
| Shelf length (each tier) | 60 inches |
| Shelf depth | 15.75 inches |
| Vertical gap — top tier | ~10 inches |
| Vertical gap — lower tier | ~9.75 inches |
- Typical component fit: small set‑top boxes and streaming players sit comfortably under the measured gaps; full‑size AV receivers can feel snug in the shallow depth and may extend past the shelf edge.
- Screen spacing and airflow: the open back keeps cables accessible but only leaves modest room behind low‑profile TV feet, so occasional nudges or slight angling of equipment are common while you fine‑tune connections.
- Practical habit: many people stagger components (one centered, one to the side) to avoid crowding ports and to make remote‑control lines-of-sight easier during everyday use.
How the stand matches your expectations and copes with real world limits of space and gear
The stand generally behaves like an ordinary three-shelf console when filled and lived with: it keeps electronics accessible and the open back makes routing power and HDMI cables straightforward, but those same openings mean wiring is visible unless actively tidied. In everyday layouts the top shelf carries the screen without noticeable flex while the lower tiers fit slim players and a modem comfortably; taller components or packed stacks sometimes need to sit sideways or be spaced apart, which changes how items are grouped on the shelf.Because the frame and shelf depth set a clear horizontal limit, placing bulkier décor or deeper boxes on the lower shelves can feel cramped, and the stand’s footprint makes tight corners and narrow walkways a small choreography of angling and shuffling when furniture is rearranged.
- Cable access: rear openness eases hookups but leaves cords exposed unless bundled or concealed behind the unit.
- component fit: slim consoles, soundbars, and streaming boxes stack fine; larger AV receivers often require rethinking placement.
- Room feel: the open design reduces visual bulk compared with closed cabinets, which helps in smaller rooms but doesn’t create extra hidden storage.
In normal use the stand copes by inviting small,routine adjustments—sliding items forward to reach jacks,rotating a device to clear a side brace,or swapping decorative objects for shallower bins when storage needs change. The balance between visible wiring and easy access tends to favour households that prefer occasional tidying over permanent concealment, and while the shelves simplify arranging media gear, they also define what can be stored without protrusion or awkward overhang. For complete specifications and current configuration details, see the listing here: Product details and specifications.
Living with it day to day for you: assembly notes, reach and access to devices, cable routing and storage behavior
Assembly tends to be a staged, hands-on process: parts arrive labeled and the hardware is bagged by type, which speeds initial sorting but still benefits from two people when lifting the frame into place. Screws and brackets line up with small tolerance, so installers frequently enough find themselves nudging metal rails and nudging shelf edges to get holes to meet; that slight fiddliness makes the work feel incremental rather than snap-together. Once upright, access to devices is immediate because of the open back, and plugging or unplugging components usually happens from behind while the unit is left in place; tenders toward occasional retightening show up after a few weeks of normal use as fasteners settle. Small habits develop naturally—choices about where to park a cable box or how far to pull a Blu‑ray player out for disc changes—so the day-to-day interaction becomes partly about rhythm as much as reach and fit.
Cable routing and storage behavior often defines how tidy the setup looks over time. The open-back design leaves cords visible unless they are routed along the frame or tucked under a shelf, and users commonly place a power strip on a lower shelf or behind stacked items to keep plugs accessible. Metal frame edges and X-brace areas act as convenient anchor points, which means cables usually run vertically along the uprights rather than across shelf faces; this creates a vertical cable cluster that can be contained but not entirely hidden, and dust tends to collect where cords lay against the wood-grain surfaces. Typical patterns observed include:
- Devices grouped by use (streaming boxes and consoles near each other),
- Power strips placed on the middle or bottom shelf,
- Decor baskets or trays used to disguise loose cables and small peripherals.
| Device | Observed placement and routing |
|---|---|
| Streaming puck / Cable box | Centered on middle shelf with short HDMI routed straight back |
| Game console | Sometimes pushed to one side; power strip nearby and controller cables drape in front |
| Soundbar / Speakers | Often wall-mounted or placed on top shelf; speaker wires follow frame uprights |
Full product listing and configuration details can be seen here: View full specifications.
How the Set Settles Into the Room
After you live with it for a while, the Lavish Home Farmhouse TV Stand – 3-Tier Open Back Entertainment Centre for 70-inch Television, Barnwood Media Console Shelves, and Metal Frame quietly eases into the room’s daily rhythms rather than announcing itself. Over time you notice how the surfaces pick up soft scuffs and the shelves learn the weight of the things you reach for most,and how that familiarity changes how the seating is used and how people move around the space.In regular household rhythms it becomes more of a backdrop for mornings,low-key evenings, and small, repeated habits than a piece you consciously think about.It becomes part of the room and stays.