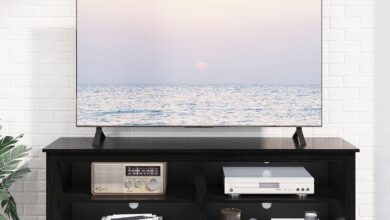
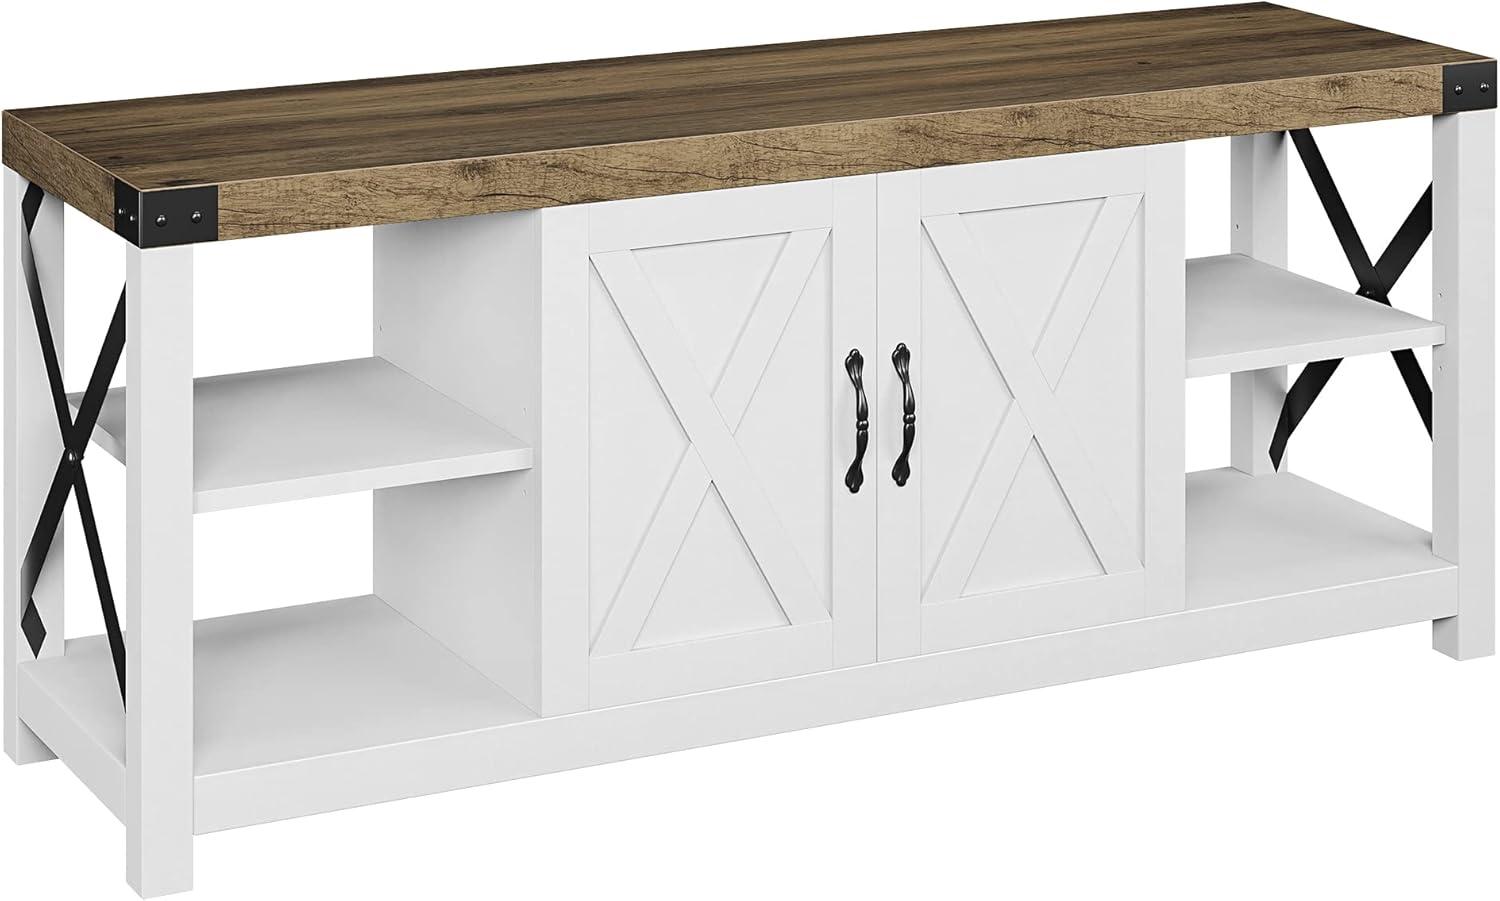
GAOMON 60 Inch TV Stand, how it fits your living room

you notice the low, five‑foot span of the GAOMON 60‑inch TV stand before anything else; from your couch it gives a broad, grounded silhouette that anchors the screen. Up close you can feel the white wood-grain finish under your palm and catch the cool of the powder‑coated metal frame where it meets the corners. If you crouch to inspect, a few small misalignments and shallow divots show up in the finish, details that don’t read from across the room. It settles into the living space like an everyday piece — visually hefty from a distance, and a little more fussy when you move around it.
A broad look at the GAOMON sixty inch TV stand and what you find in the box

When you open the shipping box, the first thing you notice is how the parts are nested and wrapped: larger panels lie flat with thinner pieces and several small plastic bags tucked into crevices. You’ll usually find an instruction booklet on top,the hardware packets grouped and labeled,and a modest Allen key sitting in one of those bags. The packaging favors compactness, so you’ll spend a few minutes pulling foam corners and cardboard separators away and laying pieces out on the floor; it’s the sort of unboxing where you pause to sort screws by size before you start. Occasionally you’ll see cosmetic scuffs on a panel or a slightly compressed corner of the box, nothing dramatic but enough that you might move parts to a clear patch of carpet or a drop cloth while you work.
Box contents (what to expect)
- Instruction manual and parts list, with exploded diagrams and labeled hardware calls.
- Several plastic bags of fasteners and metal connectors, each labeled or lettered for the assembly steps.
- A small Allen wrench included with the hardware and wrapped pieces such as panels and frame sections.
| Component | What you find |
|---|---|
| Top and larger wooden panels | Individually wrapped in foam or cardboard, stacked flat near the top of the box |
| Metal frame pieces and supports | Grouped together and often secured with taped straps or plastic wrap |
| Shelf panels and doors | Wrapped and separated to prevent rubbing; laid under the top panel |
| Hardware kit | Multiple small bags containing screws, dowels, cam locks and anchors; usually labeled |
| Assembly tools | Small Allen key included; other common tools are not packed in the box |
| Documentation | Instruction booklet with parts checklist and diagrams |
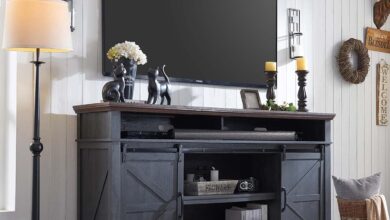
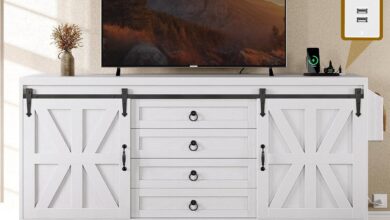
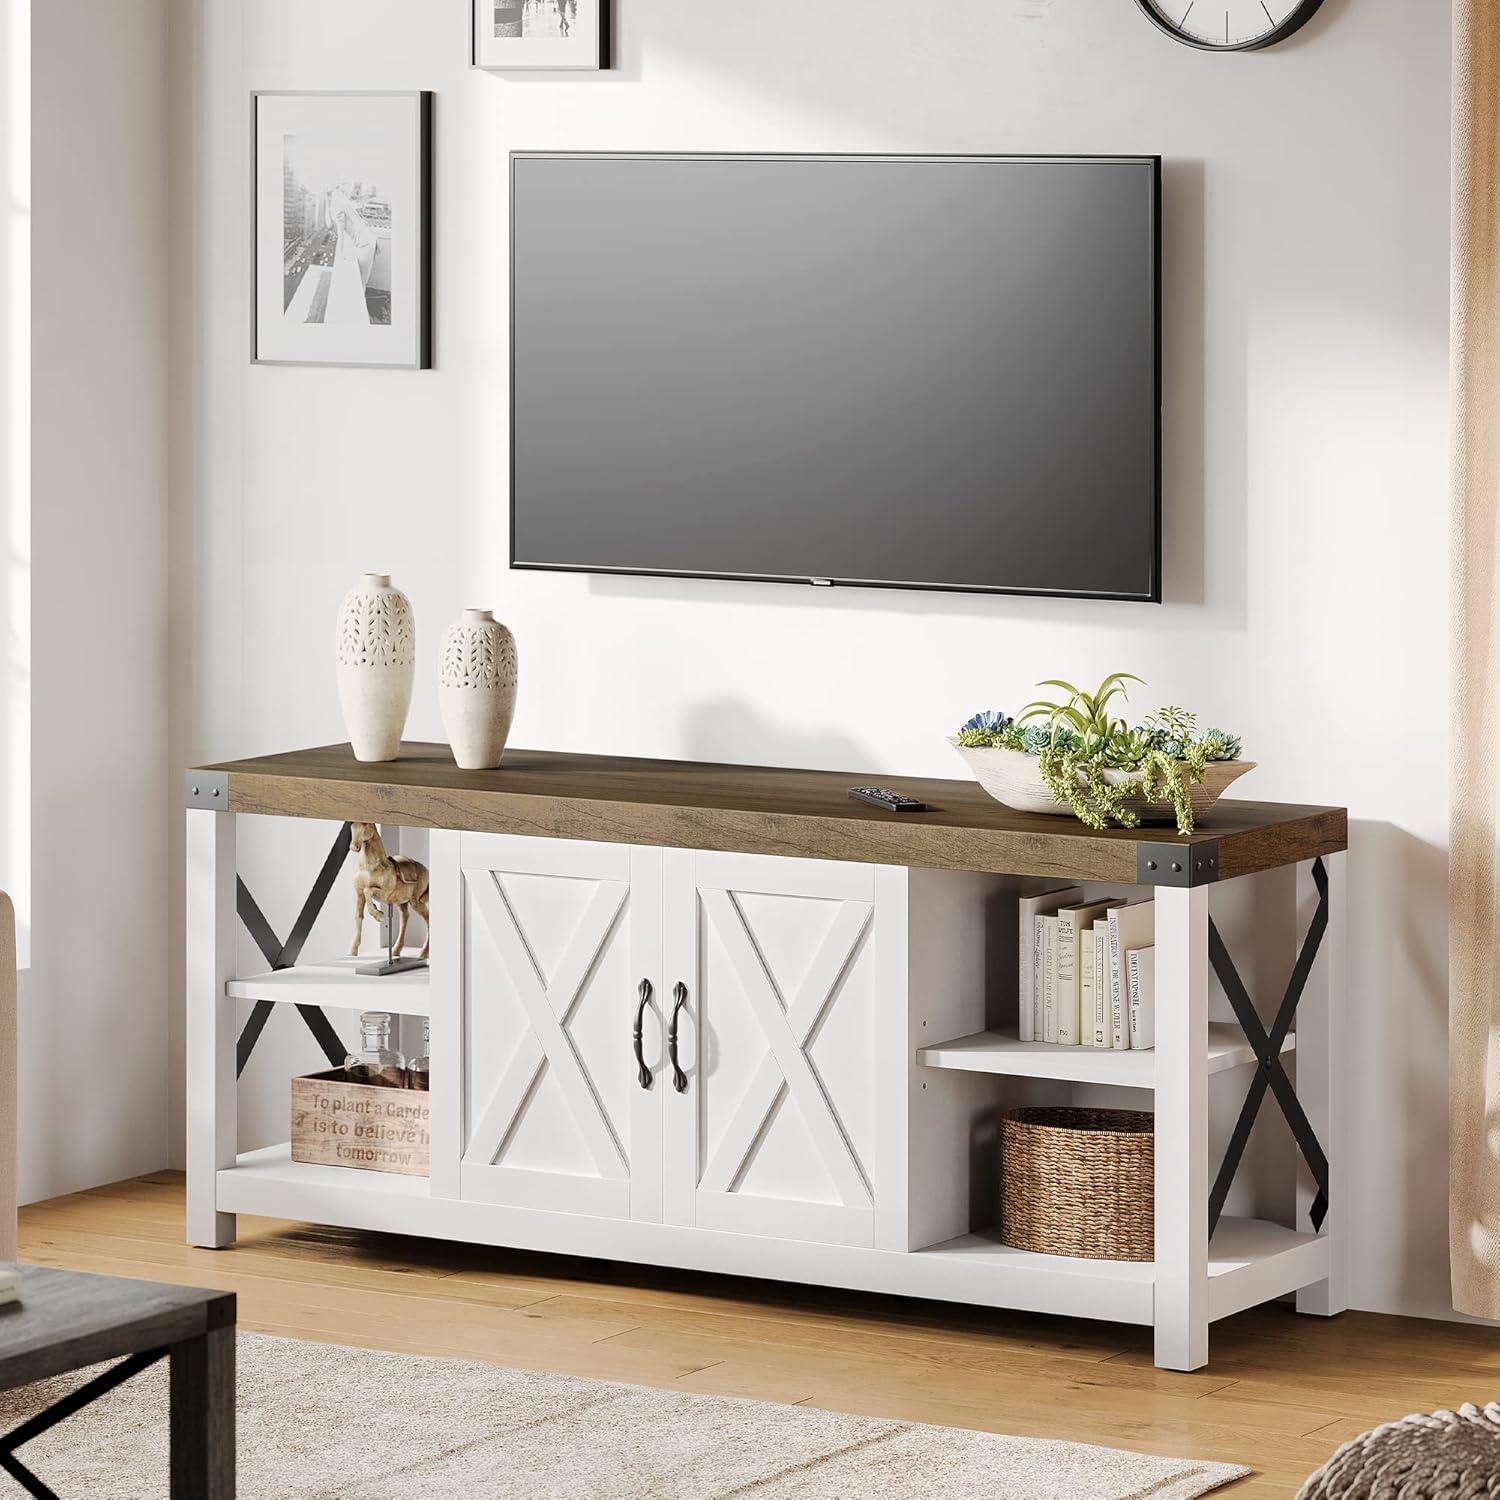
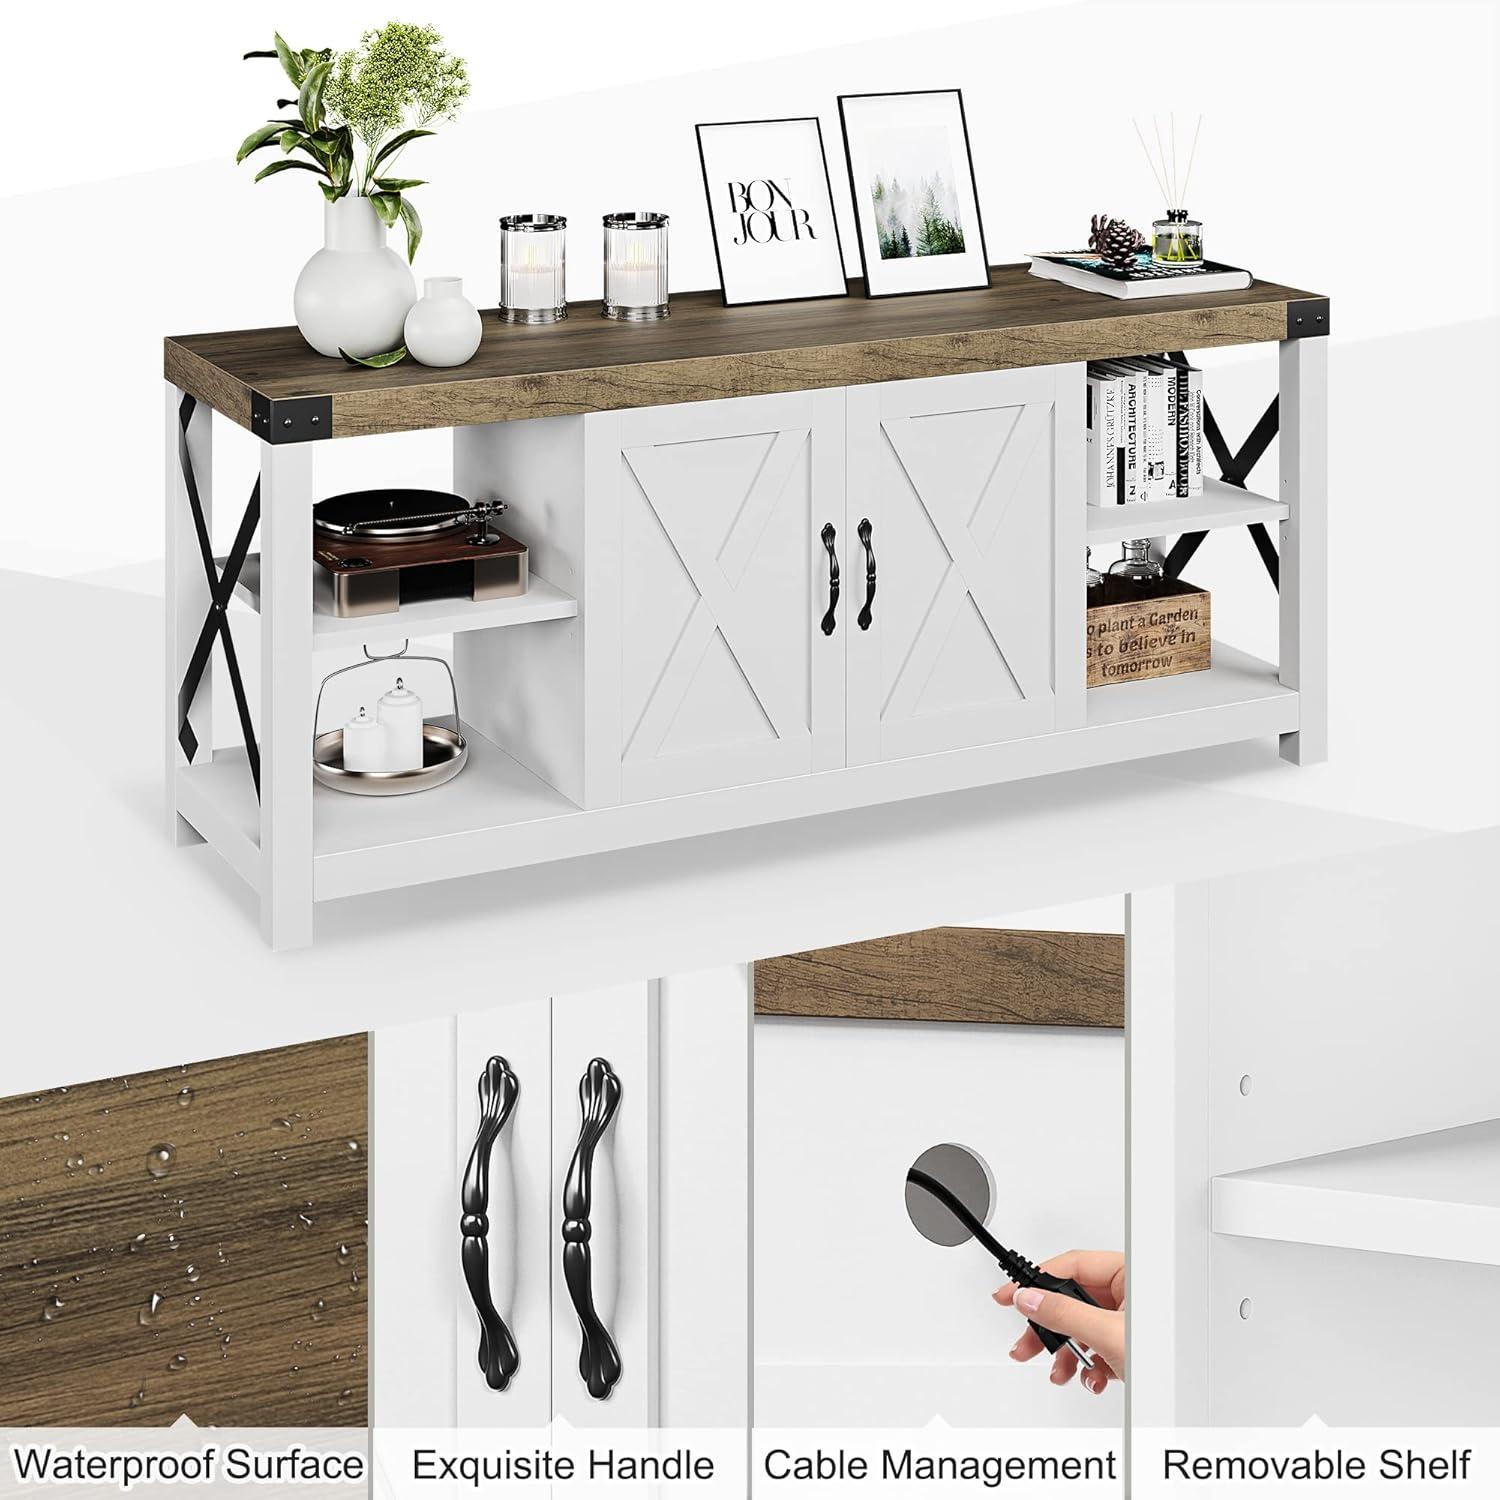
How the farmhouse white finish and open shelving read in your living room for you
The first thing you notice is how the farmhouse white finish reads like a soft backdrop rather than a focal shout — it lightens the visual weight of the unit and tends to make the media wall feel more open. From across the room the painted surface blurs into surrounding trim and linens,giving a quietly layered,cottage-like rhythm to the space; up close,the finish reveals subtle texture and any scuffs or dust more readily than a darker stain would. in practical moments — when sunlight slants in, when lamps are on, or when the TV is off — the finish interacts with light differently, so the same piece can feel crisp and modern or gently weathered depending on time of day and what you have nearby. A few on-the-ground observations:
- Bright daylight: the white pops and reads crisp against darker floors or rugs.
- Warm evening light: it softens, leaning toward cream and blending with warm woods.
- Close inspection: marks and fingerprints are more obvious than at a distance.
The open shelving contributes a drawn-out, horizontal line across the room that counterbalances a large, dark screen and keeps the setup from feeling overly boxy. When you place a mix of electronics, books and a few decorative pieces on the shelves the overall look becomes layered and lived-in; conversely, if cords or mismatched items sit exposed, the openness makes them instantly visible. You’ll likely catch yourself shifting items around more often than with closed cabinets — small rearrangements,swapping seasonal objects or adding a plant tend to be the default behaviors.The visual effect varies with lighting, as the short table below summarizes for fast reference.
| Lighting condition | How the finish and shelving read |
|---|---|
| Strong natural light | Bright, airy, higher contrast with dark furnishings |
| Soft artificial light | Warmer, blended appearance that downplays grain and seams |
| Low / cinematic lighting | Finish recedes; open shelves create silhouettes and subtle layers |
materials, joinery and hardware details you will see when you inspect it closely
When you look closely at the surfaces you’ll notice the top and shelves are melamine-faced particleboard: the printed 3D wood grain sits on a smooth, slightly satin laminate and the edges are finished with a thin PVC banding rather than solid wood end-grain. Turn a corner and you can see the core where holes are drilled — the particle board texture is visible where cam‑lock housings and confirmat screws bite in, and the back panel is a thinner hardboard that’s stapled into rabbets. The metal frame and leg pieces carry a powder‑coat finish; up close the paint is even but you can spot weld seams and the occasional touch-up where brackets meet the paneling. Small details like rubber feet, plastic shelf pegs and pre-cut cable openings in the rear panel are all plain to see when you crouch down at eye‑level with the cabinet.
Open a cabinet and the joinery and hardware language becomes clearer: the kit relies on cam‑lock connectors with short dowels in many of the corner joints, plus long confirmat‑style screws for the thicker panels; metal L‑brackets and cross‑members tie the frame to the wooden parts.The doors mount on standard concealed hinges that have the usual adjustment screws,and the adjustable shelves sit on small metal or plastic pegs that slot into a row of pre‑drilled holes. The assembly pack typically contains a small Allen key, a selection of Phillips and flathead screws, plastic anchors and magnetic catch parts — the following quick reference shows where those pieces tend to be used.
| Fastener / Part | Where you’ll find it and what it looks like |
|---|---|
| Cam locks & dowels | Hidden on panel interiors; round metal cams and short wooden or metal dowels align mating boards |
| Confirmat screws | Thicker, coarse‑thread screws driven into particle core at weight‑bearing joins |
| Metal brackets & L‑braces | Powder‑coated pieces that fasten underside of top and leg assemblies |
| Shelf pegs | Small metal/plastic pins in a line of holes inside each compartment for adjustable shelving |
What unpacking and assembly involve as you fit the cabinet together yourself
When you break the seal on the box,the first thing you’ll notice is the layered packing: larger panels wrapped in cardboard and foam, with a clear plastic hardware bag and the instruction booklet tucked somewhere on top. Lay everything out on a soft surface and work from the instructions — you’ll want to open the smaller bags one at a time and sort fasteners into a tray or cup so nothing rolls away. Take a moment to cross-check the inventory list against what you have; it usually only takes a few minutes but saves time later when a particular cam or dowel seems missing. Unpacking itself is often the quiet, fiddly part: stray plastic sleeves, paper templates for hinge placement, a few stray pieces of foam. It can feel a little chaotic if you try to do the whole thing on the floor in a narrow hallway,so give yourself some clear workspace and a place to rest panels as you go.
Assembly proceeds as a set of modestly paced steps rather than one long task. You’ll typically start by fixing smaller structural parts together (legs or side frames) and then move to the larger top and back panels; cams, dowels and short screws are the usual connectors, and the tiny allen key supplied frequently enough works but tends to slow you down.Tools that clarify the process include an assortment you probably already own:
- Included: small Allen wrench, labeled screw packs
- often useful: Phillips screwdriver (or a low-torque electric driver), a rubber mallet, and a small clamp or two for holding pieces while you align holes
A second person makes the step of raising the top and securing it to the frame easier and less awkward; some holes require a little persuasion to line up, and in a few cases you may need to nudge a dowel or re-seat a cam before tightening. watch the anchoring points as you torque screws — over-tightening can strip particle-board anchors — and expect to spend intermittent moments adjusting door hinges and the removable shelf pegs until everything sits evenly. The whole process tends to take a chunk of time in one session, with short pauses to hunt for a misplaced screw or to reposition a panel, rather than a single straight stretch of work.
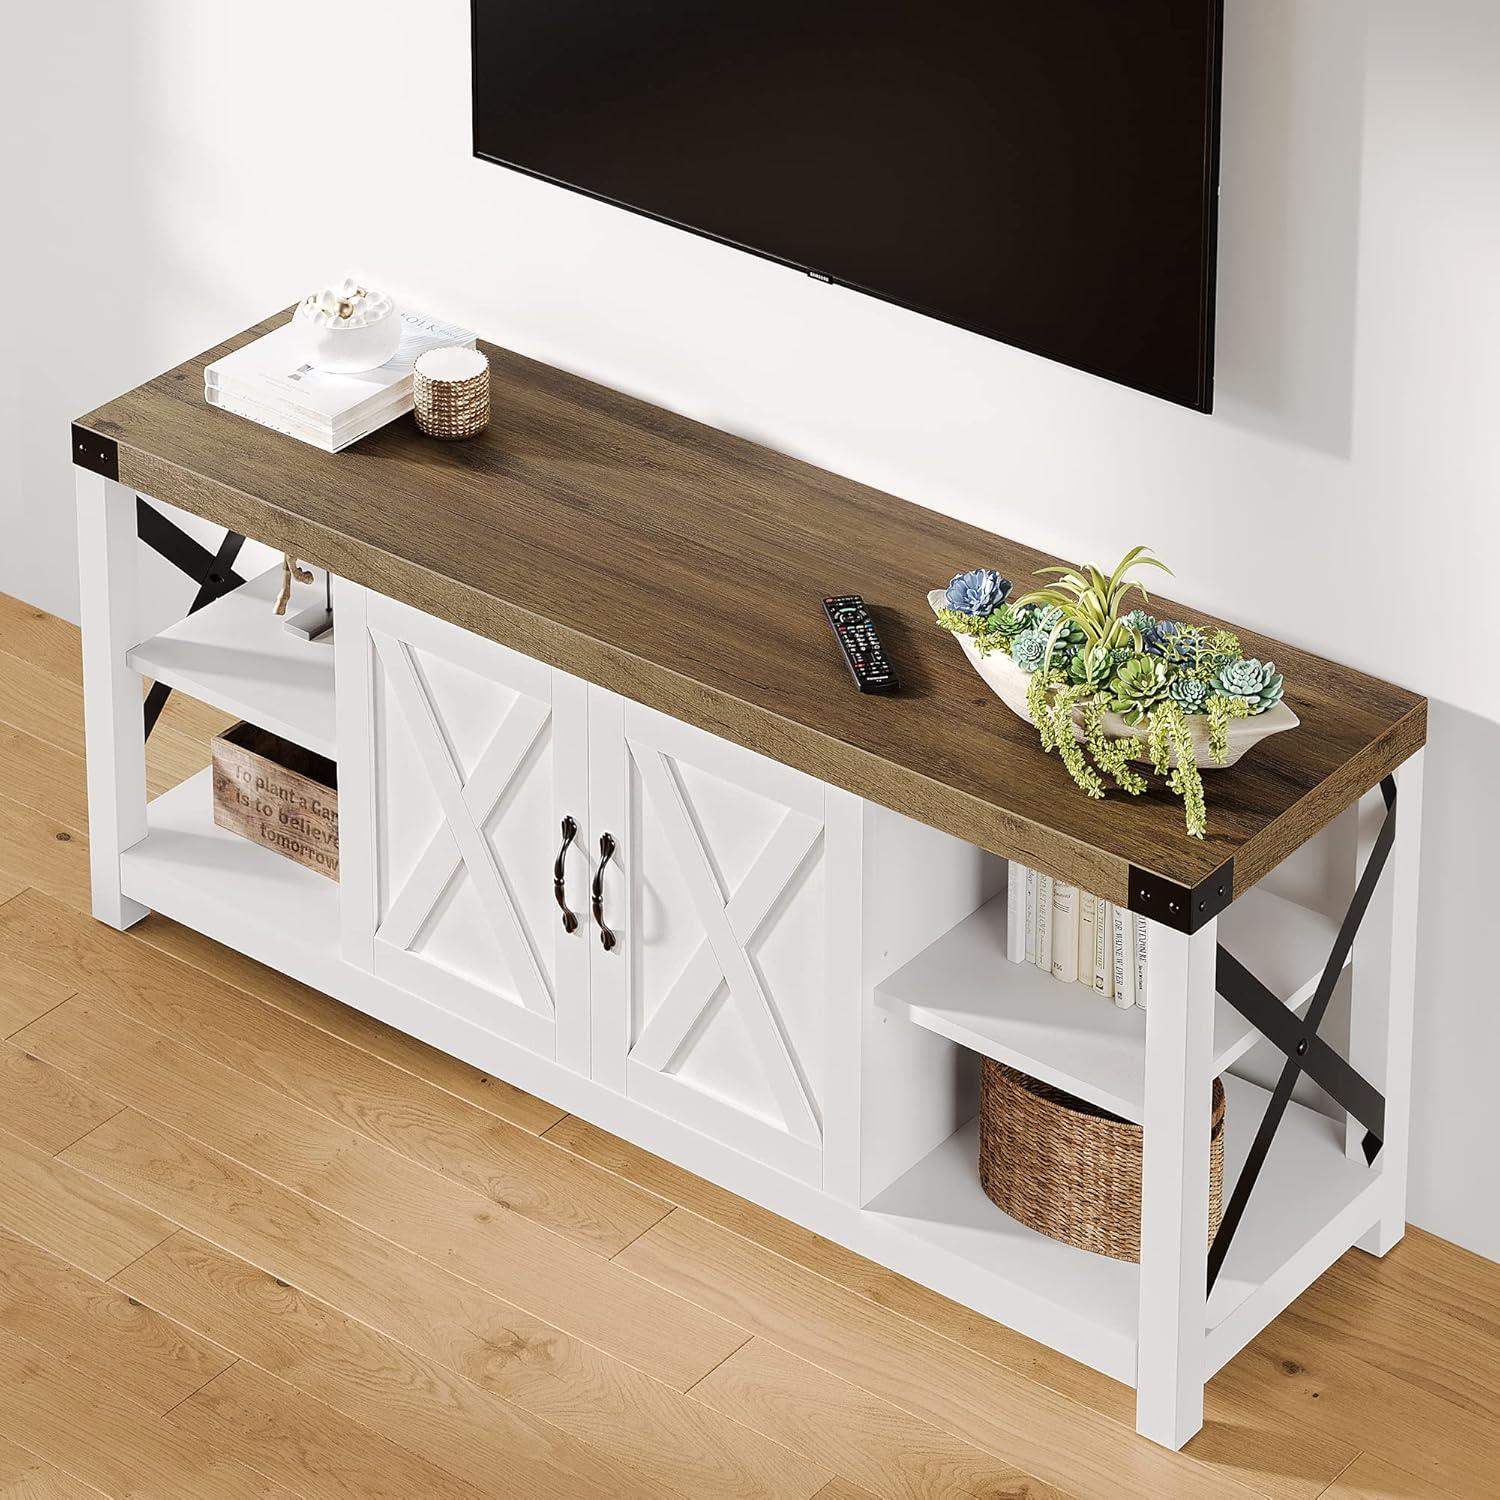
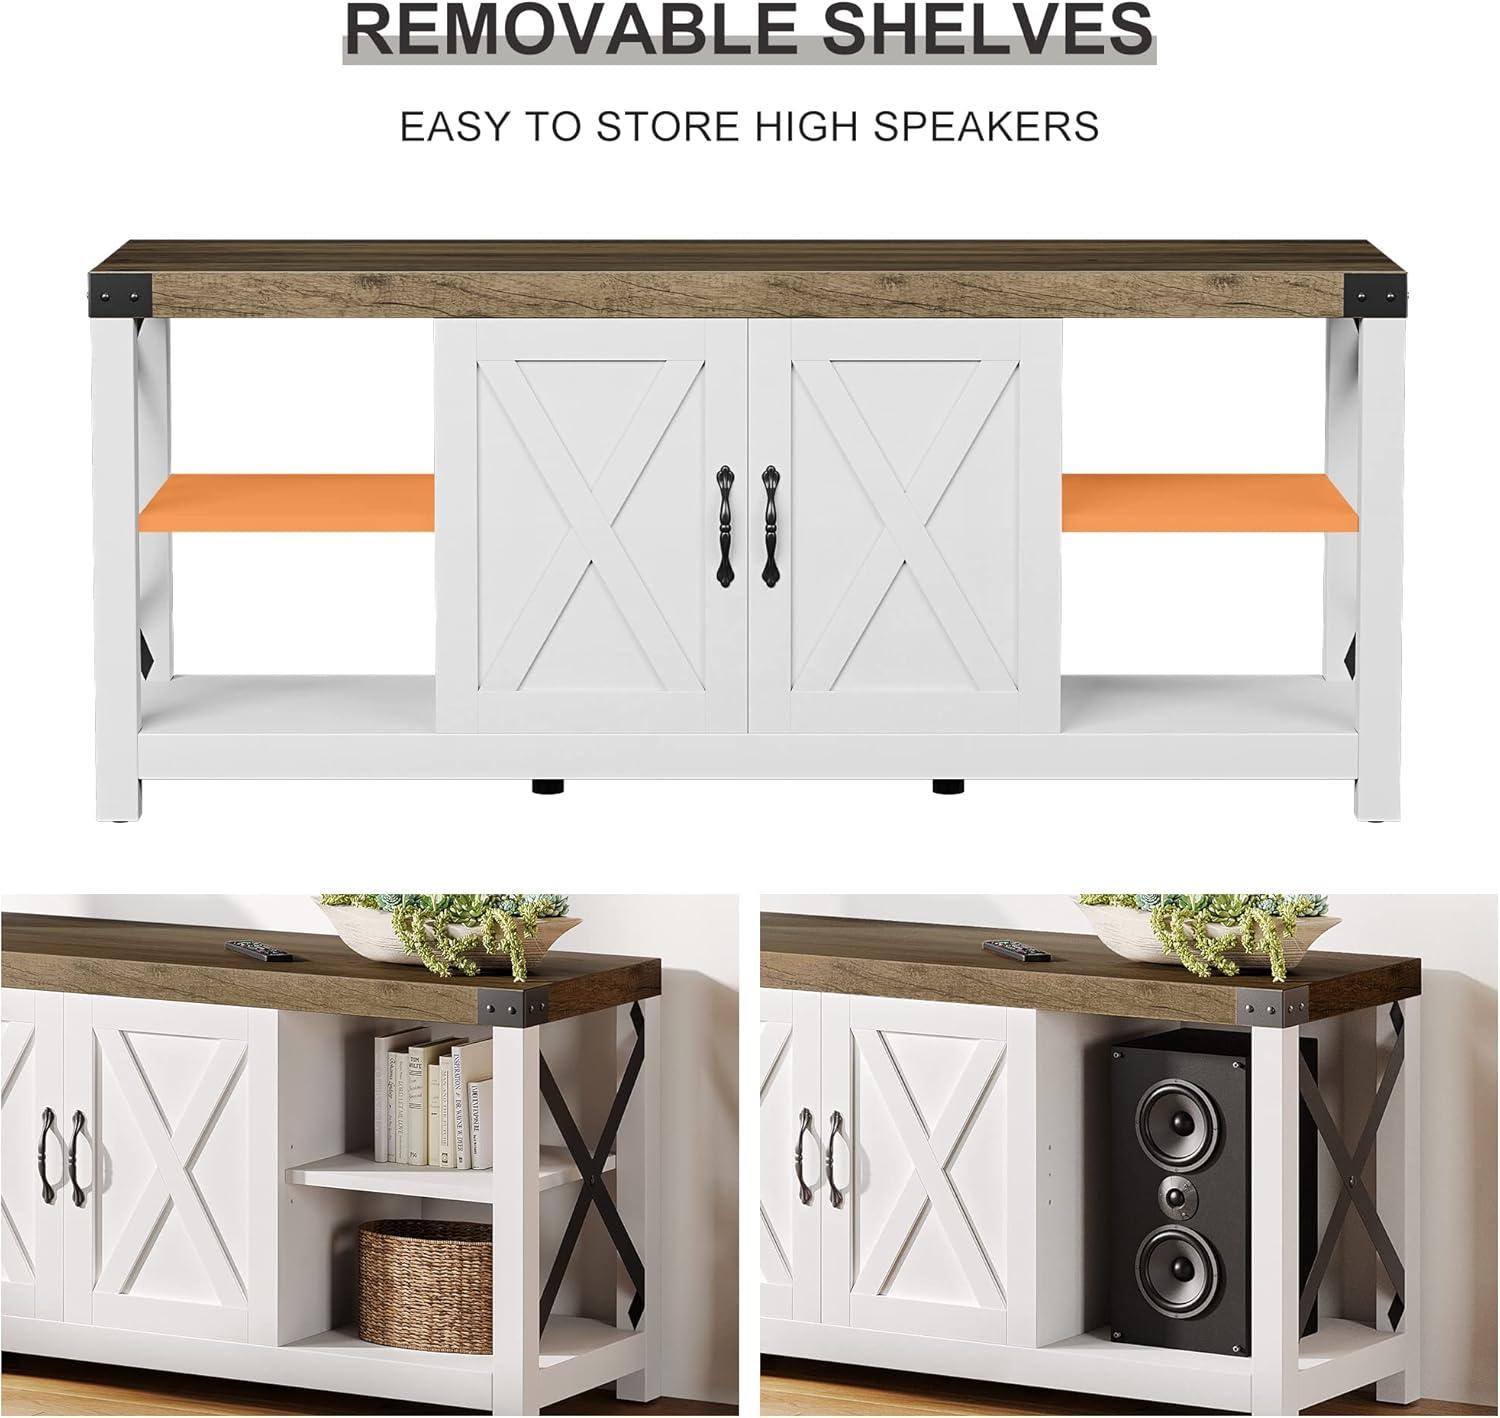
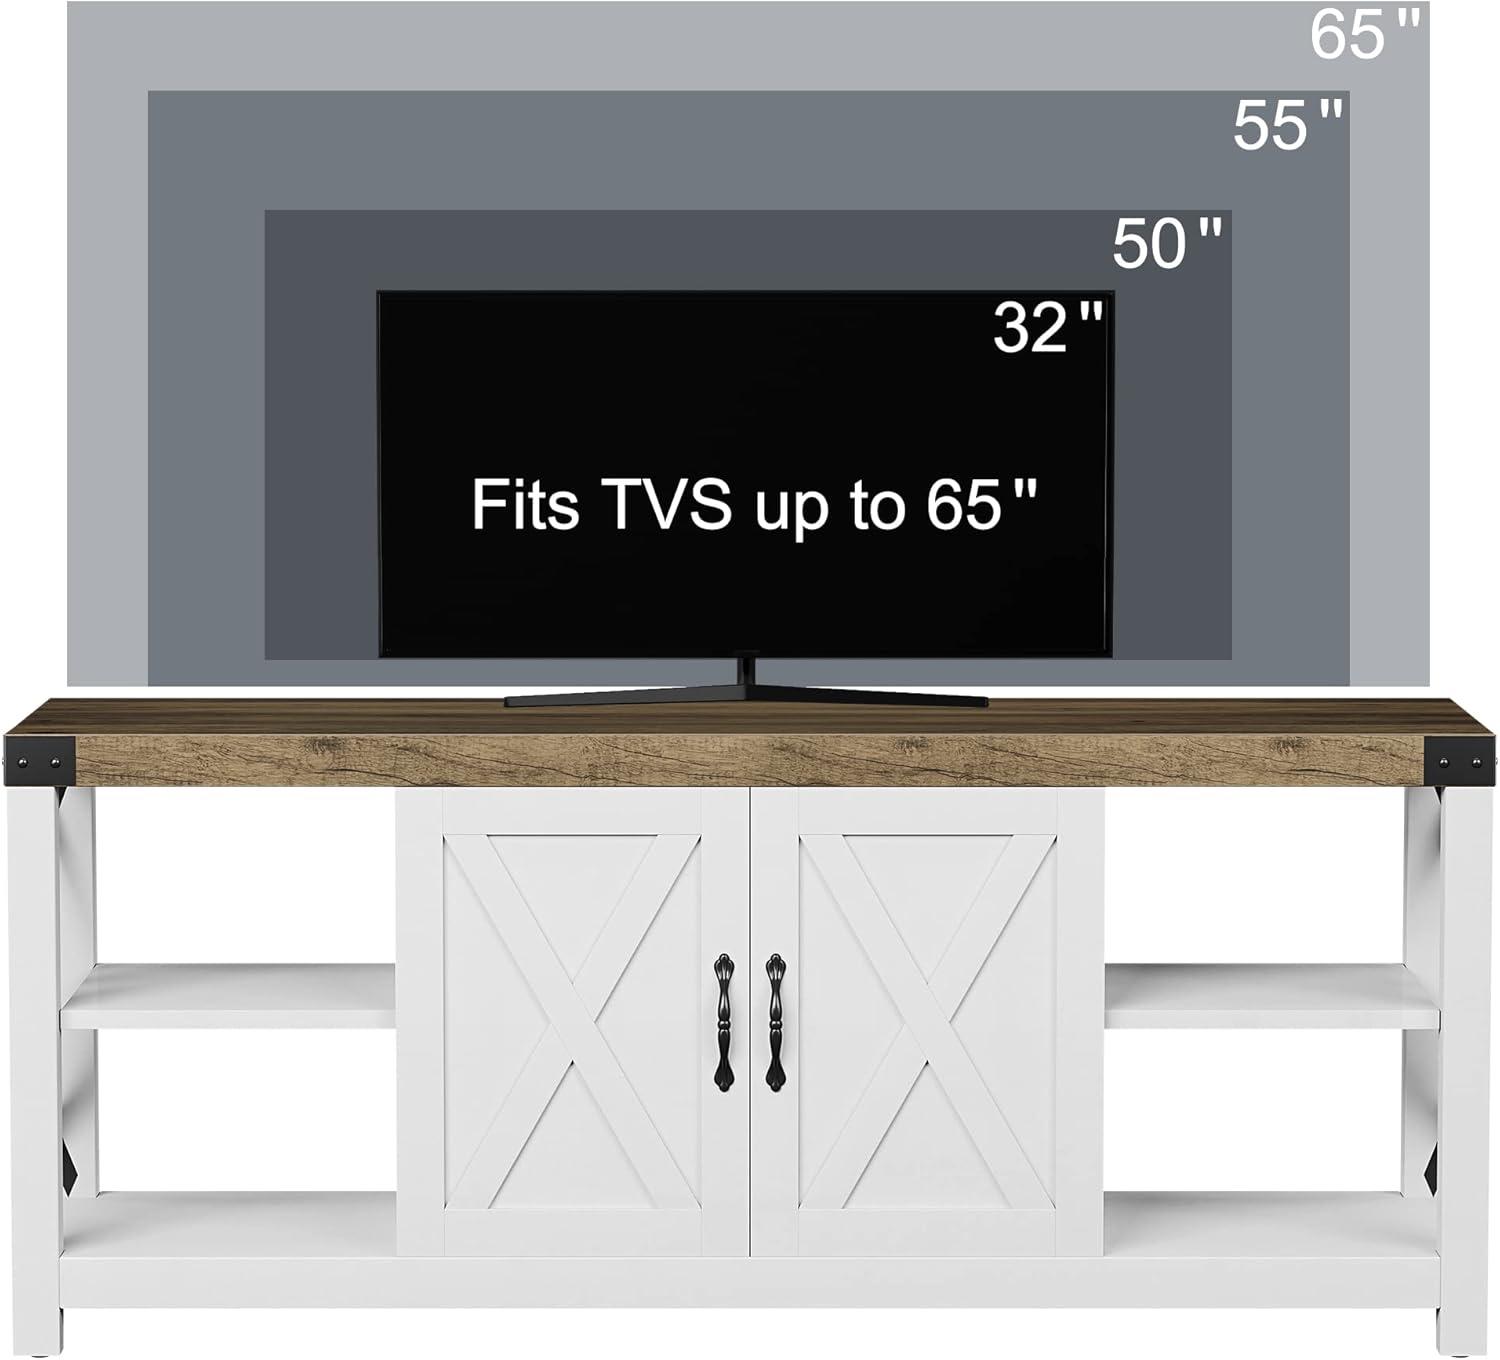
Actual measurements and how your television and components sit on the shelves
The top surface presents most of the usable real estate for a screen and any low-profile soundbar; with the cabinet’s external depth near 16 inches, the usable top depth tends to be a little under that once the back lip and edge trim are taken into account, so wider TV feet can sit close to the front edge or slightly recessed depending on their footprint. Inside the compartments the three-set adjustable shelving system allows rearrangement but results in step-like increments rather than continuously variable heights; in practice that means some taller receivers or vertically oriented consoles will require moving the shelf to a higher notch or using the bottom compartment. Cable routing is possible through the back openings, though cables often need coaxing to lie flat behind a horizontally installed device, and heavier components sometimes need two people to slide into position without shifting the shelf alignment.
- Typical component fits observed: slim cable boxes and streaming players fit easily on any shelf level;
- mid-height AV receivers usually require the shelf to be set at the highest position or to occupy the bottom compartment;
- full-size game consoles frequently enough fit depth-wise but may sit close to the rear opening, limiting airflow clearance.
| Compartment | Approx. usable depth | Common max component height that fits |
|---|---|---|
| Top surface | ~14–15 inches | soundbars and slim devices (up to ~3.5 in tall) |
| Upper/middle shelves | ~13–14 inches | compact receivers, set-top boxes (up to ~6–9 in depending on shelf notch) |
| Bottom compartment | ~13–14 inches | taller consoles or stacked components (up to ~10–12 in) |
For complete specifications and configuration details, view the product listing here.
How the stand measures up to your space, your expectations and everyday limits
In day-to-day use the stand tends to read as a substantial piece of furniture rather than background storage — it establishes a horizontal visual line in a room and frequently becomes the natural place for small, everyday items (remotes, controllers, a pair of books). Placed in tighter living areas it can nudge other furniture arrangements, prompting minor shifts in sofa or rug placement; in more open rooms it usually anchors a viewing wall without much fuss. Everyday interactions — opening doors, reaching into compartments, sliding items across the top — reveal a pattern of little adjustments: occasional re‑alignment after moving components, routine dusting of the broad surface, and the need to route cables behind the unit so they don’t billow out into sight. Reports of imperfect joins or wobble show up in regular use, so some tightening or small fixes can be part of normal ownership rather than a one‑time setup task.
The following notes summarize how typical household limits show up in practice:
- Footprint vs.traffic: takes up a clear horizontal band on a wall and can narrow pathways in compact rooms.
- Surface behavior: holds a TV and a few accessories comfortably but becomes visually cluttered if many devices or tall items are stacked.
- Everyday handling: doors and panels see repeated use and, in some cases, require occasional re‑alignment or tightening after being moved.
- Maintenance signs: scuffs and minor finish issues tend to be more obvious at close range than from across the room.
| Everyday limit | Observed effect |
|---|---|
| Frequent bumps or pets brushing past | May show wobble or need periodic fastener tightening |
| Multiple media devices and visible cords | Surface and openings can look crowded; cord routing becomes more noticeable |
| Regular disassembly or moving | Repeated assembly can accentuate minor alignment or finish imperfections |
For full specifications and current configuration details, see the complete listing here: Product listing.
Daily care, shelf adjustments and the visible changes you notice over weeks of use
In day-to-day use you’ll mostly be doing small, routine things: quick dusting across the top, wiping fingerprints from high-contact edges, and clearing out the open compartments where dust and cable fuzz collect. A damp microfiber is usually all that’s needed for routine wipe-downs; abrasive pads or strong solvents tend to leave faint marks or dull the finish over time.pay a little attention to gaps and corners—crumbs and pet hair gather there—and check door hinges and visible screws every couple of weeks since they can loosen with normal use. A few little habits you’ll find helpful are listed below, with the bold item acting as a quick reminder of what to look for in everyday care:
- Surface cleaning: wipe spills promptly and avoid soaking the edges.
- Hardware check: retighten knobs, hinges and shelf pins when they feel loose.
- Vent clearance: keep equipment vents and cord paths clear to limit dust buildup inside compartments.
Adjusting the shelves is straightforward in most moments, but over weeks you’ll notice how the routine shapes the piece: moving shelves frequently can make the peg holes feel a touch looser, and if you reposition heavy components (consoles, receivers) you may want to re-check alignment afterward. Small, visible changes tend to show up in predictable places—edges where you slide items, the underside of heavily loaded shelves, and around door seams where repeated opening can reveal tiny gaps. The table below sketches a typical short-term timeline of what you might see as the stand settles into regular use; these are descriptive patterns rather than fixed outcomes, and how quickly they appear depends on how frequently enough you adjust or load the shelves.
| Time | Typical changes observed |
|---|---|
| First week | Minor dust accumulation, initial hardware settling (a screw or two may need tightening). |
| 2–4 weeks | Small scuffs on top or edges, slight give in shelf pins if moved frequently, doors may need a small readjustment. |
| 4+ weeks | Subtle wear on high-contact surfaces, possible shallow shelf sag with continuous heavy loads, occasional need to retighten or realign fittings. |
How the Set Settles Into the Room
Over time, as the room is used in regular household rhythms, you notice how the GAOMON 60 Inch TV Stand for TV up to 50 60 65 Inches, Farmhouse Wood Stand TV Cabinet Entertainment Centre with Storage and Adjustable shelves (White) settles into a corner and begins to register itself by habit rather than intention. The shelves rearrange to match where you keep blankets and controllers, the top picks up small rings and scuffs from cups and hands, and the whole piece learns the ebb of where people pause and sit. In daily routines it becomes the place you reach without thinking, part of the quiet movement of the room and its ordinary comfort. It stays.