Walker Edison Zee Modern Floating TV Stand in your room
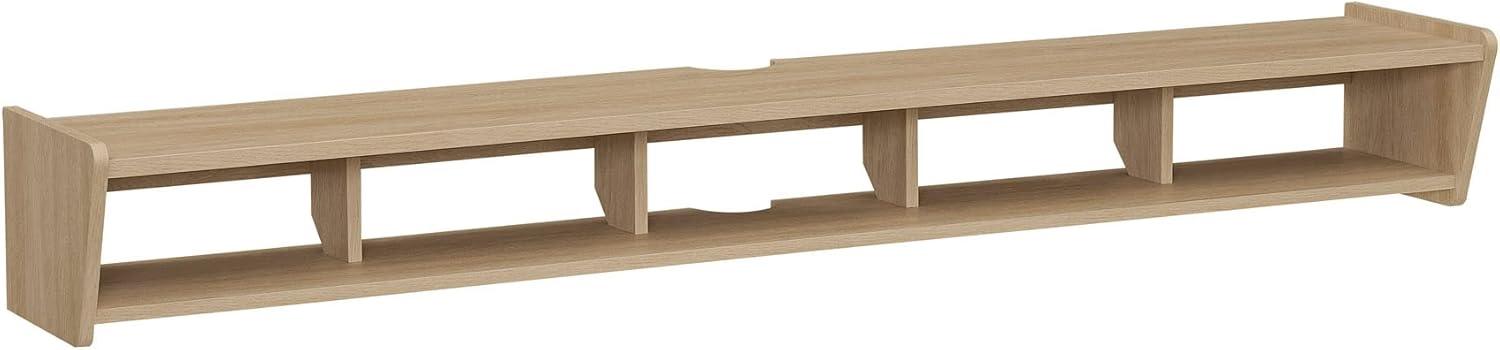
Morning light picks out the striations in the Coastal Oak finish, and the shelf reads lighter than its 65‑inch span suggests. Run your hand along the edge and you feel a smooth,slightly satiny veneer—solid enough to steady a remote,but not heavy under touch. You can tell at a glance this is Walker Edison’s Zee floating TV stand,the 65‑inch Coastal Oak model,yet it reads more as pared‑down wall décor than a bulky media cabinet. Five shallow cubbies sit open and unadorned; consoles and a couple of books nestle into them without crowding the line. Two small cable ports tuck cords out of sight, so you really only notice the wiring when you look for it. Overall it anchors the screen quietly, adding horizontal presence without visual weight.
Your first look at the Zee floating TV stand in coastal oak
When you first spot the piece on the wall it tends to read as a low,horizontal anchor—the eye settles on its line before the rest of the wall. The coastal oak finish catches the room’s light without glaring,and from a little distance the surface looks even,with subtle grain variation that breaks up a flat plane. Up close, the edges reveal the construction lines and the seams where panels meet; nothing jumps out as sloppy, but a careful glance shows the joins you’ll notice when positioning artwork or a TV above it. Small everyday effects are visible right away: fingerprints show more on the face than on the sides, and dust gathers in corners if you don’t brush past them occasionally.
A few immediate sensory notes you might use to describe that first encounter:
- Color tone: warm, light-weathered rather than shining or stark
- Surface sheen: low to medium—not glossy but not fully matte
- Profile: horizontal emphasis that visually widens the wall
| Observed trait | Notes |
|---|---|
| Finish appearance | consistent grain with slight variation; reads as modestly textured under close inspection |
| wall presence | Creates a floating effect that draws attention without dominating the room |
Touching the surface, you’ll notice a faint texture rather than slick smoothness; it feels finished but not lacquered. When it’s up on the wall you’ll probably tweak the level a few times—small adjustments to height or rotation change how it reads with other elements on that wall. The arrangement of items on and around it can quickly alter the first impression, so that initial look often evolves after you place a few remotes, a small speaker, or a bit of décor and see how the color and silhouette sit in the room’s daily light.
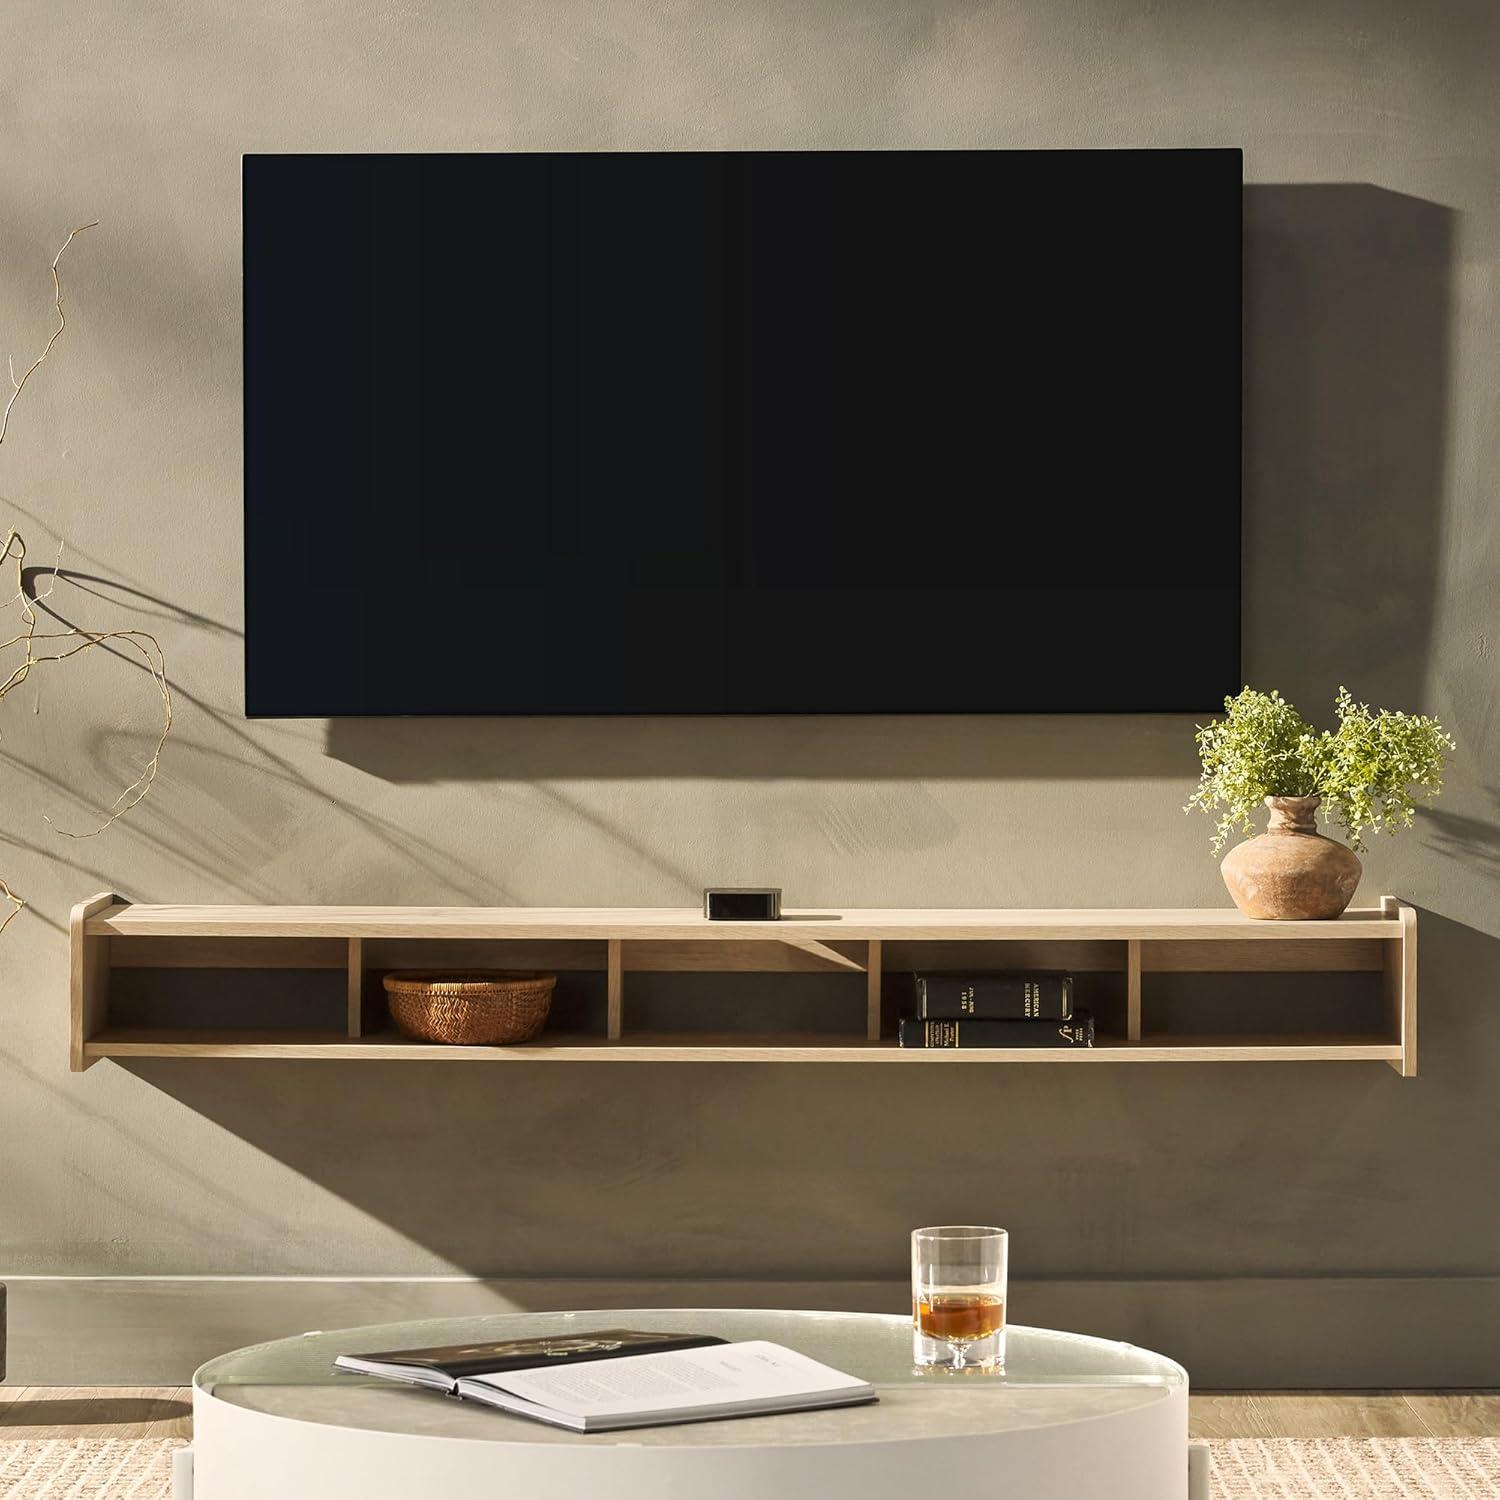
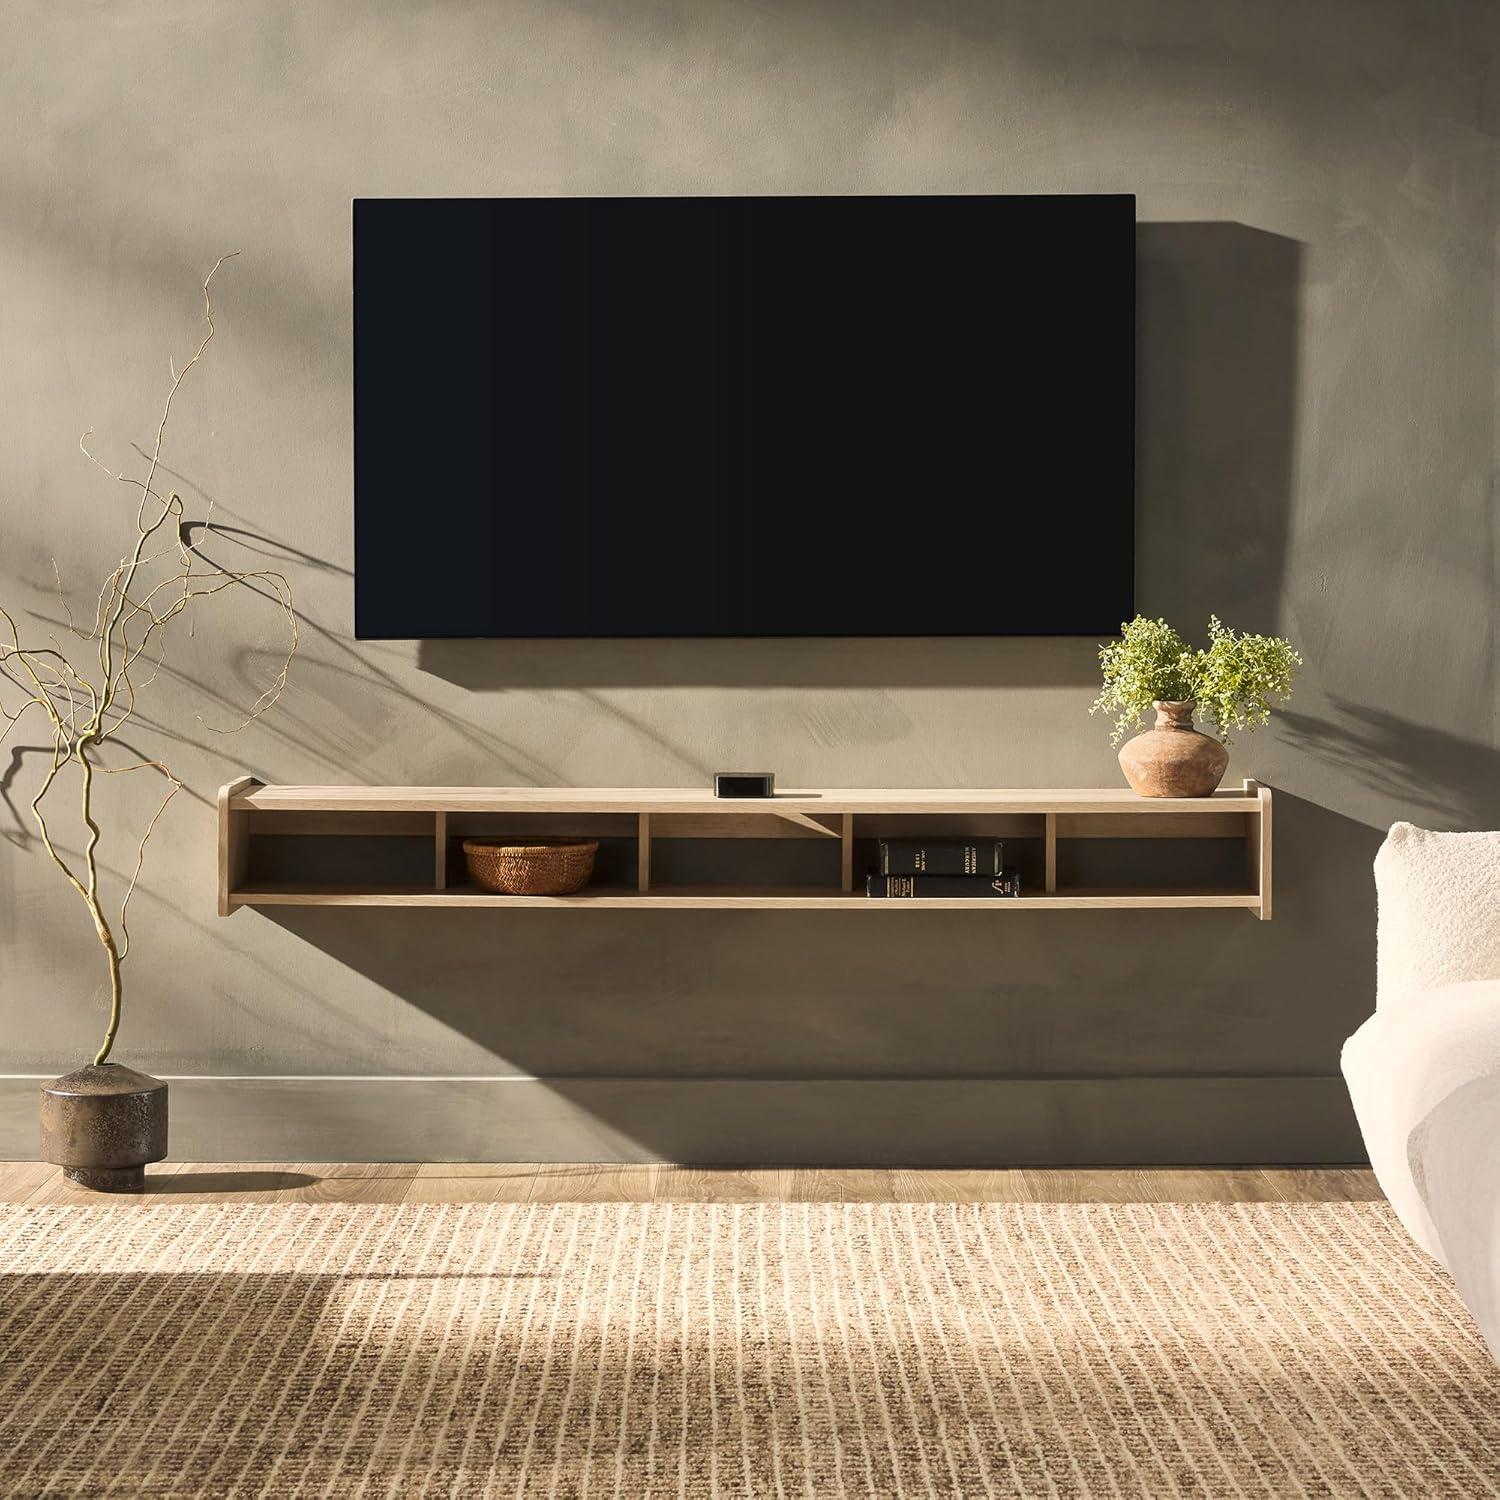
How the minimalist silhouette plays with light and scale in your living room

The slim, floating outline reads more like a drawn line on the wall than a bulky piece of furniture, so light tends to behave differently around it.Daylight often skims across the surface and slips underneath, producing a low, consistent shadow that makes the TV feel visually suspended; at night a single floor lamp can throw a narrow band of light across the face, creating a soft halo instead of a heavy silhouette.Small, incidental moments—someone nudging a decorative object, curtains stirring on a breezy afternoon—shift those highlights enough that the arrangement rarely looks static. Observably, the interplay shows up in a few ways that matter for how the room feels:
- Light bounce — the horizontal plane redirects daylight across the wall, brightening the area immediately above and beside it.
- Shadow line — the gap beneath produces a thin shadow that increases the sense of depth without adding weight.
- Visual pause — the minimal edge acts as a punctuation point, letting nearby textures and art read more clearly.
That same pared-back profile also nudges perceived scale around the entertainment wall. Because the form emphasizes a long, low horizon, a room can feel wider and the ceiling a touch higher, notably when you leave some negative space nearby instead of crowding it with tall furniture. On the flip side, the simplicity can make uneven paint or wall blemishes more noticeable as there’s less visual clutter to distract the eye; you may find yourself shifting a lamp or a plant a few inches to restore balance. The table below sketches typical lighting conditions and the visual responses you’ll most likely notice.
| Lighting condition | Perceived effect |
|---|---|
| Bright afternoon sun | Soft, even glow above the piece; shadow beneath is subtle but continuous |
| Single side lamp in evening | Pronounced low shadow and a warm highlight on the adjacent wall |
| Diffuse overcast light | Minimal contrast; the silhouette reads as a gentle horizontal anchor |
A close look at the coastal oak surface, panels, and mounting hardware
Up close, the coastal oak finish reads more like a printed woodgrain than a solid timber—warm mid-tones with lighter streaks that mimic oak growth rings. When you run a hand across it the surface feels predominantly smooth with a faint, almost paper-like texture that breaks up glare; fingerprints aren’t obvious from a few feet away, though you can see scuffs if you inspect the edge banding closely. Panel joins and the edges where the top meets the sides are visible at normal standing height; the seams sit flush most of the time, but under close inspection you can catch tiny gaps or a hairline join where panels meet. The finish tends to mask small everyday marks, while the veneered look keeps the color consistent across pieces rather of showing natural variation you might expect from real wood.
The mounting kit arrives organized and straightforward to lay out, and the main bracket is a stamped metal rail with elongated slots that allow for minor lateral adjustment during hanging. Included fasteners and anchors are a mix of zinc-plated screws, a couple of plastic drywall anchors, a pair of threaded bolts for the console-to-bracket connection, and a small hex key tucked into the hardware bag along with a paper template and installation guide. Below is a concise inventory of what you’ll find in the packet:
- Bracket: one stamped steel rail with slotted holes and pre-drilled pilot points
- Fasteners: assorted screws and two long bolts for the console connection
- Anchors: small plastic drywall anchors and extra screws
- Extras: hex key, paper template, and a short instruction sheet
| Item | Approx. Count |
|---|---|
| Steel mounting rail | 1 |
| Long console bolts | 2 |
| Zinc screws (various) | 6–8 |
| Plastic drywall anchors | 4 |
| Hex key & template | 1 each |
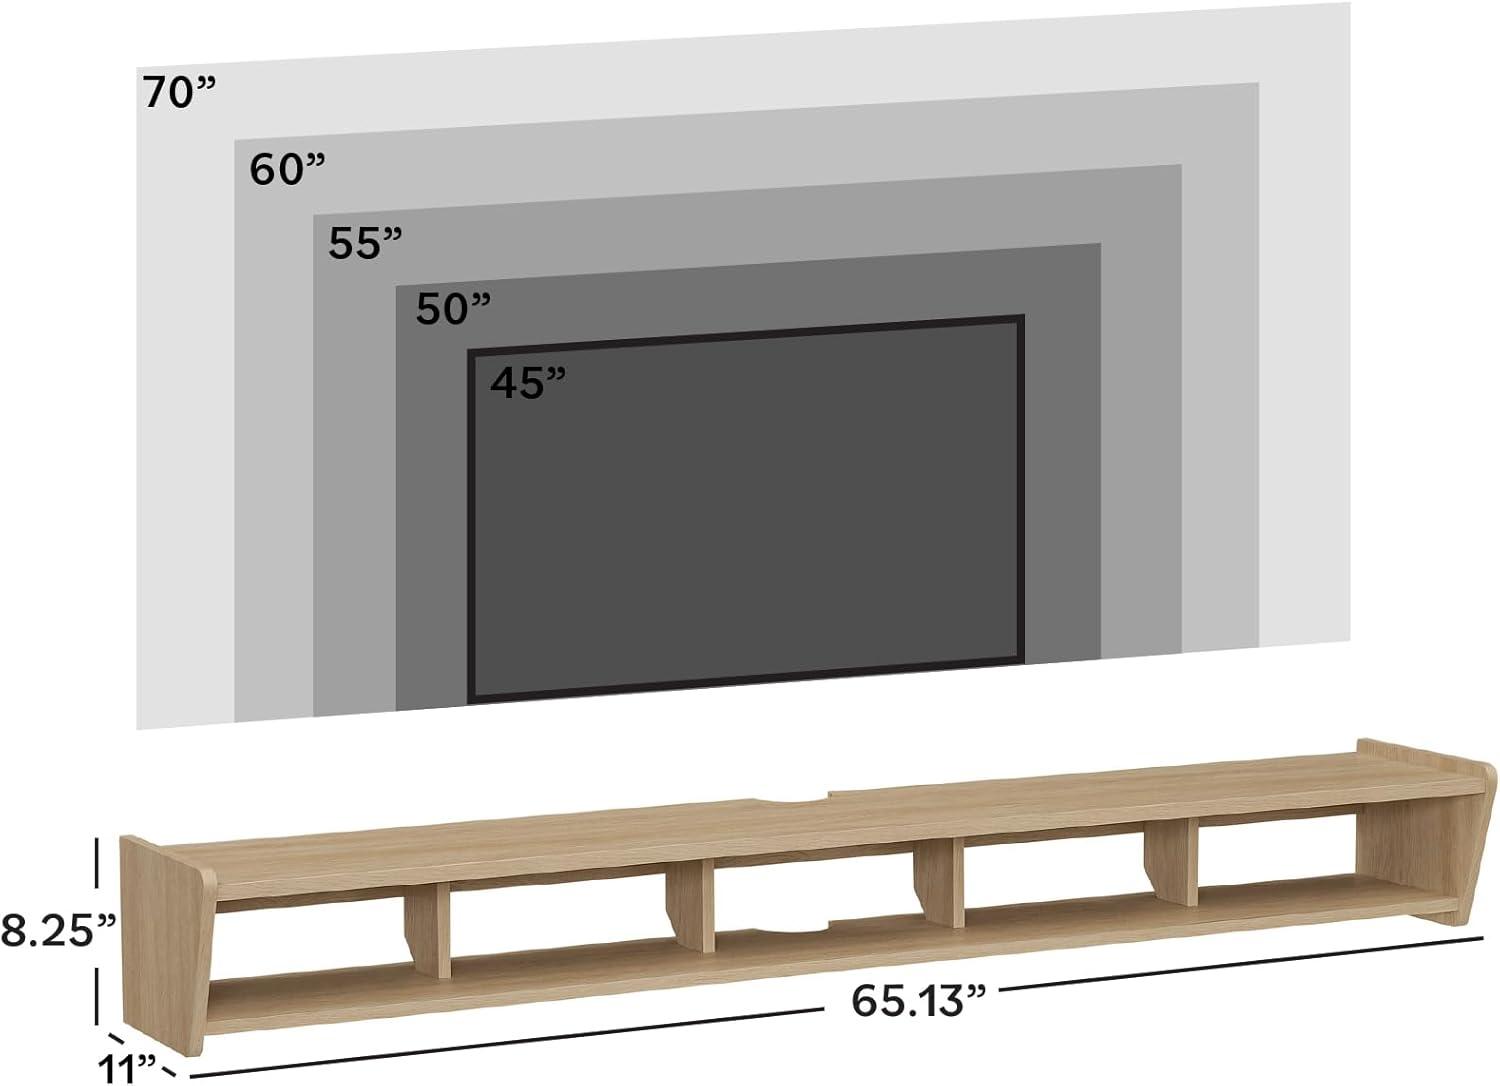
Sizing it for your wall and television: length, depth, and shelf clearance

At roughly 65 inches across, the cabinet gives you a low, wide anchor beneath a mounted screen. When you place a TV above it you’ll see how the cabinet’s footprint interacts with the set: a 65″ screen will sit nearly flush with the stand’s edges, while a larger 70″ display will extend past the console by a few inches on either side. In everyday use that difference affects how much visible platform you have for décor or remotes and whether the TV’s bottom edge visually lines up with the cabinet; you’ll likely make small adjustments to centering and height as you decide how the pair reads on the wall.
The unit’s 11-inch depth keeps the profile slim but also limits how deep your components can sit without protruding; game consoles and larger AV boxes may need to be oriented sideways or placed so cords exit the rear. The overall height of about 8¼ inches means internal vertical clearance is modest, so thicker receivers or vertically standing consoles will take up more of the visible opening or require being placed elsewhere. The quick reference below summarizes the core exterior measurements to check against your TV width and the depth/height of any equipment you plan to use with it.
- Length: 65.13″
- Depth: 11″
- Height: 8.25″
| Dimension | Measurement |
|---|---|
| Overall length | 65.13 inches |
| Overall depth | 11 inches |
| Overall height | 8.25 inches |
Interaction comfort and usability: reach, access to ports, and arranging components
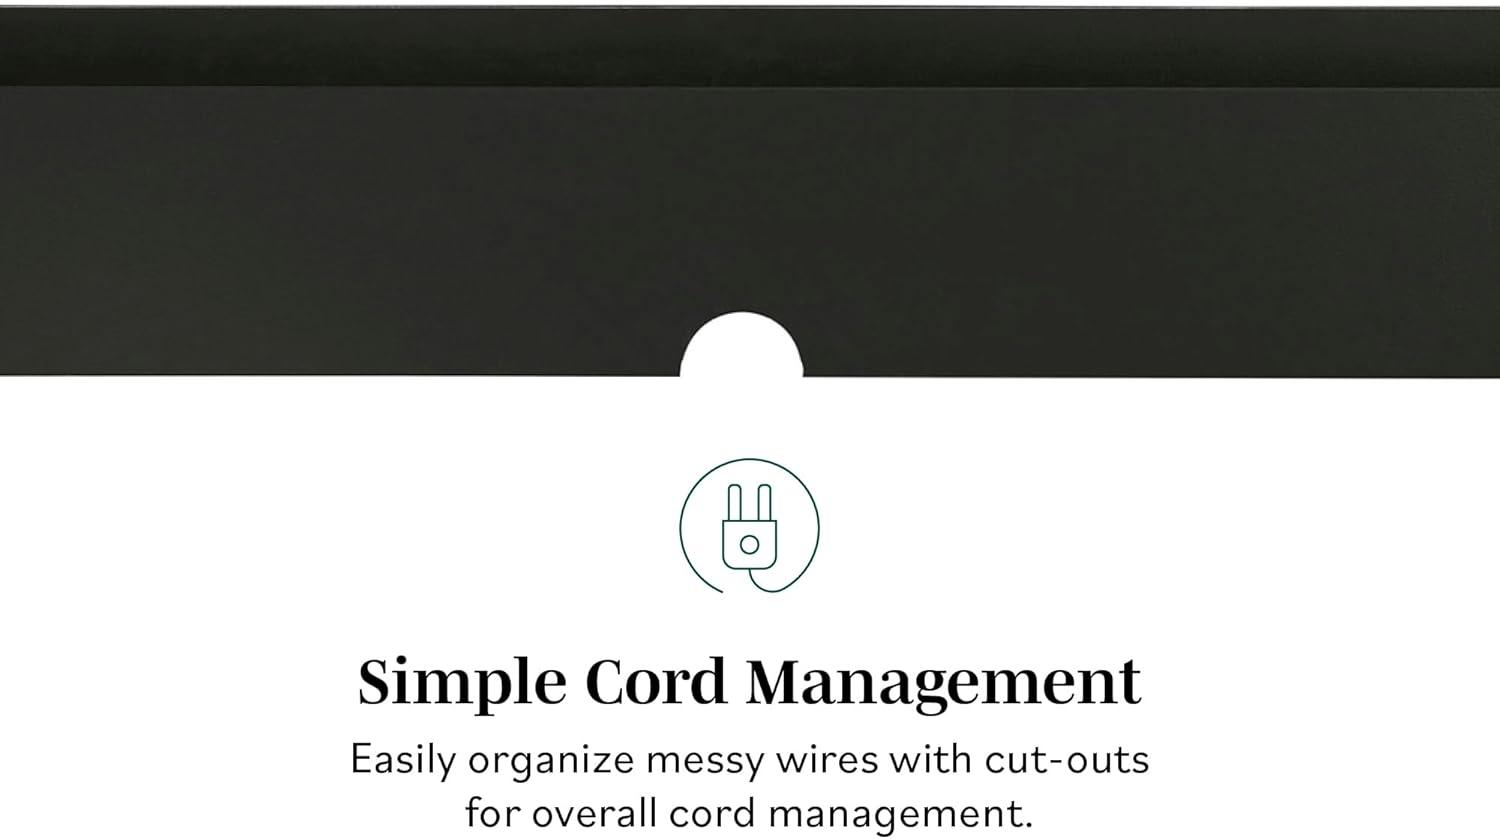
When the console is mounted at a normal viewing height, most items you reach for—remotes, small streaming boxes, a game controller—sit within easy arm’s reach, while deeper or heavier components tend to live further back and require a short lean to access their rear connections. The open cubby layout keeps the front of devices unobstructed so infrared receivers and Bluetooth dongles work without adjustment, and the cord management ports at the rear let you route cables downward or into the wall; though, wider power bricks and some right-angled plugs will push devices a little forward, so rear-facing jacks can end up snug against the back panel. In everyday use you’ll find yourself nudging a console forward to access its HDMI ports or jiggling a cable if a plug sits at an awkward angle, small interactions that become routine over time rather than one-off frustrations.
Arranging components tends to follow a few simple patterns: center cubbies often become the home for a shared power strip, outer bays for controllers and smaller players, and the more ventilated spots for anything that runs warm. Observational notes that come up fairly frequently enough include the following:
- Front access: Keeping frequently used devices toward the front saves bending to reach USB ports or power switches.
- Cable slack: Leaving a little extra length before threading cords through the ports prevents strain when plugging and unplugging.
- Device pairing: staggering consoles and streaming boxes so their front faces aren’t directly stacked preserves remote line-of-sight and keeps IR signals reliable.
| Component | Typical placement | Access note |
|---|---|---|
| Streaming stick | Front edge of cubby or plugged into TV | Minimal reach; HDMI extension sometimes used |
| Game console | Front to mid-cubby | Rear ports require a slight lean to reach |
| Power strip | Center or back | Serves multiple devices; needs slack for plugs |
Suitability for your space and expectations and the practical limits you may encounter
A wall‑mounted, low‑profile console tends to shift visual weight off the floor and into the wall plane, and that change in placement brings a few everyday realities into view. Sightlines matter — the height at wich it is hung will determine whether screens and on‑shelf items sit at a comfortable viewing angle and whether other furniture needs to be nudged to keep the composition balanced. Mounting surfaces and nearby obstructions frequently enough dictate the final location more than a room’s open floor plan does; older plaster walls, baseboard heating, or closely spaced windows can limit options in practice. Daily interactions—pulling controllers from open cubbies, swapping streaming devices, or routing power and HDMI runs—tend to be a bit more deliberate than with a freestanding unit, and simple habits like dusting behind electronics or checking cable slack become part of routine care.
Several recurring practical limits show up once the unit is in use: load and anchoring constraints influence how much weight the assembly will bear and where it can be fastened; shallow depth affects what can sit flush on top or inside without overhang; and available cable length and outlet placement often determine how tidy cable runs actually end up. The table below summarizes a few common constraints and their typical implications in everyday setups with this style of console.
- Mounting surface — anchoring choices vary by wall construction and affect final placement options
- Component ventilation — open storage exposes devices to dust and may require spacing for airflow
- Cable reach — outlet and device locations frequently set where the console can practically go
| Common constraint | Typical implication |
|---|---|
| Wall type and stud placement | May force off‑center mounting or require toggles/anchors for secure fit |
| Depth and top surface profile | Limits placement of larger soundbars or stacked devices without overhang |
| Cable length and outlet location | Often determines whether cables stay concealed or require external raceways |
View full specifications and mounting details
Installation details and day to day care observed during setup
When you unpack the pieces and lay them out, the setup tends to become a small project in the living room: the mounting bracket, screws and anchors, and the shelf components get arranged across the floor while you consult the paper instructions. You’ll find that marking stud locations and leveling the bracket occupies more time than assembling the shelves themselves; lifting the console onto the wall bracket is a two-person task in most cases, and there are moments where you nudge the unit side-to-side to get the visual alignment just right. During this phase the following items commonly appear on the coffee table or toolbox:
- tools observed: drill with masonry bit, stud finder, spirit level, socket or wrench for the anchor bolts
- Quick assembly bits: small box of labeled screws and the included template or guide
These observations describe how the parts and instructions behave in use rather than listing specifications, and they reflect the small, incidental adjustments people make when fitting the piece to an imperfect wall surface.
Once mounted, day-to-day care during initial use centers on cable routing and keeping electronics ventilated; you’ll thread cords through the ports and tidy them with ties, then move devices a few inches in their cubbies until heat and access feel right. You may find yourself making minor level checks after a few days and straightening décor or moving a controller into a cubby when it’s out of reach, and dusting with a soft cloth becomes a short weekly habit. The table below summarizes typical care activities and how often they were noticed during setup and the first week of use.
| Care task | Observed frequency / time |
|---|---|
| Cable routing and securing | Once during setup, occasional tidy-ups (5–10 minutes) |
| Micro-adjusting level/position | Within first 48–72 hours (a few minutes) |
| Dusting and surface wipe | Weekly (2–5 minutes) |
| Rearranging devices for ventilation/access | Few times in first week (varies) |
How the set Settles Into the room
Over time you notice how the Walker Edison Zee Modern Floating Mounted Minimalist TV Stand settles into a quieter role in the living space, taking on the soft familiarity of the items that gather on and around it. In daily routines it becomes a backdrop for simple rhythms — a landing spot for mugs and headphones, the place where the remote is always left, the edge that catches kids’ drawings — and the way you move through the room adjusts around that presence.The surface gathers faint scuffs and the occasional mark, more like a record of regular use than anything dramatic, and evenings feel more comfortable simply as the stand is where you expect it to be. It stays.